Have you ever stood over your grill, tongs in hand wondering if those chicken legs are done yet? I’ve been there too, friends! Getting BBQ chicken legs just right can be tricky – you want that perfect balance of juicy meat and crispy skin without turning them into charcoal or serving up raw chicken.
In this guide, I’ll share everything you need to know about how long to cook chicken legs on the BBQ, plus some tips and tricks I’ve learned from years of grilling. No more guesswork – just delicious results every time!
The Quick Answer: How Long to Cook Chicken Legs on the BBQ
For those who want the short version, here’s the essential timing for grilling chicken legs:
- Direct heat method: 30-35 minutes at 350°F-400°F
- Indirect heat method: 35-40 minutes at 350°F-400°F
- Safe internal temperature: 165°F (though some grillers prefer 175°F for extra tenderness)
- Flip frequency: Every 5-10 minutes for even cooking
- Resting time: 5-10 minutes after cooking
But there’s so much more to know if you want truly amazing BBQ chicken legs! Let’s dive deeper
Choosing the Right Chicken Legs
Before we talk about cooking times, let’s start with selecting the best chicken legs for grilling:
- Bone-in, skin-on chicken legs are ideal for BBQ
- The bones help retain moisture during cooking
- The skin crisps up beautifully and adds flavor
- Dark meat in chicken legs is more forgiving when grilling compared to breast meat
- Fresh chicken legs with a good amount of skin will yield the best results
Preparing Your Chicken Legs for the Grill
Proper preparation is key to delicious BBQ chicken legs:
Marinating for Flavor
Marinating your chicken legs can significantly improve both flavor and tenderness. Here’s what you need to know:
- Marinating time: At least 30 minutes, but 1-2 hours is better (overnight in the refrigerator is ideal)
- Basic marinade components:
- An acidic ingredient (lemon juice, vinegar)
- Oil
- Herbs and spices
- Salt and pepper
A simple but effective marinade I love to use combines:
- 1 cup olive oil
- 1/4 cup lemon juice
- 3 cloves garlic, minced
- 1 tablespoon honey
- Salt and pepper to taste
Seasoning Options
If you prefer dry rubs over marinades, consider these seasoning ideas:
- Classic BBQ rub: Brown sugar, paprika, garlic powder, onion powder, salt, and black pepper
- Citrus zest: Lemon or lime zest mixed with olive oil, salt, and pepper
- Herb blend: Fresh rosemary, thyme, and parsley with olive oil
- Spicy kick: Cayenne pepper, chili powder, or hot sauce added to your favorite rub
Setting Up Your Grill
The way you set up your grill affects cooking time and results:
Grill Types
Both charcoal and gas grills work well for chicken legs:
- Charcoal grills provide that classic smoky flavor but require more skill to maintain temperature
- Gas grills offer easier temperature control and convenience
Direct vs. Indirect Heat Methods
There are two main approaches to grilling chicken legs:
Direct Heat Method
- Place chicken legs directly over flames or heat source
- Good for achieving crispy skin and grill marks
- Requires more attention to prevent burning
- Total cooking time: 30-35 minutes
- Turn every 5-7 minutes for even cooking
Indirect Heat Method
- Position chicken legs away from direct flames
- Provides more even cooking and less risk of burning
- Great for larger or thicker chicken legs
- Total cooking time: 35-40 minutes
- Less frequent turning needed
Combination Method (My Favorite)
I personally prefer a combo approach:
- Start with direct heat for 5-7 minutes per side to sear and crisp the skin
- Move to indirect heat to finish cooking (about 20-25 minutes more)
- This gives you the best of both worlds: crispy exterior and juicy interior
Temperature: The Key to Perfect BBQ Chicken Legs
Getting the temperature right is crucial:
Grill Temperature
- Ideal grill temperature: 350°F to 400°F
- Too hot = burned outside, raw inside
- Too cool = dry, overcooked chicken
Internal Chicken Temperature
- Safe minimum temperature: 165°F
- Some prefer 175°F for more tender dark meat
- Always measure at the thickest part, avoiding the bone
- Use a reliable meat thermometer (instant-read is best)
Step-by-Step Grilling Process
Here’s my fool-proof method for BBQ chicken legs:
- Preheat grill to 350°F-400°F
- Oil grill grates to prevent sticking
- Place chicken legs on the grill (direct heat to start)
- Sear both sides for 5-7 minutes each, getting nice grill marks
- Move to indirect heat or reduce temperature
- Continue cooking for 20-25 more minutes, turning occasionally
- Check temperature with meat thermometer (165°F minimum)
- Apply glaze or sauce (if using) during the final 10 minutes
- Remove from grill when done
- Rest for 5-10 minutes before serving
Factors That Affect Cooking Time
Several things can influence how long your chicken legs take to cook:
- Size of chicken legs: Larger legs need more time
- Starting temperature: Cold chicken straight from fridge takes longer
- Weather conditions: Wind and cold can extend cooking time
- Grill hot spots: Uneven heating requires more turning
- Bone-in vs. boneless: Bone-in takes longer but stays juicier
- Marinade type: Acidic marinades can reduce cooking time slightly
How to Tell When Chicken Legs Are Done
Besides using a thermometer, look for these signs:
- Juices run clear when pierced (not pink)
- Meat feels firm but not hard
- Skin is crispy and golden brown
- Legs move easily at the joint when wiggled
Glazing Techniques for Extra Flavor
Want to add BBQ sauce or other glazes? Follow these tips:
- Apply glaze during the final 10 minutes of cooking
- This prevents burning since most glazes contain sugar
- Layer flavors: Start with a dry rub, finish with a glaze
- Multiple applications: Apply thin layers 2-3 times during final cooking
- Popular options: BBQ sauce, honey mustard, sweet chili glaze
Common Mistakes to Avoid
I’ve made plenty of errors when grilling chicken legs – learn from my mistakes!
- Don’t cook cold chicken: Let it rest at room temperature for 15-20 minutes first
- Avoid high heat only: This leads to burned skin and undercooked meat
- Don’t forget to oil the grates: Chicken skin sticks easily
- Never rush the process: Low and slow is better than fast and raw
- Don’t skip the resting period: Resting allows juices to redistribute
Troubleshooting BBQ Chicken Legs
Having problems? Here are some quick fixes:
- Burning too quickly? Move to indirect heat or lower temperature
- Taking too long to cook? Check your grill temperature and ensure lid is closed
- Skin not crisping? Start with direct heat for a few minutes per side
- Chicken sticking to grill? Make sure grates are clean and oiled
Serving Suggestions
BBQ chicken legs pair wonderfully with:
- Classic potato salad or coleslaw
- Grilled corn on the cob
- Mac and cheese
- Baked beans
- Garlic bread
Final Thoughts
Cooking chicken legs on the BBQ is more art than science. While the general timeframe is 30-40 minutes, always use temperature as your ultimate guide. With practice, you’ll develop a feel for when they’re done just by looking and touching.
Remember that the perfect BBQ chicken leg has crispy, flavorful skin and moist, tender meat that practically falls off the bone. It might take a few attempts to master, but I promise it’s worth the effort!
Now fire up that grill and get cooking! Your friends and family will be impressed with your BBQ chicken leg skills.
FAQ About BBQ Chicken Legs
Q: Should I remove the skin before grilling chicken legs?
A: No! The skin helps lock in moisture and adds flavor. Cook with skin on for best results.
Q: Can I parboil chicken legs before grilling to reduce cooking time?
A: You can, but I don’t recommend it. Parboiling removes flavor and can make the texture rubbery.
Q: How do I prevent flare-ups when grilling chicken legs?
A: Trim excess skin/fat, avoid squeezing the legs while turning, and keep a spray bottle of water handy.
Q: Can I cook frozen chicken legs on the BBQ?
A: It’s not recommended – they won’t cook evenly. Always thaw completely before grilling.
Q: How many chicken legs should I plan per person?
A: For adults, plan on 2-3 chicken legs per person as a main dish.
Happy grilling!
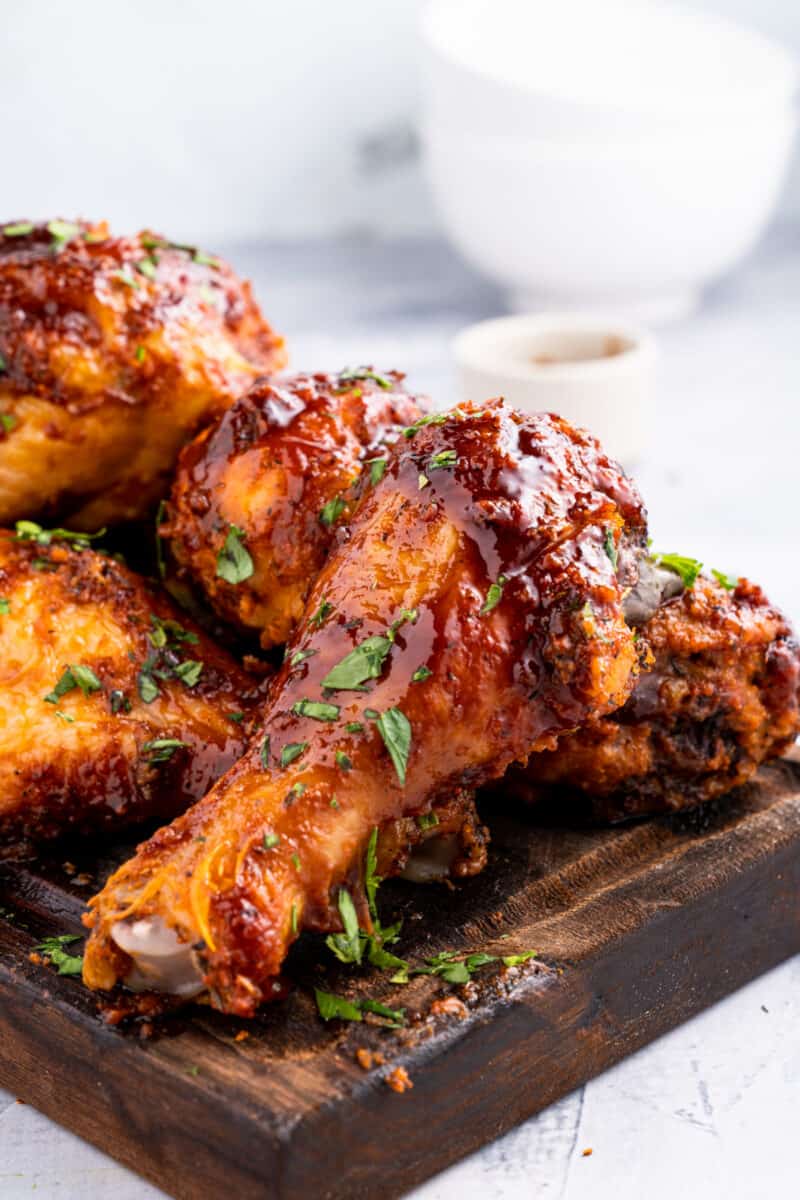
Delicious Oven BBQ Chicken Drumsticks
Our Baked chicken drumsticks are crispy on the outside and tender on the inside. Seasoned then baked to perfection, then smothered with tangy BBQ sauce.
Easily made in the oven, they can be made all year round and for any occasion.
These sticky bbq chicken drumsticks are great with almost any side dish. The whole family will be reaching for seconds.
Why You’ll Love Our BBQ Chicken
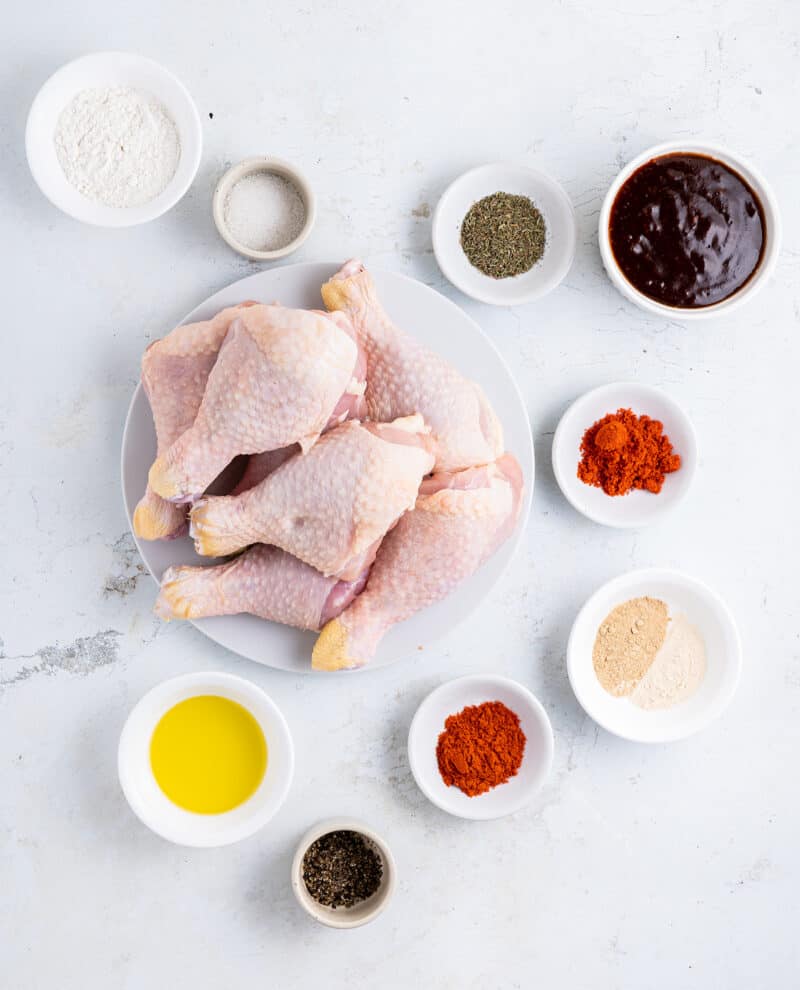
- SIMPLE INGREDIENTS – You just need chicken, basic seasonings, and your favorite barbecue Sauce.
- EASY RECIPE – This no-fail oven baked recipe has a cooking time of just 50 minutes!
- TASTY – The best way to make finger licking good barbecue chicken made in the oven, all year long. Tender chicken with a bbq crispy skin.
Need another baked chicken recipe to try? You’ll love our Baked Panko Chicken!
- Chicken Drumsticks – Use skin-on chicken drumsticks for this recipe, Yet you can also use chicken thighs, chicken breasts or chicken wings.
- Olive Oil – Substitute for vegetable oil or avocado oil if you wish.
- BBQ Sauce – Use your favorite kind of BBQ sauce for this recipe. I like sweet baby rays, myself. You can even made our Easy Keto BBQ Sauce, or your own homemade bbq sauce.
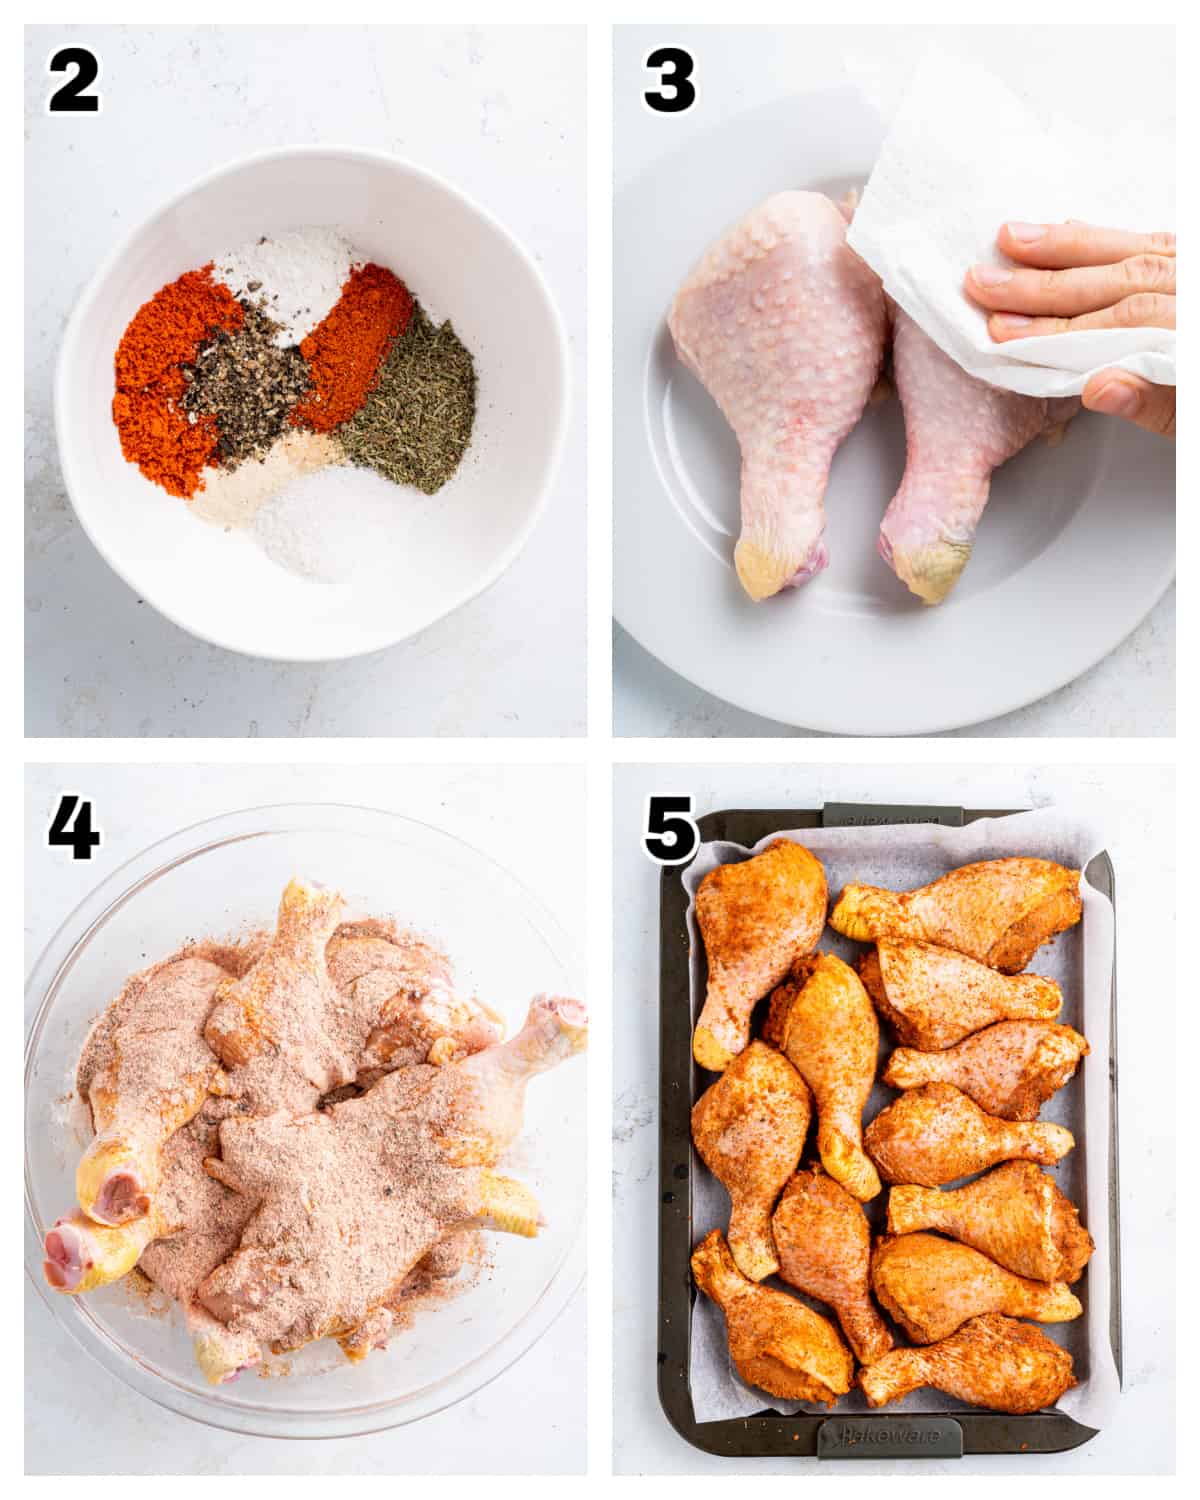
- Chicken Rub – Our rub consists of a blend of: all-purpose flour, smoked paprika, regular paprika, salt, ground black pepper, dried thyme, garlic powder, and onion powder.
How to Make BBQ Chicken Legs in the Oven
- Preheat the oven to 400 f. Then prepare a rimmed baking sheet by lining it with parchment paper or aluminum foil. Set it aside.
- Mix the BBQ rub ingredients into a small bowl. Set this aside as well.
- Pat chicken dry using a paper towel. This step is important for the drumsticks to be crispy, so I wouldn’t skip it.
- Once patted dry, coat the chicken pieces with olive oil. Then, spread BBQ rub over the chicken pieces. Toss to coat. If needed, you can add more flour or spices. You’ll want evenly coated, dry chicken.
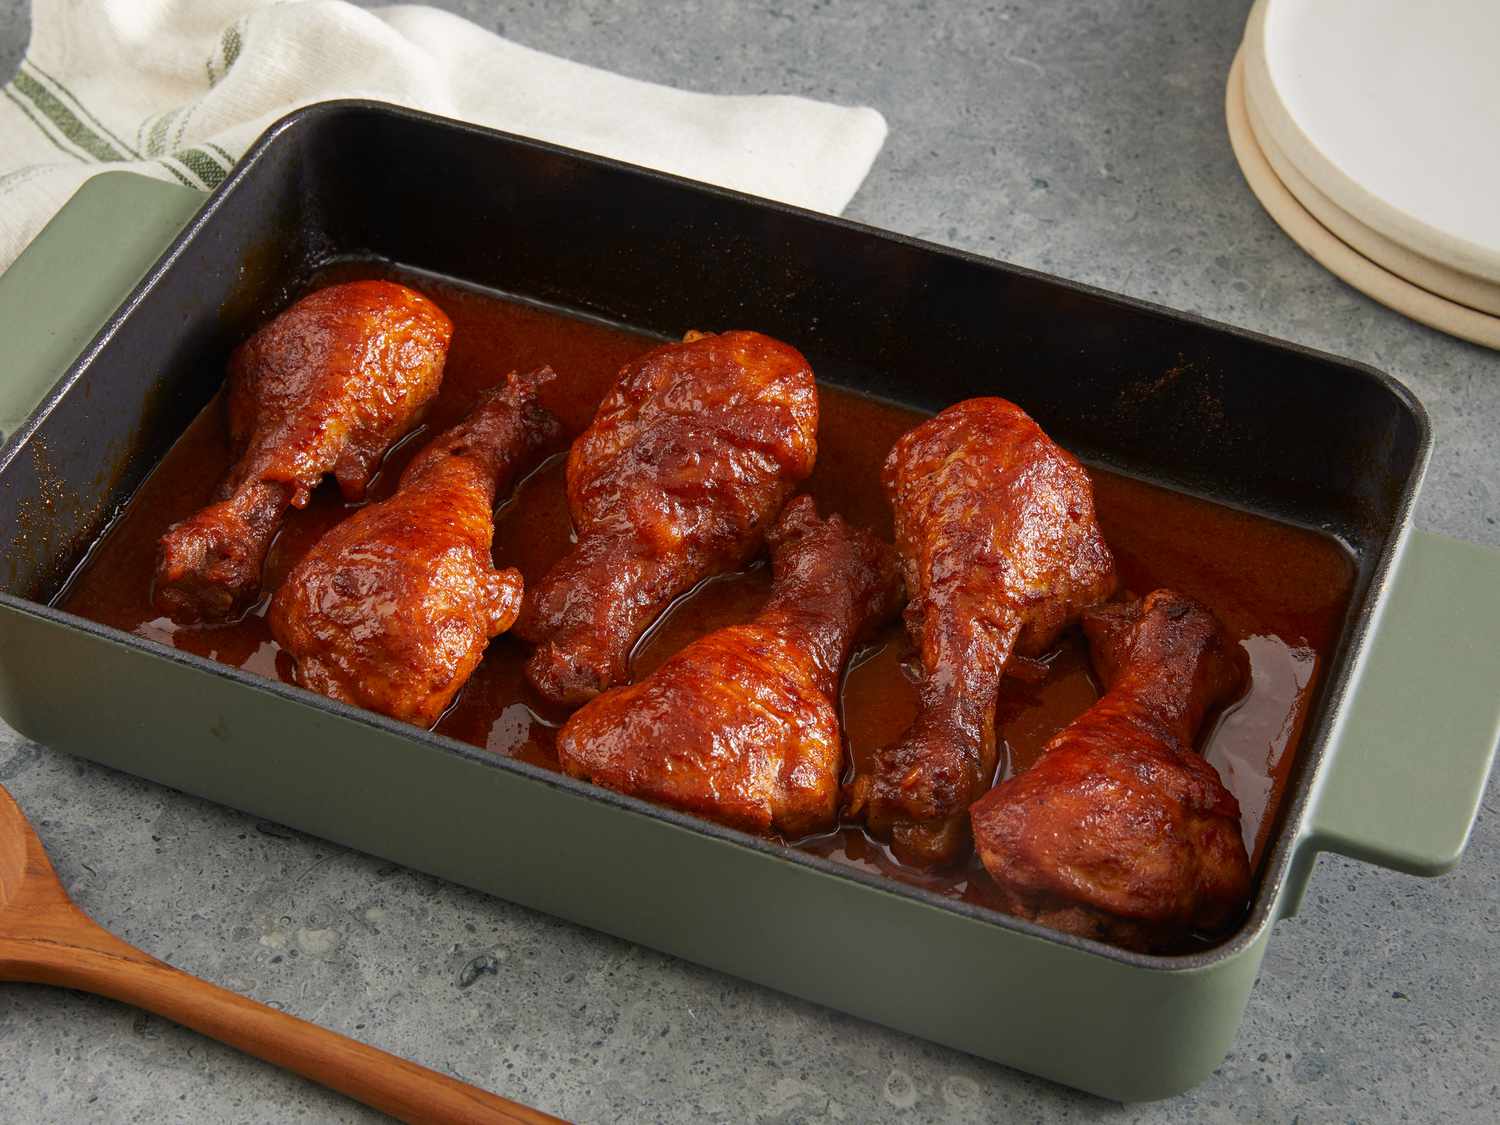
- Arrange the chicken pieces on the prepared baking dish and bake for 40-45 minutes. Once the chicken is done (when checked with a meat thermometer), remove it from the oven and coat it with the BBQ sauce. Then, bake it for 5 more minutes, so it bolds in flavor.
- Serve warm with your favorite dipping sauce and sides.