Have you ever stared down at a piece of chicken in your pan, wondering if it’s time to flip it yet? I know I have! The eternal question of when to flip chicken has plagued home cooks for generations. Get it wrong, and you’re looking at either a burnt exterior with raw insides or a sad, pale piece of chicken that sticks to your pan like it’s holding on for dear life.
After years of chicken-flipping anxiety I’ve compiled everything you need to know about this crucial cooking technique. Whether you’re working with boneless breasts, juicy thighs or a whole bird, this guide will ensure your chicken comes out perfect every single time.
Why Flipping Chicken Matters
Before we dive into the “when,” let’s talk about the “why.” Flipping chicken during cooking isn’t just a random step – it serves several important purposes:
- Even cooking: Flipping ensures heat reaches all sides of the chicken evenly
- Better browning: It allows for that gorgeous caramelization on multiple sides
- Moisture distribution: Flipping helps redistribute the juices within the meat
- Temperature control: It prevents thinner parts from overcooking
- Presentation: Multiple-sided browning gives your chicken that appetizing look we all crave
The Golden Rule of Flipping Chicken
If there’s one takeaway from this article it’s this Wait until the chicken releases easily from the pan before flipping.
When you first place chicken in a hot pan the proteins immediately form chemical bonds with the metal surface. This is why chicken sticks initially. But as the heat continues to work those bonds break down, and the meat naturally releases from the pan.
For a boneless, skinless chicken breast over medium-high heat, this magic moment typically happens after about 5 minutes. And here’s the crucial part – during those 5 minutes, resist every urge to poke, prod, wiggle, or peek under the chicken!
Flipping Different Cuts of Chicken
Different cuts require different flipping techniques. Let’s break it down:
Boneless Chicken Breasts
Boneless breasts are probably the trickiest because they can dry out so easily:
- Pan frying: Cook in a hot pan for 5 minutes without disturbing, then flip once and cook for another 5-7 minutes until done
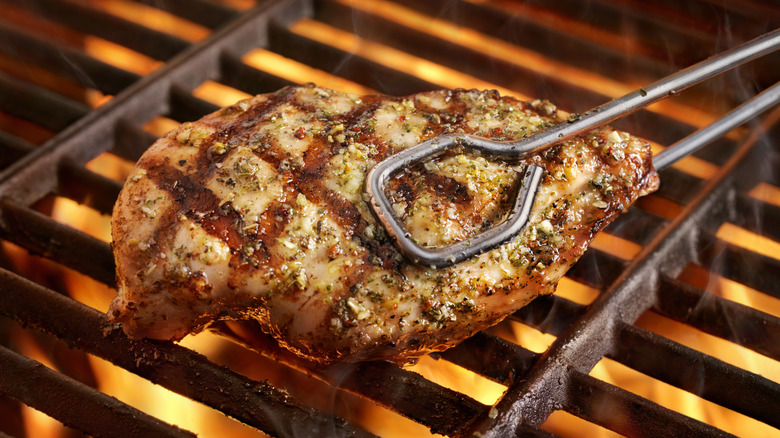
- Grilling: Flip every 2-3 minutes to prevent drying (total cooking time around 6-8 minutes per side)
- Baking: Flip halfway through at around 15 minutes, then check often until done (about 25-30 minutes total)
Bone-In Chicken Parts
For drumsticks, thighs, wings, and bone-in breasts:
- Grilling: Flip once when about halfway done (bone-in parts take 15-30 minutes total)
- Baking: Flip once halfway through baking time (usually 30-45 minutes total at 350-425°F)
- Pan Frying: Cook skin-side down first for 12-15 minutes, then flip and cook another 5-10 minutes
Whole Chicken
When roasting a whole bird:
- Flip breast-side down after 20 minutes when roasting at 350-425°F
- Flip again breast-side up 15 minutes later to brown the skin
- Continue roasting until the breast reaches 165°F (about 15-20 minutes more)
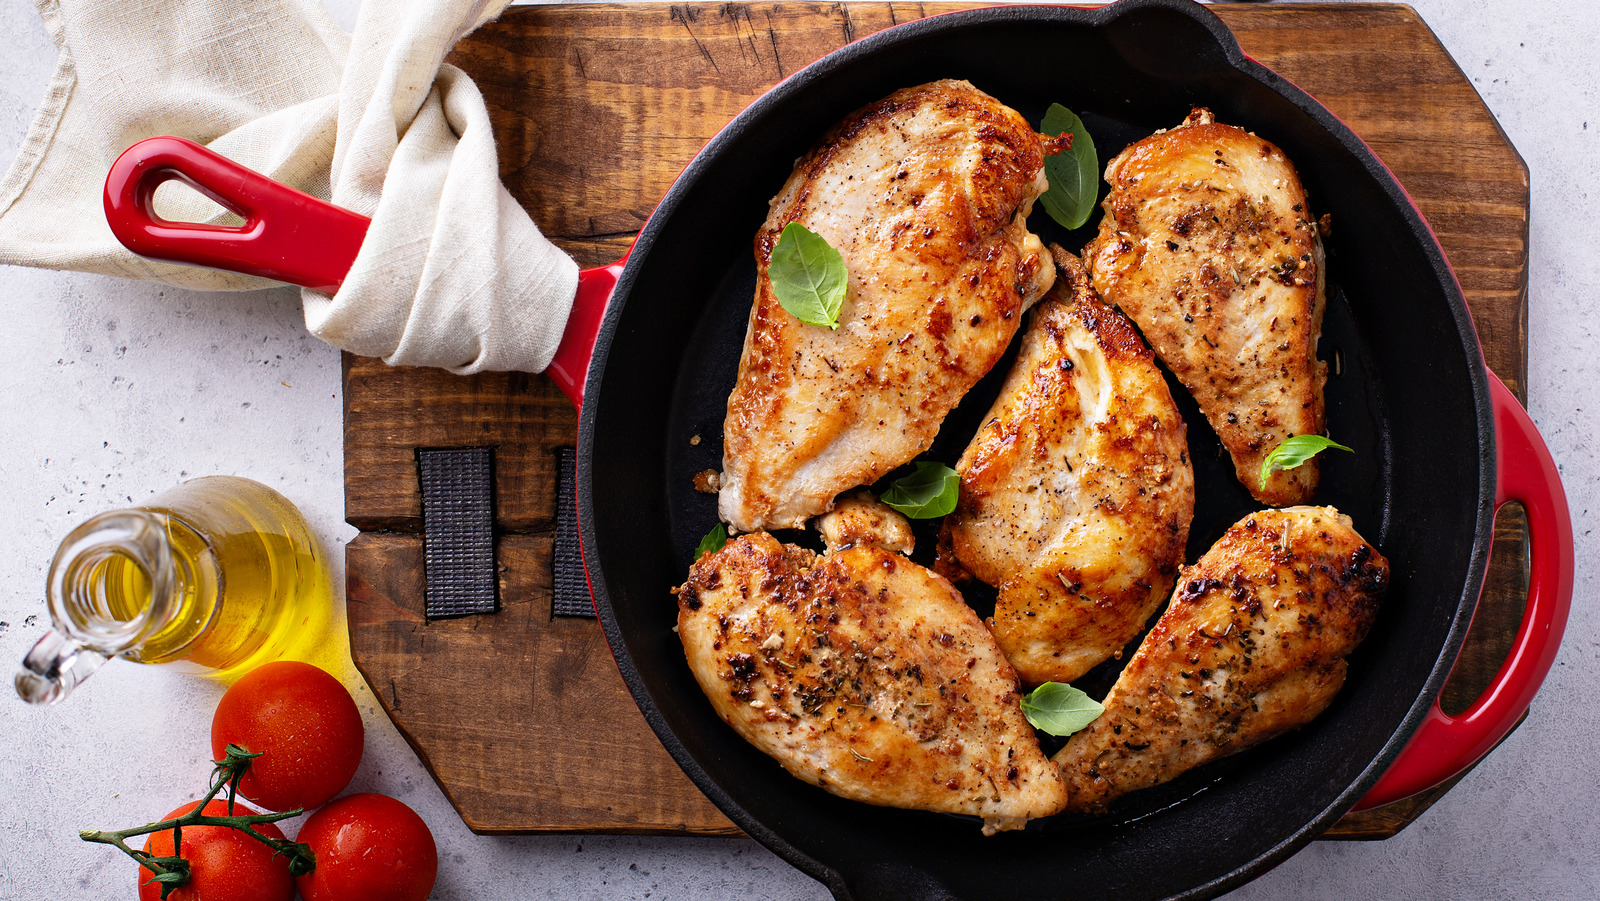
The Foolproof Method for Pan-Seared Chicken
Let me share my personal go-to method for perfectly flipping chicken in a skillet:
- Bring chicken to room temperature (about 20 minutes on the counter)
- Pat it completely dry with paper towels (moisture = steam = no browning)
- Season generously with salt and pepper on both sides
- Heat a wide, deep pan over medium-high heat
- Add oil with a high smoke point (coconut, safflower, or sunflower)
- Place chicken in the hot pan and DO NOT TOUCH IT
- Wait at least 5 minutes (seriously, hands off!)
- Gently nudge the chicken with tongs – if it moves easily, it’s ready to flip
- Flip and cook the other side without disturbing
- Use a meat thermometer to check for doneness (165°F)
Expert Flipping Tips
After years of trial and error, I’ve collected these pro tips for flawless chicken flipping:
- Use the right tools: Tongs or a thin spatula work best. Avoid forks that pierce the meat and release juices
- Flip away from you: This prevents hot oil splatter from hitting you
- Be gentle: Especially with bone-in pieces to keep skin and coating intact
- Let the chicken tell you when: If it’s sticking, it’s not ready to flip
- Temperature over time: Always use a meat thermometer rather than relying solely on cooking times
- Let it rest: After cooking, let chicken rest for 5-10 minutes before cutting
Common Chicken Flipping Mistakes
We’ve all been there! Here are the mistakes I’ve made (so you don’t have to):
- Flipping too early: The #1 mistake! Chicken needs time to release naturally
- Overcrowding the pan: This leads to steaming instead of searing
- Using olive oil at high heat: It has a low smoke point and will burn
- Constantly moving the chicken: Leave it alone for proper browning
- Forgetting to flip entirely: Results in uneven cooking and texture
When NOT to Flip Chicken
In some cases, flipping isn’t necessary or even recommended:
- Baking bone-in, skin-on pieces: Sometimes leaving skin-side up the entire time gives the best crispy result
- Slow cooker or braised chicken: These methods typically don’t require flipping
- Spatchcocked chicken: When butterflied and roasted, flipping isn’t needed
Frequently Asked Questions
Should I flip chicken in the oven?
Generally yes, flipping chicken while baking helps ensure even cooking. Bone-in parts should be flipped once halfway through, while boneless breasts benefit from being flipped every 15 minutes or so.
What if I forgot to flip my chicken?
If you forgot to flip, you might have uneven cooking. The side facing up may be overdone while the other side is undercooked. Finish cooking the undercooked side by gently flipping and monitoring temperature.
Can I flip chicken too much?
It’s actually hard to over-flip chicken. As long as you’re gentle, frequent flipping (especially for boneless cuts) can help prevent drying and overcooking. Just make sure to let it cook undisturbed for a bit after each flip.
How do I know if my chicken is done?
The only reliable way is using a meat thermometer. Chicken is safe to eat when it reaches an internal temperature of 165°F in the thickest part (without touching bone).
The 5-Minute Rule for Perfect Flipping
Let me emphasize this one more time because it’s so important: When cooking boneless, skinless chicken breast over medium-high heat, wait a full 5 minutes before attempting to flip. Don’t poke, prod, wiggle, or try to lift it before then!
This waiting period allows the chicken to form that beautiful golden crust while naturally releasing from the pan. When it’s ready to flip, it’ll tell you by sliding easily when nudged.
Final Thoughts
Mastering when to flip chicken is one of those cooking skills that seems small but makes a huge difference in your results. With the right timing and technique, you’ll be rewarded with juicy, evenly cooked chicken with a gorgeous brown crust every time.
Remember – patience is key. Let the chicken do its thing, and it’ll let you know when it’s ready to flip. Trust the process, and soon you’ll be flipping chicken like a pro!
Happy cooking!
Unsticking chicken from the pan
As chicken cooks, its proteins will bond with metal surfaces, which is why it feels impossible to separate the two from each other. But once the exterior begins to brown, a sign of the Maillard reaction, those proteins start to break down and transform into aromatic deliciousness. Its then that the breasts and thighs will release from grills, stainless steel, and cast iron all on their own.
To set yourself up for success, you can prepare by tempering your chicken, which just means taking it out of the fridge ahead of cooking it to shake the icy chill. Fat is also an essential barrier between your dinner and your cookware, so make sure youve lubricated the pan before you start to sear the meat. And dont forget to let your pan preheat — especially cast irons, which need extra warming time.
The bird will also brown better if theres less moisture around, so make sure to pat each piece dry before cooking and avoid crowding the pan, which will cause steaming. Pro tip: You can even keep prepared pieces uncovered in the refrigerator for a few hours to let the skin dry out. If your spatula wont make any headway after multiple checks, you can try adding more fat to the pan or adjusting the temperature a smidge.