Let’s face it – you’re about to roast a beautiful chicken for dinner, you’ve got everything prepped, and then you realize: you don’t have any kitchen twine to truss that bird! Don’t panic. I’ve been there more times than I’d like to admit, and I’ve discovered there are actually tons of household items that work perfectly for tying chicken legs together.
Whether you’re preparing a fancy Sunday roast or just want your weeknight chicken to cook evenly, I’m going to share all the alternative methods I’ve personally tested over years of forgetting to buy kitchen string
Why Tie Chicken Legs Together Anyway?
Before diving into alternatives, let’s quickly understand why we bother tying chicken legs in the first place:
- Helps the chicken maintain its shape during cooking
- Ensures even cooking throughout the bird
- Creates a more attractive presentation
- Prevents the cavity stuffing from falling out
- Helps retain moisture during the cooking process
Now that we know why it matters, let’s look at what you can use instead of traditional butcher’s twine!
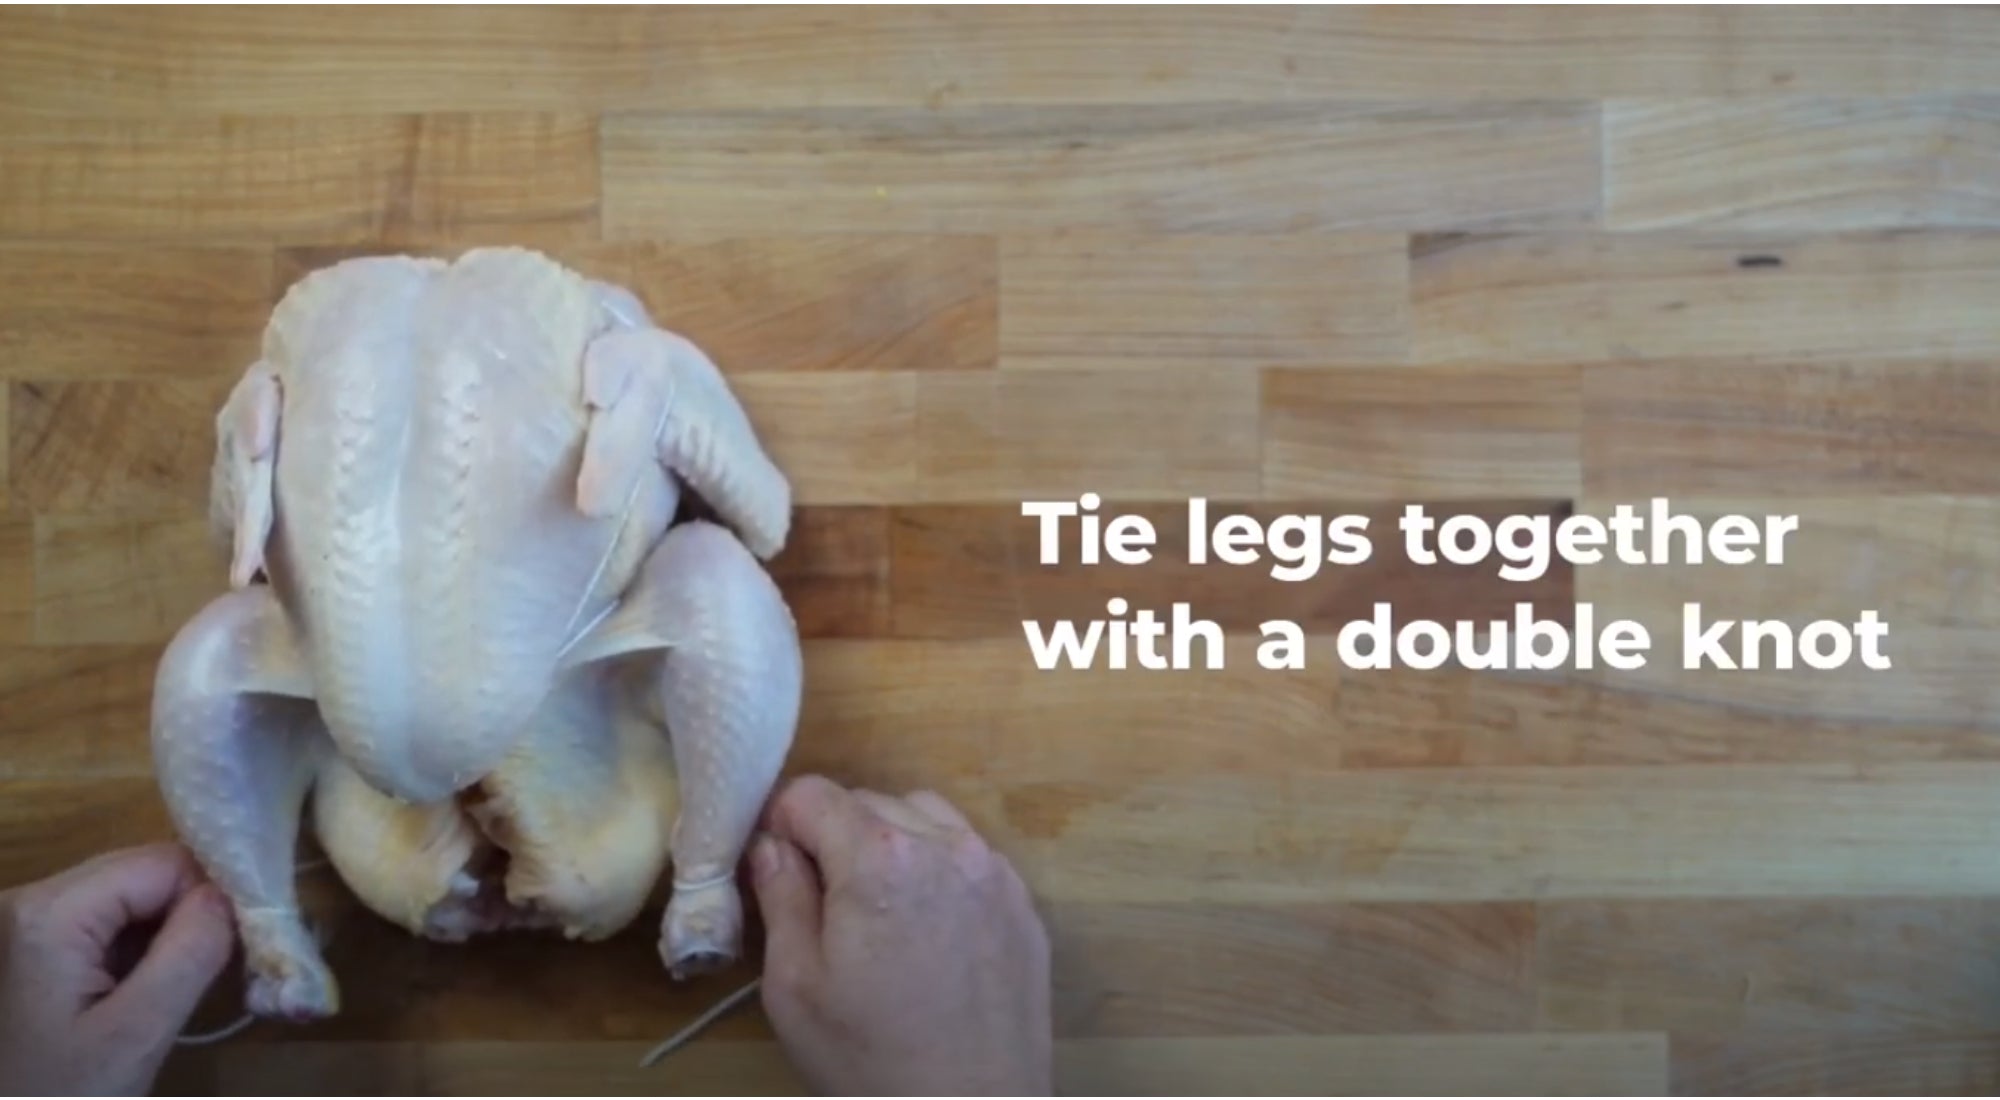
1. Dental Floss – The Kitchen Drawer Hero
Unflavored dental floss is probably my favorite emergency substitute for kitchen twine. It’s strong, heat-resistant, and most of us have it sitting in our bathroom cabinets.
Important Always use unflavored, unwaxed dental floss. The mint-flavored or waxed varieties can melt in the oven and either change the flavor of your chicken or potentially create a fire hazard.
How to use dental floss
- Cut a piece about 15-20 inches long
- Cross the chicken legs at the “ankles”
- Wrap the floss around multiple times
- Tie a secure knot
- Trim any excess
2. The No-String Method (Skin Slit Technique)
This clever technique from professional chefs doesn’t require any string or substitutes at all! I learned this from a French culinary instructor and was amazed at how well it works.
Here’s how to do it:
- Place your chicken on a cutting board with legs facing you
- Pat the bird dry with paper towels (inside and out)
- Tuck the wings under the chicken
- Find the excess skin around the cavity
- Use a sharp knife or kitchen shears to make small slits in this skin
- Carefully tuck each leg through its corresponding slit
- That’s it! Your chicken is now “trussed” without any string
This method is actually my go-to when hosting dinner parties because it looks so professional and neat.
3. Aluminum Foil Ties
Got aluminum foil? Then you’ve got a solution! I’ve used this method several times when cooking at vacation rentals where kitchen supplies are limited.
To make aluminum foil ties:
- Tear off a piece of foil about 12 inches long
- Fold it lengthwise several times to create a strong “rope”
- Wrap it around the crossed legs of your chicken
- Twist the ends together to secure
- Fold any sharp edges under to prevent them from puncturing the chicken skin
The foil is pliable yet strong enough to hold the legs in place during cooking. It works best for smaller birds or when you’re just trying to keep a stuffed chicken from unrolling.
4. Wooden Skewers or Toothpicks
These wooden helpers can be lifesavers when you’re in a bind. I always keep some bamboo skewers in my pantry for kabobs, and they double perfectly as chicken leg securers.
How to use them:
- If using bamboo skewers, you may need to cut them shorter
- Cross the chicken legs at the ankles
- Carefully push the skewer through one leg, then through the other
- For extra security, use two skewers in an X pattern
Pro tip: Count how many toothpicks you use so you know how many to remove before serving! Nobody wants a toothpick surprise in their dinner.
5. Kitchen-Safe Silicone Bands
If you have silicone cooking bands (sometimes used for bundling vegetables or herbs), these can work in a pinch. They’re heat-resistant and food-safe, making them a decent alternative to twine.
However, they might not provide as tight a grip as traditional twine, so be careful when handling your chicken during cooking.
6. Cheesecloth Wrap
Cheesecloth can be used to wrap your entire chicken, keeping everything in place. While this isn’t exactly “tying” the legs together, it achieves the same purpose of keeping the bird compact during cooking.
Simply:
- Cut a piece of cheesecloth large enough to wrap around your chicken
- Position the legs as desired
- Wrap the cloth around the entire bird
- Tie the corners together to secure
7. Herb Stems (In Emergencies Only)
I tried this once when I was truly desperate, and while it’s not ideal, sturdy herb stems like rosemary can sometimes be used to tie legs together. The stems impart flavor to the chicken, but they’re not very strong, so this method is best used for smaller birds or in combination with another method.
8. What NOT to Use
Let me save you some potential kitchen disasters by mentioning what you should definitely avoid using:
- Rubber bands: These can melt, release chemicals, and potentially catch fire
- Colored thread or embroidery floss: The dye can leach into your food
- Synthetic yarns: These can melt or burn in the oven
- Plastic zip ties: These will definitely melt and ruin your food
9. The Seam-Side-Down Method
If you’re cooking a stuffed chicken breast or similar dish where you just need to keep it from unrolling, simply place it seam-side down on your baking sheet. The weight of the meat will help keep it closed during cooking.
10. Just Skip It!
Let’s be honest – sometimes it’s okay to just skip trussing altogether. While trussing helps create that picture-perfect roast chicken, an untrussed bird will still cook just fine. The legs might cook a bit faster (which some people prefer anyway), and it might not look as elegant, but it’ll still be delicious.
If you go this route, just tuck the wing tips under the chicken body to prevent them from burning, and you’re good to go.
FAQs About Tying Chicken Legs Together
How tightly should I tie the chicken legs?
Tie them snugly enough to keep the legs close to the body, but not so tight that you’re cutting into the meat. You want them secure but not strangled!
Can I reuse any of these alternatives?
For food safety reasons, I don’t recommend reusing any of these items after they’ve been in contact with raw chicken. They may have absorbed juices that could harbor bacteria.
Will my chicken cook differently if I don’t tie the legs?
Yes, slightly. Untrussed chickens typically cook a bit faster because the heat can circulate more freely around the legs. Just keep an eye on your chicken and use a meat thermometer to ensure it reaches the proper internal temperature (165°F/74°C).
Can I use the string-free method for turkey too?
Absolutely! The skin-slit method works great for turkeys too, though you may need to make slightly larger slits due to the bigger leg size.
Conclusion
Next time you find yourself without kitchen twine when preparing chicken, don’t stress! There are plenty of creative alternatives right in your home. My personal favorite is the no-string skin slit method because it creates such a professional-looking result without requiring any additional materials.
But whether you use dental floss, aluminum foil, wooden skewers, or just skip the trussing altogether, your chicken will still be delicious. The most important thing is making sure it cooks evenly and reaches the proper internal temperature.
What’s your go-to method for tying chicken legs when you don’t have twine? I’d love to hear your kitchen hacks in the comments below!
Happy cooking!
Keep those legs crossed.
Published OnMarch 14, 2019

Photo by Mark Weinberg
In culinary school, we had many lessons on chicken, including the various ways to truss one. Doing so, in effect, allows the chicken to retain its moisture while cooking and browning evenly.
One French instructor would show us an elaborate method, wrapping butchers twine around the entire bird in a swift arrest. (Beloved grand master chef Jacques Pépin does it precisely this way. You can also do it a bit more simply by tying up just the legs at their “ankles,” still maintaining the birds compact shape.
But what if you dont have a spool of twine lying around? Should you go ahead without, roasting with the legs splayed? Yes, of course you should (and I often do, as a non-trussed bird gets me a cooked bird just a touch quicker).
Theres a time and a place for a beautiful, round bird. If Im expecting guests, I will likely go for the more put-together truss. And if I dont have any string handy—or if Im just feeling too lazy—I will opt for a string-free “trussing.” (And by “string-free,” that includes alternate supplies like unflavored dental floss, toothpicks, and the like. Im going for nothing-new-necessary here.)
All you need is a sharp knife tip or a pair of trusty kitchen shears. Heres how to do it:
- Place the bird on a cutting board with the legs toward you.
- Make sure its nice and dry by patting it down with some paper towels, both on the surface and inside the cavity.
- Tuck the wings under.
- Pull out the excess bit of skin that hangs around the cavity. Carefully cut little slits into the skin, just enough to fit the legs through. Start small, as you can always cut further.
- Tuck each leg into each slit, being careful not to tear the skin. (You can see how it will look in the photo above.)
Truly as simple as that!
Are you a chicken trusser? Let us know below!