Are you craving that perfect plate of crispy, juicy fried chicken but don’t have buttermilk on hand? Don’t worry! You can still achieve that golden, crunchy coating and tender, flavorful meat without the traditional buttermilk marinade I’ve tested multiple methods to create the perfect no-buttermilk fried chicken recipe that delivers restaurant-quality results every time
Why You Don’t Need Buttermilk for Amazing Fried Chicken
Traditionally, buttermilk is used in fried chicken recipes to tenderize the meat and add tanginess. But guess what? There are several effective alternatives that work just as well—if not better! Let me show you how to make incredible fried chicken without a drop of buttermilk.
Essential Ingredients for No-Buttermilk Fried Chicken
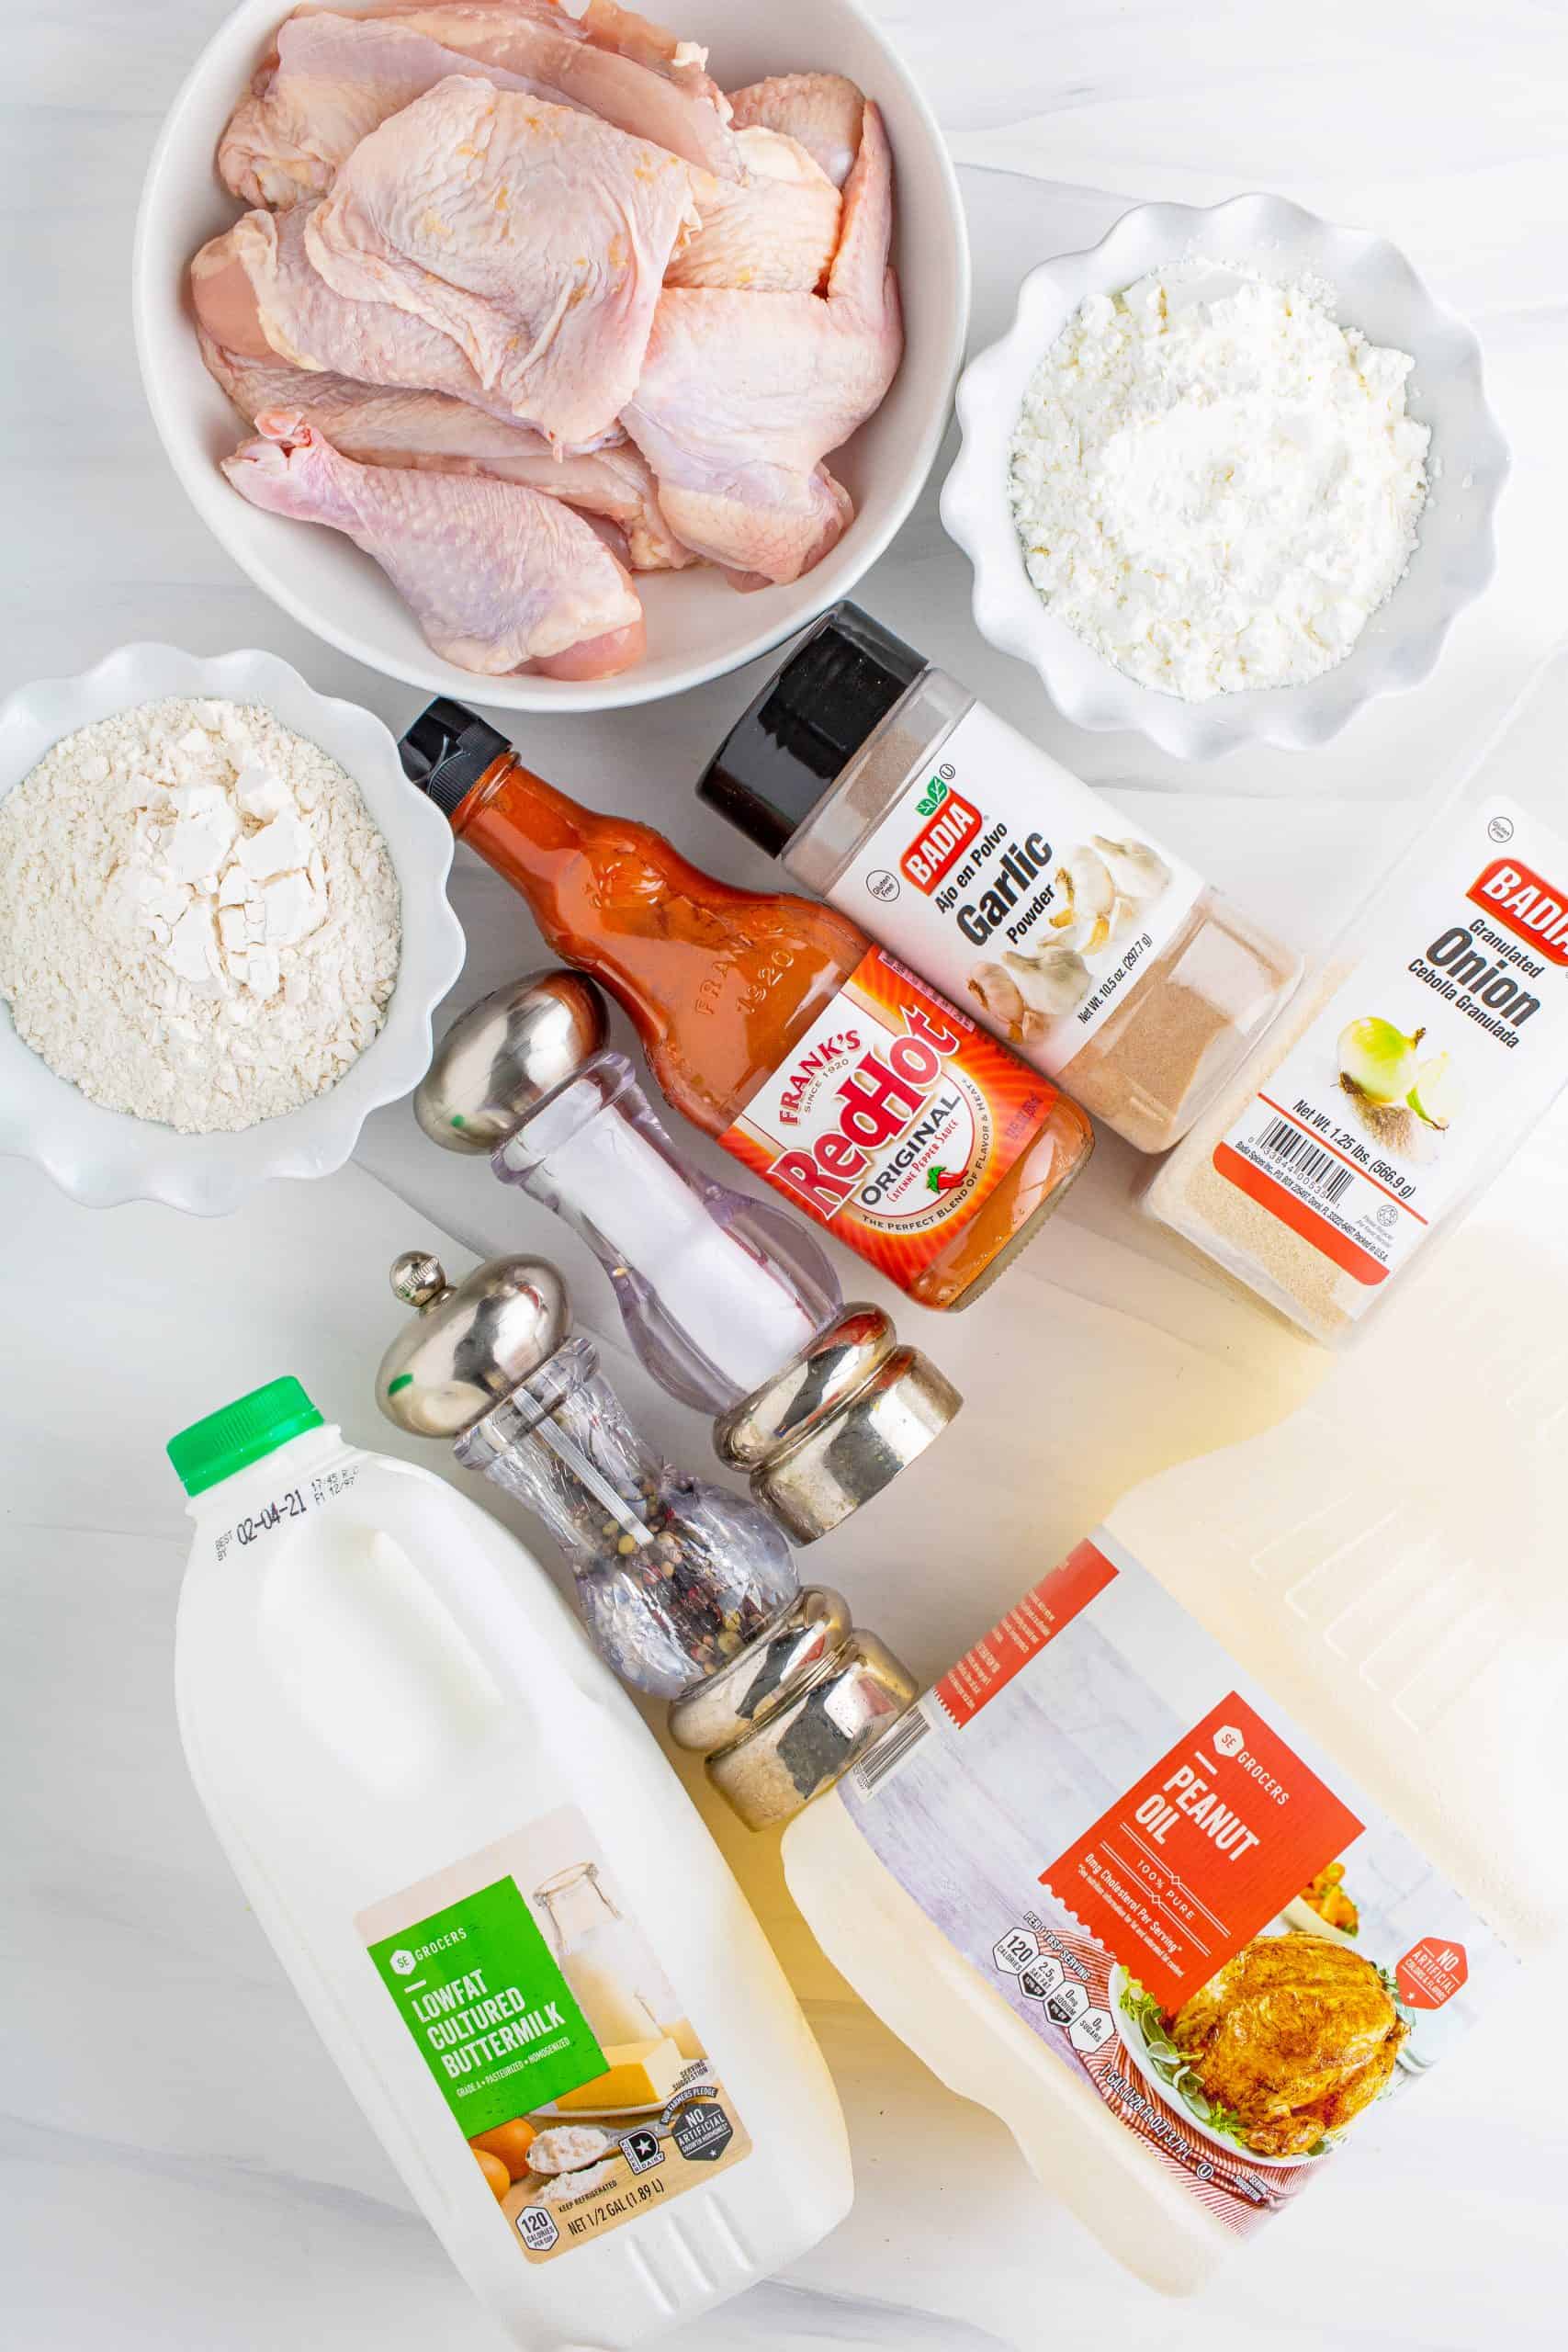
Here’s what you’ll need to make crispy, juicy fried chicken:
For the Chicken:
- 2-4 pounds chicken pieces (thighs, drumsticks, wings, or breasts)
- Vegetable oil, peanut oil, or avocado oil for frying
For the Brine (choose one)
- Simple Salt Brine: 2 cups water + 2-3 tablespoons kosher salt + 1 teaspoon sugar
- Vinegar Brine: 2 cups water + 2 tablespoons kosher salt + 1 tablespoon white vinegar + 1 teaspoon sugar
For the Coating
- 2 cups all-purpose flour
- 1 cup cornstarch (optional, but adds extra crispiness)
- 2 teaspoons garlic powder
- 2 teaspoons onion powder
- 1-2 teaspoons paprika
- 1 teaspoon dried thyme
- 1 teaspoon black pepper
- 1-2 teaspoons salt
- ½-1 teaspoon cayenne pepper (adjust to taste)
For the Egg Wash:
- 2-3 large eggs
- 3 tablespoons water
- 1 tablespoon hot sauce (optional)
Step-by-Step Instructions
1. Prepare the Brine
The brine is your secret weapon for juicy, flavorful chicken without buttermilk!
For the vinegar brine:
- Combine cold water, kosher salt, white vinegar, and sugar in a large bowl
- Stir until salt and sugar completely dissolve
- Add smashed garlic cloves and bay leaf (optional but recommended)
- Submerge chicken pieces completely in the brine
- Cover and refrigerate for at least 4 hours (overnight is even better!)
2. Set Up Your Dredging Station
After brining, you’ll need to create that perfect crispy coating:
- Remove chicken from brine, rinse under cold water, and pat thoroughly dry with paper towels
- In a large bowl, whisk together eggs, water, and hot sauce (if using)
- In another bowl, combine flour, cornstarch, and all seasonings, mixing well
- Arrange your station in order: chicken, seasoned flour, egg wash, and seasoned flour again
3. Double-Dredge for Maximum Crispiness
This double-dredging technique is the key to that thick, craggy coating everyone loves:
- Working with one piece at a time, coat chicken in seasoned flour first, shaking off excess
- Dip into egg wash, allowing excess to drip off
- Return to seasoned flour for a second coating, pressing gently to create a textured surface
- Place dredged pieces on a wire rack and let rest for 15 minutes (this helps the coating stick)
4. Fry to Golden Perfection
Now for the magic moment—transforming your coated chicken into crispy deliciousness:
- Fill a cast iron skillet or Dutch oven with 2-3 inches of oil
- Heat oil to 350°F (use a thermometer for accuracy!)
- Carefully add chicken pieces away from you to prevent splatter
- Fry in batches (don’t overcrowd!) – about 12-14 minutes for larger pieces, 10-12 for smaller ones
- Turn chicken once halfway through cooking
- Look for a deep golden-brown color and internal temperature of 165°F
- Remove to a wire rack over a baking sheet (not paper towels, which create steam)
- Let rest 5-10 minutes before serving
Pro Tips for Perfect Fried Chicken Every Time
After making countless batches of fried chicken, I’ve discovered some game-changing tips:
- Temperature matters: Maintain oil at 350°F throughout cooking – too low = greasy chicken, too high = burnt outside/raw inside
- Rest your dredged chicken: Let it sit 15-30 minutes before frying for better coating adhesion
- Use a carrot in the oil: Adding a peeled carrot to the frying oil helps keep it clean during multiple batches
- Check for doneness: Chicken should reach internal temperature of 165°F (use a meat thermometer!)
- Don’t crowd the pan: Fry in small batches to maintain oil temperature
- Rest after frying: Let chicken rest on a wire rack for 5-10 minutes to stay crispy
Troubleshooting Common Problems
Coating Falls Off During Frying
- Make sure chicken is completely dry before dredging
- Let the coated chicken rest before frying
- Don’t flip the chicken too early or too often
Chicken Is Greasy
- Oil temperature was too low during frying
- Didn’t drain properly after frying (use wire rack, not paper towels)
Outside Burns Before Inside Cooks
- Oil temperature too high
- Pieces too large (try cutting into smaller portions)
- Consider finishing larger pieces in a 350°F oven after frying
Delicious Variations to Try
Once you’ve mastered the basic recipe, try these tasty variations:
- Extra Spicy: Double the cayenne in your flour mixture and add hot sauce to your egg wash
- Herb-Infused: Add 2 tablespoons fresh herbs like thyme, rosemary, and parsley to your flour
- Lemon Pepper: Add 1 tablespoon lemon zest and extra black pepper to your flour mixture
- Gluten-Free: Swap all-purpose flour for a 1:1 gluten-free flour blend
Perfect Side Dishes for Your Fried Chicken
Serve your crispy fried chicken with these classic sides:
- Creamy mac and cheese
- Southern collard greens
- Candied yams
- Cornbread
- Coleslaw
- Biscuits and gravy
- Mashed potatoes
Frequently Asked Questions
Q: How do you keep fried chicken crispy?
A: Place on a wire rack after frying (not paper towels). For leftovers, reheat in a 375°F oven for 10-15 minutes to restore crispiness.
Q: Can I make this recipe ahead of time?
A: Yes! You can brine the chicken up to 24 hours in advance, and pre-mix your seasoned flour. Fried chicken can be refrigerated for up to 4 days.
Q: What’s the best oil for frying chicken?
A: Vegetable oil, peanut oil, and avocado oil all work great due to their high smoke points. Avocado oil is my personal favorite for its neutral taste and health benefits.
Q: How do I know when the oil is hot enough?
A: Use a deep-fry thermometer (350°F is ideal). Or, drop a small piece of bread into the oil – it should bubble vigorously and turn golden in about 60 seconds.
Q: Can I use an air fryer instead?
A: Absolutely! Spray dredged chicken with oil and air fry at 380°F for 12-15 minutes per side.
The Bottom Line
You don’t need buttermilk to make incredible fried chicken! The secret lies in proper brining, seasoning, double-dredging, and maintaining the right oil temperature. With this method, you’ll get that perfect combination of crispy exterior and juicy interior every single time.
I’ve made this recipe countless times for family gatherings, and it’s always the first thing to disappear. The vinegar brine works just as effectively as buttermilk to tenderize the meat, while the double-dredging technique creates that craggy, crispy coating we all crave.
Give this no-buttermilk fried chicken recipe a try, and I bet you won’t even miss the buttermilk. It’s seriously that good!
FRIED CHICKEN RECIPE FOR CRUNCHY SKIN AND TENDER CHICKEN
I’m from the south and we all know that Fried Chicken is a staple here. Something that you are born to love and born to eat! This recipe for The Best Southern Fried Chicken is one of my favorite recipes and one that took me a few years to get just right. This recipe produces a crunchy exterior with moist chicken on the inside. The absolute perfect chicken in my opinion. Really good fried chicken takes time so don’t rush this one.

No, please don’t if at all possible. If you are going to go through the trouble of making fried chicken from scratch, you will be missing out on so much flavor. Please, please try to pick up the real stuff (not the kind that you make with milk and vinegar and lemon juice (more on that below – that is good for most recipes but not the most ideal for fried chicken). An overnight soak is optimal for maximum juiciness.
The mixture of the cornstarch and flour helps give it that extra crunchy exterior.
This recipe works with any cut of chicken. The key is just making sure the chicken is cooked to 165F degrees internal temperature.
Peanut oil has a neutral flavor that won’t compromise the flavor of the chicken. Canola oil would be my second choice.
I deep fry my chicken in a deep fryer but you can also do this in a deep, heavy bottomed pot. I just find that you often get darker burn-like spots with a cast iron pan if you aren’t super careful.
Well, you’ll need to use their famous 11 herbs and spices. Just substitute the garlic powder, onion powder, salt and pepper in this recipe for the following seasonings: (you will skip the step of seasoning the individual chicken pieces and stir in 2 1/2 Tablespoons of this seasoning in with the flour/cornstarch mixture). Note: you will not use this entire amount. Mix it together and use about 2 1/2 Tablespoons of the mixture in place of the seasonings I provide below if using it in this recipe. 2 teaspoons salt ½ Tablespoon dried thyme ½ Tablespoon dried basil 1 teaspoon dried oregano 1 teaspoon celery salt ½ Tablespoon black pepper 1 Tablespoon mustard powder 2 Tablespoons paprika 2 Tablespoons garlic salt 1 Tablespoon powdered ginger 1 Tablespoon pepper (use white pepper if you have it)

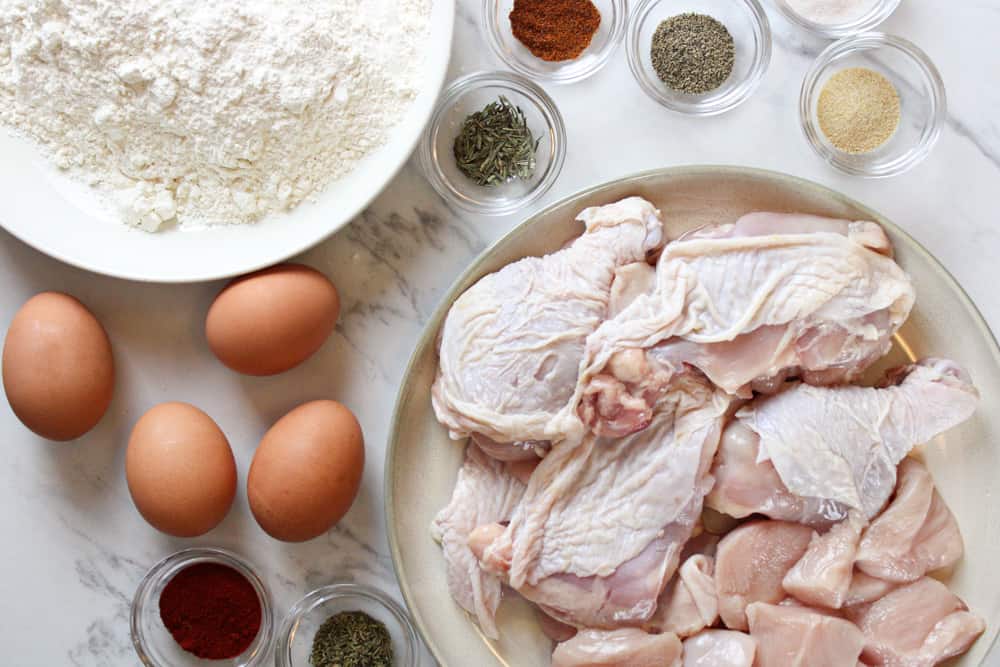
INGREDIENTS NEEDED: (SEE RECIPE CARD BELOW FOR THE FULL RECIPE)
- whole chicken (cut up) – you can just use your favorite cut of chicken here: breasts, thighs, wings, legs.
- salt, pepper, garlic powder, onion powder – this is the blend of seasonings I enjoy but feel free to use your favorite or use the copycat KFC seasoning blend above in the FAQ.
- buttermilk – I talk about this in more detail above in the Frequently Asked Question section. This really makes the meat so tender and keeps it from being dry. As I said above, there really is just no true substitute for buttermilk here. If you are in an absolute pinch, you can check out my post on How to Make Buttermilk (but seriously, try to use the real stuff here).
- hot sauce – this is optional but adds a nice little kick.
- cornstarch – this is what gives you that crispy skin so don’t skip it.
- peanut oil – this is my favorite oil to fry in since it isn’t going to take away flavor from the chicken (and its the less stinky kind of oil).