Are you tired of dry, bland chicken? Want to impress your family and friends with juicy, flavorful chicken that has that perfect crispy skin? Well, you’re in the right place! Today, I’m gonna share my tried-and-true method for grilling chicken leg quarters on a gas grill.
As someone who’s been grilling for years, I’ve made every mistake possible (seriously, I once turned chicken into chicken-shaped charcoal). But through trial and error, I’ve perfected this technique, and now I’m sharing all my secrets with you!
Chicken leg quarters are my absolute favorite cut for grilling – they’re economical, juicy and packed with flavor. Plus they’re pretty forgiving for beginners. Let’s dive into how to transform these humble cuts into mouthwatering masterpieces on your gas grill!
Key Takeaways
Before we get into the nitty-gritty details, here are the crucial points to remember:
- Preparation is key: Clean and trim chicken leg quarters to remove excess fat
- Marinate for flavor: Allow at least 1 hour (preferably overnight) for best results
- Master heat management: Use both direct and indirect heat for perfect results
- Cook to temperature: Aim for 165°F internal temperature for safe, juicy chicken
- Let it rest: Allow 5-10 minutes rest time before serving to keep juices inside
What You’ll Need
- 4 chicken leg quarters
- Your favorite marinade or seasoning (I’ll share some options below)
- Meat thermometer
- Tongs
- Paper towels
- Oil for grates
Selecting the Perfect Chicken Leg Quarters
First things first – quality matters! When shopping for chicken leg quarters
- Look for fresh chicken with pinkish hue (avoid grayish tones)
- Choose organic or free-range if possible for better flavor
- Make sure the packaging isn’t leaking or bulging
- Check for pieces that are roughly the same size for even cooking
I prefer chicken leg quarters because they contain both the thigh and drumstick, giving you two delicious cuts in one piece. Plus, they tend to be more affordable than individual parts!
Preparation: Setting Your Chicken Up for Success
Cleaning and Trimming
Before we add any flavors. proper preparation is crucial
- Rinse each piece under cold water to remove any residue
- Pat them completely dry with paper towels (this helps seasonings stick better)
- Trim any excess fat or loose skin with kitchen scissors
- Make small cuts in the thickest parts to allow marinade to penetrate
This prep work might seem tedious, but trust me, it makes a HUGE difference in the final result!
Marinade and Seasoning Options
Now for the fun part – flavoring! You’ve got two main options:
Simple Dry Rub (Quick Option)
- 4 teaspoons Grilled Chicken Seasoning (like Kinder’s)
- OR make your own with:
- 2 tablespoons paprika
- 1 tablespoon garlic powder
- 1 tablespoon onion powder
- 1 teaspoon black pepper
- 1 teaspoon salt
- 1/2 teaspoon dried herbs (thyme, rosemary, oregano)
Wet Marinades (For More Flavor)
- Basic Marinade: 1 cup olive oil, 1/4 cup vinegar, salt, and pepper
- Herb Marinade: 1 cup yogurt, minced garlic, chopped rosemary, and thyme
- Spicy Marinade: 1 cup hot sauce, 1/4 cup honey, and lime juice
Whichever option you choose, be generous! Rub the seasoning or marinade all over the chicken, making sure to get it under the skin for maximum flavor penetration.
For dry rubs, you can cook immediately. For marinades, place the chicken in a sealed plastic bag or container and refrigerate for at least 1 hour, though overnight delivers the best results.
Setting Up Your Gas Grill
Proper grill setup is often overlooked, but it’s absolutely essential for perfect chicken leg quarters!
Preheating and Cleaning
- Open your grill lid (safety first!)
- Turn on all burners to high
- Close lid and preheat for 10-15 minutes
- Scrape grates clean with a grill brush
- Oil the grates with a paper towel dipped in cooking oil and held with tongs
Your target temperature is around 400-425°F for the initial sear. This high heat creates those beautiful grill marks and crispy skin we all love.
Creating Direct and Indirect Heat Zones
This is the secret to perfectly cooked chicken leg quarters! You need:
- Direct heat zone: Keep one side of the grill on medium-high (for searing)
- Indirect heat zone: Turn the other side down to low or off completely (for gentle cooking)
This two-zone setup prevents burning while ensuring the chicken cooks through properly. On a three-burner grill, I usually keep one side on medium-high, the middle on low, and turn the third burner off completely.
The Grilling Process
Alright, now for the main event! Here’s how to grill those chicken leg quarters to perfection:
Step 1: The Initial Sear
- Place chicken quarters skin-side down on the direct heat zone
- Close the lid
- Grill for 2-4 minutes until you get nice grill marks
- Flip and sear the other side for another 2-4 minutes
- Move chicken pieces around as needed to prevent flare-ups
During this stage, you’re creating that gorgeous crispy exterior. Don’t wander off – this is when flare-ups happen!
Step 2: Indirect Heat Cooking
- Move all chicken pieces to the indirect heat zone
- Close the lid (very important!)
- Cook for about 30 minutes, flipping halfway through
- Start checking temperature around the 25-minute mark
This is when patience pays off. The indirect heat gently cooks the chicken through without burning the outside. Keep that lid closed as much as possible – every time you open it, you lose heat and extend cooking time.
Step 3: Temperature Check
Here’s where your meat thermometer becomes your best friend:
- Insert thermometer into the thickest part of the thigh, avoiding the bone
- Look for a reading of 165°F (74°C)
- If you don’t have a thermometer, cut into the thickest part – juices should run clear with no pink
If your chicken isn’t quite at 165°F, continue cooking on indirect heat, checking every 5 minutes until done.
Troubleshooting Common Issues
Even experienced grillers encounter problems sometimes. Here’s how to handle the most common ones:
Dealing With Flare-Ups
Flare-ups happen when fat drips onto the flames. To manage them:
- Keep a spray bottle of water handy to dampen flames
- Move chicken to a cooler part of the grill immediately
- Never use a spray bottle directly on food – just on flames
- Trim excess fat before grilling to prevent flare-ups
Chicken Cooking Unevenly
If some pieces are cooking faster than others:
- Rotate chicken quarters during cooking
- Move faster-cooking pieces to cooler zones
- Consider butterflying very large pieces for more even cooking
Skin Burning Before Inside Is Done
This is a common problem that’s easily solved:
- Start with skin-side down on direct heat to crisp it
- Flip sooner if blackening occurs
- Move to indirect heat earlier
- Consider lowering your overall grill temperature
The Final Steps
You’re almost there! These last steps make all the difference:
Resting the Chicken
After removing from the grill:
- Place chicken on a clean plate or cutting board
- Tent loosely with foil (don’t wrap tightly or skin will get soggy)
- Let rest for 5-10 minutes
I know it’s tempting to dig in right away, but this resting period allows juices to redistribute throughout the meat. Skip this step, and all those beautiful juices will run out when you cut in, leaving you with drier chicken.
Serving Suggestions
Chicken leg quarters pair wonderfully with:
- Classic sides like coleslaw, corn on the cob, or grilled vegetables
- A simple garden salad for a lighter option
- Crusty bread to soak up those delicious juices
- Additional sauces like BBQ, hot sauce, or aioli on the side
Pro Tips From My Kitchen to Yours
After years of grilling chicken leg quarters, here are some insider tips I’ve picked up:
- Bring chicken to room temperature before grilling (about 20 minutes) for more even cooking
- Keep the lid closed as much as possible to maintain consistent temperature
- Don’t over-flip the chicken – twice is usually enough
- Use a drip pan under the indirect heat side to catch drippings and prevent flare-ups
- Consider brining your chicken before marinating for extra juiciness (1/4 cup salt to 4 cups water for 2-4 hours)
Final Thoughts
Grilling chicken leg quarters might seem challenging at first, but once you master the basic technique, it becomes second nature. The key is understanding your grill’s hot spots, managing the two-zone cooking method, and being patient during the indirect heat phase.
I still remember the first time I nailed this recipe – my family couldn’t believe I made it myself! There’s something deeply satisfying about serving up perfectly grilled chicken with that irresistible combination of crispy skin and juicy meat.
So fire up that gas grill, grab some chicken leg quarters, and get cooking! I’d love to hear how your grilling adventures turn out. Feel free to experiment with different seasonings and marinades to make this recipe your own.
Happy grilling, friends!
FAQs
How long does it take to grill chicken leg quarters on a gas grill?
Typically 35-45 minutes total (5-7 minutes on direct heat, then 30-40 minutes on indirect heat).
What temperature should my gas grill be for chicken leg quarters?
Start with 400-425°F for the initial sear, then reduce to around 350-375°F for indirect cooking.
Can I use frozen chicken leg quarters on the grill?
It’s not recommended. Always thaw completely for even cooking and food safety.
How do I know when chicken leg quarters are done?
Use a meat thermometer to check for an internal temperature of 165°F in the thickest part.
What’s the best marinade for grilled chicken leg quarters?
This is personal preference, but a combination of acid (vinegar/citrus), oil, herbs, and spices works best. Marinate for at least 1 hour, preferably overnight.
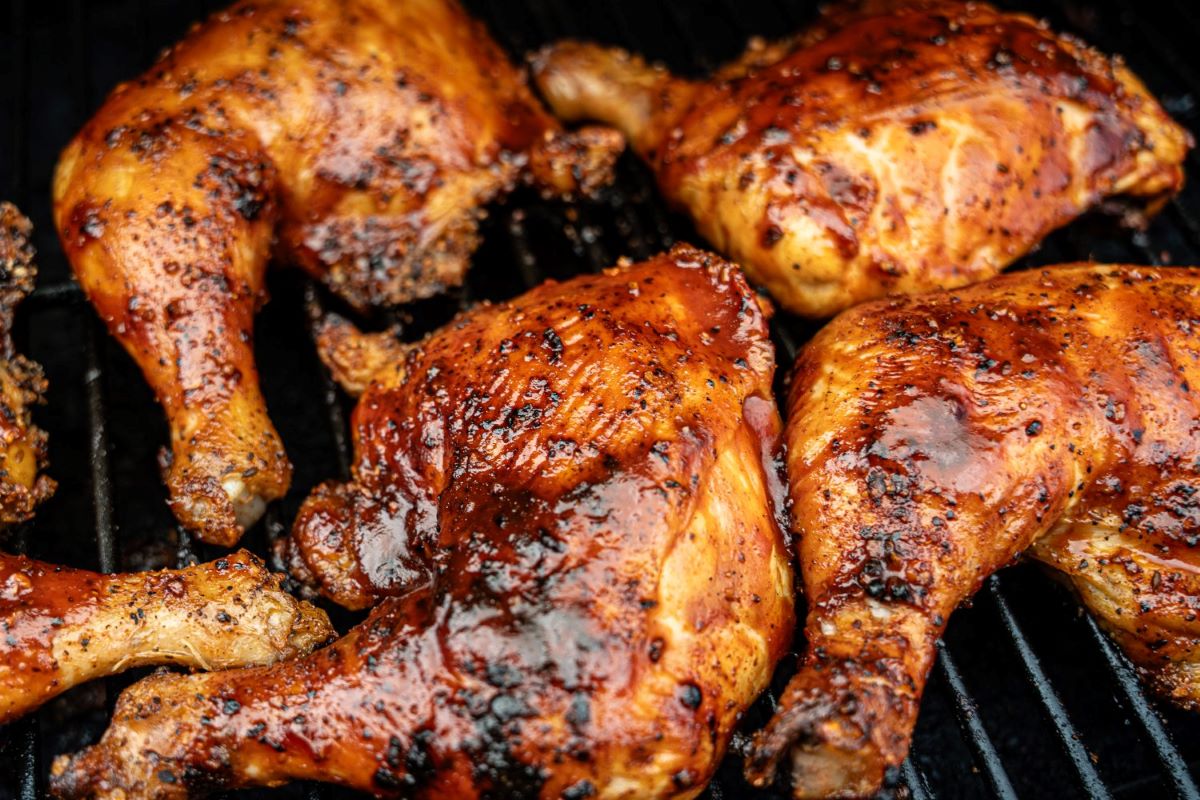
Grilled Chicken Leg QuartersLet Kinder’s Grilled Chicken Seasoning do the work for you in this simple grilled chicken legs recipe. Our blend of sea salt, cracked black pepper, garlic, onion, and herbs brings that next level flavor to grilled chicken. Serve with a salad, your favorite grilled veggies, or crusty bread for a simple dinner.
