Hey there, grill enthusiasts! If you’ve got a Blackstone griddle sittin’ in your backyard and you’re itchin’ to whip up some juicy mouth-waterin’ chicken breast you’ve come to the right place. I’m gonna walk ya through every step of how to grill chicken breast on a Blackstone griddle, turnin’ that plain ol’ poultry into a flavor-packed masterpiece. Whether you’re a newbie or a seasoned griller, I’ve got the tips and tricks to make sure your chicken comes out tender, tasty, and downright impressive. So, fire up that griddle, and let’s get cookin’!
Why a Blackstone Griddle is Your Chicken’s Best Friend
Before we dive into the nitty-gritty, let me tell ya why I’m obsessed with usin’ a Blackstone griddle for chicken breast. This flat-top beast heats up nice and even, givin’ you a perfect sear without hot spots burnin’ your meat. Plus, it’s got tons of space, so you can cook a whole batch for the fam or meal prep for the week. And don’t even get me started on the flavor—that griddle surface locks in juices like nobody’s business. Trust me, once you try this, you ain’t goin’ back to a regular grill for chicken.
Step-by-Step: Grillin’ Chicken Breast on a Blackstone Griddle
Let’s cut to the chase. Here’s how I grill chicken breast on my Blackstone to get that perfect, juicy result every dang time. Follow along, and you’ll be a pro in no time.
Step 1: Get Your Gear and Chicken Ready
First things first, gather up what you need. You don’t wanna be runnin’ around mid-cook lookin’ for stuff. Here’s my go-to list:
- Chicken breasts: Go for boneless, skinless ones. They cook even and quick. Grab ones that are about the same size so they finish at the same time.
- Oil: I like avocado oil ‘cause it handles high heat like a champ, but canola or veggie oil works too. Just don’t use olive oil—it burns too easy.
- Seasonings: Keep it simple with salt, pepper, and garlic powder, or get fancy with a rub or marinade (more on that later).
- Tools: A good spatula, tongs, and a meat thermometer. Don’t guess if it’s done—check it!
- Blackstone griddle: Obvious, but make sure it’s clean and ready to roll.
Pick out your chicken—three or four breasts should feed a small crowd. If they’re super thick, I sometimes fillet ‘em into thinner pieces to speed things up. Pat ‘em dry with a paper towel; wet chicken don’t sear as nice
Step 2: Preheat That Griddle Like You Mean It
Turn on your Blackstone and set it to medium-high heat, aimin’ for around 400°F to 450°F. Lemme tell ya preheating is key—don’t skip this! Give it a good 10 to 15 minutes to get hot. You want that surface screamin’ ready so it sears the chicken on contact. To test it flick a few drops of water on there. If they sizzle and vanish quick, you’re golden.
Once it’s hot, drizzle on a thin layer of oil and spread it around with your spatula. This keeps the chicken from stickin’ and adds a lil’ flavor. Don’t overdo it though; you ain’t deep-fryin’ here.
Step 3: Season or Marinate for Flavor That Pops
While the griddle’s warmin’ up, let’s talk flavor. I ain’t about bland chicken, and you shouldn’t be neither. At the bare minimum, hit those breasts with salt, pepper, and a pinch of garlic powder. Rub it in good. If you’ve got a few minutes—or better yet, a few hours—marinate ‘em. Here’s a couple ideas I swear by:
- Citrus Kick: Mix up some lemon juice, a splash of lime, a bit of oil, and some chopped garlic. It keeps the meat moist and zesty.
- BBQ Vibes: Slather on your fave barbecue sauce with a tiny bit of vinegar for tang. It’ll caramelize into somethin’ magical.
- Soy Savory: Blend soy sauce, a dribble of sesame oil, and some grated ginger. Gives it an Asian flair that’s outta this world.
Toss the chicken in a bag or dish with the marinade, makin’ sure it’s coated. Let it sit for at least 30 minutes, or overnight in the fridge if you’re plannin’ ahead. If you’re in a rush, just season and go—still gonna be tasty.
Step 4: Grill Time—Sear and Flip
Alright, griddle’s hot, chicken’s ready. Lay those breasts down on the oiled surface, and don’t mess with ‘em for the first few minutes. You wanna hear that sizzle—that’s the sear lockin’ in the juices. Cook ‘em for about 6 to 8 minutes on the first side, dependin’ on how thick they are. You’ll see a nice golden-brown crust formin’. Flip ‘em over, and give the other side another 5 to 6 minutes.
Here’s a lil’ trick I picked up: after flippin’, drop a small pat of butter on top of each piece. It melts down and adds extra richness. Don’t overcrowd the griddle neither; give each piece some space to cook even.
Step 5: Check for Doneness—Don’t Guess!
I’ve ruined enough chicken in my day to know you can’t eyeball this stuff. Grab that meat thermometer and stick it in the thickest part of the breast. You’re lookin’ for 165°F—that’s when it’s safe to eat. If you ain’t got a thermometer, cut into one; the juices should run clear, and the meat should look opaque, not pink. If it’s underdone, give it a couple more minutes. If you pull it off at around 160°F, it’ll keep cookin’ a bit from residual heat, hittin’ that sweet spot without dryin’ out.
Step 6: Rest and Serve
Take the chicken off the griddle and let it chill on a plate for 5 minutes. Don’t skip this restin’ step—it lets the juices settle so they don’t all spill out when you cut in. After that, slice it up or serve it whole. You’ve just nailed it, my friend!
Quick Reference: Grillin’ Times and Temps
Here’s a handy table to keep things straight. I scribbled this down after plenty of trial and error, so you don’t gotta mess up like I did.
| Aspect | Details |
|---|---|
| Griddle Temperature | 400°F to 450°F |
| Preheat Time | 10-15 minutes |
| Cook Time (per side) | 6-8 minutes (based on thickness) |
| Internal Temp (done) | 165°F |
| Resting Time | 5 minutes |
Keep this in mind, and tweak it if your chicken’s thicker or thinner than usual.
Why Chicken Breast Goes Wrong (And How to Fix It)
Now, I gotta be real with ya—chicken breast can be a pain if you don’t treat it right. I’ve had my share of dry, rubbery disasters, specially early on. Here’s the common screw-ups and how to dodge ‘em:
- Overcookin’: Biggest sin ever. Cook past 165°F, and it turns to cardboard. Use that thermometer, and pull it off a tad early if you’re unsure—carryover heat’s got your back.
- No Seasoning: Plain chicken is borin’ as heck. Even if you’re rushed, a lil’ salt and pepper goes a long way. Better yet, experiment with spices like paprika or cajun for a kick.
- Skippin’ the Oil: Chicken breast ain’t fatty, so it sticks like glue without oil on the griddle. A thin coat saves the day.
- Not Restin’: Cut in right away, and all that juice runs out. Be patient for them 5 minutes, trust me.
Fix these, and you’re golden. I remember one time I overcooked a batch so bad, my dog wouldn’t even touch it. Learned my lesson after that fiasco!
Flavor Variations to Keep Things Fresh
Once you’ve got the basics down, it’s time to play around. I get bored cookin’ the same thing over and over, so I mix it up with different vibes. Here’s a few ideas to spark your creativity:
- Spicy Cajun: Rub on some cajun seasoning before grillin’. It’s got a smoky heat that pairs awesome with a cool slaw on the side.
- Taco Night: Use taco seasoning and a squeeze of lime after cookin’. Slice it up for fajitas or quesadillas—my kids go nuts for this.
- Loaded Style: After flippin’, top it with shredded cheese, sautéed onions, and bell peppers. It’s like a mini Philly cheesesteak but with chicken.
- Sweet BBQ: Brush on BBQ sauce a couple minutes before it’s done. That sticky, sweet glaze is pure heaven.
Don’t be afraid to get weird with it. I once tried a honey-mustard glaze, and dang, it was a game-changer. What’s your go-to flavor combo? Experiment and find what you love.
What If You Don’t Got a Blackstone Griddle?
I know not everyone’s got a Blackstone sittin’ around, and that’s cool. If you’re stuck, you can still pull this off on a stovetop with a cast iron skillet. Heat it up nice and hot, oil it like you would the griddle, and follow the same cook times. It won’t be quite the same—that flat-top magic is hard to beat—but it’ll get ya close. I’ve done this on rainy days when I couldn’t grill outside, and it still turned out pretty darn good.
Servin’ Up Your Grilled Chicken Masterpiece
Now that your chicken’s grilled to perfection, let’s talk about makin’ a meal outta it. I love how versatile this stuff is—you can go fancy or keep it chill. Here’s some ways I serve it up:
- Classic Plate: Pair it with grilled veggies like zucchini or asparagus. Throw some mashed potatoes or rice on the side for a hearty dinner.
- Sandwich Style: Slice it thin and pile it on a bun with lettuce, tomato, and a smear of mayo. Instant crowd-pleaser.
- Salad Topper: Chop it up and toss it over a fresh garden salad with a light dressin’. Keeps things healthy but fillin’.
- Fajita Fun: Cut into strips, grab some tortillas, and add sautéed peppers and onions. Don’t forget the salsa!
For an extra punch, whip up a quick sauce. I’m a sucker for a garlic butter drizzle—just melt some butter with minced garlic and a pinch of parsley. Or go zesty with a mix of orange juice, lemon, and a touch of honey. Drizzle it on right before servin’, and watch folks beg for seconds.
Sides That Steal the Show
A great chicken dish needs great sides, right? I’ve got a few faves that I whip up on the Blackstone while the chicken’s cookin’ or right after. Keeps the mess to a minimum, and everything’s hot at the same time.
- Grilled Veggies: Toss bell peppers, broccoli, or whatever’s in the fridge with a lil’ oil and salt. Cook ‘em right on the griddle for a few minutes till tender.
- Potatoes: Dice up some spuds, season ‘em, and crisp ‘em up on the flat-top. They get this perfect golden edge that’s to die for.
- Cauliflower Rice: For a lighter option, I sauté some riced cauliflower with lime and cilantro. Takes like 5 minutes and feels fancy.
One time, I grilled up some asparagus alongside the chicken, and my buddy swore it was restaurant-quality. It’s all about timin’—throw the sides on while the chicken rests, and you’re set.
Storin’ Leftovers (If There Are Any!)
If by some miracle you’ve got leftovers, don’t let ‘em go to waste. I stick mine in an airtight container in the fridge, and they’re good for about 4 days. Reheat ‘em gently on the griddle or in a skillet with a splash of oil to keep ‘em from dryin’ out. Or, get creative—chop ‘em up for a quick wrap, toss ‘em in a soup, or make a killer chicken salad. I’ve got a whole stash of leftover ideas up my sleeve from years of cookin’ too much!
Tools That Make Grillin’ Easier
I ain’t one for tons of gadgets, but a few things make grillin’ on the Blackstone a breeze. If you’re just startin’ out, here’s what I recommend:
- Meat Thermometer: I said it before, but it’s a lifesaver. No more guessin’ games.
- Spatula and Tongs: Get sturdy ones for flippin’ and movin’ stuff around. The Blackstone ones are built tough.
- Thermometer Gun: Sounds fancy, but it’s just for checkin’ the griddle temp. Helps if your model don’t got a built-in gauge.
These ain’t gotta be expensive. I picked up my spatula set for cheap, and it’s been goin’ strong for years. Invest in the basics, and you’re good to grill.
Common Questions I Get Asked
Over the years, folks always hit me with the same questions about grillin’ chicken on a Blackstone. Here’s my quick takes on ‘em:
- Can I use chicken thighs instead? Heck yeah! They’re juicier than breasts ‘cause of the extra fat. Cook time might be a tad longer, so check that temp.
- What if my chicken sticks? You probably didn’t oil the griddle enough, or it wasn’t hot when you started. Crank the heat next time, and don’t skimp on oil.
- Can I add BBQ sauce? Yup, just brush it on near the end so it don’t burn. Last couple minutes is perfect for that sticky goodness.
Got more questions? Hit me with ‘em, and I’ll dish out whatever wisdom I’ve got.
Final Thoughts on Grillin’ Like a Champ
Masterin’ how to grill chicken breast on a Blackstone griddle ain’t just about followin’ steps—it’s about feelin’ the heat, trustin’ your gut, and makin’ it your own. I’ve been at this for ages, and every cookout teaches me somethin’ new. Whether you’re feedin’ a crowd or just treatin’ yourself, this method’s gonna elevate your game. So, get out there, fire up that griddle, and show that chicken who’s boss. You’ve got this, and I’m rootin’ for ya! What’s your next grill project gonna be? Let’s keep the flames goin’!

Ingredients Needed for BBQ Chicken
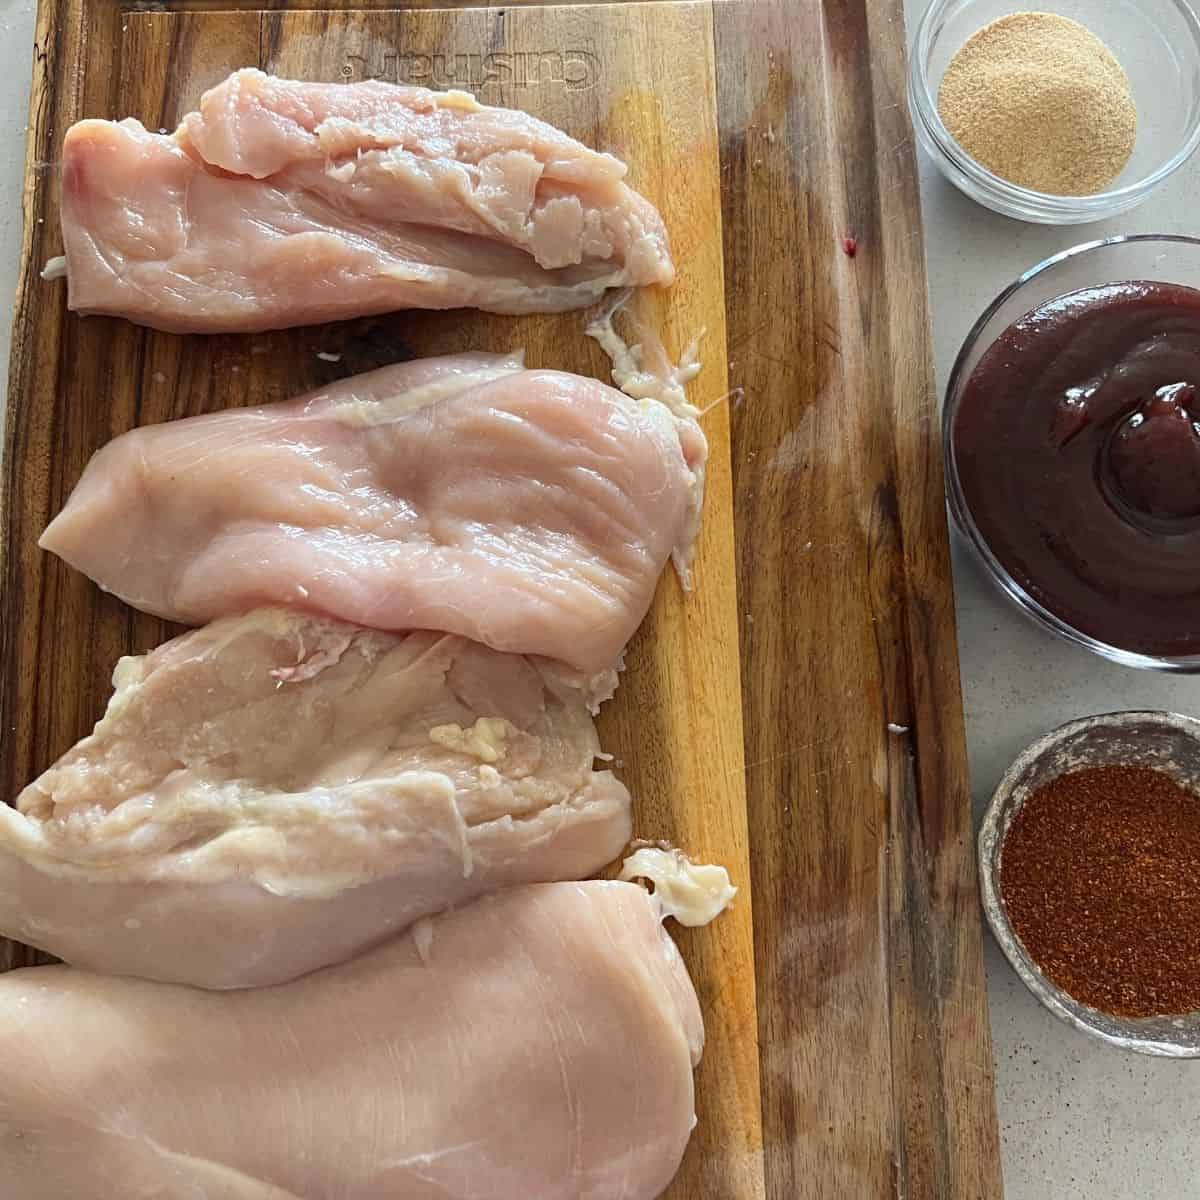
- 1.5 pounds boneless, skinless chicken breasts or thighs
- 1 tablespoon olive oil or avocado oil
- Salt and pepper, to taste
- ½ teaspoon garlic powder
- ½ teaspoon smoked paprika (optional for a smoky kick)
- ½ cup BBQ sauce of choice (sugar-free options work great too)
- Chicken: Use thighs for more flavor and moisture, or breasts for leaner protein.
- BBQ Sauce: Try sugar-free BBQ for low-carb or WW-friendly versions. I love G Hughes or Primal Kitchen.
- Seasonings: Keep it simple, or add a dry rub before cooking if you want bolder flavors.
- Want something spicy? Try Spicy Smoked Chicken Thighs
- Want an easy marinade recipe Check out Easy 3 Ingredient Grilled Italian Chicken Marinade
Why You’ll Love This Recipe
Ive tested a lot of BBQ Chicken recipes over the years —from oven-baked to Instant Pot Shredded BBQ Chicken (2 Ingredients)—nothing beats the speed and flavor of a hot, flat-top griddle. The Blackstone gives you a golden crust on the outside while locking in all that juicy, barbecue-y goodness inside. Plus, cleanup is a breeze compared to traditional grilling.
Whether youre feeding a crowd or meal prepping for the week, this recipe is a win. I’ve made it with both chicken breasts and thighs, and it always turns out delicious.
I like to use this BBQ chicken to make Blackstone Chicken Quesadillas or add it to Chicken Tortilla Rollups if youre looking for something extra to make with it.