Hey there, kitchen warriors! If you’re lookin’ to whip up somethin’ hearty and downright tasty without spendin’ hours slavin’ over a hot stove, you’ve stumbled on the right spot. Today, we’re divin’ headfirst into the art of cookin’ split chicken breast on the stove top. Trust me, this ain’t just another boring chicken recipe—it’s a game-changer for busy nights when you want flavor without the fuss. I’ve been makin’ this for years, and lemme tell ya, the smell of that crispy skin hittin’ the pan is pure magic. So, grab your skillet, and let’s get to work!
What’s a Split Chicken Breast, Anyways?
Before we get our hands dirty, let’s clear up what we’re dealin’ with. A split chicken breast is basically a chicken breast that’s still got the bone in and the skin on. It’s been “split” from the whole bird, so you’re not wrestlin’ with a full chicken. Why’s this cut so great? Well, that bone and skin ain’t just for show—they keep the meat juicy and pack in a ton of flavor durin’ cookin’. Plus, it’s often cheaper than them boneless, skinless ones, which is a win for us budget-minded cooks.
Now cookin’ this on the stove top is perfect ‘cause it’s quick you don’t need fancy gear, and you can control every step. No oven preheat nonsense—just a hot pan and some elbow grease. Ready to make this happen? Let’s break it down nice and easy.
Step-by-Step: Cookin’ Split Chicken Breast on Stove Top
I’m gonna walk ya through this like we’re standin’ side by side in my kitchen. This method’s been my go-to forever and it turns out tender, juicy chicken with a crispy skin that’ll have everyone askin’ for seconds. Here’s how we do it
1. Pick the Right Chicken
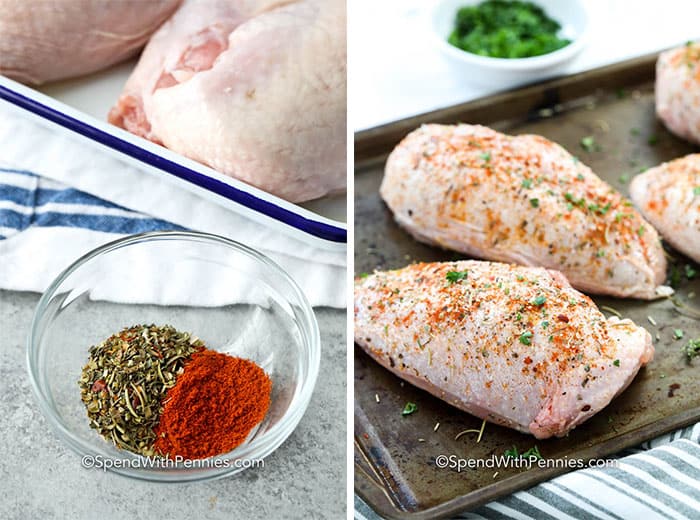
First things first, ya gotta start with good stuff Head to your local market or butcher and look for fresh split chicken breasts How do ya know it’s fresh? Check for a bright pink color and a firm feel—no squishy business. And don’t skimp on the skin-on kind; that skin’s gonna lock in moisture and give ya that golden crunch.
- Tip: If it smells funky or looks dull, pass on it. Fresh is key!
- Why skin-on?: It acts like a lil’ shield, keepin’ the meat from dryin’ out while it cooks.
2. Season It Up Real Good
Now, let’s talk flavor. You don’t need to be a chef to make this pop—start simple with salt, pepper, and a drizzle of oil. Rub it all over that chicken, gettin’ under the skin if ya can. Wanna kick it up a notch? Toss on some garlic powder, a pinch of paprika for color, or even a splash of lemon juice for a zesty bite. Me, I love mixin’ it up with whatever’s in the pantry—sometimes a lil’ Cajun spice, sometimes just herbs I got lyin’ around.
- Basic Mix: Salt, pepper, and a tablespoon of oil (olive or whatever ya got).
- Get Wild: Try marinatin’ it for an hour with some Italian dressin’ or a spicy blend if ya got time.
- Don’t Overdo It: Too much salt can dry it out, so go easy at first.
3. Heat Up That Skillet
Grab a big skillet—cast iron if ya got one, ‘cause it holds heat like a champ. Crank the heat to medium-high and add a couple tablespoons of oil. We’re usin’ somethin’ like vegetable or canola ‘cause they can handle the sizzle without burnin’ up. Wait till that oil starts shimmerin’—that’s your sign it’s ready. Don’t rush this part; a hot pan is how ya get that killer crust.
- Oil Choice: Skip olive oil for now; it burns too easy at high heat.
- Test It: Flick a tiny drop of water in—if it pops, you’re good to go.
4. Sear for That Crispy Skin
Lay them chicken breasts in the pan, skin-side down. Hear that sizzle? That’s the sound of awesome happenin’. Don’t mess with it—let it sit there for 7 to 10 minutes. You’re aimin’ for a gorgeous golden-brown crust. If ya try to flip it too soon and it sticks, give it another minute. Patience, my friend, is your secret weapon here.
- No Pokin’: Leave it alone! Movin’ it too much ruins the sear.
- Time Check: 7-10 minutes usually does it, dependin’ on your stove.
5. Flip and Cook Through
Once ya got that crispy skin, flip them breasts over. Drop the heat down to medium-low and pop a lid on the skillet. This traps the steam and cooks the meat nice and gentle, keepin’ it juicy. Let it go for another 15-20 minutes. You’re lookin’ for an internal temp of 165°F (or 75°C if ya think in Celsius). Grab a meat thermometer if ya got one—don’t guess and risk raw chicken or, worse, dry-as-a-bone meat.
- Cover Trick: Lid on means moisture stays in. No lid, and it might toughen up.
- Safety First: 165°F at the thickest part near the bone. No pink, no problem.
6. Rest Before Ya Dig In
When it’s done, pull them breasts outta the pan and set ‘em on a cuttin’ board or plate. Let ‘em rest for 5 minutes. I know, I know, you’re hungry, but this step lets the juices settle back into the meat instead of spillin’ all over your plate. Cut in too soon, and ya lose all that good stuff.
- Why Rest?: It’s like givin’ the chicken a lil’ nap to get even tastier.
- Wait Time: 5 minutes ain’t long—use it to set the table or somethin’.
Ampin’ Up the Flavor Game
Alright, ya got the basics down, but let’s make this split chicken breast somethin’ to rave about. Here’s a few tricks I’ve picked up over the years to take it from good to “dang, who made this?!”
Toss in Some Aromatics
About 5 minutes before it’s done, throw some extras in the pan. Minced garlic, chopped onions, or a sprig of fresh rosemary or thyme—whatever ya got. These lil’ bits soak into the chicken and make your kitchen smell like a fancy restaurant. Just don’t add ‘em too early, or they’ll burn and taste bitter.
- Ideas: Garlic for punch, onions for sweet, herbs for earthy vibes.
- Timing: Last 5 minutes only, so they don’t turn to ash.
Deglaze for a Quick Sauce
After ya pull the chicken out, don’t waste them tasty bits stuck to the pan. Splash in a bit of white wine or chicken broth—bout a quarter cup—and scrape up all that browned goodness with a spoon. Let it simmer for a minute or two till it thickens a tad. Drizzle this over your chicken for a sauce that’ll blow minds. It’s easy peasy, and it looks like ya put in way more effort than ya did.
- Liquid Options: Wine for fancy, broth for everyday.
- Scrape It: Them bits are flavor gold—don’t let ‘em go to waste.
Play with Seasonin’ Combos
Don’t stick to just salt and pepper every time. Mix it up! One night, go for a smoky vibe with paprika and a dash of cayenne if ya like heat. Another time, try a lemon-herb thing with zest and dried basil. I’ve even slapped on some barbecue rub when I’m feelin’ lazy, and it works like a charm.
- Smoky: Paprika + cayenne + a lil’ black pepper.
- Bright: Lemon juice + garlic powder + dried herbs.
- Lazy: Any pre-made spice mix ya got in the cupboard.
What If Things Go Sideways?
Look, we ain’t perfect, and sometimes cookin’ don’t go as planned. Here’s how to fix a few oopsies I’ve run into myself:
- Too Dry?: If ya overcooked it, don’t panic. Slice it thin and serve with that deglazed sauce I mentioned to add some moisture back. Next time, check the temp sooner.
- Not Cooked Through?: If it’s still pink near the bone, pop it back in the pan on low heat with the lid on for 5 more minutes. Check again—safety first.
- Burnt Skin?: If ya cranked the heat too high and charred it, trim off the worst bits. The inside might still be fine. Lower the heat next go-round.
Servin’ It Up: Pairin’ Ideas
Now that ya got this beautiful split chicken breast all cooked up, whatcha gonna eat it with? This stuff is versatile as heck, so let’s brainstorm some sides that’ll make it a full-on meal. I’m all about keepin’ it simple, ‘cause who’s got time for complicated after work?
- Veggie Vibes: Roast some carrots or zucchini with a lil’ oil and salt. Toss ‘em in the oven while the chicken’s restin’ if ya got one handy, or steam ‘em quick.
- Carb Comfort: Serve it over a bed of fluffy rice or mashed taters. That chicken juice soaks in and makes every bite amazin’.
- Light and Fresh: Throw together a quick salad with whatever greens ya got—spinach, lettuce, whatever. A lil’ vinaigrette, and it balances the richness of the chicken.
- Wrap It Up: Shred the meat after it cools a bit and stuff it in a tortilla with some lettuce and sauce. Boom, instant chicken wrap for lunch tomorrow.
Wanna get fancy? Slice it up and lay it over some creamy pasta. Or, if you’re feelin’ real cozy, pair it with a warm roll to sop up them juices. Me, I usually just pile it on a plate with whatever’s in the fridge—sometimes it’s just steamed broccoli and a hunk of bread, and I’m happy as can be.
Why Stove Top Beats Other Methods
Ya might be wonderin’, why bother with the stove when ya could bake or grill? Lemme tell ya why I’m team stovetop all the way for split chicken breast. First off, it’s fast—way quicker than waitin’ for an oven to heat up. Second, ya got full control over the heat, so ya can tweak it on the fly if somethin’ ain’t lookin’ right. And third, that pan searin’ gives a crust ya just can’t match with bakin’. Grillin’s cool and all, but not everyone’s got one, and weather can mess ya up. Stove’s always there, rain or shine.
Plus, ya don’t need no fancy equipment beyond a skillet and a lid. It’s low-key cookin’ for real folks who just wanna eat good without a big production. I’ve tried other ways, and sure, they got their place, but nothin’ beats the ease and flavor of this method when I’m crunched for time.
Variations to Keep It Fresh
Once ya nail the basic stove top split chicken breast, ya can switch it up so ya don’t get bored. Here’s a few ideas I’ve messed around with that turned out pretty darn tasty:
Spicy Kick
If ya like a lil’ heat, rub on some chili powder or a hot sauce marinade before cookin’. Sear it the same way, but maybe toss in some sliced jalapeños with them aromatics at the end. It’ll wake up your taste buds real quick. I did this for a game night once, and folks couldn’t stop talkin’ bout it.
Sweet and Savory
Mix a lil’ honey with some soy sauce and brush it on after ya flip the chicken. It glazes up nice while it finishes cookin’. The sweet-salty combo with that crispy skin is somethin’ else. Just watch it don’t burn—honey can char if the heat’s too high.
Herb-Infused
Stuff some fresh herbs like thyme or rosemary under the skin before ya start. It steeps into the meat as it cooks, givin’ ya a real earthy, fancy flavor without much extra work. I’ve done this for family dinners when I wanna impress without stressin’.
Storage and Leftovers: Don’t Waste a Bite
Cooked more than ya can eat? No worries, split chicken breast keeps like a dream if ya store it right. Let it cool down all the way—don’t trap heat in a container or it gets soggy. Then, stick it in an airtight container or wrap it tight in foil and pop it in the fridge. It’ll stay good for bout 4 days. I’ve used leftovers in salads, sandwiches, or just reheated with some fresh sides for a quick meal.
Wanna save it longer? Freeze it. Wrap each piece in plastic wrap, then toss ‘em in a freezer bag. It’ll keep for a couple months. Thaw it in the fridge overnight before reheatin’ so it don’t get weird and rubbery. I’ve got a stash in my freezer right now for them lazy days when cookin’ ain’t happenin’.
- Fridge Life: Up to 4 days if cooled proper.
- Freezer Hack: Wrap tight, freeze for 2-3 months. Label it so ya don’t forget what it is!
- Reheat Tip: Warm it low and slow on the stove with a splash of broth to keep it moist.
A Lil’ Story from My Kitchen
Lemme share a quick tale ‘bout why this dish means somethin’ to me. Back when I first moved out on my own, I barely knew how to boil water, let alone cook meat. One night, I had a couple friends comin’ over, and I panicked—ain’t no way I was orderin’ pizza again. So, I grabbed some split chicken breasts on a whim, found a beat-up skillet in my tiny kitchen, and figured it out by trial and error. Burnt the first one somethin’ awful, but by the second try, I had that crispy skin down pat. My pals were impressed, and I felt like a legit cook for the first time. Now, every time I make this, it’s a lil’ reminder of how far I’ve come. You’ll get there too—just takes a hot pan and a lil’ grit.
Wrappin’ It Up
So, there ya have it—everythin’ ya need to know bout cookin’ split chicken breast on the stove top. It’s simple, it’s cheap, and it tastes like ya spent hours when really, it’s bout 30-40 minutes tops. Start with fresh chicken, season it to your likin’, sear it hot for that crust, cook it through with a lid on, and let it rest. Add some flair with aromatics or a quick sauce, pair it with whatever sides ya fancy, and boom—dinner’s served. I’ve given ya all my tricks, from fixin’ mistakes to storin’ leftovers, so ya got no excuse not to try this out.
Next time ya at the store, grab a pack of these bone-in beauties and give it a whirl. Mess up? Laugh it off and try again. Cookin’s bout learnin’, and I’m right here cheerin’ ya on. Drop a comment if ya got questions or wanna share how it turned out—I’m all ears. Now, go sizzle up some supper and make your kitchen smell like a dream!
How To Freeze Cooked Chicken Pieces
After cooking the chicken, let it cool completely before storing in a zip-top freezer bag.
The best way to do this is to actually spread out the cooked chicken bites on wax paper on a baking sheet. Put that in the freezer until the chicken is frozen, then you can transfer it to freezer bags. This way they freeze separately and not in a big frozen clump. This is great if you just need to grab a small amount of chicken from the freezer. I use these pieces when a want to make a quick quesadilla for my kids or a small amount of chicken salad.
If you don’t want to start the freezing on a sheet pan, you can put them right in the freezer bag but distribute them well in the bag, lay it flat, and then shake it every 45 minutes or so until frozen. Once frozen, the pieces can touch, you just don’t want them freezing to each other.
Using Your Cooked Chicken Pieces
Now you’ve got delicious, perfectly cooked little bites of chicken. So, how are you going to serve them?
You could serve the pan-seared chicken on top of a salad or chop them smaller and use them for my cottage cheese chicken salad. Try adding them to fettucine alfredo or another pasta dish. You can add them to cooked veggies with a teriyaki sauce and serve over rice for a quick stir-fry meal. Use them as the protein for your taco bowls or in burritos. There’s so many wonderful options.
How to Cook Chicken Breasts on the Stovetop
FAQ
How long should it take to cook chicken breasts on a stove top?
Cooking chicken breast on the stove typically takes 15-20 minutes simmering in water or broth. Boil water, add chicken, reduce to medium heat, and cook until internal temperature reaches 165°F (74°C). Cooking for an hour is excessive and likely results in overcooked, dry meat.
What is the difference between chicken breast and split chicken breast?
A split chicken breast is the larger half of a whole chicken breast, remaining bone-in and skin-on, while a standard chicken breast is typically the boneless, skinless, and butterflied cut, also known as a chicken cutlet. Split breasts cook more slowly but remain juicier, are often more affordable, and can result in a crispier skin. Standard chicken breasts cook faster, making them ideal for quick meals, though they require more careful cooking to avoid drying out.
How long should I cook a split chicken for?
How to cook chicken breast on the stove top without drying it out?
- Flatten the chicken breasts. …
- Season the chicken breasts. …
- Heat the pan. …
- Cook the chicken breasts over medium heat for 1 minute without moving. …
- Flip the chicken breasts. …
- Turn the heat down to low. …
- Cover the pan and cook on low for 10 minutes. …
- Turn off the heat and let sit for an additional 10 minutes.