Hey there, food lovers! If you’ve never tried making beer can chicken in the oven, you’re seriously missing out on one of the juiciest, most flavorful ways to cook a whole chicken. I’ve been making this dish for years and it’s always a crowd-pleaser at family dinners and gatherings with friends. Today I’m gonna share my favorite method for creating this deliciously moist chicken with perfectly crispy skin – all without firing up the grill!
What Makes Beer Can Chicken So Special?
Beer can chicken (sometimes called “beer butt chicken” if we’re being honest) is a cooking method where you perch a whole chicken upright on a can of beer before roasting it. As the chicken cooks, the beer steams inside the cavity, infusing moisture and subtle flavor throughout the meat while the outside gets wonderfully crisp.
The result? A chicken that’s:
- Incredibly juicy on the inside
- Perfectly crispy on the outside
- Evenly cooked from all angles
- Infused with amazing flavor
- Super impressive looking when served!
What You’ll Need
Before we get started. let’s gather everything you’ll need for this recipe
Ingredients:
- 1 whole chicken (3-4 pounds works best)
- 1 can of beer (any kind works – I’ll discuss options below)
- 2-3 tablespoons vegetable oil or olive oil
- 2 tablespoons salt (don’t be shy here!)
- 1 teaspoon black pepper
- 3 tablespoons of poultry seasoning or spice rub
Equipment:
- Roasting pan or baking sheet
- Beer can chicken holder (optional but helpful)
- Meat thermometer
- Aluminum foil (for easier cleanup)
Step-by-Step: How to Cook Beer Can Chicken in the Oven
1. Prep Your Chicken
First things first, let’s get that chicken ready:
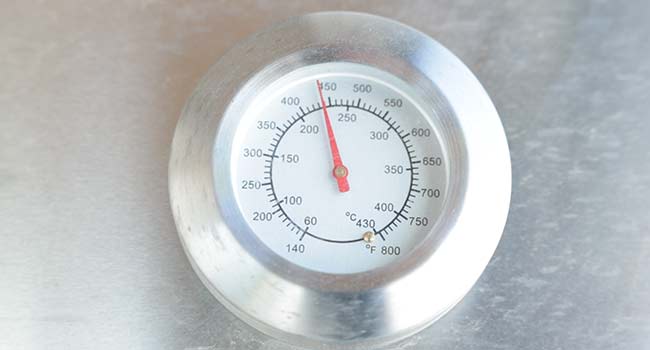
- Preheat your oven to 425°F (220°C).
- Remove any giblets from the chicken cavity and discard.
- Rinse the chicken thoroughly (inside and out) and pat it completely dry with paper towels. This step is super important for getting crispy skin!
- Place your chicken on a clean cutting board and let it come to room temperature for about 20 minutes.
2. Season Your Chicken
While there are countless ways to season your beer can chicken, here’s my go-to spice rub that never disappoints:
Beer Can Chicken Rub
- 1-2 tablespoons brown sugar (creates amazing caramelization)
- 2 tablespoons salt
- 1 teaspoon black pepper
- 1 tablespoon smoked paprika (for that subtle smoky flavor)
- 1 teaspoon garlic powder
- 1 teaspoon onion powder
- Optional: 1/2 teaspoon chili powder for a bit of heat
Mix all these ingredients together in a small bowl. Then:
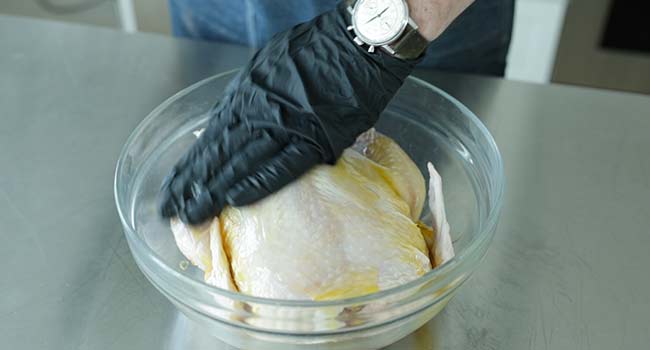
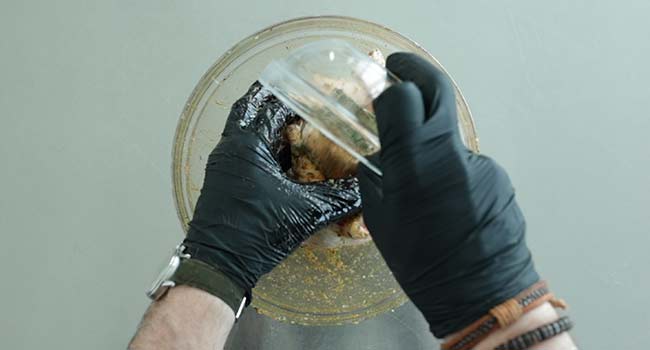
- Drizzle olive oil all over your chicken and massage it in, making sure to cover every nook and cranny.
- Sprinkle your spice mix all over the chicken, inside and out. Don’t be shy! Use your hands to rub it in thoroughly.
3. Prepare the Beer Can
Now for the fun part:
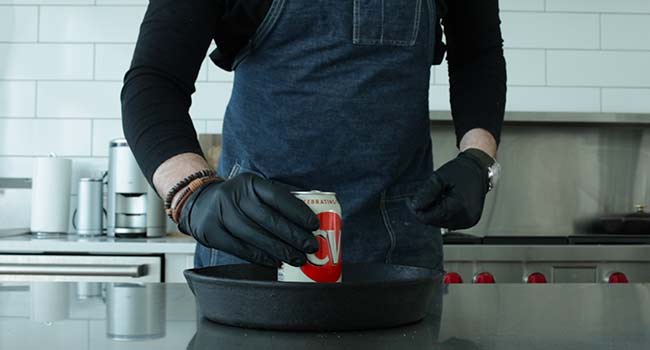
- Open your beer can and pour (or drink) about 1/4 to 1/3 of the beer. This prevents overflow when the beer heats up.
- Place the beer can in the center of your roasting pan.
- If you’re using a beer can chicken holder, place the beer can in the holder.
- If you want extra moisture in your pan (highly recommend!), pour some of that beer you removed into the bottom of the roasting pan.
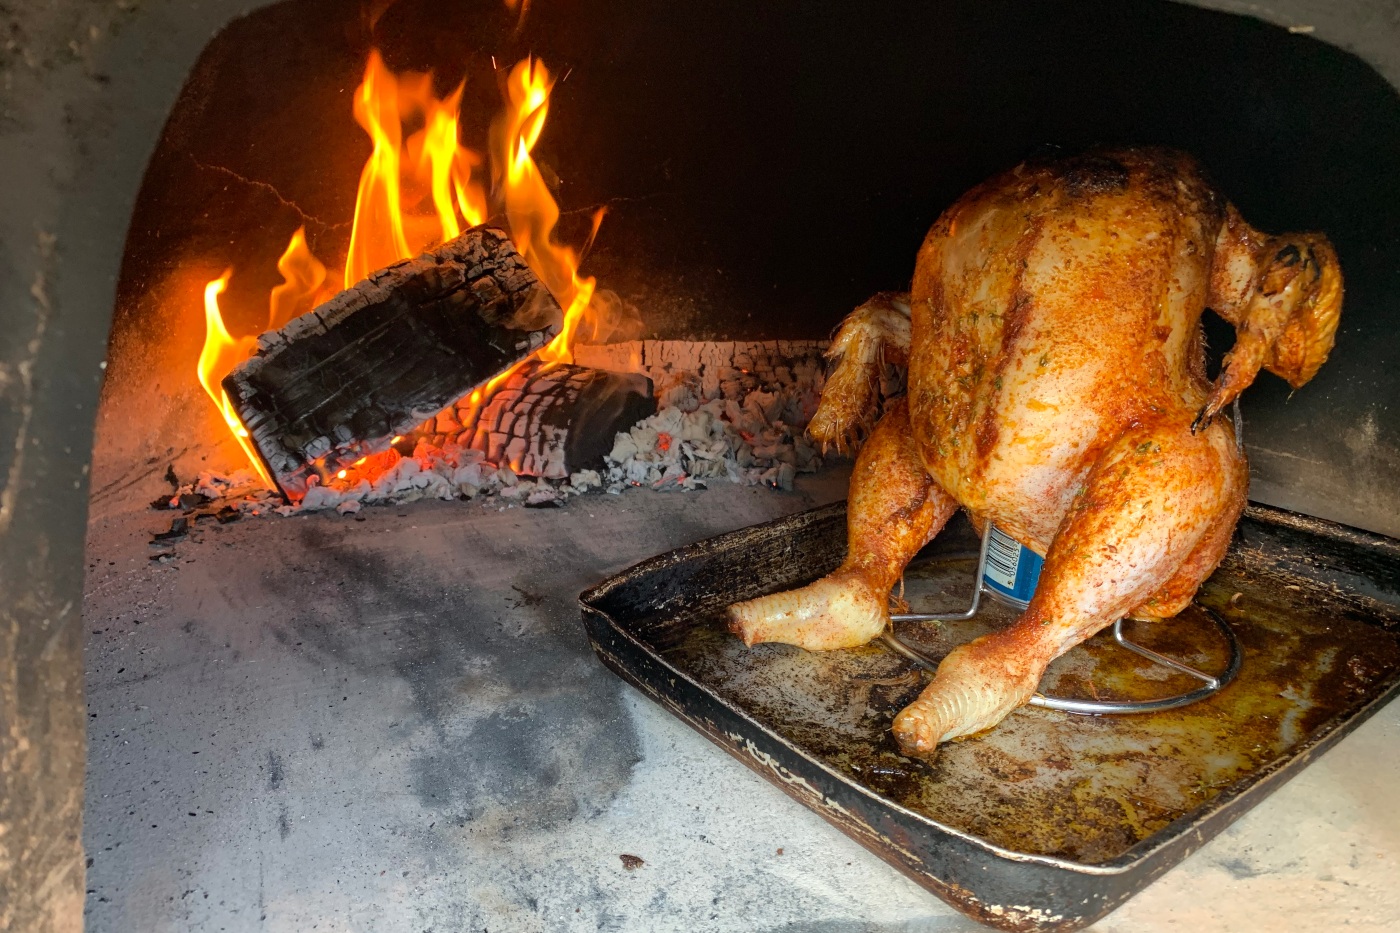
4. Mount Your Chicken
This is where it gets a little silly-looking, but trust me, it works!
- Carefully lower the chicken onto the beer can, inserting the can into the cavity of the bird.
- Use the chicken legs to create a tripod effect with the beer can – this helps stabilize the chicken so it stands upright.
- Adjust the chicken so it sits balanced and upright. The can should be about halfway inserted into the cavity.
If your chicken keeps tipping over, don’t worry! There are a few solutions:
- Use a beer can chicken holder/rack (totally worth it if you make this often)
- Place the chicken in a smaller dish that helps support it
- Position the legs better to create that tripod effect
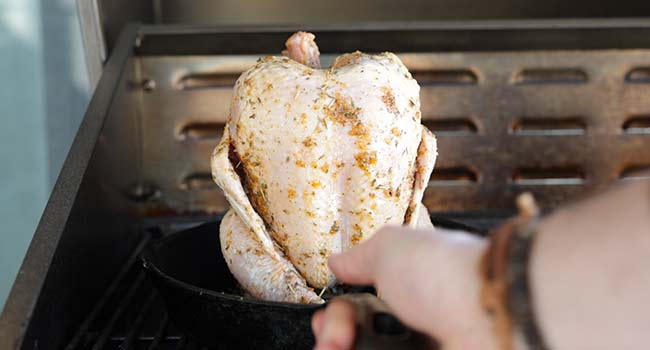
5. Roast to Perfection
Now we’re ready for the oven:
- Carefully transfer your chicken (standing on the beer can) to the preheated oven.
- Roast for approximately 1 hour and 15 minutes. Cooking time will vary depending on the size of your chicken.
- The chicken is done when a meat thermometer inserted into the thickest part of the thigh reads 165°F (75°C) and the juices run clear.
- If the skin is browning too quickly, you can loosely tent some foil over the top.
6. Rest Before Carving
This step is SUPER important for juicy meat:
- Carefully remove the chicken and beer can from the oven (this is tricky – get someone to help if possible).
- Tent the chicken loosely with foil and let it rest for 10-15 minutes.
- Carefully remove the chicken from the beer can. I find it easiest to use tongs to hold the chicken while carefully pulling the can out.
- Transfer to a cutting board and carve as you normally would.
Pro Tips for the Perfect Beer Can Chicken
After making this dish countless times, I’ve picked up some tricks:
Best Beer Options
While you can use ANY beer, different types will give subtle flavor variations:
- Lagers and pilsners: Light, clean flavors
- IPAs: More hoppy, slightly bitter notes
- Citrus beers: Add a nice brightness
- Ginger ale or non-alcoholic beer: Great alternatives if you don’t want to use alcohol
Non-Beer Alternatives
Don’t drink beer? No problem! You can use:
- Chicken broth
- Ginger ale
- Lemon-lime soda
- Vegetable broth
Troubleshooting Tips
- Chicken won’t stand up? Try a smaller bird (3-4 pounds is ideal) or invest in a beer can chicken holder.
- Skin not crispy enough? Make sure you thoroughly dry the chicken before seasoning, and check that your oven temperature is accurate.
- Cooking too quickly? Lower the oven temperature to 375°F and cook a bit longer.
- Worried about the can? While I’ve never had an issue, if you’re concerned about heating the aluminum can, you can purchase stainless steel beer can chicken holders.
Perfect Side Dishes for Beer Can Chicken
Beer can chicken pairs beautifully with so many sides! Here are some of my faves:
- Roasted baby carrots
- Garlic mashed potatoes
- Smashed potatoes
- Creamy coleslaw
- Italian roasted mushrooms
- Dinner rolls
- Roasted sweet potatoes
Storing Leftover Beer Can Chicken
Got leftovers? Lucky you! Beer can chicken makes amazing next-day meals:
- Refrigerate in an airtight container for up to 5 days
- Freeze for up to 3 months
- Use leftover meat in salads, tacos, wraps, or sandwiches
FAQ: Beer Can Chicken in the Oven
Q: Is it safe to cook with a beer can inside the chicken?
A: Yes! I’ve been doing this for years with no issues. The can won’t explode or release harmful chemicals. If you’re concerned, you can buy a stainless steel beer can chicken holder.
Q: Can kids eat beer can chicken?
A: Absolutely! The alcohol cooks off during the roasting process. If you’re still concerned, use non-alcoholic beer or ginger ale.
Q: Can I make beer can chicken without a specific holder?
A: Yes! While a holder makes it easier, you can balance the chicken directly on the beer can. Just make sure to position the legs properly to form a tripod for stability.
Q: How do I know when my chicken is done?
A: The most reliable method is using a meat thermometer inserted into the thickest part of the thigh (without touching bone). It should read 165°F (75°C). Also, the juices should run clear when you pierce the meat.
Q: Can I prep this ahead of time?
A: Absolutely! You can season the chicken up to 24 hours in advance and keep it covered in the refrigerator. Just bring it to room temperature for about 20 minutes before cooking.
Why This Will Be Your New Favorite Chicken Recipe
I gotta tell you, once you try making beer can chicken in the oven, you might never go back to regular roasted chicken again. There’s something magical about how this method creates the perfect balance of juicy meat and crispy skin. Plus, it’s just fun to make!
The best part? It’s actually simpler than it looks. Once you’ve prepped the chicken and balanced it on the can, the oven does all the work. It’s perfect for entertaining because it’s both impressive-looking and hands-off once it’s cooking.
So next time you’re craving chicken, skip the boring methods and give this beer can chicken a try. Your taste buds (and dinner guests) will thank you!
Happy cooking!
How to Make a Beer Can Chicken
Preheat one side of your grill to medium-high heat (400° to 450°). We cook this using the indirect heat method by placing the chicken on the side of the grill where there is no direct heat underneath.
Add the whole chicken to a large bowl and completely coat it inside and out with oil.
Next, add your seasonings to the chicken and rub it in so that it is covered.
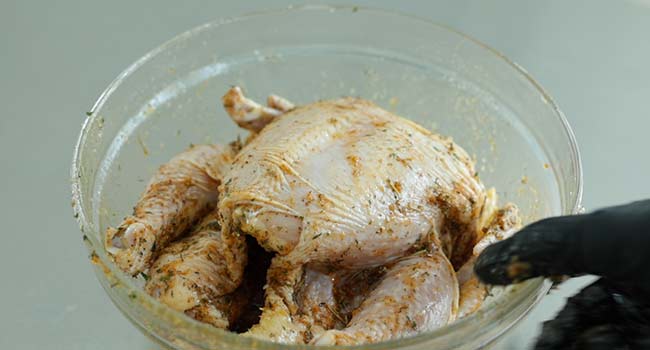
Sprinkle some of the seasoning in the oiled cavity and rub it in as well.
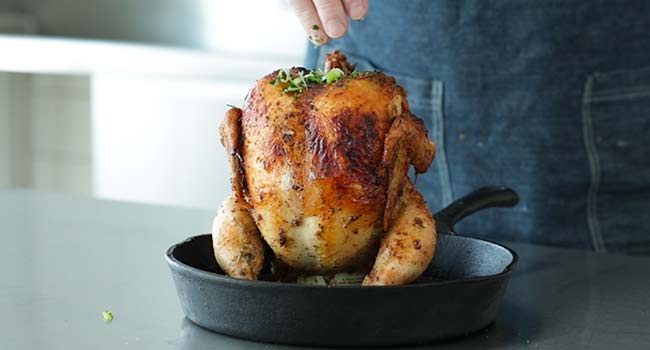
Place a half-full beer in the center of a 10” cast iron skillet or sauté pan.
Put the chicken on the beer by wrapping the cavity opening around it.
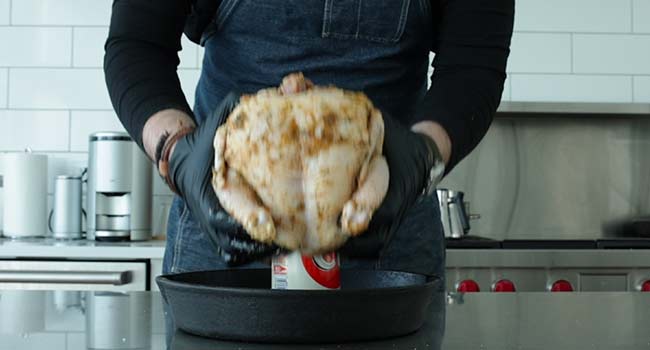
Stand the chicken upright and then place it on the side of the grill where there is no heat directly underneath and roast for 1 hour and 15 minutes or until it is browned and reads 165° in the breast and thigh.
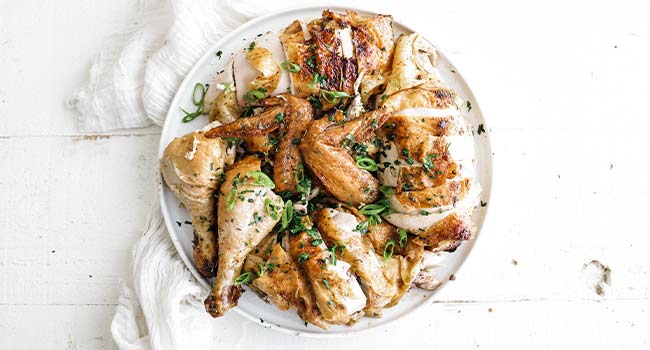
Add optional garnishes of parsley and sliced green onions.
You can serve it as is or carve the chicken and serve it.
Here are a few alternate cooking methods if preparing this on a grill is not an option:
Oven Baked – Place the beer can chicken in a pan standing upright and place it on the middle rack in the oven. Bake at 425° for 1 hour and 15 minutes or until it is browned and reads 165° in the breast and thigh.
Smoked – For smokier flavors, place the beer can chicken in a pan standing upright. Place it in a preheated smoker at 425° and smoke for 1 hour and 15 minutes or until it is browned and reads 165° in the breast and thigh.
Make-Ahead: This recipe is best when eaten as soon as it’s done cooking. However, you can keep this warm in a pan covered in the oven at low temperatures (<200°) for up to 30 minutes before serving.
How to Store: Place the beer can chicken covered in the refrigerator for up to 4 days. This will freeze well-covered for up to 3 months. Thaw for 1 day in the refrigerator or until thawed before using.
How to Reheat: Place the chicken in a pan with ½ cup of water. Cover with foil and bake in the oven at 350° for 20-25 minutes or until hot.
Chef Notes + Tips
- To boost the flavor, use the brine in my best-fried chicken recipe.
- You can customize this chicken by adding a zesty rub like in my BBQ Rub, Southwest Rub, or Cajun Rub.