Are you wondering how long to pressure can that delicious batch of homemade chicken soup? You’re not alone! As someone who’s been pressure canning for years, I can tell you that proper timing is crucial for both safety and taste.
In this comprehensive guide, I’ll walk you through everything you need to know about pressure canning chicken soup – from precise timing to step-by-step instructions that’ll have you confidently stocking your pantry with homemade goodness.
The Definitive Answer on Canning Times
Let’s get straight to the point! Pressure canning chicken soup requires
- Pint jars: 75 minutes at 10 pounds of pressure
- Quart jars: 90 minutes at 10 pounds of pressure
These times are non-negotiable for safety reasons and must be adjusted for altitude (more on that later)
Why You Must Use a Pressure Canner for Chicken Soup
I can’t stress this enough – pressure canning is the only safe method for preserving chicken soup. Here’s why:
Chicken soup is a low-acid food, which creates the perfect environment for botulism spores to thrive. These dangerous spores can only be killed at temperatures above 240°F (116°C), which regular water bath canning simply cannot reach.
A pressure canner is designed specifically to achieve these higher temperatures, making it essential for safely preserving meat and low-acid foods like chicken soup.
Step-by-Step Guide to Pressure Canning Chicken Soup
Ingredients for a Basic Chicken Soup Recipe
For 4 quarts (or 8 pints) of canned chicken soup:
- 4 quarts chicken stock
- 3 cups cooked chicken, diced (about 3 pounds)
- 1½ cups celery, chopped (about 3 stalks)
- 1½ cups carrots, sliced (about 3 medium)
- 1 cup onion, chopped (1 large)
- Salt and pepper to taste
Remember that the “solids” should only fill your jars halfway – the rest should be broth.
Equipment You’ll Need
- Pressure canner (not a pressure cooker like an Instant Pot)
- Canning jars (pints or quarts)
- New canning lids and bands
- Jar lifter
- Funnel
- Bubble remover or plastic spatula
- Clean cloths for wiping jar rims
Preparation Steps
-
Prepare your soup: Start with a tested recipe from a reliable source like the USDA or Ball Blue Book. Make your chicken soup according to the recipe, but remember:
- No thickeners (flour, cornstarch, rice, pasta)
- No dairy products
- Limit fat content (skim excess fat)
-
Prep your jars: Wash jars, lids, and bands in hot, soapy water. Rinse thoroughly. Keep jars hot until ready to use.
-
Prepare your canner: Add the recommended amount of water to your pressure canner (usually 2-3 inches) and place the rack in the bottom.
The Canning Process
-
Fill the jars: Ladle hot soup into hot jars, filling them halfway with solids and the rest with broth. Leave 1 inch of headspace.
-
Remove air bubbles: Use a non-metallic utensil to release trapped air by sliding it between the jar and the food.
-
Clean the rims: Wipe jar rims with a clean, damp cloth to ensure a proper seal.
-
Apply lids and bands: Center lids on jars and screw on bands until fingertip tight (not too tight!).
-
Load the canner: Carefully place filled jars in the canner. Make sure they don’t touch each other or the sides.
-
Process the jars:
- Close the canner and heat until steam vents steadily for 10 minutes
- Close the vent and bring to 10 pounds of pressure (adjust for altitude)
- Start timing when the required pressure is reached
- Process pints for 75 minutes and quarts for 90 minutes
- Maintain consistent pressure throughout processing
-
Cool naturally: Turn off heat and let the canner depressurize naturally. Do not attempt to cool it quickly or force-open the lid.
-
Remove jars: After pressure returns to zero, wait 10 more minutes, then open the canner. Remove jars and place them on a towel-lined surface with space between them.
-
Check seals: After 12-24 hours, check that lids are concave and don’t flex when pressed. Remove bands for storage to prevent rust.
Altitude Adjustments: Super Important!
Water boils at lower temperatures at higher altitudes, which affects canning safety. Here’s how to adjust:
For weighted gauge canners:
- 0-1,000 feet: Use 10 pounds pressure
- Above 1,000 feet: Use 15 pounds pressure
For dial gauge canners:
- 0-2,000 feet: 11 pounds pressure
- 2,001-4,000 feet: 12 pounds pressure
- 4,001-6,000 feet: 13 pounds pressure
- 6,001-8,000 feet: 14 pounds pressure
Common Questions About Pressure Canning Chicken Soup
Can I use an Instant Pot or electric pressure cooker?
No! Despite having “canning” functions, these appliances aren’t designed to maintain the consistent pressure needed for safe canning. Stick to a dedicated pressure canner.
What if a jar doesn’t seal properly?
You have three options:
- Reprocess with a new lid within 24 hours
- Refrigerate and use within 3-4 days
- Freeze the contents
Can I add noodles or rice to my soup before canning?
Absolutely not. Starchy ingredients like pasta, rice, or potatoes can interfere with heat penetration and make your soup unsafe. Add these ingredients when you reheat the soup for serving.
How long will canned chicken soup last?
Properly processed chicken soup can be stored for at least one year, though quality is best within two years. Always check for signs of spoilage before consuming.
What are the signs of spoilage I should look for?
Watch out for:
- Bulging or unsealed lids
- Leaking jars
- Strange odors
- Mold
- Cloudy liquid
- Bubbling or foaming when opened
If you see any of these signs, discard the soup without tasting it.
Why Home-Canned Chicken Soup is Worth the Effort
I’ve been canning chicken soup for years, and lemme tell ya, it’s totally worth the effort! Here’s why:
-
Convenience: Nothing beats having homemade soup ready when you’re sick or tired.
-
Control over ingredients: No preservatives or mystery ingredients.
-
Budget-friendly: Take advantage of sales on chicken and bulk-prepped meals.
-
Emergency preparedness: Food security during power outages or emergencies.
-
Tastes amazing: Home-canned soup often tastes better than store-bought varieties.
Make It Your Own (Safely)
While you should stick to tested recipes, you can customize your chicken soup within safe parameters:
- Adjust the ratio of vegetables (as long as solids only fill half the jar)
- Use different herbs and spices
- Try bone-in chicken for added nutrients
- Omit vegetables you don’t like
Just remember that all ingredients must be approved for pressure canning.
Final Tips for Success
- Follow instructions precisely – no shortcuts!
- Use fresh, high-quality ingredients
- Process for the full recommended time
- Let the canner depressurize naturally
- Check seals before storing
- Label jars with contents and date
- Store in a cool, dark place
I personally find that canning chicken soup in the fall gives me a wonderful supply throughout winter when colds and flu are common. There’s nothing better than opening a jar of homemade chicken soup when you’re feeling under the weather!
Conclusion
Pressure canning chicken soup requires 75 minutes for pint jars and 90 minutes for quart jars at 10 pounds of pressure (adjusted for altitude). While the process demands attention to detail and patience, the reward is having delicious, homemade soup ready whenever you need it.
By following the guidelines in this article, you’ll be well on your way to safely preserving chicken soup that tastes like it was made fresh. Just remember – never take shortcuts with canning times or processing methods when it comes to low-acid foods like chicken soup.
Have you tried pressure canning chicken soup before? What’s your favorite recipe variation? I’d love to hear about your experiences in the comments!
Pressure Canned Chicken Soup Instructions
While the soup is simmering, collect quart-sized jars, lids, and rings. Prepare the pressure canner and add two inches of water. There are a lot of pressure canners to choose from. I have one similar to this TFal Pressure Canner. Please remember you cannot water bath can this recipe, you have to have a pressure canner. Bring water to a simmer so it is ready for your jars. Ladle the hot soup into jars, leaving 1-inch of head space. Wipe the rims of the jars with a wet rag or paper towel. Make sure there are no air bubbles in the jar. Put the lids and rings on the jars making them fingertip tight. I use tools like these to help with the whole canning process. Just a few things make canning a lot easier.
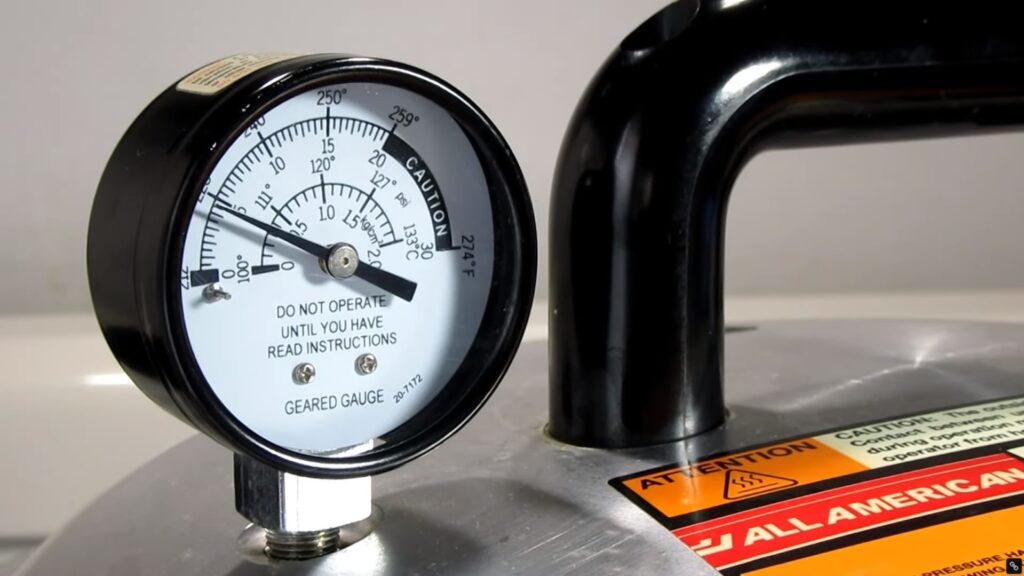
Put the jars on a rack inside the pressure canner in the simmering water. Make sure your pressure canner has the right amount of water (based on the directions of your specific canner). Secure the lid and vent the steam for 10 minutes. Close the vent so the canner will pressurize to 10 psi. (on my canner, it is set to 2). Once pressurized, process quart-sized jars for 1 hour and 30 minutes. (1 hour and 15 minutes for pints)
Turn off the heat and allow the pressure to come down to zero. Once it has reached zero, remove the lid and let the jars cool for 10 minutes. Remove jars and allow them to cool undisturbed for 12 hours. Check to make sure they are sealed. Label and store. If a jar does not seal, store it in the refrigerator and eat it soon!
Chicken Bone Broth Recipe with Veggie Scraps
Much like the chicken feet bone broth I talked about above, bone broth is full of nutrients and is a must-make. Grab the chicken bones and extra veggie scraps from the chicken soup and put it all into a crockpot, instant pot, or regular pot. I used the chicken carcasses, the onion skins, and scraps from garlic, carrots, and celery in the bone broth. The more veggies and seasonings the better the flavor will be, not to mention the extra nutrients from the veggie scraps.
Cover with water and let the bones simmer until they become soft. This will take at least 12 hours depending on how you’re cooking it. Strain and jar your broth and enjoy in your next soup or by itself! If you’re going to can the broth in the pressure canner make sure to read the instructions in your canning manual. You can combine the chicken feet with the bone broth and veggie scraps to make the ultimate bone broth!