Are you tired of dry, flavorless chicken breasts? I sure was! After years of trial and error (and some embarrassingly tough chicken dinners), I’ve finally cracked the code on how long to cook chicken breast in a cast iron skillet for juicy, flavorful results every single time.
Cast iron cooking might seem intimidating at first – I remember being nervous about using my grandmother’s old skillet! But trust me, once you master the timing, you’ll never want to cook chicken any other way. The perfect sear, the juicy interior, and the incredible flavor are absolutely worth learning this technique.
Why Cast Iron is a Chicken Breast’s Best Friend
Before diving into cooking times let’s talk about why cast iron is so amazing for chicken
- Even heating: Cast iron distributes heat uniformly, preventing those annoying hot spots that lead to uneven cooking
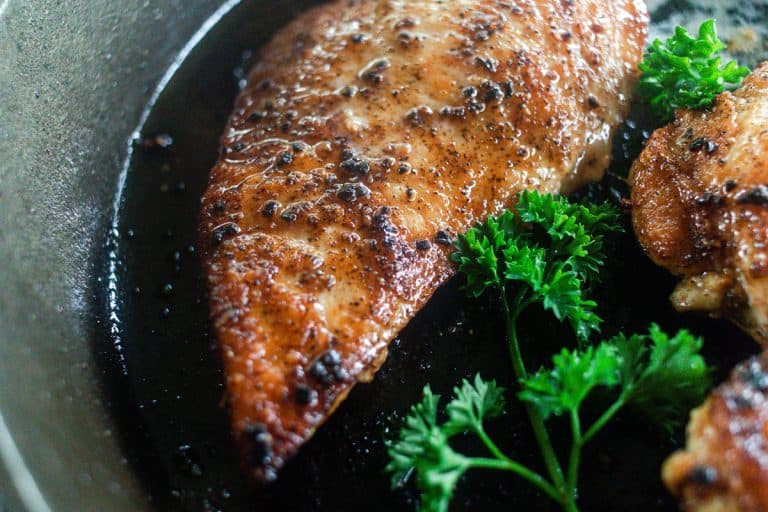
- Superior searing: The high heat retention creates that gorgeous golden-brown crust we all crave
- Heat stability: Once hot, cast iron maintains consistent temperature, giving you more control
- Natural non-stick surface: A well-seasoned skillet needs minimal oil, making your meal healthier
- Bonus iron: A small amount of dietary iron can leach into your food – a nutritional bonus!
My cast iron skillet has become my kitchen MVP, especially for chicken breasts that used to turn out disappointingly dry when cooked other ways.
The Perfect Timeline: How Long to Cook Chicken Breast in Cast Iron
Let’s get to the heart of the matter – timing! The total cooking time for chicken breasts in a cast iron skillet typically ranges from 15 to 20 minutes for boneless chicken breasts. However, several factors affect this timing
Cooking Time Based on Chicken Type and Thickness
| Chicken Breast Type | Thickness | Heat Level | Time Per Side | Total Cooking Time |
|---|---|---|---|---|
| Boneless, Skinless | ½ inch (thin) | Medium | 3-4 minutes | 6-8 minutes |
| Boneless, Skinless | 1 inch (average) | Medium | 5-6 minutes | 10-12 minutes |
| Bone-in, Skin-on | 1-1.5 inches | Medium | 7-8 minutes | 14-16 minutes |
For bone-in chicken breasts, you’ll need to extend cooking time to 25-35 minutes total, as the bones slow down the cooking process.
Step-by-Step Guide to Perfect Cast Iron Chicken Breasts
Now let’s break down the exact process I use for foolproof results:
1. Choose and Prepare Your Chicken
I prefer boneless, skin-on chicken breasts whenever possible. The skin helps lock in moisture while cooking faster than bone-in varieties. Whatever you choose:
- Pat the chicken completely dry with paper towels (this is CRUCIAL for crispy skin!)
- If thickness varies, pound the breasts to an even thickness using a meat mallet
- Allow chicken to sit at room temperature for 15-20 minutes before cooking
2. Season Generously
Don’t be shy with seasonings! My favorite approach:
- Carefully lift the skin and season directly on the meat underneath
- Use a mix of kosher salt, freshly cracked black pepper, and garlic powder as a base
- Add additional herbs or spices according to your preferences
- Season both sides thoroughly
3. Preheat Your Cast Iron Skillet Properly
This step is non-negotiable for amazing results:
- Place your cast iron skillet over medium-high heat
- Allow it to heat for 5-10 minutes until thoroughly hot
- Test readiness by sprinkling a few drops of water – they should instantly sizzle and evaporate
4. The Initial Sear (The Most Important Part!)
Here’s where timing becomes critical:
- Add just 1 tablespoon of ghee or high smoke-point oil (like avocado or canola)
- Place chicken breasts skin-side down in the hot skillet
- DO NOT MOVE THEM for 4-5 minutes (seriously, resist the urge to peek!)
- Flip once the skin is crispy and golden brown
- Sear the second side for another 4 minutes without disturbing
5. Finish Cooking to Perfection
After the initial sear:
- Reduce heat to medium
- Continue cooking for 5-7 more minutes, flipping occasionally
- For thicker pieces, you may need up to 10 additional minutes
- Check temperature regularly with a meat thermometer
6. Rest Before Serving
- Remove chicken when internal temperature reaches 160°F (it will rise to 165°F while resting)
- Let chicken rest for 5-10 minutes before cutting to redistribute juices
- BE CAREFUL with the hot skillet handle! I always place an oven mitt on the handle to remind myself
How to Know When Your Chicken is Done
The absolute best way to check doneness is with a meat thermometer. Chicken is safe to eat at 165°F, but I remove mine at 160°F and let carryover cooking finish the job during resting.
If you don’t have a thermometer, look for:
- Opaque white meat (no pink)
- Clear juices when pierced (not pink)
- Firm but slightly springy texture when pressed
Common Questions About Cast Iron Chicken
Should I Use Oil When Cooking Chicken in Cast Iron?
Yes, but you only need a small amount! I use 1 tablespoon of ghee or high smoke-point oil. Cast iron develops a natural non-stick surface over time, so you don’t need to drown your chicken in oil.
Does Chicken Stick to Cast Iron?
If your cast iron is properly seasoned and preheated, sticking should be minimal. The secret is not moving the chicken during the initial sear – let it form a natural crust that will release when ready.
Should I Flip Chicken Often When Cooking?
Nope! Too much flipping prevents proper browning. I sear each side undisturbed for 4-5 minutes initially, then flip only occasionally during the final cooking phase.
My Favorite Cast Iron Chicken Tips
After countless chicken dinners, I’ve picked up some tricks:
- Use bone-in, skin-on chicken for maximum flavor when you have time
- Don’t crowd the pan – cook in batches if needed for proper browning
- Try basting with butter and herbs in the final minutes for extra flavor
- Make a quick pan sauce with the drippings for an elevated meal
- Finish thicker pieces in a 350°F oven if the outside is getting too dark
Delicious Side Dishes for Cast Iron Chicken
While your chicken is resting, consider preparing one of these sides:
- A quick dinner salad with your favorite dressing (I love creamy Italian!)
- Orzo pasta with spinach and parmesan
- Mashed potatoes or steamed vegetables
- Oven-roasted potatoes with herbs
My Go-To Cast Iron Chicken Recipes
Once you’ve mastered the basic technique, try these variations:
- Lemon-Herb Chicken: Add lemon zest and fresh herbs to your seasoning
- Cajun Style: Use a spicy cajun seasoning blend for a kick
- Garlic-Butter: Baste with garlic-infused butter in the final minutes
- Greek-Inspired: Season with oregano, garlic, and lemon
Final Thoughts on Cast Iron Chicken
Cooking chicken breast in a cast iron skillet isn’t just about timing – it’s about understanding the process. With practice, you’ll develop an intuition for when to flip, when to adjust heat, and exactly when your chicken has reached perfection.
- Preheat skillet: 5-10 minutes
- Initial sear: 4-5 minutes per side
- Finish cooking: 5-7 additional minutes
- Rest before serving: 5-10 minutes
Once you master this technique, you might never go back to other cooking methods. And that’s perfectly okay – your taste buds will thank you!
How To Cook a Chicken Breast Recipe: FAQs Answered
Start by seasoning your chicken breasts generously with kosher salt, black pepper, and your favorite fresh herbs and spices. We recommend paprika, garlic powder, and onion powder for a nice, balanced flavor. A solid seasoning mix can really enhance the natural flavors of the chicken and create a delicious crust during cooking.
Preheat your cast iron skillet over medium-high heat until its hot enough that a drop of water sizzles and evaporates on contact. Preheating is key for searing, as it helps the chicken sear immediately when it hits the hot pan, locking in juices and creating a flavorful crust.
Add a small amount of cooking oil to the skillet and swirl it to coat the bottom. Place the chicken breasts in the skillet, skin-side down if youre using skin-on breasts. Let them sear without moving for several minutes until a golden-brown crust forms. Flip the chicken and sear the other side.

Use a meat thermometer to check the internal temperature of the chicken breasts. Theyre safe to eat when they reach an internal temperature of 165°F (74°C). Insert the thermometer into the thickest part of the breast for an accurate reading.
For extra flavor and moisture, baste the chicken with its own juices or a mixture of butter and herbs during the last few minutes of cooking. Tilt the skillet slightly and use a spoon to pour the hot liquid over the chicken. This step adds a delicious glaze and keeps the chicken moist.
What Are the Best Side Dishes for Chicken?
Pairing your perfectly cooked chicken breast with the right side dishes can make your meal truly special.
Here are a few options:
- Roasted Veggies: Carrots, potatoes, and Brussels sprouts roasted in the same cast iron skillet can complement the chicken beautifully.
- Salads: A fresh, crisp salad with a tangy vinaigrette can balance the richness of the chicken.
- Rice or Quinoa: These grains can soak up the delicious juices from the chicken, making for a hearty and satisfying side.
- Mashed Potatoes: Creamy mashed potatoes provide a comforting contrast to the crispy, flavorful chicken.