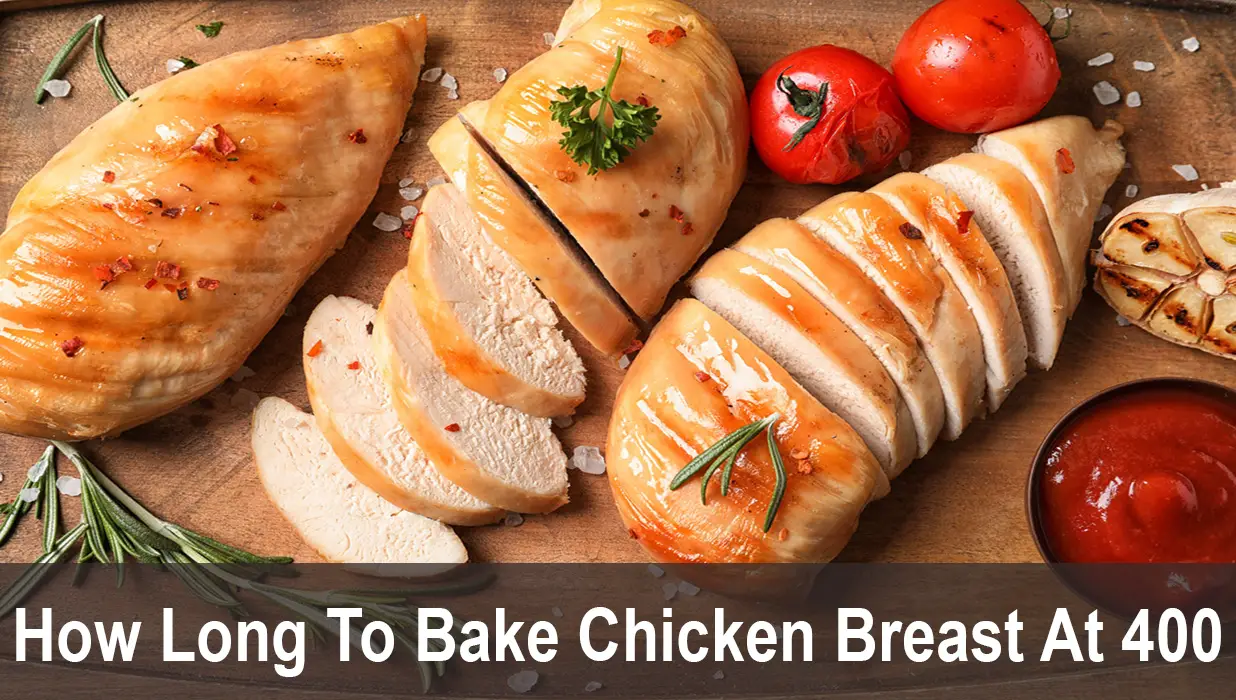
Hey there, kitchen warriors! If you’re wondering how long to bake chicken breast tenders at 350°F, you’ve landed in the right spot. I’ve gotcha covered with all the deets to get those tenders golden, juicy, and downright delicious. Spoiler alert: it usually takes 18-25 minutes in a preheated 350°F oven, but you gotta make sure they hit an internal temp of 165°F to keep things safe and tasty. Stick with me, and I’ll walk ya through every step, tip, and trick to nail this simple dish!
Why 350°F Is the Magic Number for Chicken Tenders
Baking at 350°F is like the sweet spot for chicken breast tenders. It’s not too hot to burn the outside before the inside cooks, and it ain’t too low to leave ‘em soggy. This temp gives you that perfect balance of a crispy crust (if you’re breading ‘em) and tender, moist meat. Let’s break down the timing and why it matters.
- General Timing: Most tenders need 18-25 minutes at 350°F. Thinner ones might be done closer to 18, while thicker cuts could nudge up to 25.
- Safety First: Always check the internal temperature. Pop a meat thermometer into the thickest part—if it reads 165°F, you’re golden. No guesswork, no raw chicken disasters!
- Oven Quirks: Not all ovens are created equal. Some run hot, some lag. If yours is a lil off, start checking at the 18-minute mark to be safe.
What Affects Baking Time for Chicken Tenders?
Not all chicken tenders bake the same ya know? A few things can mess with the clock so let’s chat about what to watch for.
- Thickness: Skinny tenders cook faster than chunky ones. If they’re uneven, the small ones might dry out while the biggies are still pink inside.
- Fresh vs. Frozen: Fresh tenders cook quicker. If you’re using frozen, thaw ‘em overnight in the fridge first. Baking straight from frozen? Add 10-15 minutes and check that temp!
- Breading or Naked: Breaded tenders take a tad longer ‘cause the coating needs to crisp up. Unbreaded ones might shave off a minute or two.
- Pan Crowding: Cram too many on the tray, and they’ll steam instead of bake. Give ‘em space to breathe for even cooking.
Step-by-Step: Baking Chicken Breast Tenders at 350°F
Alright, let’s get down to business I’m gonna lay out the whole process so you can whip up these bad boys with zero stress Grab your apron, and let’s do this!
What You’ll Need
- 1 pound of chicken breast tenders (fresh or thawed)
- Seasonings (salt, pepper, garlic powder, paprika—whatever ya fancy)
- Optional: Breadcrumbs, flour, and eggs for breading
- Cooking spray or a drizzle of oil
- Baking sheet and parchment paper (for easy cleanup)
- Meat thermometer (trust me, it’s a game-changer)
How to Do It
- Preheat That Oven: Crank it to 350°F. Give it a good 10-15 minutes to heat up proper. No skipping this step—it’s key for even cooking!
- Prep Your Tenders: Pat ‘em dry with paper towels. Wet chicken = soggy results. Sprinkle on some salt, pepper, and whatever spices you’re feelin’. I’m a sucker for garlic powder and a pinch of paprika for color.
- Breading (If You Want It): Set up three bowls—flour in one, beaten eggs in another, breadcrumbs in the third. Dip each tender in flour, then egg, then crumbs. Coat ‘em good for max crunch!
- Set Up the Pan: Line your baking sheet with parchment or foil. Give it a quick spray of cooking oil so nothing sticks. Lay the tenders out in a single layer—don’t let ‘em touch!
- Bake ‘Em Up: Slide the tray into the oven. Set a timer for 18 minutes to start. If they’re breaded or thick, plan for closer to 22-25 minutes.
- Check for Doneness: Pull one out at 18 minutes and poke a thermometer in. 165°F? You’re done! If not, give ‘em a few more minutes. No thermometer? Slice one open—white meat and clear juices mean they’re good to go.
- Rest Time: Let ‘em sit on the tray for 2-3 minutes after baking. This locks in the juices so they don’t dry out when you cut in.
Tips to Keep Your Chicken Tenders Juicy (Not Dry as Heck)
Nothin’ worse than chewin’ on cardboard, right? Here’s how I make sure my tenders stay moist and tender every darn time.
- Don’t Overcook: Biggest sin in chicken cookin’. Check at 18 minutes, even if you think they need more. Better safe than sorry.
- Foil Trick: Worried about dryness? Cover the tray with foil for the first 10-15 minutes, then uncover to crisp ‘em up. Traps the moisture like magic.
- Marinate for Extra Juiciness: Soak ‘em in buttermilk or a mix of lemon juice and olive oil for 30 minutes before baking. Adds flavor and keeps ‘em soft.
- Don’t Skip the Rest: Givin’ ‘em a quick 2-3 minute rest after baking lets the juices settle. Cut too soon, and all that goodness spills out.
How to Get That Crispy, Golden Finish
If you’re like me, you want that satisfying crunch with every bite. Here’s a few tricks I swear by to get that crispy vibe without deep fryin’.
- Use Panko: Regular breadcrumbs are fine, but panko crumbs are lighter and crunchier. Total game-changer.
- Oil Spray: Lightly spritz the tops with cooking spray before they go in. Helps ‘em brown without soakin’ in grease.
- Flip Halfway: About 10-12 minutes in, flip each tender over. Gets both sides nice and golden.
- Don’t Crowd: I said it before, but it’s worth repeatin’. Space ‘em out on the tray so hot air can hit every side.
Spicin’ Things Up: Flavor Ideas for Your Tenders
Plain chicken is borin’ as heck. Let’s jazz ‘em up with some killer seasonings and coatings. Mix and match to keep things fresh!
- Classic Combo: Salt, pepper, garlic powder, and paprika. Simple but never fails.
- Spicy Kick: Add cayenne or chili powder to the mix. Pair with a cool ranch dip to balance the heat.
- Herby Vibes: Dried oregano, thyme, or Italian seasoning. Feels fancy without extra work.
- Sweet & Savory: A lil honey mixed with mustard for a glaze. Brush it on in the last 5 minutes of baking—trust me, it’s fire!
Here’s a quick table of flavor combos I’ve tried and loved:
| Style | Seasonings | Best Dip |
|---|---|---|
| Classic | Salt, Pepper, Garlic Powder, Paprika | Honey Mustard |
| Spicy | Cayenne, Chili Powder, Black Pepper | Ranch |
| Herby | Oregano, Thyme, Basil | Garlic Aioli |
| Sweet & Tangy | Honey, Mustard Glaze | BBQ Sauce |
What to Serve with Chicken Breast Tenders
Tenders are awesome on their own, but pairin’ ‘em with the right sides takes dinner to the next level. Here’s some ideas to round out your meal—pick what ya vibe with!
- Crispy Fries: Gotta love the classic combo. Sprinkle some sea salt on ‘em and dip in ketchup alongside your tenders.
- Creamy Mac & Cheese: Comfort food central! The cheesy goodness with crispy chicken is a match made in heaven.
- Tangy Coleslaw: Cuts through the richness with a fresh, crunchy bite. I like mine with a lil extra vinegar for zing.
- Garlic Bread: Warm, buttery, and garlicky. Perfect for soppin’ up any sauces or just munchin’ on the side.
- Sweet Potato Mash: Bit of sweet, bit of savory. Whips up quick and feels kinda healthy too.
Got dips? Don’t sleep on ‘em. Whip out some honey mustard, BBQ, or a creamy ranch to dunk those tenders. Makes every bite pop!
Common Mistakes When Baking Chicken Tenders (And How to Fix ‘Em)
I’ve messed up plenty of batches in my day, so lemme save ya some trouble. Here’s the slip-ups I see most and how to dodge ‘em.
- Overcookin’ ‘Em: Like I keep sayin’, don’t let ‘em go past 165°F. Check early, check often.
- Not Preheatin’: Tossin’ tenders into a cold oven makes ‘em cook uneven. Always preheat to 350°F first.
- Skippin’ the Space: Crowd the pan, and you’re steamin’ instead of bakin’. Spread ‘em out, even if it means two batches.
- Forgettin’ to Dry ‘Em: Wet chicken won’t crisp. Pat ‘em dry with a paper towel before seasonin’—takes two seconds.
FAQs: Your Burning Questions About Baking Chicken Tenders
Got doubts? I’ve been there! Here’s answers to stuff I wondered about when I started cookin’ tenders at 350°F.
- Can I bake frozen tenders at 350°F? Yup, but thawin’ overnight in the fridge is best. If you’re in a rush, add 10-15 minutes to the bake time and double-check that internal temp.
- How do I reheat leftovers? Pop ‘em back in the oven at 350°F for 5-10 minutes. Microwave works if you’re desperate, but they might get soggy.
- What if they’re brownin’ too fast? Cover the tray with foil to slow down the crisping while the inside catches up. Easy fix!
- Can I add cheese on top? Heck yeah! Sprinkle some cheddar or parm in the last 3-5 minutes. Melty goodness awaits.
Switchin’ It Up: Different Temps and Methods
While 350°F is my go-to, sometimes ya gotta adjust based on your gear or time crunch. Here’s a quick rundown of other options I’ve played with.
- Higher Temp (375°F): Cuts cookin’ time to about 15-20 minutes. Good if you’re rushed, but watch for burnin’ on the edges.
- Air Fryer at 350°F: Faster, around 12-15 minutes. Flip halfway for even crisp. Plus, less oil needed!
- Convection Oven: Shaves off a few minutes—try 15-18 minutes at 350°F or lower the temp a bit. Air circulates better, so it cooks quicker.
Stick with 350°F in a regular oven if you’re new to this. It’s the safest bet for consistent results.
Why Chicken Tenders Are a Dinner Win
Lemme tell ya, chicken breast tenders are a lifesaver for busy nights. They cook fast, kids love ‘em, and you can switch up the flavors endless ways. Whether you’re feedin’ a picky toddler or just want somethin’ simple after a long day, these lil strips of goodness got your back. I’ve made ‘em for game nights, quick lunches, heck, even as a party snack with some killer dips.
Plus, they’re healthier than fryin’ when you bake ‘em. Less grease, same tasty vibes. You control the ingredients—no weird fast-food additives here. Just good ol’ chicken and whatever spices you’re diggin’.
Storage and Leftovers: Keepin’ It Fresh
Made too many? No prob! Here’s how I store ‘em so they don’t go to waste.
- Fridge: Cool ‘em down, then toss in an airtight container. Stays good for 3-4 days. Reheat in the oven for best texture.
- Freezer: Freeze cooked tenders for up to 2 months. Lay ‘em flat on a tray first so they don’t stick together, then bag ‘em up. Thaw in the fridge before reheatin’.
- Reheat Tip: Like I said, 350°F oven for 5-10 minutes. Add a lil oil spray if they look dry.
Wrappin’ It Up: Get Bakkin’!
So, there ya have it—everything you need to know about how long to bake chicken breast tenders at 350°F. Stick to that 18-25 minute range, check for 165°F inside, and use my tips to keep ‘em juicy and crispy. I’ve cooked these suckers a million times, and I’m tellin’ ya, it’s hard to mess up once you get the hang of it.
Grab some tenders, fire up that oven, and make a meal that’ll have everyone askin’ for seconds. Got a fave way to season ‘em or a side you always pair with? Drop a comment—I’m all ears for new ideas! Let’s keep the kitchen convos rollin’. Happy bakin’, y’all!
How Long to Bake Chicken Tenderloins
The time it takes to bake chicken tenderloins depends on a few factors:
- The oven temperature
- The size and thickness of the tenderloins
- Whether they are fresh or frozen
- Whether they are breaded or plain
- Baking Fresh (Unbreaded) Chicken Tenderloins
- Oven Temperature: 400°F (200°C)
- Bake Time: 15-20 minutes
- This is the sweet spot for juicy, well-cooked tenderloins with a bit of browning on the outside. Always use a meat thermometer to check for an internal temperature of 165°F (74°C).
- You can also bake them at:
- 375°F (190°C): 20-25 minutes
- 425°F (220°C): 12-15 minutes (watch closely to avoid overcooking)
If your tenderloins are breaded (think panko, flour coating, or store-bought frozen tenders), theyll need more time to crisp up.
- Oven Temperature: 400°F (200°C)
- Bake Time: 20-25 minutes
- Flip halfway through for even crisping, especially if you arent using a wire rack.
Forgot to thaw? No problem.
- Oven Temperature: 400°F (200°C)
- Bake Time: 25-30 minutes
- There is no need to defrost, but youll need to add 5–10 minutes more than fresh. Always ensure the internal temperature reaches 165°F.
Details – How Long to Bake Chicken Tenderloins
Chicken tenderloins (also called chicken tenders or inner fillets) are the small, thin strips of muscle found underneath the chicken breast. Because of their smaller size, theyre naturally more tender than the breast and cook more quickly.
Heres why people love them:
- Quick-cooking: Great for busy weeknights
- Lean protein: High in protein, low in fat
- Kid-friendly: Easy to season and customize
- Versatile: Bake, grill, fry, or sauté