Let’s be real – there’s nothing quite as satisfying as biting into a perfectly fried chicken tender. Crispy on the outside, juicy on the inside. pure heaven! But getting that restaurant-quality result at home can be tricky. The most common question I get from readers is “How long should I fry chicken tenders?” Today, I’m gonna break it all down for you with everything you need to know!
As someone who’s made (and occasionally burned) more chicken tenders than I care to admit I’ve learned that timing is EVERYTHING. Generally speaking chicken tenders require about 3-5 minutes per side when frying on the stove. But there’s way more to the story than just a simple timeframe.
The Basic Timing for Perfect Chicken Tenders
Let me cut straight to the chase – here’s what you need to know about frying times:
- Deep frying: 6-8 minutes total at 350-375°F (175-190°C)
- Pan-frying on stovetop: 3-5 minutes per side at medium-high heat
- Air frying: 12-15 minutes at 400°F (200°C), flipping halfway
The exact timing will depend on a bunch of factors (which we’ll get into), but these guidelines should get you started. The most important thing is reaching that internal temperature of 165°F (74°C) – that’s non-negotiable for food safety!
Factors That Affect Chicken Tender Frying Time
Okay so here’s the thing – not all chicken tenders are created equal! Several factors can impact how long it takes to get your tenders perfectly cooked:
1. Tender Thickness
This is probably the biggest factor. Thicker tenders naturally need more time to cook through than skinny ones. For thicker pieces, you might need to add an extra minute or two per side.
2. Oil Temperature
Getting your oil to the right temperature is super crucial! If your oil isn’t hot enough (ideally 350-375°F or 175-190°C), your tenders will absorb too much oil and end up greasy instead of crispy. Too hot, and the outside burns before the inside is done. Ugh, nobody wants that!
I always keep a thermometer handy, but if you don’t have one, you can test by dropping a small piece of breading into the oil – it should sizzle and turn golden brown within a few seconds.
3. Batch Size
Don’t overcrowd your pan! I made this mistake way too many times when I was starting out. Putting too many tenders in at once lowers the oil temperature dramatically. This leads to soggy, unevenly cooked tenders.
For best results, fry in small batches with plenty of space between each tender. This might take a bit longer overall, but trust me, the results are 100% worth it!
4. Breading Thickness
The thickness and type of your breading makes a difference too. A thicker breading will take a bit longer to get crispy and golden brown. Panko breadcrumbs tend to crisp up faster than regular breadcrumbs, so keep that in mind.
Step-by-Step Guide to Frying Chicken Tenders
Alright, now let’s get into the nitty-gritty of actually making these bad boys! Here’s my foolproof method:
Preparation
- Pat the chicken dry with paper towels. This helps the breading stick better and promotes crisping.
- Season generously with salt, pepper, and any other desired spices.
- Set up your breading station:
- First bowl: All-purpose flour
- Second bowl: Beaten eggs
- Third bowl: Breadcrumbs (panko works great for extra crispiness!)
- Bread your tenders by dredging in flour, dipping in egg, then coating in breadcrumbs. Press the breadcrumbs onto the chicken to help them stick.
- Let rest for 5-10 minutes before frying. This helps the coating adhere better.
For Pan-Frying (My Favorite Method)
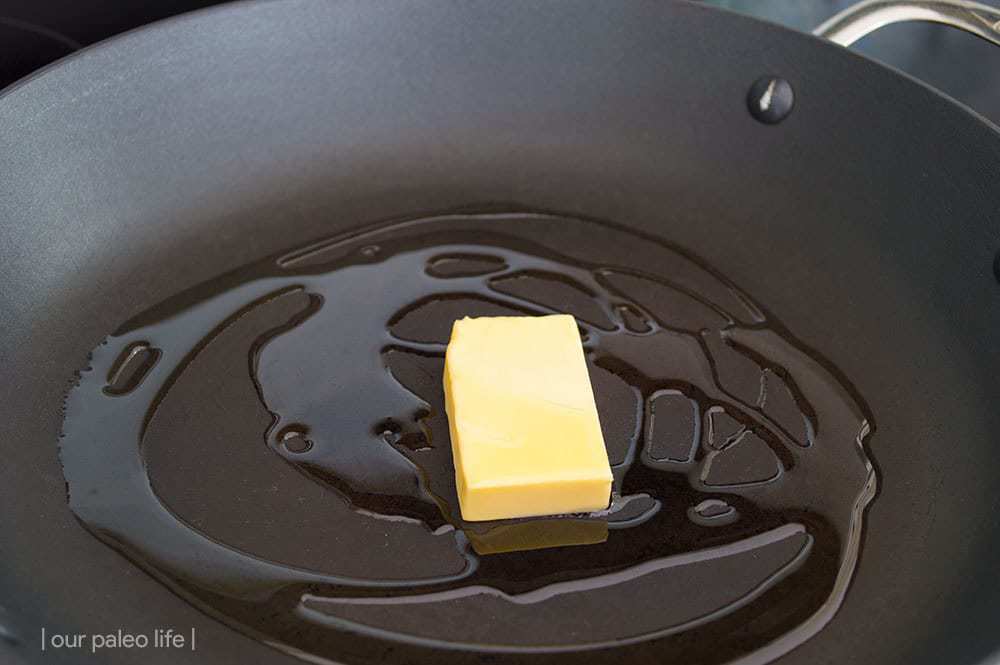
- Heat a heavy-bottomed skillet (cast iron is perfect!) over medium-high heat.
- Add about 2 tablespoons of ghee or butter and 1 tablespoon of avocado oil. The combo gives awesome flavor!
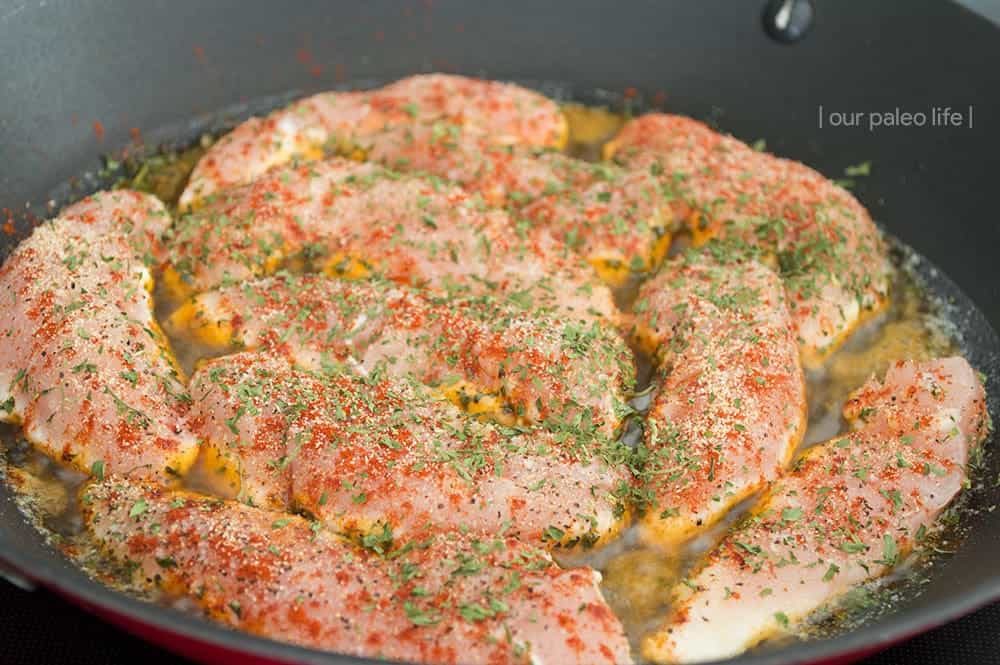
- Once the oil is hot but not smoking, add your chicken tenders in a single layer. Don’t overcrowd!
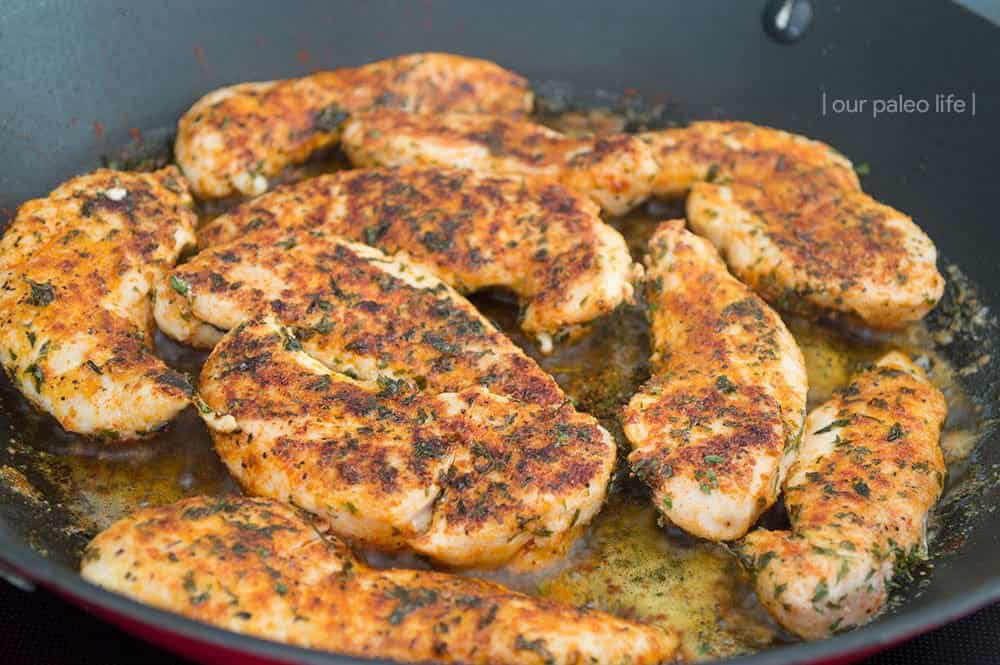
- Cook untouched for 3-4 minutes until golden brown.
- Flip and cook for another 3-4 minutes on the other side.
- Check for doneness – cut into the thickest part or use a meat thermometer to ensure they’ve reached 165°F (74°C).
- Transfer to a paper towel-lined plate to drain excess oil.
For Deep Frying
- Fill a deep fryer or heavy pot with oil to a depth of at least 2 inches.
- Heat oil to 350-375°F (175-190°C).
- Carefully add tenders to the hot oil in small batches.
- Fry for 6-8 minutes total until golden brown and cooked through.
- Remove and drain on paper towels.
Tips for Chicken Tender Success
Over the years, I’ve learned a few tricks that can really elevate your chicken tender game:
- Use a meat thermometer! Seriously, this takes the guesswork out completely.
- Don’t flip too soon! Let the tenders develop that golden crust before turning.
- Season the breading, not just the chicken. This adds layers of flavor.
- Try adding some cornstarch to your flour for extra crispiness.
- If making a large batch, keep cooked tenders warm in a 200°F (95°C) oven on a wire rack (not stacked!) until ready to serve.
Troubleshooting Common Problems
We’ve all been there – sometimes things don’t go as planned. Here’s how to fix common chicken tender issues:
Soggy Tenders?
Usually caused by oil that’s not hot enough or overcrowding the pan. Make sure your oil is properly heated and fry in smaller batches.
Breading Falls Off?
Make sure chicken is completely dry before breading, and let the breaded tenders rest before frying. Also, don’t move them around too much in the pan.
Burnt Outside but Raw Inside?
Your oil is too hot! Lower the temperature and give them more time to cook through.
What to Serve with Your Chicken Tenders
Now that you’ve made perfect tenders, what should you serve with them? Here are some of my fave options:
- Honey mustard dipping sauce (mix 1/2 cup mayo, 2 tbsp yellow mustard, 2 tbsp honey, and 1/2 tbsp lemon juice)
- Ranch dressing
- BBQ sauce
- Fresh salad
- Sweet potato fries
- Honey glazed carrots
Storing and Reheating Leftover Tenders
If you somehow have leftovers (which rarely happens in my house!), store them in an airtight container in the refrigerator for up to 3-4 days.
To reheat without losing that crispy texture:
- Preheat oven to 400°F (200°C)
- Place tenders on a wire rack over a baking sheet
- Bake for 10-15 minutes until hot and crispy
Avoid microwaving if possible – it’ll make them soggy!
FAQs About Frying Chicken Tenders
Can I use frozen chicken tenders?
While fresh is best, you can fry frozen tenders. They’ll need a bit longer cooking time, and the breading might not adhere as well. Make sure they reach 165°F (74°C) internal temperature.
Can I reuse the frying oil?
Yes, you can reuse it a few times if you strain it through a fine-mesh sieve lined with cheesecloth after it cools. Store in an airtight container in a cool, dark place. Discard if it darkens, thickens, or smells off.
Can I make these healthier?
Absolutely! Try pan-frying with less oil or use an air fryer. For a lower-carb option, try using almond flour or crushed pork rinds instead of breadcrumbs.
What if I don’t have a thermometer?
You can test if chicken is done by cutting into the thickest part – the meat should be white with clear juices, not pink.
Wrapping It Up
So there you have it – everything you ever wanted to know about how long to fry chicken tenders! Remember, it’s typically about 3-5 minutes per side when pan-frying, but always use visual cues (golden brown color) and a meat thermometer for best results.
Honestly, making perfect chicken tenders takes a bit of practice, but once you get the hang of it, you’ll be making restaurant-quality tenders that’ll have everyone asking for seconds!
What’s your favorite dipping sauce for chicken tenders? Drop me a comment below – I’m always looking for new flavor combos to try!
Happy cooking!

Ingredients Needed (full recipe below)
- 12 Chicken Tenders
- 1 tsp Garlic Powder
- 1 tsp Onion Powder
- 1 tsp Smoked Paprika
- 1 tsp Dried Parsley
- 1 tsp Salt
- 1 tsp Ground Black Pepper
- 2 Tbsp Ghee or Grass-Fed Butter
- 1 Tbsp Avocado Oil
Chicken Tender Spice Blend
There aren’t any quantities on the ingredients, like the garlic, for this gluten-free chicken, because it’s more of a how-you’re-feeling-at-the-moment kind of recipe. But we’ve found this particular blend of spices to be just right, so make sure you use them all.
- 1 tsp Garlic Powder
- 1 tsp Onion Powder
- 1 tsp Smoked Paprika
- 1 tsp Dried Parsley
- 1 tsp Salt
- 1 tsp Ground Black Pepper
The easiest way to season the chicken is to do one side before you add it to the skillet, put them in the skillet, seasoned side down, then season the other side while they’re cooking on the frying pan. Less mess and all the spices stick to the chicken tenders and not to the plate.