Ever stood at your stove wondering if your chicken thighs are done or if they need more time? I’ve been there too! Frying chicken thighs seems simple enough but getting that perfect balance of juicy inside and crispy outside can be tricky if you don’t know the right timing.
After years of kitchen experiments (and yes, some disasters), I’ve mastered the art of pan-frying chicken thighs to golden perfection. Today, I’m sharing everything I know about timing, temperature, and techniques for perfectly fried chicken thighs every single time.
The Quick Answer: Chicken Thigh Frying Times
For those who need the fast answer
- Boneless, skinless chicken thighs: About 5-7 minutes per side
- Bone-in, skin-on chicken thighs: About 8-10 minutes per side, but can take up to 20-25 minutes per side for perfectly crispy skin
But wait! There’s much more to successful chicken thigh frying than just watching the clock. Let’s dive into the details that make all the difference.
Why Chicken Thighs Are Amazing for Pan-Frying
Before we talk timing, I want to mention why chicken thighs are my absolute favorite cut to fry:
- They’re more forgiving than breast meat (harder to dry out)
- They have more flavor thanks to higher fat content
- They stay juicy and tender even with longer cooking times
- The skin (if using skin-on) gets wonderfully crispy
The Secret to Perfect Pan-Fried Chicken Thighs
The truth is, cooking time depends on several factors:
- Whether you’re using bone-in or boneless thighs
- Whether the thighs have skin or not
- The size of the chicken thighs
- The temperature of your pan
- How crowded your pan is
Let me break down the process for perfect results every time.
Preparing Your Chicken Thighs
Preparation is key to even cooking and perfect timing:
-
Pat them dry: This is super important! Use paper towels to thoroughly dry the chicken. Moisture is the enemy of crispy skin and proper browning.
-
Season liberally: At minimum, use salt and pepper. I like adding garlic powder, paprika, and sometimes a pinch of thyme.
-
Let them come to room temperature: Take them out of the fridge about 15-20 minutes before cooking. This helps them cook more evenly.
-
Trim excess fat: While some fat is good, too much can lead to flare-ups and excessive spattering.
Choosing Your Pan and Oil
The right equipment makes a huge difference:
- Best pan: A heavy skillet like cast iron or stainless steel provides even heat
- Oil options: Use an oil with a high smoke point
- Olive oil works fine (contrary to what some say)
- Coconut oil (refined/unscented) is another good option
- Vegetable oil or canola oil are perfectly suitable too
The Actual Frying Process
Here’s my step-by-step method that works every time:
For Bone-in, Skin-on Chicken Thighs:
-
Add about 1 tablespoon of oil to your pan over medium heat.
-
When the pan is hot, place chicken thighs SKIN SIDE DOWN in the pan.
-
DON’T MOVE THEM for about 20-25 minutes. Yes, you read that right! The key to amazingly crispy skin is patience. The skin needs time to render fat and crisp up.
-
If the skin starts to burn, lower the heat. You want a steady sizzle, not a scorching situation.
-
The chicken is ready to flip when the skin is deep golden brown and releases easily from the pan. If it’s sticking, it probably needs more time.
-
After flipping, cook for about another 20 minutes until the meat near the bone is fully cooked.
For Boneless, Skinless Chicken Thighs:
-
Follow the same beginning steps with oil and pan heating.
-
Cook for 5-7 minutes on the first side until golden brown.
-
Flip and cook another 5-7 minutes until cooked through.
-
Total cooking time is typically 10-15 minutes depending on thickness.
How to Know When They’re Done
Don’t rely just on cooking time! Use these methods to check for doneness:
-
Temperature check: Use a meat thermometer inserted into the thickest part (avoiding bone). Chicken is safe at 165°F (74°C).
-
Visual cues: Juices should run clear, not pink, when pierced.
-
Texture test: When pressed with tongs, properly cooked chicken feels firm but still has a little give.
Common Problems and Solutions
Problem: Chicken sticking to the pan
Solution: Your pan probably wasn’t hot enough before adding chicken, or you’re trying to flip too soon. Be patient!
Problem: Chicken burns on outside but raw inside
Solution: Your heat is too high. Lower the temperature and consider finishing in a 350°F oven.
Problem: Skin isn’t crispy
Solution: You’re either flipping too soon or your pan is overcrowded. Give each piece plenty of space and time.
My Favorite Tricks for Even Better Results
After countless chicken dinners, I’ve developed some personal tricks:
- Splatter screen: Saves a ton of cleanup time and prevents oil burns.
- Vinegar bowl: Place a small bowl with vinegar near the stove to absorb cooking odors.
- Press gently: In the first few minutes of cooking skin-on thighs, I press them down with a spatula to ensure even contact with the pan.
- Let them rest: After cooking, let the thighs rest for 5-10 minutes before serving for juicier meat.
Delicious Variations to Try
Once you’ve mastered the basic timing, try these flavor variations:
- Garlic butter basting: In the last few minutes, add butter and crushed garlic to the pan and spoon over the chicken.
- Lemon herb: Add lemon slices and fresh herbs to the pan during the last 5 minutes.
- Honey soy glaze: Brush with a mixture of honey, soy sauce, and garlic after flipping.
Storing and Reheating Leftover Fried Chicken Thighs
If you somehow end up with leftovers:
- Store in an airtight container in the refrigerator for 3-4 days.
- Reheat in a skillet over medium-low heat with a splash of water to retain moisture.
- Alternatively, reheat in a 350°F oven for 10-15 minutes.
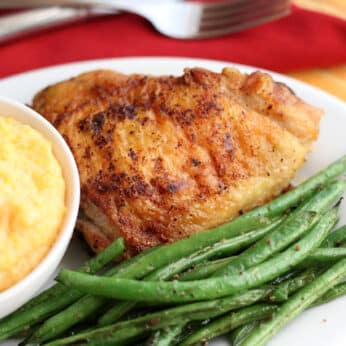
Perfect Sides for Your Fried Chicken Thighs
My favorite pairings include:
- Creamy pasta salad
- Roasted vegetables
- Mashed potatoes
- Fresh green salad with vinaigrette
- Mac and cheese
Final Thoughts: It’s Worth the Wait
The most important thing I’ve learned about frying chicken thighs is patience. That golden-crisp skin and juicy interior doesn’t happen in 5 minutes. The good news is that once you’ve mastered the timing, you’ll have a foolproof method for one of the most satisfying and economical meals possible.
Remember, chicken thighs are forgiving. They won’t dry out like chicken breasts, so if you’re a few minutes over, you’ll still have delicious results. Just keep an eye on that skin to prevent burning, and you’ll be rewarded with chicken that’s crispy on the outside and mouthwateringly tender inside.
FAQ About Frying Chicken Thighs
Q: Can I use frozen chicken thighs?
A: It’s best to fully thaw them first for even cooking and to prevent oil splatter.
Q: Do I need to rinse chicken thighs before cooking?
A: No! Food safety experts recommend against rinsing poultry as it can spread bacteria. Just pat them dry with paper towels.
Q: How many chicken thighs can I cook at once?
A: Don’t overcrowd the pan. Leave at least an inch between pieces. For an average skillet, 4-6 thighs is usually the maximum.
Q: Can I reuse the oil from frying chicken?
A: Yes, if it’s not burned. Strain it through a fine mesh strainer and store in a glass container.

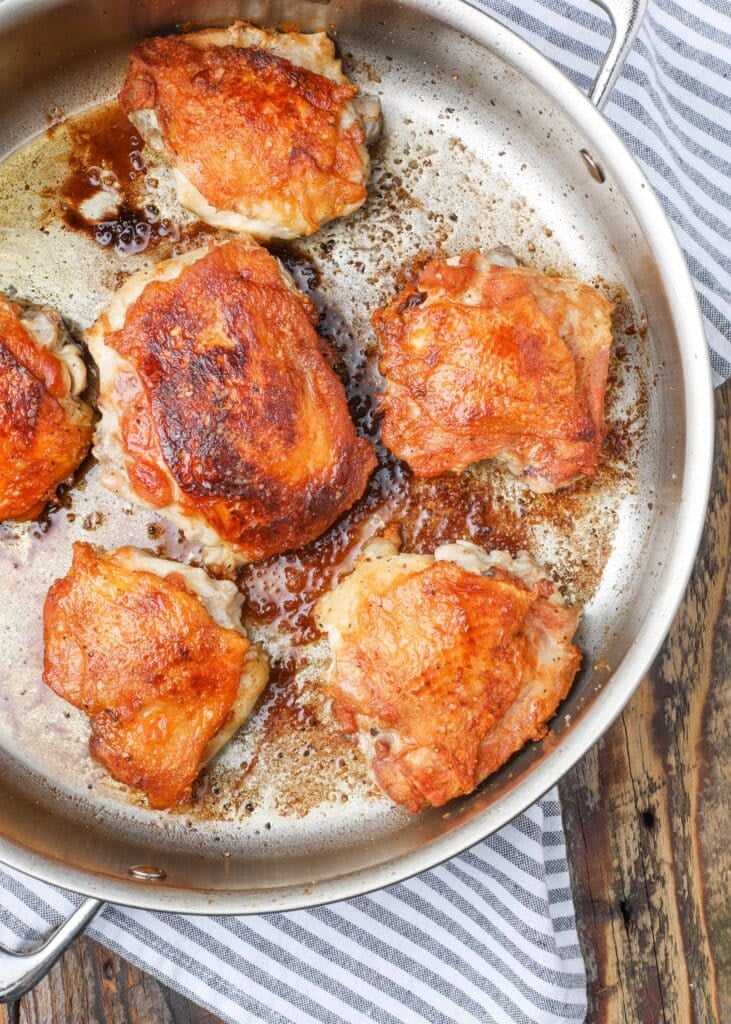
How Long To Fry Chicken Thighs
- Pour a tablespoon of oil into a large stainless or cast-iron skillet over medium heat. (A non-stick skillet will work as well, although it isn’t required.)
- Generously sprinkle the skin side of the chicken thighs with spices and then place them in the hot skillet, skin side down. Sprinkle the other side of the thighs and then, without moving them, cook uncovered* for about 20-25 minutes.
- Let the chicken cook until the fat has rendered and the skin is deep golden brown and crisp; this could take as long as 30 minutes. If the skin is sticking to the pan, it likely isn’t finished on that side. Reduce the heat as needed if the skin starts to burn before it is evenly golden brown.
- Turn the thighs over and continue to cook for about 20 more minutes. When the meat closest to the bone is cooked through, the chicken is done.
* Please note that a splatter-screen for your skillet will help cut down on the mess on the stovetop and a small bowl with a cup of vinegar set next to the stove will greatly reduce the lingering aroma of this recipe through the rest of the night.

When I finally learned how to cook chicken on the stove, I was in heaven. Crispy chicken thighs really are possible without deep frying or standing over the stove the whole time.
With a few tips in hand, you’re going to be making some amazing chicken in no time. First, you’ll want to start with a heavy skillet.
A splatter-screen for cooking will help cut down on the mess on the stovetop.
A small bowl with a cup of vinegar set next to the stove will greatly reduce the lingering aroma of this recipe through the rest of the night.
Pan Fried Chicken Thighs
These pan-fried chicken thighs have become a staple in my house over the past few years. I made this chicken at least once a week for the first couple of months and I still make it at least once a month. The chicken turns out perfectly every single time.
My kids now ask for the “crispy skin chicken” every time they see me purchasing chicken. This pan-cooked chicken has been a kid and adult favorite for over ten years now.
Short answer? YES! I’ve been asked so many times, I finally made a note in the recipe card. I used to use refined (unscented) coconut oil to pan-fry chicken because it had a slightly higher smoking point, but I’ve been using olive oil for years now without any issues at all.
You’re not cooking at a high temp and you aren’t deep frying the chicken either. This is a shallow pan fry method that requires just a tablespoon of oil. You’ll be just fine with olive oil in this case.
After cooking chicken this way for a couple of years, I decided to play with an oven method for achieving the same crispy chicken thighs. I’m thrilled to tell you that this Oven Baked Crispy Chicken is pretty amazing too.
My first choice for crispy chicken thighs is the pan-fried method, but a very close second (and perfect for the busiest of days) is the crispy chicken made in the oven. I’m so happy to have two great methods now for cooking perfectly crispy chicken.
These Instant Pot Sweet Potatoes are next on my list to try with this chicken. What’s not to love about a piping hot silky smooth sweet potato that practically cooks itself?