Have you ever tried making fried chicken at home, only to end up with a coating that’s either falling off or just not crispy enough? I’ve been there too! After years of trial and error in my kitchen, I’ve finally mastered the art of making incredibly crunchy fried chicken using bread crumbs instead of the traditional flour coating. Today, I’m excited to share my foolproof method that’ll give you restaurant-quality results right in your own kitchen!
Why Bread Crumbs Make Superior Fried Chicken
Before we dive into the recipe. let’s talk about why bread crumbs are actually an amazing choice for fried chicken
- They create a thicker, crunchier crust than flour alone
- The texture is more consistent and stays crispy longer
- Bread crumbs absorb less oil, resulting in a lighter finished product
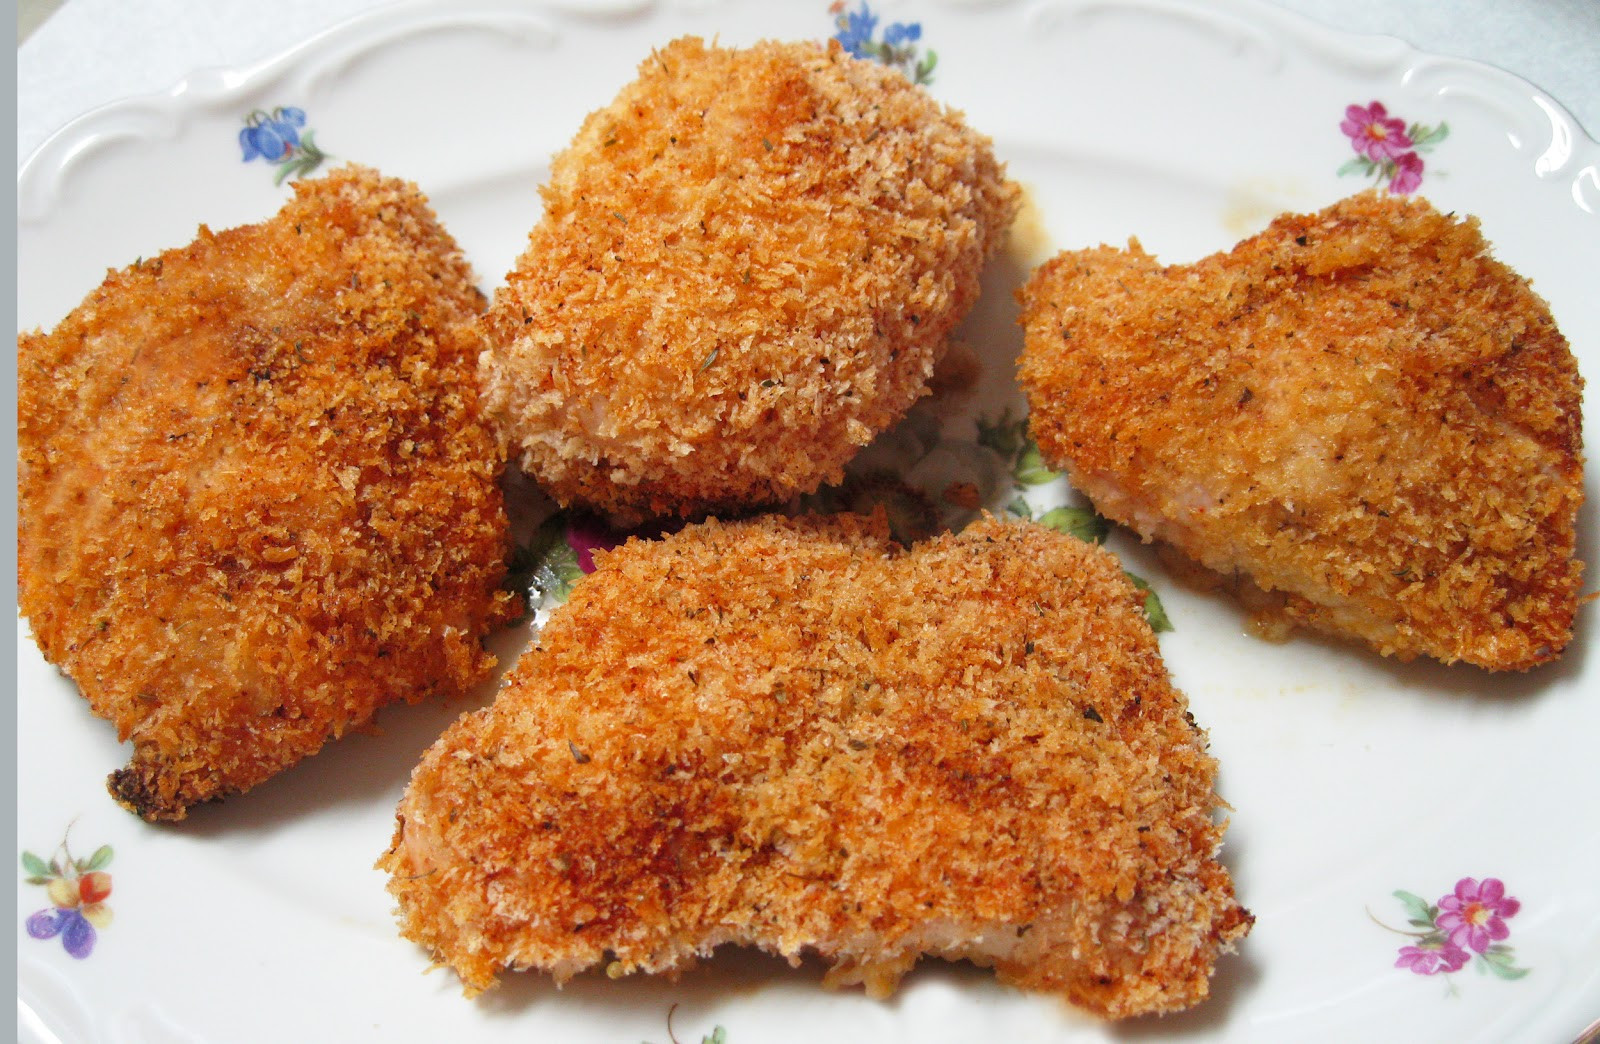
- They brown more evenly and give that beautiful golden-orange color we all love
I remember the first time I tried using bread crumbs instead of flour – the difference was night and day! My family couldn’t stop raving about how much better it was than my previous attempts
Essential Ingredients for Bread Crumb Fried Chicken
Here’s what you’ll need to make perfect bread crumb fried chicken
- 1 whole chicken, cut into 8 pieces (or your preferred chicken parts)
- 1 cup all-purpose flour
- 2 cups bread crumbs (regular or panko)
- 2 eggs, beaten
- 1 teaspoon salt
- 1 teaspoon black pepper
- Vegetable oil for frying
Step-by-Step Guide to Bread Crumb Fried Chicken
1. Prepare Your Chicken
First things first – preparation is key! Start by taking your chicken out of the refrigerator about 30 minutes before cooking. This brings it closer to room temperature, which helps it cook more evenly.
Pat the chicken pieces dry with paper towels. This step is crucial – excess moisture is the enemy of crispy chicken! If the chicken is too wet, your coating won’t stick properly and might become soggy during frying.
2. Season Your Flour
In a shallow dish, combine your cup of flour with salt and pepper. This seasoned flour creates the first layer of your breading system. Feel free to add other seasonings here too – I sometimes throw in a bit of garlic powder or paprika for extra flavor!
3. Create Your Dipping Station
Set up a breading station with three shallow dishes:
- Your seasoned flour
- Beaten eggs in the second dish
- Bread crumbs in the third dish
This assembly line approach makes the coating process much less messy and ensures consistent coverage.
4. The Triple Dip Method
Now for the magic trick that makes restaurant-quality fried chicken – the triple dip method:
- Dredge each chicken piece in the flour mixture, shaking off any excess
- Dip it into the beaten eggs, allowing extra egg to drip off
- Press it firmly into the bread crumbs, making sure it’s completely coated
For extra crunchiness, you can double-bread your chicken! After the first bread crumb coating, dip it back in the egg wash and then into the bread crumbs again. This creates an ultra-thick, super crispy crust that’ll stay crunchy even as it cools.
5. Heat Your Oil Properly
The secret to perfectly crispy fried chicken is getting your oil temperature just right. Heat vegetable oil in a large skillet or deep fryer to 350°F (175°C). Use a thermometer if you have one – this isn’t just being fancy, it’s crucial for good results!
If your oil is too cool, the chicken will absorb too much oil and become greasy. If it’s too hot, the outside will burn before the inside cooks through. Neither is what we want!
6. Fry with Patience
Carefully place your breaded chicken pieces into the hot oil. Don’t overcrowd the pan – this lowers the oil temperature and leads to soggy chicken. Work in batches if necessary.
Fry the chicken for about 10-15 minutes, turning occasionally, until it’s golden brown and cooked through. The internal temperature should reach 165°F (74°C) for food safety.
7. The Draining Step
Once your chicken is done, transfer it to a wire rack set over a baking sheet or onto paper towels to drain excess oil. Letting it drain properly prevents it from becoming soggy as it cools.
Tips for Extra Crispy Fried Chicken
Want to take your bread crumb fried chicken to the next level? Here are some pro tips I’ve learned over the years:
1. Try a Buttermilk Soak
For extra tender and flavorful chicken, soak it in buttermilk for at least 4 hours (or overnight) before breading. The acidity in buttermilk helps tenderize the meat while adding subtle tanginess. When ready to cook, just pat the chicken dry before proceeding with the breading steps.
2. Use Panko for Extra Crunch
Swap regular bread crumbs for Japanese panko bread crumbs for an even crispier result. Panko crumbs are lighter and airier than regular bread crumbs, creating an extra-crunchy coating that stays crispy longer.
3. Add Parmesan to Your Bread Crumbs
Mix some grated Parmesan cheese into your bread crumbs for added flavor and crispiness. The cheese creates these amazing little crispy bits throughout the coating. About 1/4 cup of Parmesan per 2 cups of bread crumbs works great!
4. Don’t Forget the Spices
Elevate your bread crumb mixture with additional seasonings:
- 1 teaspoon paprika (gives that orange-golden color)
- 1/2 teaspoon garlic powder
- 1/2 teaspoon onion powder
- 1/4 teaspoon cayenne pepper (if you like heat)
- 1 teaspoon dried herbs like thyme or oregano
5. The Double Fry Technique
For next-level crispiness that rivals any restaurant, try the double-fry method:
- Fry the chicken first at 325°F (165°C) for about 8-10 minutes
- Remove and let rest for 15 minutes
- Increase oil temperature to 375°F (190°C)
- Fry again for 2-3 minutes until extra crispy
This technique creates an incredibly crunchy exterior while ensuring the inside is perfectly cooked.
Troubleshooting Common Problems
Even with the best instructions, things can sometimes go wrong. Here are solutions to common fried chicken problems:
Problem: Coating Falls Off During Frying
Solution: Make sure to:
- Pat the chicken completely dry before starting
- Press the bread crumbs firmly onto the chicken
- Let the breaded chicken rest in the refrigerator for 30 minutes before frying
- Don’t flip the chicken too early – let it form a crust first
Problem: Chicken Isn’t Crispy Enough
Solution:
- Your oil might not be hot enough
- Try the double-breading method
- Use panko bread crumbs instead of regular
- Make sure you’re not overcrowding the pan
Problem: Outside Burns Before Inside Is Cooked
Solution:
- Your oil is too hot
- Try using smaller chicken pieces
- Consider finishing larger pieces in the oven (350°F) after frying until they reach 165°F internally
No-Egg Alternative
If you’re out of eggs or have an egg allergy, you can still make delicious breaded chicken! Here’s how:
- Soak chicken in buttermilk for at least 4 hours
- Dredge in seasoned flour
- Dip directly into bread crumbs, pressing firmly to adhere
- Proceed with frying as normal
The buttermilk provides enough moisture for the bread crumbs to stick without needing eggs.
Healthier Oven-Baked Option
Want the crunch without all the oil? Try this oven-baked version:
- Follow all the steps for breading the chicken
- Preheat your oven to 400°F (200°C)
- Place breaded chicken on a baking sheet lined with parchment paper
- Spray or drizzle chicken with a bit of oil to help it crisp up
- Bake for 20-25 minutes, or until chicken reaches 165°F internally and coating is golden brown
While it won’t be identical to deep-fried, this method still produces deliciously crispy chicken with way less oil!
Perfect Side Dishes for Bread Crumb Fried Chicken
Your amazing fried chicken deserves equally delicious sides! Here are some of my favorite pairings:
- Classic creamy mashed potatoes
- Tangy coleslaw (the acidity cuts through the richness)
- Fluffy buttermilk biscuits
- Sweet corn on the cob
- Fresh green salad with vinaigrette
- Mac and cheese (for a truly indulgent meal!)
Storing and Reheating Leftovers
Got leftover fried chicken? Lucky you! Here’s how to store and reheat it properly:
Storing:
Store leftover fried chicken in an airtight container in the refrigerator for up to 3 days.
Reheating for Maximum Crispiness:
- Preheat your oven to 350°F (175°C)
- Place chicken on a wire rack over a baking sheet
- Reheat for 10-15 minutes until heated through and crispy again
Avoid microwaving if possible – it’ll make your beautifully crispy chicken soggy!
Final Thoughts
Making fried chicken with bread crumbs isn’t complicated, but it does require attention to detail. The key steps to remember are: properly drying your chicken, seasoning each component well, using the triple-dip method, and maintaining the correct oil temperature.
So, What’s the Best Way to Bread Chicken?
Marinate your chicken in lemon juice and crushed garlic for maximum flavor and the most tender meat.
For the biggest (and most consistent) crunch, dredge in flour, then dip in egg, then coat in crumbs. If you’re into a battered cutlet but don’t want to commit all the way, combine the flour and egg, then coat in crumbs.
When it comes to breading, it’s tough to go wrong. If you’re a big fan of the flavor of any specific cracker or chip (like Ritz or Saltine or Cheez-Its), use those. For a classic, extra-crunchy boy, use panko or panko-Parm. For something nuttier, try fresh bread crumbs made from whole wheat or multigrain.
What should Ella test in a future column? Share requests in the comments!
According to sooo many tests.
Published OnMarch 15, 2022

Photo by Rocky Luten. Prop Stylist: Molly Fitzsimons. Food Stylist: Anna Billingskog.
In Absolute Best Tests, Ella Quittner destroys the sanctity of her home kitchen in the name of the truth. Shes boiled dozens of eggs, mashed a concerning number of potatoes, and seared more Porterhouse steaks than she cares to recall. Today, she tackles chicken cutlets.
Most chicken cutlets one encounters in the wild are pretty good. The average one wears an armor of crunch that’s seasoned heartily enough to play smokescreen for any dryness inside. Usually doused in a sauce, or pressed between two halves of an Italian roll, or blanketed by melted American cheese, breaded chicken is the form of cooked poultry Most Likely To Be Fine, whatever the circumstance.
But a truly life-changing cutlet is hard to come by.
I can count on one hand the number of cutlets I would betray a close family member for, cutlets I fall asleep thinking about, cutlets I would board planes to pursue. So this latest installment of Absolute Best Tests is an ode to that—to finding the recipe for an undeniably excellent cutlet that is better than “pretty good.” It’s an exercise in small tweaks, in hot pursuit of perfection. Ready those forks:
For each test, I used boneless, skinless chicken breasts, sliced and pounded into cutlets. I seasoned with Diamond Crystal kosher salt and freshly ground black pepper.
I let each piece of breaded chicken rest at room temperature for 15 to 30 minutes before frying for two reasons. Primarily, it helps the breading adhere, probably because the crumbs have more time to absorb the egg from the dredging process. And it also allows the chicken to come to a less frigid temperature, which means it won’t have as crazy an effect on the oil when you drop it in.
Cast-Iron Skillet: Fabulous for ensuring maximum crunch on a breaded cutlet (or on a breaded anything, really).
Fish Spatula: Necessary for flipping the cutlets with ease, and minimal oil splatter.
Whisk: For easy egg beating or batter-mixing.
Shallow Bowls: The MVP trio for all things dredging.
Adapted from That Sounds So Good by Carla Lalli Music.
1 large boneless, skinless chicken breast
¼ cup potato starch
1 large egg, beaten
1/2 teaspoon kosher salt
1 pinch freshly ground black pepper
¼ cup neutral oil, like avocado, rice bran, or peanut
1. Horizontally halve the chicken breast. Gently pound the resulting cutlets so they’re an even thickness, about ½ inch.
2. Set up 3 bowls for the breading: one with the starch, one with the egg, and one with the panko. Whisk the salt and pepper into the starch.
3. First dip each piece of chicken into the starch, dusting off any extra; then into the eggs, making sure it is coated completely; and finally into the panko, making sure the whole piece is evenly coated. Let the breaded chicken pieces rest on a plate for 15 to 30 minutes at room temp.
4. In a cast-iron skillet or Dutch oven, heat the oil over medium-high heat for a few minutes, until it vigorously bubbles when you drop in a stray piece of breading. Add the breaded chicken to the pan, making sure not to crowd them (you may need to cook them in batches). Cook until the bottom is deep golden-brown, 3 to 4 minutes, then flip and let the other side brown, about 3 minutes.
5. Transfer the pieces to a wire rack or paper towel–lined plate and serve hot.
Was she perfect? I had high hopes that a potato starch dredge would add even more crunch than all-purpose flour (see: French fries and latkes are incredibly crispy), but the results were similar, even a bit less crispy and crackly, and overall less consistent (peaks and valleys of crisp rather than tundra). It was still delicious though, and if I only had potato starch in my pantry, I wouldn’t hesitate to swap it in for flour.
Adapted from Spruce Eats.
1 large boneless, skinless chicken breast
¼ cup all-purpose flour
1 large egg, beaten
½ teaspoon kosher salt
1 pinch freshly ground black pepper
¼ cup whole milk
¼ cup neutral oil, like avocado, rice bran, or peanut
1. Horizontally halve the chicken breast. Gently pound the resulting cutlets so they’re an even thickness, about 1/2 inch.
2. Set up 2 bowls for the breading: one with the flour, another with the egg. Whisk the salt and pepper into the flour. Whisk the milk into the egg.
3. First dip each piece of chicken into the flour, dusting off any extra; then into the milky egg, making sure it is coated completely; then into the flour again, making sure the whole piece is evenly coated.
4. In a cast-iron skillet or a Dutch oven, heat oil over medium-high heat for a few minutes, until it vigorously bubbles when you drop in a stray piece of breading. Add the breaded chicken to the pan, making sure not to crowd them (you may need to cook them in batches). Cook until the bottom is deep golden-brown, 3 to 4 minutes, then flip and let the other side brown, about 3 minutes.
5. Transfer the pieces to a wire rack or paper towel–lined plate and serve hot.
Was she perfect? This is the batter lover’s cutlet. It looked like a chicken-fried steak, with a smooth, detached-in-places exoskeleton of carb. Battering the cutlet instead of simply breading it kept the meat juicier than any other test, but at what cost? It was a deeply flavored specimen, but lacked the crepitation of those breaded in sharp shards of panko.
1 large boneless, skinless chicken breast
1 large egg, beaten
2 tablespoons all-purpose flour
½ teaspoon kosher salt
1 pinch freshly ground black pepper
¼ cup neutral oil, like avocado, rice bran, or peanut
1. Horizontally halve the chicken breast. Gently pound the resulting cutlets so they’re an even thickness, about 1/2 inch.
2. Set up 2 bowls for the breading: one in which you whisk together the egg, flour, salt, pepper, and 1 tablespoon of water, and the other with the panko.
3. First dip each piece of chicken in the egg mixture, then into the panko, making sure the whole piece is evenly coated. Let the breaded chicken pieces rest on a plate for 15 to 30 minutes at room temp.
4. In a cast-iron skillet or a Dutch oven, heat oil over medium-high heat for a few minutes, until it vigorously bubbles when you drop in a stray piece of breading. Add the breaded chicken to the pan, making sure not to crowd them (you may need to cook them in batches). Cook until the bottom is deep golden-brown, 3 to 4 minutes, then flip and let the other side brown, about 3 minutes.
5. Transfer the pieces to a wire rack or paper towel–lined plate and serve hot.
Was she perfect? This was a Very Important Cutlet. Sam Seneviratne’s smart instructions have you whisk egg and flour together, to create a sort of pre-batter, onto which you pack the panko. So it presented a combo option, for those who love batter but also want their cutlets traditionally breaded (covered in little crispy shavings rather than one contiguous shell). The result was a much thicker crust, almost chewy beneath the frizzled panko layer. It would be the ideal cutlet for someone who loves the corner piece of baked pasta.
Adapted from Food52 and Bon Appétit.
1 large boneless, skinless chicken breast
6 tablespoons freshly squeezed lemon juice (from about 2 lemons)
2 garlic cloves, minced
1 pinch freshly ground black pepper
¼ cup all-purpose flour
1 large egg, beaten
¼ cup neutral oil, like avocado, rice bran, or peanut
1. Horizontally halve the chicken breast. Gently pound the resulting cutlets so they’re an even thickness, about ½ inch. Marinate in the lemon juice, garlic, and a big pinch for salt for 30 minutes to 1 hour in the fridge.
2. When you’re ready to cook, set up 3 bowls for the breading: one with the flour, one with the egg, and one with the panko. Whisk ½ teaspoon of salt and the pepper into the flour.
3. Remove chicken from marinade and let the juice and garlic drip off. First dip each piece of chicken in the flour, dusting off any extra; then into the eggs, making sure it is coated completely; and finally into the panko, making sure the whole piece is evenly coated. Let the breaded chicken pieces rest on a plate for 15 to 30 minutes at room temp.
4. In a cast-iron skillet or a Dutch oven, heat oil over medium-high heat for a few minutes, until it vigorously bubbles when you drop in a stray piece of breading. Add the breaded chicken to the pan, making sure not to crowd them (you may need to cook them in batches). Cook until the bottom is deep golden-brown, 3 to 4 minutes, then flip and let the other side brown, about 3 minutes.
5. Transfer the pieces to a wire rack or paper towel–lined plate and serve hot.
Was she perfect? I feel like a fool for sleeping on this lemon-garlic technique, which came to me in a DM from Emily Schultz, who learned it from a Molly Baz recipe. This simple, two-ingredient marinade ensures juicy, flavorful, tender meat every single time. I have dabbled with other, fussier marinades in the past, to little result with such notoriously thin chicken. The lemon-garlic swim imparted a somehow cheesy (!!!) flavor to the chicken, which was less tough than any other specimen from this round. The dredging technique also produced a supremely crunchy exterior, a textbook cutlet shell.
Adapted from Hellmann’s.
1 large boneless, skinless chicken breast
½ teaspoon kosher salt
1 pinch freshly ground black pepper
¼ cup neutral oil, like avocado, rice bran, or peanut
1. Horizontally halve the chicken breast. Gently pound the resulting cutlets so they’re an even thickness, about 1/2 inch.
2. Set up 2 bowls for the breading: one with the mayonnaise, and one with the panko. Whisk the salt and pepper into the mayonnaise.
3. First dip each piece of chicken in mayo, using a knife to make sure it’s coated with an even, thin layer. Then, dip into the panko, coating evenly on all sides. Let the coated chicken pieces rest on a plate for 15 to 30 minutes at room temp.
4. In a cast-iron skillet or a Dutch oven, heat oil over medium-high heat for a few minutes, until it vigorously bubbles when you drop in a stray piece of breading. Add the breaded chicken to the pan, making sure not to crowd them (you may need to cook them in batches). Cook until the bottom is deep golden-brown, 3 to 4 minutes, then flip and let the other side brown, about 3 minutes.
5. Transfer the pieces to a wire rack or paper towel–lined plate and serve hot.
Was she perfect? I sometimes eat mayo straight from a spoon, which I suppose I don’t have to admit, but I want to be honest about my expectations for this trial. Unfortunately, the resulting cutlet was less mayo-flavored, and more soft and bland. I suspect the oil and egg in the mayonnaise separated during cooking, contributing to greasier, squishier panko, and chicken that tasted extremely chicken-y, not in an amazing way. It should be said, though, that the meat of the chicken was very tender and juicy, coming in second place to the battered cutlet.
These tests were all conducted with the most consistently crunchy method from round one: flour, then egg, then crumbs.
1 large boneless, skinless chicken breast
6 tablespoons freshly squeezed lemon juice (from about 2 lemons)
2 garlic cloves, minced
15 Saltines (about ½ sleeve)
1/4 cup all-purpose flour
1 large egg, beaten
1/2 teaspoon kosher salt
1 pinch black pepper
¼ cup neutral oil, like avocado, rice bran, or peanut
1. Horizontally halve the chicken breast. Gently pound the resulting cutlets so they’re an even thickness, about ½ inch. Marinate in the lemon juice and garlic for 30 minutes to 1 hour in the fridge.
2. Place the Saltines in a zip-top plastic bag, squeeze out as much air as possible, and seal. Use a rolling pin—or a wine bottle, or anything heavy—to pound into fine crumbs.
3. When you’re ready to cook, set up 3 bowls for the coating: one with the flour, one with the egg, and one with the Saltine crumbs. Whisk the salt and pepper into the flour.
4. Remove chicken from marinade and let juice and garlic drip off. First dip each piece of chicken in the flour, dusting off any extra; then into the egg, making sure it is coated completely; and finally into the Saltine crumbs, making sure the whole piece is evenly coated. Let the coated chicken pieces rest on a plate for 15 to 30 minutes at room temp.
5. In a cast-iron skillet or a Dutch oven, heat oil over medium-high heat for a few minutes, until it vigorously bubbles when you drop in a stray piece of breading. Add the breaded chicken to the pan, making sure not to crowd them (you may need to cook them in batches). Cook until the bottom is deep golden-brown, 3 to 4 minutes, then flip and let the other side brown, about 3 minutes.
6. Transfer the pieces to a wire rack or paper towel–lined plate and serve hot.
Was she perfect? This cutlet was somehow reminiscent of schnitzel, a veal cutlet which is obviously not made using Saltines as breading.The crisp was present, but subtler, thinner, a fizz to panko’s crackle. And the overall flavor was slightly yeasty; one taster asked if I used alcohol in the dredge.
1 large boneless, skinless chicken breast
6 tablespoons freshly squeezed lemon juice (from about 2 lemons)
2 garlic cloves, minced
20 Ritz crackers (about ½ sleeve)
¼ cup all-purpose flour
1 large egg, beaten
½ teaspoon kosher salt
1 pinch freshly ground black pepper
¼ cup neutral oil, like avocado, rice bran, or peanut
1. Horizontally halve the chicken breast. Gently pound the resulting cutlets so they’re an even thickness, about ½ inch. Marinate in the lemon juice and garlic for 30 minutes to 1 hour in the fridge.
2. Place Ritz crackers in a zip-top plastic bag, squeeze out as much air as possible, and seal. Use a rolling pin—or a wine bottle, or anything heavy—to pound into fine crumbs.
3. When you’re ready to cook, set up 3 bowls for the coating: one with the flour, one with the egg, and one with the Ritz crumbs. Whisk the salt and pepper into the flour.
4. Remove chicken from marinade and let juice and garlic drip off. First dip each piece of chicken in the flour, dusting off any extra; then into the egg, making sure it is coated completely; and finally into the Ritz crumbs, making sure the whole piece is evenly coated. Let the coated chicken pieces rest on a plate for at least 15 minutes and up to 30 at room temp.
5. In a cast-iron skillet or a Dutch oven, heat oil over medium-high heat for a few minutes, until it vigorously bubbles when you drop in a stray piece of breading. Add the breaded chicken to the pan, making sure not to crowd them (you may need to cook them in batches). Cook until the bottom is deep golden-brown, 3 to 4 minutes, then flip and let the other side brown, about 3 minutes.
6. Transfer the pieces to a wire rack or paper towel–lined plate and serve hot.
Was she perfect? Slicing into the Ritz cutlet sounded like a commercial for the concept of crunch. The crackers lent each bite a sweet flavor (sugar features prominently in buttery Ritz), which was extremely delicious and unlike any other trial. The chicken itself was juicy. The Ritz cutlet would be ideal on a roll with melted American cheese, ketchup, and chile crisp. It just needs a little extra salt, either sprinkled onto it directly or in its serving accoutrement, to reach full potential.
1 large boneless, skinless chicken breast
6 tablespoons freshly squeezed lemon juice (from about 2 lemons)
2 garlic cloves, minced
¼ cup all-purpose flour
1 large egg, beaten
½ teaspoon kosher salt
1 pinch freshly ground black pepper
¼ cup neutral oil, like avocado, rice bran, or peanut
1. Horizontally halve the chicken breast. Gently pound the resulting cutlets so they’re an even thickness, about ½ inch. Marinate in the lemon juice and garlic for 30 minutes to 1 hour in the fridge.
2. Place Cheez-Its in a zip-top plastic bag, squeeze out as much air as possible, and seal. Use a rolling pin—or a wine bottle, or anything heavy—to pound into fine crumbs.
3. When you’re ready to cook, set up 3 bowls for the coating: one with the flour, one with the egg, and one with the Cheez-It crumbs. Whisk the salt and pepper into the flour.
4. Remove chicken from marinade and let juice and garlic drip off. First dip each piece of chicken in the flour, dusting off any extra; then into the eggs, making sure it is coated completely; and finally into the Cheez-It crumbs, making sure the whole piece is evenly coated. Let the coated chicken pieces rest on a plate for 15 to 30 minutes at room temp.
5. In a cast-iron skillet or a Dutch oven, heat oil over medium-high heat for a few minutes, until it vigorously bubbles when you drop in a stray piece of breading. Add the breaded chicken to the pan, making sure not to crowd them (you may need to cook them in batches). Cook until the bottom is deep golden-brown, 3 to 4 minutes, then flip and let the other side brown, about 3 minutes.
6. Transfer the pieces to a wire rack or paper towel–lined plate and serve hot.
Was she perfect? I would eat Cheez-Its out of a pile of hot garbage, so my findings from this trial are, admittedly, biased. The initial presentation of the Cheez-It cutlet was surprisingly not-neon; the fry process toned the crust down to a generic toasty brown. Flavor-wise, it was incredibly cheesy. Probably a 7 on the 1 to 10 scale of cheesiness, wherein 10 is actual cheese. The jaunt in hot oil also produced a warm, toasty flavor I don’t typically associate with my Its, but which I particularly enjoyed. Other tasters were less enthused, and felt the flavor of the crust was “gimmicky” and overshadowed the chicken.
1 large boneless, skinless chicken breast
6 tablespoons freshly squeezed lemon juice (from about 2 lemons)
2 garlic cloves, minced
¼ cup all-purpose flour
1 large egg, beaten
½ teaspoon kosher salt
1 pinch freshly ground black pepper
2 tablespoons finely grated Parmesan (or Pecorino Romano)
¼ cup neutral oil, like avocado, rice bran, or peanut
1. Horizontally halve the chicken breast. Gently pound the resulting cutlets so they’re an even thickness, about ½ inch. Marinate in the lemon juice and garlic for 30 minutes to 1 hour in the fridge.
2. When you’re ready to cook, set up 3 bowls for the coating: one with the flour, one with the egg, and one with the panko. Whisk the salt and pepper into the flour, and stir the grated Parm into the panko.
3. Remove chicken from marinade and let juice and garlic drip off. First dip each piece of chicken in the flour, dusting off any extra; then into the egg, making sure it is coated completely; and finally into the panko, making sure the whole piece is evenly coated. Let the coated chicken pieces rest on a plate for 15 to 30 minutes at room temp.
4. In a cast-iron skillet or a Dutch oven, heat oil over medium-high heat for a few minutes, until it vigorously bubbles when you drop in a stray piece of breading. Add the breaded chicken to the pan, making sure not to crowd them (you may need to cook them in batches). Cook until the bottom is deep golden-brown, 3 to 4 minutes, then flip and let the other side brown, about 3 minutes.
5. Transfer the pieces to a wire rack or paper towel–lined plate and serve hot.
Was she perfect? In the dredging round, one taster noted that it would be hard to beat the flavor and texture of panko. I am happy to report that adding grated Parmesan does just that. The crust was still just as crisp, but with a subtle, salty chew. The Parmesan also caused some of the panko to clump together for more overall crunch, almost reminiscent of when you get a good cluster of granola.
1 large boneless, skinless chicken breast
6 tablespoons freshly squeezed lemon juice (from about 2 lemons)
2 garlic cloves, minced
½ teaspoon kosher salt
1 pinch freshly ground black pepper
¼ cup all-purpose flour
1 large egg, beaten
½ cup Italian-style dried bread crumbs
¼ cup neutral oil, like avocado, rice bran, or peanut
1. Horizontally halve the chicken breast. Gently pound the resulting cutlets so they’re an even thickness, about ½ inch. Marinate in the lemon juice and garlic for 30 minutes to 1 hour in the fridge.
2. When you’re ready to cook, set up 3 bowls for the coating: one with the flour, one with the egg, and one with the bread crumbs. Whisk the salt and pepper into the flour.
3. Remove chicken from marinade and let juice and garlic drip off. First dip each piece of chicken in the flour, dusting off any extra; then into the egg, making sure it is coated completely; and finally into the bread crumbs, making sure the whole piece is evenly coated. Let the coated chicken pieces rest on a plate for 15 to 30 minutes at room temp.
4. In a cast-iron skillet or a Dutch oven, heat oil over medium-high heat for a few minutes, until it vigorously bubbles when you drop in a stray piece of breading. Add the breaded chicken to the pan, making sure not to crowd them (you may need to cook them in batches). Cook until the bottom is deep golden-brown, 3 to 4 minutes, then flip and let the other side brown, about 3 minutes.
5. Transfer the pieces to a wire rack or paper towel–lined plate and serve hot.
Was she perfect? This cutlet looked like it should be on the front of the bread crumbs can. It was so crisp, golden, and oil-soaked, it seemed to glimmer. Fresh from the fryer, the texture of these crumbs read almost like sand—super fine, much closer to ground-down crystal than the panko or crackers. Flavor-wise, it was mediocre. Parm would have helped. Garlic powder too. Overall, it was a middle-of-the-pack specimen, perfectly delicious but also exceedingly average.
1 large boneless, skinless chicken breast
6 tablespoons freshly squeezed lemon juice (from about 2 lemons)
2 garlic cloves, minced
¼ cup rice flour
1 large egg, beaten
½ teaspoon kosher salt
1 pinch freshly ground black pepper
¼ cup whole milk
¼ cup neutral oil, like avocado, rice bran, or peanut
1. Horizontally halve the chicken breast. Gently pound the resulting cutlets so they’re an even thickness, about ½ inch. Marinate in the lemon juice and garlic for 30 minutes to 1 hour in the fridge.
2. When you’re ready to cook, set up 2 bowls for the coating: one with the flour, and one with the egg. Whisk the salt and pepper into the flour. Separately, whisk the milk into the egg.
3. Remove chicken from marinade and let the juice and garlic drip off. First dip each piece of chicken in the flour, dusting off any extra; then into the milky egg, making sure it is coated completely; and finally into the flour again, making sure the whole piece is evenly coated.
4. In a cast-iron skillet or a Dutch oven, heat oil over medium-high heat for a few minutes, until it vigorously bubbles when you drop in a stray piece of breading. Add the breaded chicken to the pan, making sure not to crowd them (you may need to cook them in batches). Cook until the bottom is deep golden-brown, 3 to 4 minutes, then flip and let the other side brown, about 3 minutes.
5. Transfer the pieces to a wire rack or paper towel–lined plate and serve hot.
Was she perfect? This was one of my favorite cutlets, though my tasters disagreed. I loved the chew of the crust and the subtle, toasted rice flavor. My tasters felt that it didn’t represent the qualities one is looking for in a cutlet, because its exterior didn’t crisp up nearly as much as the other contenders. (Their contracts are currently under review.)
1 large boneless, skinless chicken breast
6 tablespoons freshly squeezed lemon juice (from about 2 lemons)
2 garlic cloves, minced
1 fist-sized hunk fresh bread, like sourdough or multigrain
½ teaspoon kosher salt
1 pinch freshly ground black pepper
¼ cup all-purpose flour
1 large egg, beaten
¼ cup neutral oil, like avocado, rice bran, or peanut
1. Horizontally halve the chicken breast. Gently pound the resulting cutlets so they’re an even thickness, about ½ inch. Marinate in the lemon juice and garlic for 30 minutes to 1 hour in the fridge.
2. Chop bread into chunks and place into a food processor or blender. Pulse until you reach a coarse crumb size, like cake sprinkles.
3. When you’re ready to cook, set up 3 bowls for the coating: one with the flour, one with the egg, and one with the bread crumbs. Whisk the salt and pepper into the flour.
4. Remove chicken from marinade and let the juice and garlic drip off. First dip each piece of chicken in the flour, dusting off any extra; then into the egg, making sure it is coated completely; and finally into the bread crumbs, making sure the whole piece is evenly coated. Let the coated chicken pieces rest on a plate for 15 to 30 minutes at room temp.
5. In a cast-iron skillet or a Dutch oven, heat oil over medium-high heat for a few minutes, until it vigorously bubbles when you drop in a stray piece of breading. Add the breaded chicken to the pan, making sure not to crowd them (you may need to cook them in batches). Cook until the bottom is deep golden-brown, 3 to 4 minutes, then flip and let the other side brown, about 3 minutes.
6. Transfer the pieces to a wire rack or paper towel–lined plate and serve hot.
Was she perfect? This cutlet surprised me most. I expected the fresh crumbs to get a little soggy, but they fried right up for a craggy, thick exterior. The flavor was also noteworthy. I used sliced multigrain bread, which became nutty when cooked into a crust. The fresh crumbs also seemed to keep the chicken a bit juicier, perhaps because of their downy, moist (so, so sorry) bulk.
1 large boneless, skinless chicken breast
6 tablespoons freshly squeezed lemon juice (from about 2 lemons)
2 garlic cloves, minced
¾ cup potato chips, like Plain Ridged or Cheddar–Sour Cream Ruffles
¼ cup all-purpose flour
1 large egg, beaten
½ teaspoon kosher salt
1 pinch freshly ground black pepper
¼ cup neutral oil, like avocado, rice bran, or peanut
1. Horizontally halve the chicken breast. Gently pound the resulting cutlets so they’re an even thickness, about ½ inch. Marinate in the lemon juice and garlic for 30 minutes to 1 hour in the fridge.
2. Place the chips in a zip-top plastic bag, squeeze out as much air as possible, and seal. Use a rolling pin—or a wine bottle, or anything heavy—to pound into fine crumbs.
3. When you’re ready to cook, set up 3 bowls for the coating: one with the flour, one with the egg, and one with the chip crumbs. Whisk the salt and pepper into the flour.
4. Remove chicken from marinade and let juice and garlic drip off. First dip each piece of chicken in the flour, dusting off any extra; then into the egg, making sure it is coated completely; and finally into the chip crumbs, making sure the whole piece is evenly coated. Let the coated chicken pieces rest on a plate for 15 to 30 minutes at room temp.
5. In a cast-iron skillet or a Dutch oven, heat oil over medium-high heat for a few minutes, until it vigorously bubbles when you drop in a stray piece of breading. Add the breaded chicken to the pan, making sure not to crowd them (you may need to cook them in batches). Cook until the bottom is deep golden-brown, 3 to 4 minutes, then flip and let the other side brown, about 3 minutes.
6. Transfer the pieces to a wire rack or paper towel–lined plate and serve hot.
Was she perfect? This cutlet’s crust was so thick and crisp (from being double-fried), it produced an incredibly loud eating noise, which sounded like someone housing a bag of chips solo. The potato chip crust kept the chicken super tender, perhaps from the extra fat blanketing the mostly fatless meat, like a really confusing take on a porchetta. All I know for sure is that it was so delicious, one taste-tester started unironically doing the wave after several bites. There was, however, a somewhat greasy aftertaste that might not be for everyone.
How to Properly Add the Breadcrumb Coating to Chicken
FAQ
How to make fried chicken using bread crumbs?
To make fried chicken using bread crumbs, mix together the bread crumbs, basil, and thyme in a third shallow dish. Have ready one large plate. Season the chicken with salt and pepper. Working with 1 piece of chicken at a time, dip it first in the flour, shaking off excess. Next, place the floured chicken into the beaten eggs, coating it completely.
How do you make fried chicken with cracker crumbs?
Preheat oven to 375°F. Place eggs in a small bowl and whisk until well beaten; set aside. Place cracker crumbs in a separate bowl and stir in ½ teaspoon salt, ½ teaspoon garlic and 1/8 teaspoon pepper; set aside. Season chicken with remaining salt, garlic and pepper. Dip the chicken in the eggs, then in the crumb mixture.
How do you cook chicken in breadcrumbs?
In separate shallow bowls, place the breadcrumbs seasoned to taste, beaten egg and flour. Dip the chicken in the flour, then in the beaten egg and finally coat in the breadcrumbs. Lay the chicken on a greased baking tray. (The process is easier if you keep one hand clean of egg for dipping the chicken in the flour and breadcrumbs.)
How do you make chicken fritters with bread crumbs?
Add chicken, egg, Dijon mustard, salt and spices to a mixing bowl then stir with a fork until well combined. Stir in 1/4 cup bread crumbs. Pour additional bread crumbs into a shallow bowl or pie plate (about a cup or so). Portion chicken mixture into six fritters.
Can you make fried chicken with bread crumbs without eggs?
If you don’t have eggs on hand, you can still make fried chicken with bread crumbs using a buttermilk marinade. Here’s how: Buttermilk Marinade: In a large bowl, combine 1 cup of buttermilk, 1 tablespoon of salt, and 1 teaspoon of pepper. Submerge the chicken pieces in the marinade and refrigerate for at least 4 hours or overnight.
How to make a crumb-fried chicken sandwich?
To make a crumb-fried chicken sandwich, first marinate the chicken pieces with eggs, garlic paste, refined flour, black pepper, and salt for at least an hour. Then, coat the marinated chicken pieces with breadcrumbs. Heat oil until it’s hot enough to fry the chicken. Place the chicken pieces in the oil without touching each other.
Can I use breadcrumbs instead of flour for fried chicken?
How to make fried chicken in breadcrumbs?
Start by coating the chicken in flour to absorb moisture, then dip it in beaten egg, and finish with a layer of fresh breadcrumbs that stick perfectly. Serve these golden-brown cutlets hot from the pan with your favorite sides, sliced over a salad, in sandwiches, or transformed into chicken parmesan.
Do you put chicken in breadcrumbs with egg or flour first?
Remember F.E.B. = Flour, Egg, Breadcrumbs. That’s the standard order you should follow when breading chicken.