Hey there fellow chicken enthusiasts! Today I’m gonna share with you one of the most useful DIY projects for your backyard flock – making your own chicken water bucket. As someone who’s been raising chickens for years I can tell you that providing clean, fresh water is absolutely essential for keeping your chickens healthy and happy. Plus, those store-bought waterers can be pricey, and sometimes they just don’t work as well as we’d like them to.
Did you know that a single chicken drinks about 1 pint of water daily? That adds up quickly if you’ve got a decent-sized flock! Let’s dive into how you can make an affordable, effective chicken water bucket using materials you probably already have lying around
Why You Should Make Your Own Chicken Water Bucket
Before we get into the how-to let’s talk about why a DIY chicken water bucket is such a great idea
- It’s super economical – you can make one for under $10 (sometimes even for free!)
- They’re easy to clean and maintain
- DIY buckets can hold more water than many commercial options
- They’re customizable to your specific needs
- It’s a satisfying project that directly benefits your flock
Plus, adequate hydration is crucial for egg production. If your chickens don’t have enough water, they’ll stop laying! Water also helps chickens regulate their body temperature and aids in digestion and waste elimination.
Materials You’ll Need
One of the great things about this project is how simple the materials list is. Here’s what you’ll need:
- A 5-gallon bucket with a tight-fitting lid (food-grade plastic is best)
- A drill with a 1-inch hole saw or paddle bit
- A large metal or plastic pan/tray (about 16 inches wide and 4 inches deep)
- Optional: Silicone sealant
- Optional: Stainless steel poultry nipples
Pro tip: You can often get free 5-gallon buckets from local sandwich shops, bakeries, or restaurants where they receive bulk ingredients like pickles or frosting!
Step-by-Step Guide to Making a Chicken Water Bucket
Let’s break this down into simple steps:
Method 1: The Basic Bucket-and-Pan Waterer
This is the simplest method and works based on simple physics:
-
Clean your bucket thoroughly – Wash it with soap and water to remove any residue.
-
Drill holes – Along the bottom edge of the bucket, drill two 1-inch holes directly opposite from each other. Make sure these holes are about 1-2 inches from the bottom edge.
-
Prepare your pan – Clean your pan and place it on level ground in your chicken coop or run.
-
Assemble the waterer – Place the bucket inside the pan with the drilled holes facing into the pan.
-
Fill the bucket with water – Fill through the holes or by temporarily removing the bucket.
-
Seal the lid tightly – This is super important! The water will only stop flowing when it reaches the level of the holes IF the lid creates an airtight seal. Otherwise, the water will just keep flowing and overflow your pan.
The physics behind this is cool – the air pressure inside the sealed bucket prevents the water from continuing to flow once it covers the holes. As your chickens drink the water, more water is released from the bucket to maintain the level.
Method 2: Nipple Waterer System
If you want to take things up a notch:
-
Clean your bucket thoroughly.
-
Drill holes in the bottom of the bucket for the nipples (usually 3/8″ holes).
-
Install the poultry nipples by screwing them into the holes.
-
Apply silicone sealant around the nipples to prevent leaks.
-
Let the sealant dry completely before adding water.
-
Hang the bucket in your chicken coop with the nipples facing downward.
-
Fill with water and secure the lid.
With this system, chickens drink by pecking at the nipples, which release small amounts of water. This system tends to keep the water cleaner since chickens can’t contaminate it with droppings or debris.
Tips for Maintaining Your Chicken Water Bucket
Once you’ve got your water bucket set up, here are some tips to keep it working well:
-
Clean it regularly – At least once a week, empty and scrub the bucket with hot soapy water. More frequent cleaning may be needed in hot weather.
-
Check for leaks – Periodically inspect for cracks or leaks in the bucket or around the nipples.
-
Prevent algae growth – Keep the water bucket in a shaded area to slow algae growth. You can also add a small amount of apple cider vinegar to the water.
-
Winterize your waterer – In cold weather, you might need to insulate the bucket or even use a heated base to prevent freezing.
-
Keep it elevated – This helps prevent dirt and droppings from contaminating the water.
Common Problems and Solutions
Like any DIY project, you might encounter some issues:
Problem: Water keeps flowing and overflowing the pan
Solution: Check that your lid is creating an airtight seal. You may need to replace the lid or add weatherstripping.
Problem: Algae grows quickly in the water
Solution: Move the bucket to a shadier location and clean it more frequently. Adding a tiny bit of apple cider vinegar can help.
Problem: Bucket is difficult to fill
Solution: For the pan-style waterer, you can remove it, fill through the bottom holes, then flip it back over into the pan.
Problem: Chickens aren’t drinking from the nipples
Solution: They may need to be trained. Try putting a bit of shiny metal or a drop of honey on the nipples to attract them.
Alternative Options
If DIY isn’t your thing, here are some alternatives:
- Commercial chicken waterers – Available in various sizes but tend to be more expensive.
- Pre-made nipple waterers – These can be purchased online or at farm supply stores.
- Automatic watering systems – These connect to your water supply for constant fresh water.
FAQ About Chicken Water Buckets
Q: How many chickens can drink from one 5-gallon bucket?
A: A 5-gallon bucket can provide water for about 10-15 chickens, depending on the weather and the size of your birds.
Q: Do chickens need water at night?
A: Chickens typically don’t drink at night as they sleep on their roosts until morning.
Q: How high should I place the water bucket?
A: The top of the water source should be at about the height of the chicken’s back or slightly lower.
Q: How often should I change the water?
A: Even with a good system, you should refresh the water daily and clean the bucket weekly.
Q: Can chickens drink tap water?
A: Yes, if it’s safe for you to drink, it’s generally safe for chickens too.
Our Experience
We’ve been using the bucket-and-pan waterer system for our flock of 12 Rhode Island Reds for about 3 years now. Initially, we used those aluminum foil turkey roasting pans from the dollar store, but they only lasted about 6 weeks before they started leaking. We upgraded to some heavy-duty metal pans from the hardware store for about $10 each, and they’ve been going strong ever since.
The whole setup cost us less than $20 and has been way more reliable than the store-bought waterers we tried before. Plus, with the 5-gallon capacity, we don’t have to refill it as often, which is super helpful during busy weeks.
The Bottom Line
Making your own chicken water bucket is one of those rare projects that’s both easy AND incredibly useful. With just a few materials and about 30 minutes of your time, you can create a watering system that will keep your flock hydrated for years to come.
Remember, happy chickens = more eggs, and proper hydration is a huge part of chicken happiness! So grab a bucket, drill some holes, and give your feathered friends the gift of a reliable water source.
Have you tried making your own chicken water bucket? What methods worked best for you? Drop a comment below and let us know!
Note: This article was last updated on September 11, 2025, to provide the most current information on DIY chicken waterers.

Step 1: Step 1: Drill the Saucer and Bucket
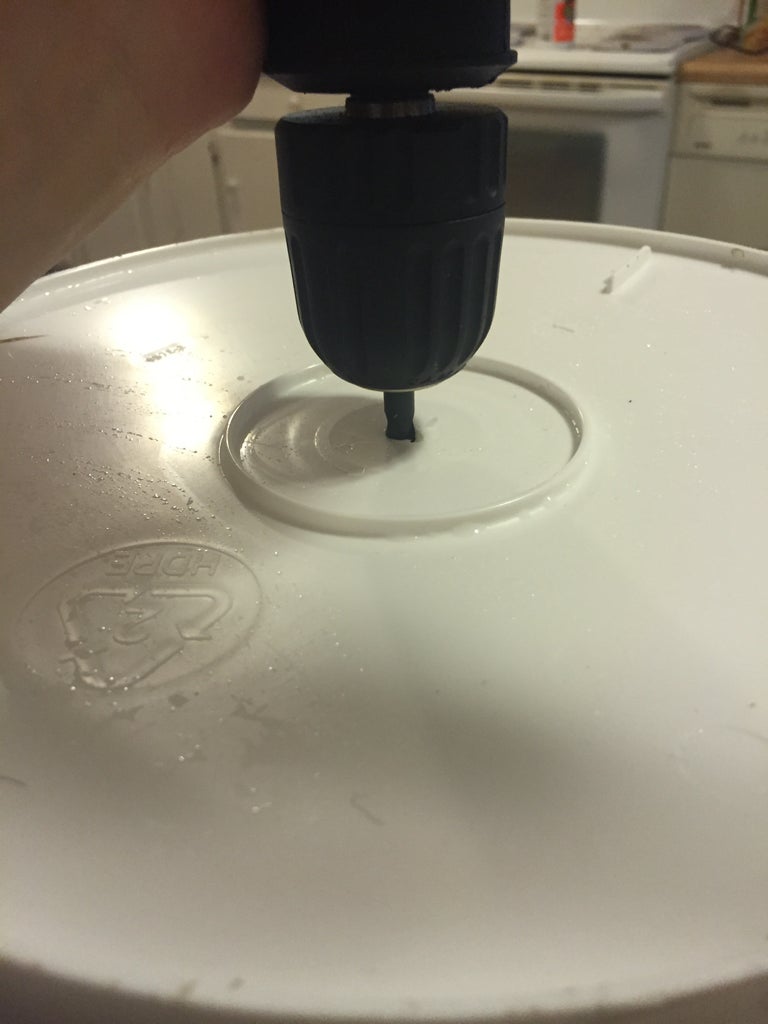
Using the 5/8″ Drillbit drill a hole in center of the Saucer and Bucket. *Hint Drilling in Reverse will yield a cleaner hole
Step 4: Step 4: the Fill Spout
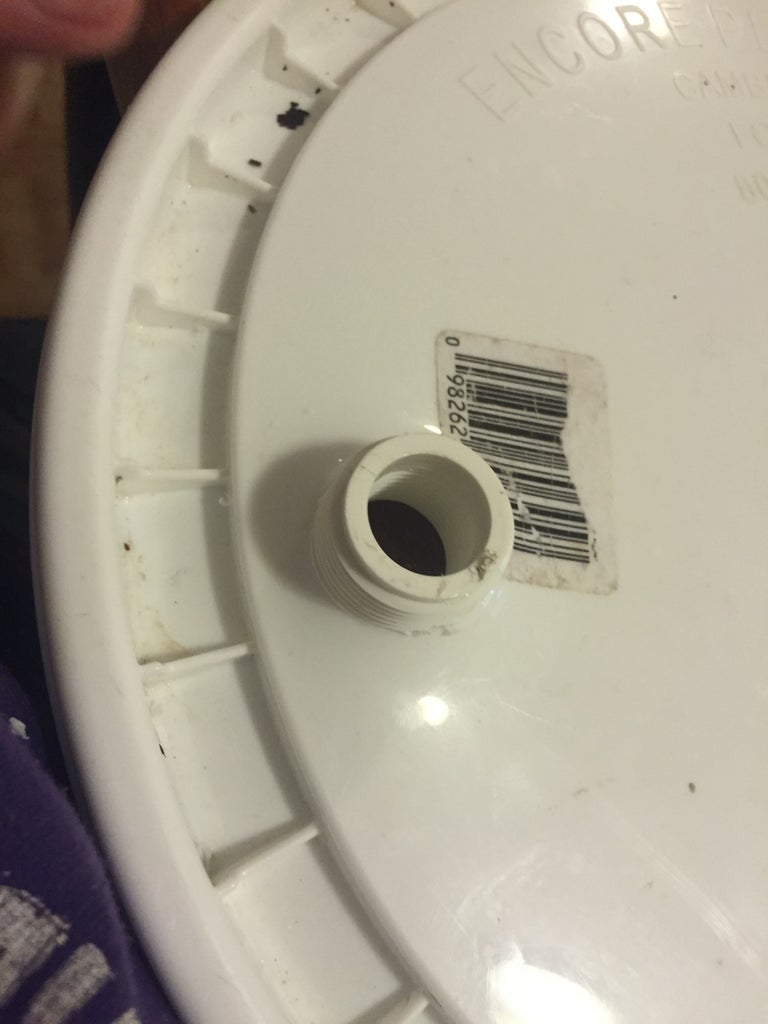
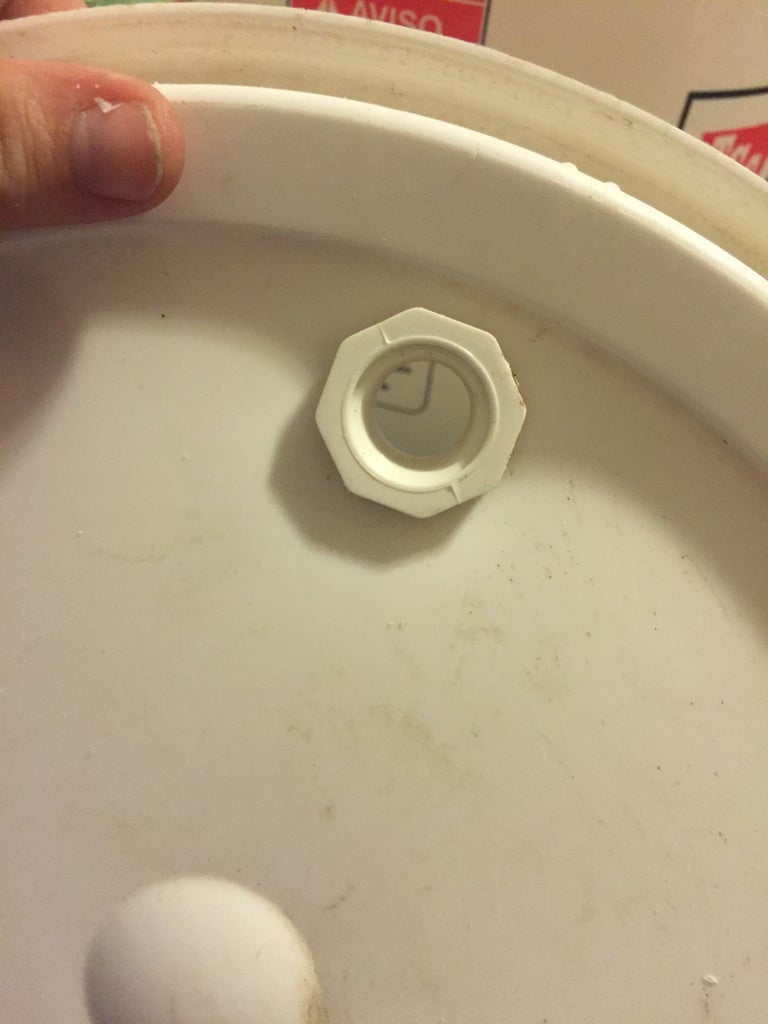

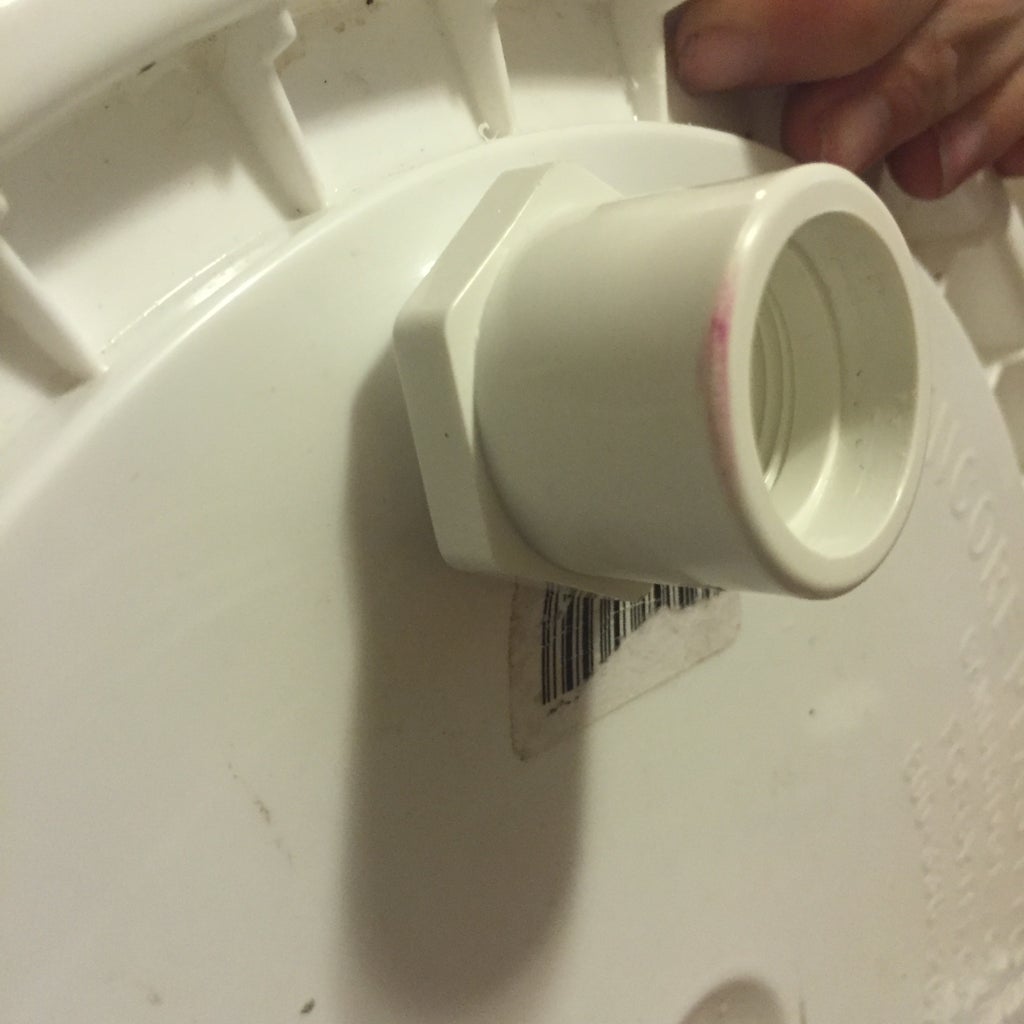
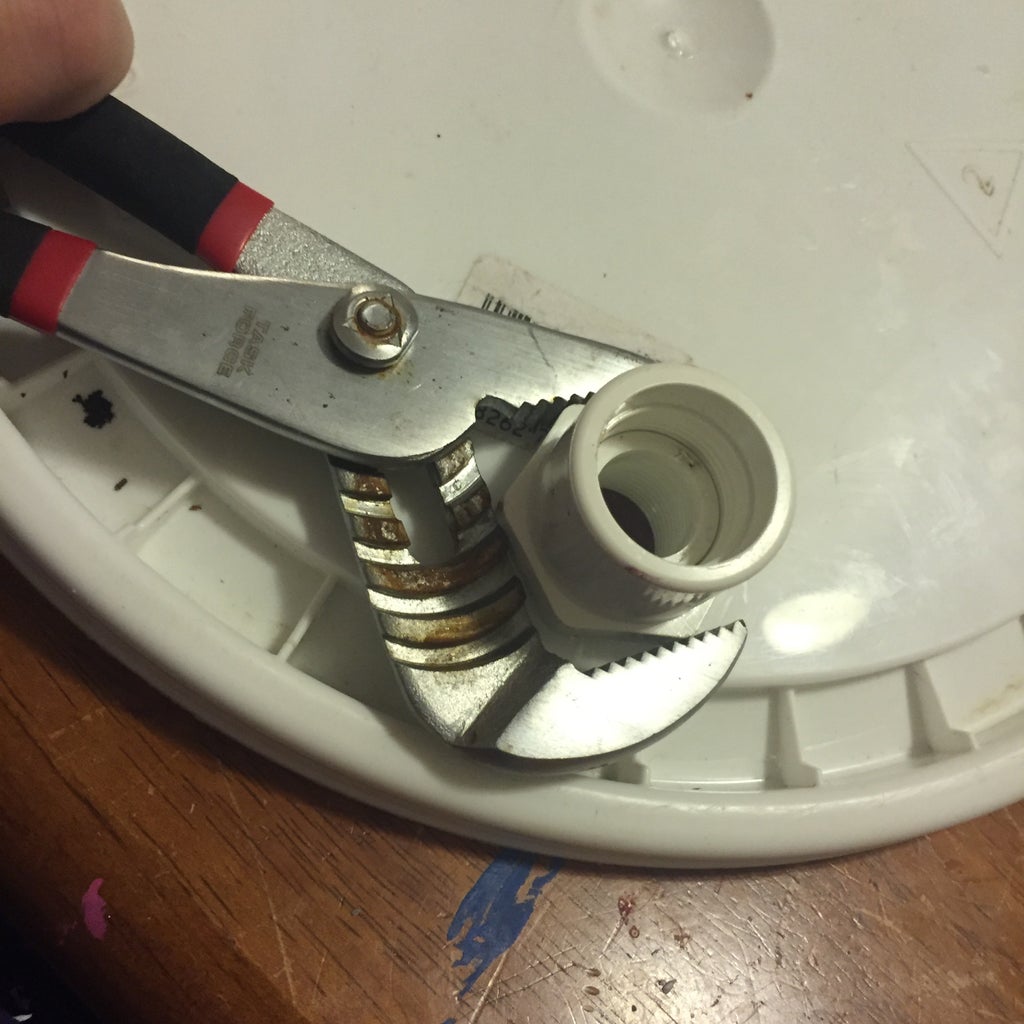
- Dill a 1″ hole in the top of the bucket, i choose to use the side as it has better support.
- Thread the 1/2″-3/”4 from the bottom of the lid
- Now Thread the 3/4″-1″ from the top, youll want to use the channel locks to really tighten this down. The two pieces need to be air tight against the bucket lid
You can Skip this Step if you can find one of these 5-Gallon Pour Lids