Ever wondered how to turn an ordinary chicken and a can of beer into something extraordinary? If you’ve never tried beer can chicken (or as some colorfully call it, “beer butt chicken”), you’re seriously missing out on one of grilling’s greatest achievements! I’ve been perfecting this technique for years, and lemme tell you – once you try this method, you might never roast a chicken any other way.
The concept is brilliantly simple prop a chicken on a half-full beer can and let it cook to juicy perfection while developing that gorgeous crispy skin we all fight over at the dinner table It’s not just delicious – it’s got that unmistakable “wow factor” that’ll impress your guests every single time
In this complete guide, I’ll walk you through everything you need to know about making amazing beer can chicken, whether you’re using a grill or an oven. So grab a cold one (you’ll need it for the recipe anyway!), and let’s dive in!
What Makes Beer Can Chicken So Special?
Before we get into the nitty-gritty details let’s talk about why this cooking method deserves a spot in your regular rotation
- Incredibly moist meat: The steam from the beer helps keep the chicken super juicy from the inside
- Crispy, flavorful skin: While the inside steams, the outside gets that perfect crackly exterior
- Even cooking: The vertical position allows for more even heat distribution
- Impressive presentation: It just looks awesome on your dinner table!
- Great for leftovers: The tender meat works beautifully in sandwiches, salads, and other meals
What You’ll Need
Let’s gather our equipment and ingredients before we get started:
Basic Equipment:
- Grill (gas or charcoal) or oven
- Instant-read meat thermometer
- Heat-resistant gloves or tongs
- Rimmed baking sheet or pan (for transferring the chicken)
Main Ingredients:
- 1 whole chicken (4-5 pounds), giblets removed
- 1 can of beer (12 ounces), room temperature
- 2-3 tablespoons olive oil or canola oil
- Your favorite seasoning rub (I’ll share mine below!)
Preparing Your Chicken
The first step to perfect beer can chicken is proper preparation Here’s what you need to do
-
Clean and dry the chicken: Remove giblets from the cavity and pat the chicken completely dry with paper towels. Don’t skip this step! Drying the skin really well is crucial for achieving crispy skin.
-
Prepare the beer can: Open a room temperature can of beer and drink (or pour out) about half of it. Some folks like to make additional holes in the top of the can using a church key-style can opener to allow more steam to escape.
-
Season generously: This is where the magic happens! You can use any rub you like, but here’s my go-to seasoning blend that never fails to impress:
My Favorite Beer Can Chicken Rub
- 2 tablespoons olive oil
- 2 teaspoons kosher salt
- 1 tablespoon cumin
- 2 teaspoons garlic powder
- 2 teaspoons onion powder
- 1 teaspoon sweet paprika
- 1 teaspoon chili powder
- 1 teaspoon dried oregano or fresh thyme
- ½ teaspoon ground black pepper
- A generous sprinkling of freshly-cracked coarse black pepper
Mix all these spices with the oil to create a paste. Then, rub this mixture ALL over the chicken – and I mean everywhere! Get it under the skin over the breasts if you can, inside the cavity, and all over the outside. Don’t be shy with it – use every last bit of that seasoning.
- Mount the chicken: This is the fun part! Carefully lower the chicken onto the half-full beer can, so it’s sitting upright with the can inside the cavity. The legs should extend forward to form a tripod with the can, creating a stable base. If the chicken seems wobbly, you can tie the legs together with kitchen twine for extra stability.
Grilling Method: Step-by-Step
Now that your chicken is prepped and mounted, let’s cook it on the grill:
-
Prepare your grill:
- For a gas grill: Preheat to medium-high heat with all burners lit initially.
- For a charcoal grill: Set up for indirect cooking by placing the coals on one side only.
-
Position the chicken:
- Place the chicken (on its beer can throne) on the indirect heat side of the grill.
- For gas grills, turn off one burner and place the chicken over this area.
- Adjust the heat to maintain a temperature between 325°F and 350°F.
-
Close the lid and walk away:
- This is key – resist the urge to peek! Let it cook undisturbed for at least 40-60 minutes.
-
After the first hour:
- You can baste with apple juice using a spray bottle for extra flavor and moisture.
- Rotate the chicken 180° to ensure even cooking.
-
Continue cooking:
- Let it go for another 30-75 minutes, depending on the size of your chicken.
- The total cooking time will be approximately 1 hour and 15 minutes to 2 hours for a 4-5 pound chicken.
-
Check for doneness:
- Use an instant-read thermometer to check the temperature at the thickest part of the thigh (without touching bone).
- The chicken is done when the breast meat reaches 160-165°F and the thigh reaches 170-175°F.
-
Optional crisp-up:
- For extra crispy skin, you can crank up the heat to high for the last 10 minutes of cooking.
Oven Method: For Those Rainy Days
Don’t have a grill or facing bad weather? No problem! You can make beer can chicken in your oven too:
- Preheat your oven to 350°F.
- Prepare the chicken exactly as you would for grilling.
- Place the chicken (on its beer can) in a large roasting pan that’s big enough to catch any drippings.
- Roast for approximately 13-15 minutes per pound (so about 1 hour and 15 minutes for a 5-pound chicken).
- Check for doneness using the same temperature guidelines as the grilling method.
Removing the Chicken (Safely!)
Here’s where things can get tricky – that beer can is HOT! Follow these steps to safely remove your chicken:
- Wear heat-resistant gloves or use tongs.
- Grab the chicken with one hand (with gloves on!) and the can with the other.
- Carefully lift and transfer the entire setup to a rimmed baking sheet.
- Let it rest for 10 minutes before attempting to remove the can.
- To remove the can, hold the chicken at a slight angle, grasp the can, gently twist it back and forth to loosen it, and carefully pull it out.
- Do this over the sink or a rimmed pan to catch any spills!
Creative Variations to Try
One of the things I love most about beer can chicken is how versatile it is. Here are some fun variations to experiment with:
Different Liquid Options:
- Various beer types: Try lager, pilsner, ale, wheat, stout – each gives a slightly different flavor profile
- Soda: Coke, Dr. Pepper, root beer, or even Fresca for a citrusy twist
- Wine: White wine can add an elegant flavor dimension
- Juice: Apple or citrus juices work wonderfully
Flavor Boosters:
- Add aromatics to the can: Drop garlic cloves, onion pieces, or herbs into the beer can
- Different rubs: BBQ, Cajun, lemon-herb, or even a curry-inspired blend
- Basting options: Try different liquids for basting, including the same beverage you’re using in the can
Technique Tweaks:
- Higher temperature cooking: Some folks prefer roasting at 325-350°F for a shorter time
- Specialty holders: If you’re concerned about cooking with aluminum cans, you can purchase beer can chicken holders that serve the same purpose
- Different sized birds: Use smaller cans for Cornish hens or larger cans for bigger chickens
Troubleshooting Tips
Even with such a straightforward method, things can occasionally go wrong. Here are solutions to common issues:
Problem: Chicken keeps falling over
Solution: Make sure the legs are positioned forward to form a stable tripod with the can. You can also purchase a beer can chicken holder for extra stability.
Problem: Skin isn’t crispy enough
Solution: Make sure you dried the chicken thoroughly before seasoning. Also, try increasing the heat for the last 10 minutes of cooking.
Problem: Chicken is taking too long to cook
Solution: Your grill or oven temperature might be too low. Adjust accordingly and make sure the lid stays closed as much as possible to maintain heat.
Problem: Chicken is cooking unevenly
Solution: Make sure to rotate the chicken halfway through cooking. Also check that your heat source is evenly distributed.
What to Serve with Beer Can Chicken
The beauty of beer can chicken is that it pairs well with almost anything! Here are some of my favorite sides:
- Coleslaw (the tangy crunch complements the juicy chicken perfectly)
- Grilled vegetables (throw them on the grill while the chicken is cooking)
- Cornbread muffins (perfect for soaking up those flavorful juices)
- Potato salad (try a German-style version for something different)
- Baked beans (especially if you use the bean can for your chicken!)
- Grilled corn on the cob
Delicious Ways to Use Leftovers
If you’re lucky enough to have leftovers (we rarely do at my house!), here are some tasty ways to use them:
- Chicken sandwiches with mayo and lettuce
- Chicken salad with curry or Asian-inspired flavors
- Tacos or quesadillas with cheese and your favorite toppings
- Soups and chilis (the smoky flavor adds great depth)
- Pasta dishes like chicken alfredo or chicken pesto pasta
Is It Really the Beer That Makes the Difference?
There’s some debate about whether the beer actually flavors the chicken or if it’s just the steam that matters. In my experience, the beer doesn’t impart a strong flavor to the meat itself, but it does create steam that helps keep the chicken moist. The vertical roasting position and indirect heat are probably the bigger factors in the chicken’s success.
That said, adding aromatics to the beer or using different liquids can definitely influence the subtle flavors of the finished dish. It’s worth experimenting to find your favorite combination!
Safety Considerations
A few important safety notes to keep in mind:
- Always use heat-resistant gloves when handling the hot chicken and beer can
- Be extremely careful when removing the chicken from the grill – that beer can is VERY hot
- Make sure your chicken reaches the proper internal temperature (165°F in the breast)
- If you’re concerned about cooking with aluminum cans, consider purchasing a special beer can chicken holder
My Final Tips for Beer Can Chicken Success
After years of making this dish, here are my top tips for ensuring perfect results every time:
-
Dry that chicken thoroughly – This is the KEY to crispy skin. Use paper towels to pat every inch of the chicken dry.
-
Don’t skimp on the seasoning – Be generous with your rub and make sure to get it everywhere, including under the skin when possible.
-
Keep the lid closed – Every time you peek, you’re losing heat and extending the cooking time.
-
Use a meat thermometer – Don’t guess about doneness. A good instant-read thermometer is your best friend.
-
Let it rest – Those 10 minutes of resting time are crucial for the juices to redistribute throughout the meat.
So there you have it – everything you need to know about making incredible beer can chicken! Whether you’re a grilling novice or a seasoned pro, this method is guaranteed to produce a show-stopping chicken that’s juicy on the inside, crispy on the outside, and packed with flavor all the way through.
Next time you’re looking to impress your family or guests, skip the complicated recipes and reach for a can of beer and a chicken. Sometimes the simplest methods really do yield the most spectacular results!
Have you tried beer can chicken before? What’s your favorite seasoning combo? Drop me a comment below – I’d love to hear how yours turned out!
Select The Smoke Wood
Use 3 chunks of apple smoke wood. Each chunk should be small, for example 3″ x 2″ x 2″ or similar. Cherry, oak, or other mild fruit wood can be used if apple is not available.
There is no need to soak the wood or remove the bark before use.
Fire-up the cooker using the Minion Method. Fill the charcoal chamber 1/2 full with unlit Kingsford Charcoal Briquets. Light 20-40 briquettes using a Weber chimney starter and spread them over the unlit charcoal.
Put the water pan in the cooker and fill it with cold tap water to help with temperature control.
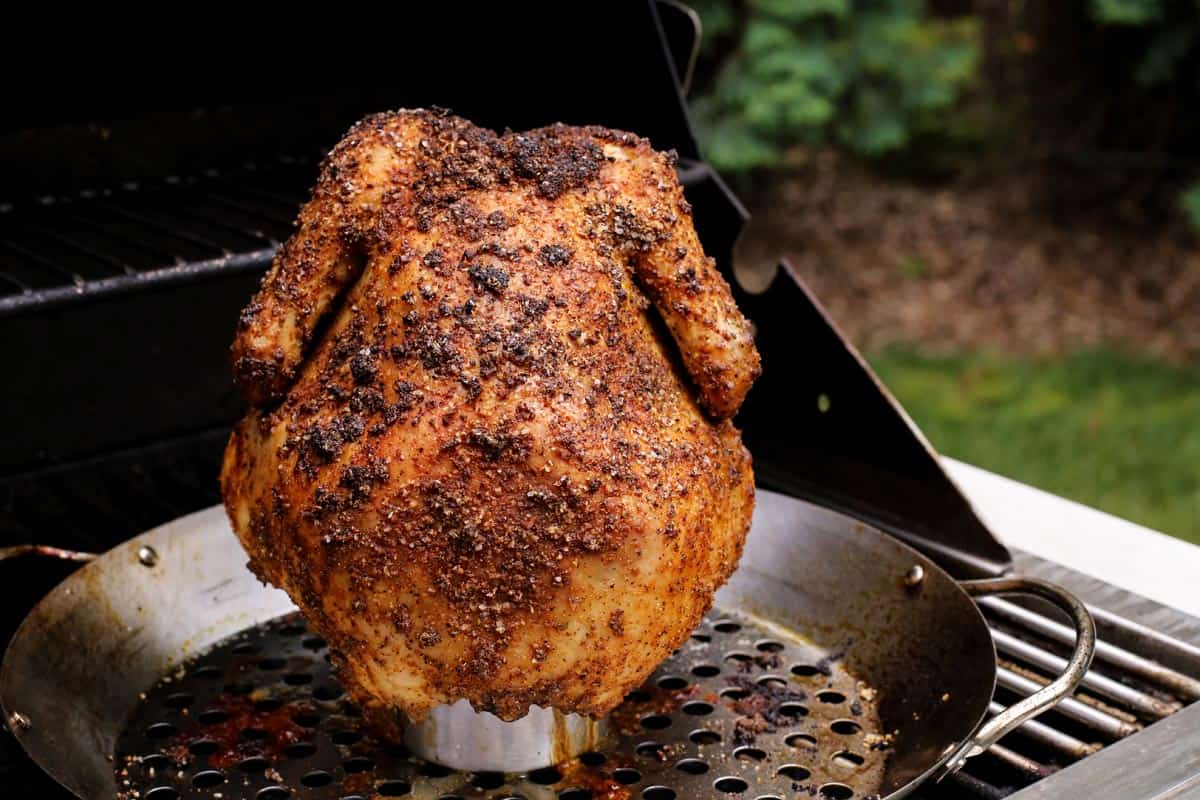
Assemble the cooker, add the smoke wood chunks, and put the chickens back-to-back on the top cooking grate.
Set the 3 bottom vents to 100% open. Open the top vent fully and leave it that way throughout the entire cook.
When the cooker reaches about 225°F, set the 3 bottom vents to 25% open so the cooker settles in at 225-250°F measured at the lid. Adjust the 3 bottom vents as necessary to maintain this temperature range throughout the cooking session.
Cook for 2 hours, then baste the chickens with apple juice using a spray bottle. To make sure the chickens are cooking evenly, rotate them by carefully turning the grate 180°.
Cook for another hour, then baste again with apple juice.
Cook for another 30 minutes to 1 hour, then check the internal meat temperature using an instant-read thermometer. The chicken is done when the breast meat registers 160-165°F and the thigh registers 170-175°F.
There should be no need to add water to the pan during the cooking session.
Here’s how the cooker temperatures and vent settings went during my cook:
| Time | Lid Temp | Vent 1 % | Vent 2 % | Vent 3 % |
| 1:00 pm | – | 100 | 100 | 100 |
| 1:15 pm | 220 | 25 | 25 | 25 |
| 1:30 pm | 215 | 25 | 25 | 25 |
| 1:45 pm | 220 | 25 | 25 | 25 |
| 2:00 pm | 229 | 25 | 25 | 25 |
| 2:15 pm | 236 | 15 | 15 | 15 |
| 2:30 pm | 235 | 15 | 15 | 15 |
| 3:00 pm (r)(b) | 235 | 15 | 15 | 15 |
| 3:30 pm | 230 | 15 | 15 | 15 |
| 4:00 pm (b) | 235 | 15 | 15 | 15 |
| 4:30 pm | 242 | 10 | 10 | 10 |
| 5:00 pm | 232 | 10 | 10 | 10 |
(r) rotated meat (b) basted with premium apple juice
Note that the vent percentages represent the way I set the vents at the time indicated.
Using heat-resistant gloves, remove the chickens carefully from the cooker and let cool for 5 minutes before serving.
Since the beer in the can will be very hot, make sure to support the can as you lift the chicken off the grate. You can do this with your gloved hand, or you can grasp the can with tongs to support the chicken from below while using your other gloved hand to steady the chicken.
To remove the can, hold the chicken at a slight angle in the palm of one gloved hand, grasp the can with your other gloved hand, twist the can back and forth to loosen it, and pull it out carefully. Do this over the sink or a rimmed baking sheet pan to catch any spills.
Prepare The Beer Cans And Apply The Rub
Wash 2 12-ounce beer cans with soapy water and rinse well. Open the cans and drink half the beer in each. Use a church key-style can opener to make two additional holes in the lid.
Now prepare a batch of the rub.
Wild Willy’s Number One-derful Rub
- 6 Tablespoons paprika
- 2 Tablespoons ground black pepper
- 2 Tablespoons salt
- 2 Tablespoons sugar
- 1 Tablespoon chili powder
- 1 Tablespoon granulated garlic powder
- 1 Tablespoon onion powder
- 1 teaspoon cayenne
Combine all ingredients and mix thoroughly.
Sprinkle the rub liberally inside the body cavity and the neck cavity, then all over the outside of the chicken. If you want, sprinkle some rub under the skin over the breasts and work it around with your fingers.
Place the chicken over the beer can, making sure it’s firmly seated inside the cavity as far as possible. Position the legs forward to form a tripod, keeping the chicken balanced.
Let the chickens sit at room temperature as you fire-up your Weber Bullet.
How to: Make Beer Can Chicken
FAQ
How long do you cook a beer canned chicken for?
Close the lid and cook chicken until no longer pink at the bone and the juices run clear, about 1 hour 15 minutes. An instant-read thermometer inserted into the thickest part of the thigh, near the bone should read 165 degrees F (74 degrees C).
How do you cook beer canned chicken in the oven?
Oven Instructions: You can also roast a chicken this way in the oven. Just place it as directed on an open half-filled can of beer, sitting up, in a roasting pan on the lower rack of your oven. Roast at 350°F until done (about an hour fifteen to an hour and a half for a 4-pound chicken).
What temperature do you cook a beer can chicken on the grill?
What does beer do when cooking chicken?
The beer can also adds moisture and flavor to the chicken, while the steam created by the beer helps to keep the meat moist and tender.Apr 21, 2023