Have you ever stared at a recipe that calls for “browning chicken” and thought, “What the heck does that even mean?” Trust me, you’re not alone! When I first started cooking, I’d end up with pale, soggy chicken pieces swimming in their own juices instead of that gorgeous golden-brown crust we all drool over.
After years of kitchen mishaps (and a few smoke detector incidents), I’ve finally mastered the art of browning chicken. Today, I’m sharing everything I’ve learned so you can get that perfect, flavorful crust every single time.
Why Browning Chicken Matters (It’s Science, Y’all!)
Before we dive into the how-to let’s chat about why browning is worth the extra effort
- Better Flavor: Browning creates complex, savory flavors that simply don’t exist in pale chicken
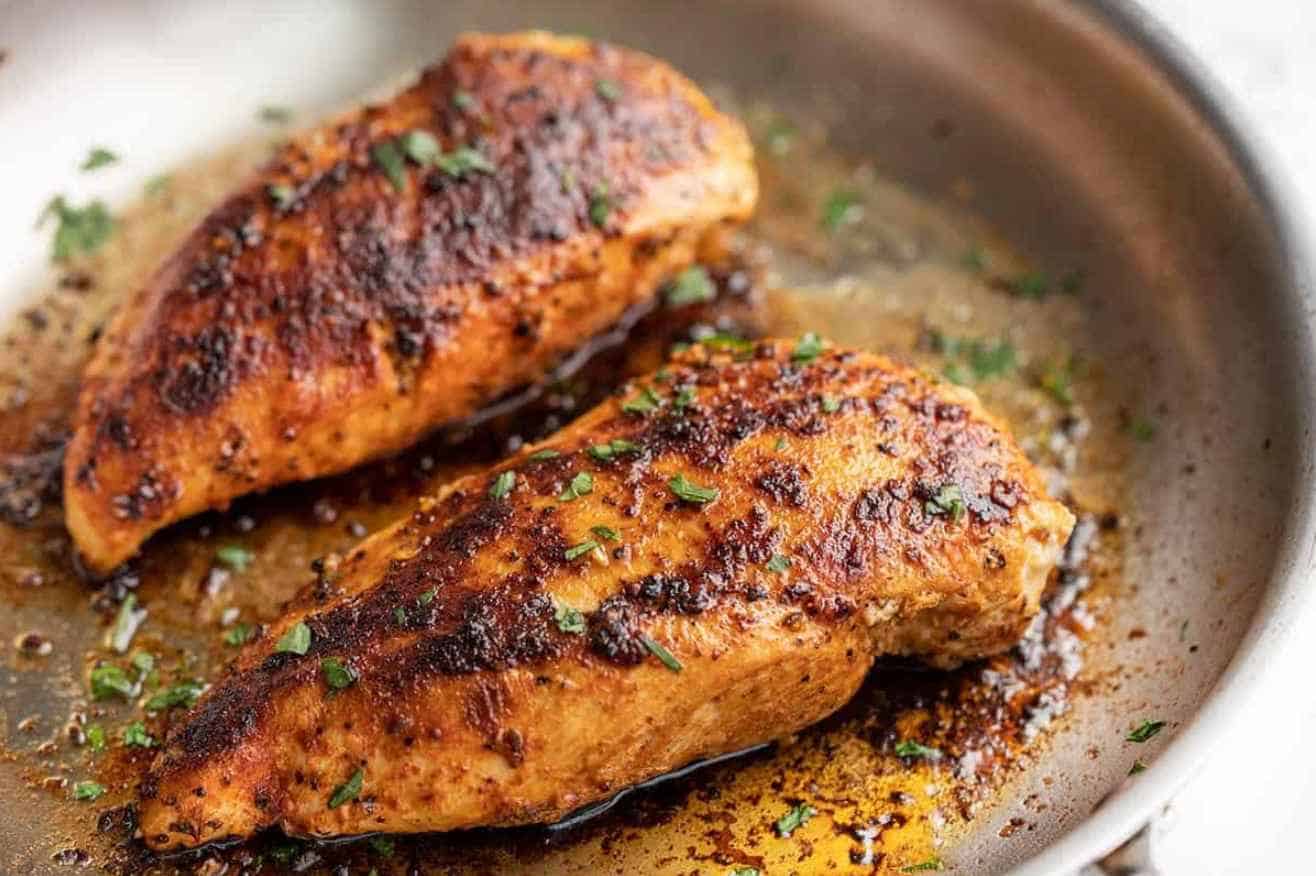
- Improved Texture: A properly browned exterior provides delightful contrast to juicy meat
- Enhanced Appearance: Golden-brown chicken just looks more appetizing than its pale counterpart
- Locks in Juices: Despite what some may claim, proper browning helps keep chicken moist
The magic behind browning is something called the Maillard reaction – a chemical process that happens when proteins and sugars in the chicken are exposed to heat (typically between 280°F and 330°F). This reaction creates hundreds of new flavor compounds and that mouthwatering aroma that makes your stomach growl!
Common Browning Mistakes (That I’ve Definitely Made)
Before we get to the techniques. let’s address some common pitfalls
- Overcrowding the pan – This is the #1 reason for soggy chicken! When pieces touch, they steam instead of brown
- Too much moisture – Wet chicken = steamed chicken
- Improper heat – Too low, and it won’t brown; too high, and it’ll burn
- Impatience – Constantly flipping or moving the chicken prevents browning
- Using the wrong cookware – Some pans just don’t conduct heat well enough
Technique #1: Pan-Searing (The Classic Method)
This is my go-to method for smaller chicken pieces or when I’m in a hurry.
What you’ll need:
- A heavy-bottomed skillet (cast iron or carbon steel works best)
- High-smoke-point oil (avocado, canola, or rice bran)
- Paper towels
- Tongs
- Your favorite seasonings
Step-by-step:
-
Prep your chicken – Pat it COMPLETELY dry with paper towels. This is non-negotiable! Moisture is the enemy of browning.
-
Season generously – Salt, pepper, and whatever spices you like. Don’t be shy!
-
Heat your pan properly – Medium-high heat is ideal. The pan should be hot but not smoking. If using induction, don’t use the “boost” setting—it’s too hot!
-
Add oil – Just enough to coat the bottom of the pan (2-3 tablespoons). Let it heat for about 10-15 seconds until shimmering.
-
Add chicken in batches – Here’s where most people mess up! You need space between pieces—at least a quarter of the pan should be visible.
-
Be patient – This is hard for me, but resist the urge to move the chicken! Let it cook undisturbed for 2-3 minutes until it releases easily from the pan.
-
Flip once – Turn each piece over when nicely browned on one side. No need to brown all sides of small pieces.
Pro tip: If cooking boneless chicken breasts, consider cutting them in half horizontally to create thinner pieces that brown more evenly!
Technique #2: Oven Roasting (For Hands-Off Browning)
When I’ve got other dishes to prep, this is my favorite method. The oven does all the work!
What you’ll need:
- Roasting pan with rack
- Olive oil or melted butter
- Seasonings
- Meat thermometer
Step-by-step:
-
Preheat your oven – 400°F to 450°F is the sweet spot for browning.
-
Prep the chicken – Again, pat it dry! For whole birds, I like to air-dry in the refrigerator, uncovered, for an hour or overnight.
-
Season and oil – Brush with olive oil or melted butter after seasoning.
-
Elevate the chicken – Place on a roasting rack inside your pan. This allows air to circulate underneath for even browning.
-
Roast at high heat – Start with high heat (425°F) for the first 20 minutes to develop color, then reduce to 375°F to finish cooking without burning.
-
Optional: Broil finish – For extra crispy skin, broil for the last 2-3 minutes (watch carefully!).
-
Rest before serving – Let the chicken rest for 10-15 minutes to redistribute juices.
For chicken pieces, roast for about 35-40 minutes, depending on size. Whole chickens will take longer (about 1 hour to 1 hour 15 minutes).
Technique #3: Grilling (Perfect for Summer)
When the weather’s nice, I take my browning game outdoors!
Step-by-step:
-
Prep your grill – Preheat to medium-high and oil the grates.
-
Season chicken – After patting dry, of course!
-
Place skin-side down first – This helps render fat and crisp the skin.
-
Grill undisturbed – About 15 minutes on the first side for bone-in pieces.
-
Flip once – Then cook another 15 minutes or until internal temperature reaches 165°F.
-
Add sauce late – If using barbecue sauce, brush it on during the last 5 minutes to prevent burning.
Technique #4: Browning Cut-Up Chicken Breast (The Tricky One)
Chicken breast pieces are the most challenging to brown because they’re:
- Low in fat
- High in moisture
- Easy to overcook
Here’s my approach for small breast pieces:
-
Work in very small batches – I’m talking 1/3 of what you think you can fit in the pan!
-
Higher heat, shorter time – Use medium-high heat and work quickly.
-
Consider slightly larger pieces – Tiny cubes release too much moisture too quickly.
-
Accept some compromise – With small pieces, you might need to choose between perfect browning and juicy meat. I usually opt for slightly less browning to keep the meat tender.
-
Try browning larger pieces first – Brown chicken breasts whole, then cut them up after browning.
Technique #5: The Flour Dredge Trick (My Secret Weapon)
When all else fails, this method gives great browning and bonus: it helps thicken your sauce!
-
Pat chicken dry (sensing a theme here?)
-
Season flour – Mix flour with salt, pepper, and spices
-
Lightly dredge chicken – Just a thin coating
-
Shake off excess – Too much flour will burn
-
Proceed with pan-searing – The flour helps develop a beautiful crust
Troubleshooting: When Browning Goes Wrong
Even now, I sometimes run into issues. Here’s how I fix them:
-
Chicken sticking to the pan? Your pan wasn’t hot enough before adding the chicken. Next time, heat it longer.
-
Burning on the outside, raw inside? Your heat is too high. Lower it and finish cooking in the oven.
-
Lots of liquid in the pan? You’ve likely overcrowded it. Remove some pieces, pour off the liquid, and continue with fewer pieces.
-
No browning despite following steps? Your chicken might have been “plumped” with salt water (common in supermarket chicken). Try a different brand or source.
The Appropriate Browning Method for Different Dishes
Not all chicken dishes need the same browning approach:
| Dish Type | Best Browning Method | Notes |
|---|---|---|
| Stir-fries | High-heat pan-sear | Small pieces, work in batches |
| Stews/Curries | Initial sear, then simmer | Don’t need to brown all sides |
| Roast Chicken | Oven method | Air-drying overnight helps |
| Fried Chicken | Flour dredge + pan-fry | Double dredging creates extra crispiness |
| Chicken Soup | Can skip browning | Though a light browning adds flavor |
When Can You Skip Browning?
Let’s be real – sometimes I’m just too tired or hungry to bother with perfect browning. You can skip this step when:
- Making soups where chicken will be shredded
- Using bone-in, skin-on cuts that are already flavorful
- Cooking ground chicken for certain recipes
- When the sauce is heavily seasoned and will provide plenty of flavor
Final Thoughts: Practice Makes Perfect
Browning chicken is partly science and partly art. My first attempts were disasters (my family still talks about “the great smoke-out of 2018”), but with practice, you’ll develop an intuition for it.
Remember that different cuts brown differently – skin-on pieces brown more easily than skinless, and thighs brown better than breasts due to higher fat content.
The most important takeaways:
- DRY your chicken thoroughly
- Don’t overcrowd the pan
- Be patient and resist constant flipping
- Use the right heat level
- Choose appropriate cookware
Now get out there and make some gorgeously browned chicken! Your taste buds (and dinner guests) will thank you.
What’s your favorite chicken dish that requires browning? Drop a comment below – I’d love to hear about your successes (or hilarious failures)!
Tips for Browning Chicken
- Trim the fat off of the chicken and wash it in cold water.
- Pat the chicken dry and season it.
- Heat a pan on medium high and add oil or butter.
- Put the chicken in the pan and leave space between each piece.
- Cook the chicken 8-10 minutes without moving it.
- Flip the chicken and cook for another 8-10 minutes.
- Remove the chicken and wait 10 minutes until cutting into it.
Expert Q&ASearch
- Question Why does my chicken not get brown? Ed Kuoha Chef Ed Kuoha is a Chef and the Owner of Kuoha Culinary based in Aiea, Hawaii. He has more than 20 years of experience in various culinary kitchens and settings such as Morimoto Waikiki, where he received hands-on training from Iron Chef Morimoto. Chef Ed specializes in small catering events and private chef requests. He holds an Associate’s degree from The Culinary Institute of the Pacific at Kapiolani Community College. Ed Kuoha Chef Expert Answer Youre probably not heating your pan properly, as youll need high heat and oil to caramelize the chicken and give it that nice brown look.
- Question When cooking a whole chicken in the oven, my recipe says “uncover and brown for 15 minutes.” Is all I have to do uncover it and cook it for another 15 minutes?
 Maddie Top Answerer Yes. If the chicken isnt brown after 15 minutes, bake a little longer in 3-to-5-minute increments until brown.
Ask a Question 200 characters left Include your email address to get a message when this question is answered.
Browning Chicken or Meat
FAQ
How do you get chicken to brown?
To brown chicken, first pat the chicken dry and season it well, then heat oil in a heavy skillet over medium-high heat until shimmering. Place chicken in the hot pan in a single layer, ensuring the pan isn’t overcrowded, and cook undisturbed for several minutes until it releases easily and is golden brown on the first side. Flip and brown the other side until desired color is achieved, then continue with the recipe.
Is it better to brown chicken in butter or oil?
The issue with using butter on the outside is that it doesn’t have a high smoke point compared to many oils, so you risk burning the butter and failing to brown the chicken skin. Using oil also makes it easier to coat the chicken so it’s evenly browned from breast to wing.