Are you tired of losing your precious chickens to predators? Do you want your flock to enjoy the benefits of free-ranging while staying protected? An A-frame chicken tractor might be exactly what you need! As a chicken owner who’s experienced the heartbreak of losing hens to hawks and other predators, I’ve spent countless hours researching and building the perfect solution.
What Is an A-Frame Chicken Tractor?
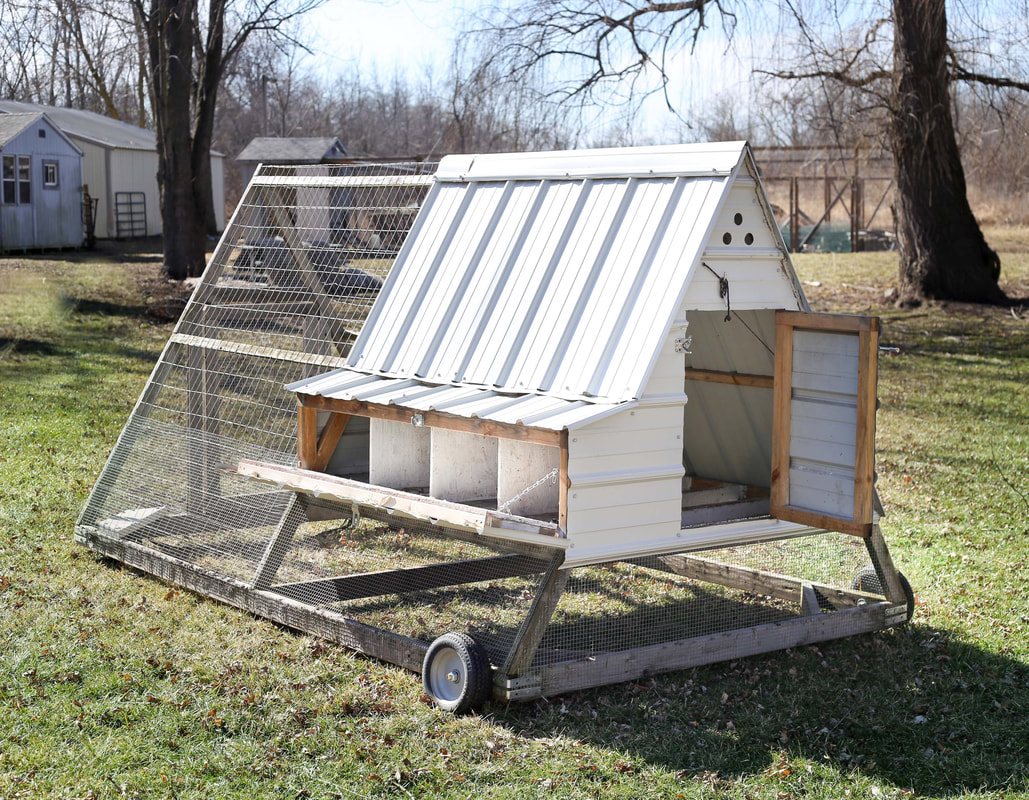
An A-frame chicken tractor is a portable chicken coop with a distinctive triangular shape that allows you to move your chickens to fresh grass regularly The “A” design provides roosting space at the top while creating a protected run area underneath, The mobility aspect means your chickens get fresh bugs and grass while fertilizing different parts of your yard – a win-win!
I built my first A-frame chicken tractor after losing four hens and a rooster to a nasty hawk That feeling of guilt was unbearable, and I knew I needed a solution that balanced protection with the health benefits of pasture access
Benefits of an A-Frame Chicken Tractor
Before we dive into the building process, let’s look at why A-frame chicken tractors are so popular:
- Predator Protection: When properly built, these coops keep predators out while keeping your chickens safe
- Fresh Pasture Access: Chickens get new grass, bugs, and worms daily
- Natural Fertilization: Your lawn gets fertilized as chickens leave droppings behind
- No Cleaning: Moving the tractor daily eliminates the need to clean out the coop
- Quick to Build: Most designs can be completed in a weekend
- Budget-Friendly: Can be built for $100-$650 depending on size and materials
- Permit-Free: In many areas, mobile structures don’t require building permits
Common A-Frame Chicken Tractor Designs
After reviewing dozens of designs I’ve found these three sizes work best for different flock needs
- Mini A-Frame: Houses 4-6 hens, dimensions around 6’W x 8’L x 5.5’H
- Medium A-Frame: Accommodates 6-10 hens, dimensions approximately 6’W x 10’L x 5.5’H
- Mega A-Frame: Perfect for 15-20 hens, dimensions roughly 8’W x 10’L x 7’H
Materials Needed for a Basic A-Frame Chicken Tractor
For a simple, budget-friendly A-frame that houses 2-4 chickens, you’ll need:
- 14 – 2x4s, 8 feet long
- 1 – sheet 3/4″ T1-11 plywood siding
- 6 T-Strap hinges
- 30 feet of 30″ wide chicken wire (or hardware cloth for better predator protection)
- 2-3/4″ exterior self-tapping deck screws
- 1/2″ exterior staples for chicken wire
- Scrap plywood for floor of upstairs coop and ladder
- Optional 1x2s for trim
- Wheels (if you want to make it easier to move)
Tools You’ll Need
- Circular saw or table saw
- Miter saw
- Jigsaw
- Drill with various bits
- Stapler
- Tin snips (if using metal)
- Screwdrivers
- Pliers
- Tape measure
- Square
- Pencil and marker
Step-by-Step Building Process
Step 1: Create the A-Frame Sides
The trickiest part is cutting the 60-degree angles for the top of your A-frame rafters. If your miter saw doesn’t cut 60-degree angles, mark them with a square and cut with a circular saw.
For each side, you’ll need:
- 3 – 2x4s @ 64″ with 60-degree angle on top end and 30-degree angle on bottom end
- 3 – 2x4s @ 96″ for side supports
Leave a gap of about 24-25″ for access to the upstairs coop. Cover the bottom with chicken wire before assembling – trust me, it’s WAY easier to do this now than when you’re awkwardly reaching inside the coop later!
Step 2: Connect the Two A-Frame Sides
Once both sides are built, connect them at the base with support boards. Then attach the tops with countersunk screws.
Step 3: Add Floor Braces for the Upper Coop
Add 2×4 floor braces to create a platform for the upstairs roosting area. These braces add significant strength to the structure. Attach from the outside using 2-3/4″ exterior screws.
Step 4: Add Doors
For easier access, I recommend splitting the doors into sections so you can access different parts of the coop independently. Trim the doors with 1x3s for added strength and to accommodate hinges.
Step 5: Add a Nesting Box and Roost
This is where many plans fall short. Chickens need a place to lay eggs and a bar to roost on at night. Create a simple nesting box at one end of the upper section and add a roosting bar across the top section.
Step 6: Add Wheels for Mobility
While not included in all plans, adding wheels makes moving your tractor much easier. You can install them on one end so you can lift and roll the tractor like a wheelbarrow.
Step 7: Finishing Touches
Fill holes with wood filler, sand in the direction of the wood grain with 120-grit sandpaper, and apply a non-toxic finish to protect the wood.
My Experience: Lessons Learned the Hard Way
When I built my first A-frame chicken tractor, I made several mistakes that you can avoid:
-
Using chicken wire instead of hardware cloth: Raccoons can tear right through chicken wire! Hardware cloth is more expensive but worth it for predator protection.
-
Not adding a solid floor to the roosting area: Predators can dig under the tractor at night. Adding a solid floor to the roosting area gives extra protection.
-
Making it too heavy: My first design was too heavy to move easily. Consider using lighter materials for the upper portions.
-
No exterior egg access: Reaching inside for eggs is annoying. Add an exterior egg door for convenient collection.
-
Not adding a pulley system for the ramp: A pulley system allows you to close the ramp at night, keeping hens secure, and lets you move the tractor in the morning before releasing the hens.
Pros and Cons of A-Frame Chicken Tractors
Pros
- Easy and quick to build
- Affordable (most cost $100-$650 depending on size)
- Portable – gives chickens fresh pasture daily
- No coop cleaning needed
- Fertilizes your lawn naturally
- Usually doesn’t require building permits
Cons
- Limited roosting space
- Can be challenging to add proper nesting boxes
- Ventilation can be tricky to get right
- Potential predator access underneath if not properly designed
- Risk of injuring chickens when moving if not careful
Winterizing Your A-Frame Chicken Tractor
If you live in a cold climate like I do, you’ll need to consider winterizing options:
-
For mild winters (above 20°F): The tractor works as-is with added straw bedding
-
For colder climates:
- Add mylar reflective insulation to the roosting area
- Close off the roosting area with plywood and add thick bedding
- Consider a safe chicken heating mat
- Cover the run area with clear polycarbonate sheets to create a greenhouse effect
- Add thick straw to the ground for insulation
-
Extreme cold option: Move the entire tractor into a garage or barn for winter
Customer Testimonials
Don’t just take my word for it! Here’s what some of my fellow chicken owners have said about their A-frame tractors:
“After losing chickens to a hawk, we built this A-frame tractor and haven’t lost a single hen in three years!” – Michael S.
“I’m a 5’4″ woman and can move this tractor by myself with no problem thanks to the wheel design. Our hens have never been happier or safer!” – Annemieke
“The egg yolks are a deep orange now that our chickens get fresh grass daily. Our customers couldn’t be more pleased!” – Summer
Common Questions About A-Frame Chicken Tractors
Q: How many chickens can an A-frame chicken tractor hold?
A: Depending on the size, anywhere from 2-20 chickens. A small A-frame works for 2-4 chickens, while larger designs can hold up to 20.
Q: Do I need to worry about predators digging under the tractor?
A: Moving the tractor daily helps prevent this, but for extra security, you can add hardware cloth along the bottom edge or ensure the roosting area has a solid floor.
Q: Can I install an automatic door opener?
A: Yes! Many chicken owners successfully use products like Chicken Guard Extreme for their A-frame tractors.
Q: How do I move the tractor?
A: Most designs include wheels on one end so you can lift and roll it like a wheelbarrow. For longer distances, you can add a tow bar to pull it with an ATV or garden tractor.
Final Thoughts
Building an A-frame chicken tractor was one of the best decisions I’ve made for my flock. Not only do my chickens enjoy fresh pasture daily, but I sleep better knowing they’re safe from predators. The natural fertilization of my yard is just an added bonus!
Whether you’re a beginner or experienced builder, an A-frame chicken tractor offers an excellent solution for keeping chickens safe while allowing them the benefits of pasture access. The sense of relief I feel knowing my chickens are protected is truly priceless.
Have you built an A-frame chicken tractor? I’d love to hear about your experience in the comments below!
Note: Material costs and build times are estimates based on current prices as of 2025. Your actual costs may vary depending on your location and material choices.
Why use a chicken tractor over a chicken coop?
If chickens are left in one area, such as a coop and run scenario, they will quickly peck up all of the grass and leave a dusty barren area behind. A tractor allows birds to get fresh pasture daily, while never leaving them in one area very long. It is also great for yard and garden fertilizer, as they leave their manure behind. Since they are moved daily, no area ever gets too much fertilizer.
We used this same method for our five backyard chickens when we lived on a quarter acre in town.
You can see more on our small chicken tractor on our tiny homestead in this post: 7 Essentials for a Backyard Chicken Coop
We were able to raise five chickens on only a quarter acre, with plenty of access to bugs and grass.
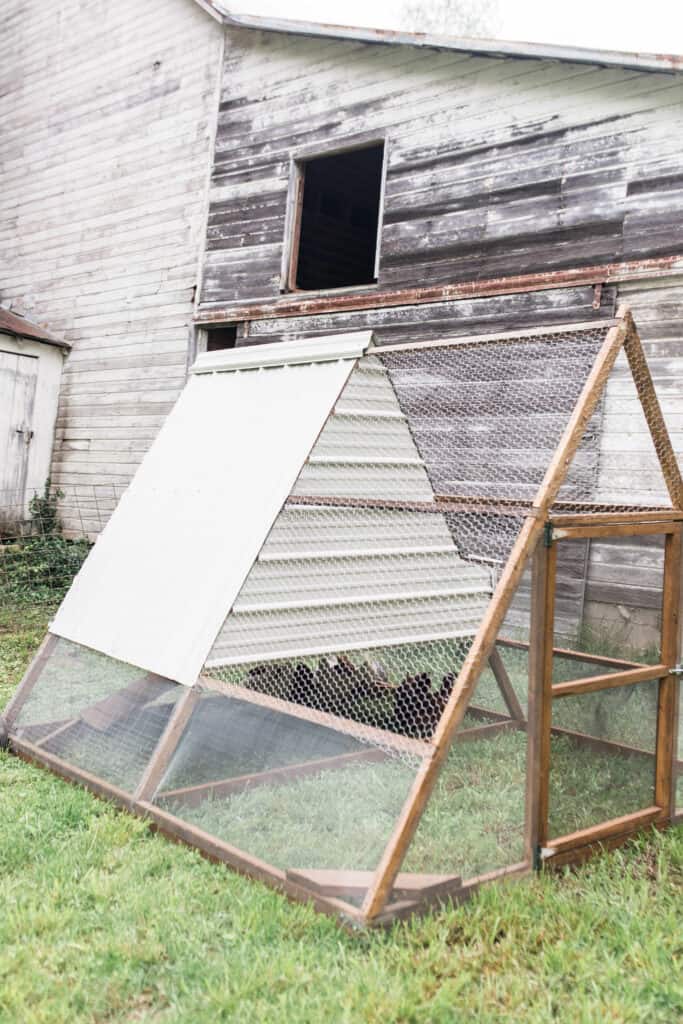
Come see our a frame chicken tractor that we built with Green Willow Homestead plans. It is complete with nesting boxes, a ramp and plenty of space to roam for fresh grass and bugs.

This little a frame chicken tractor here is a long time coming. A good month ago now, back in April, I shared with you some tips on how to care for backyard chickens. I talked about feed, water, breeds, needs, and shelter.
Oh yeah, shelter. The one thing we didn’t have yet when we purchased our fresh little chickys.
Not to worry, I had already purchased some a frame coop build plans and all the supplies needed to build our very own coop. (You can use code: boonebuds15 to get 15%off of this plan.)
Well, as projects always do, this thing took us at least twice the amount of time to build as I expected. It’s not that it was particularly difficult, but Luke and I aren’t carpenters.
We built our farmhouse coffee table, 9-foot dining room table and our front porch swing (all featured in Do it Yourself magazine, which you can read about our story here). But all of those projects were soo easy. We chose a not-so-quick-and-easy chicken coop plan for several reasons.