Are you scratching around trying to create a drawing of a chicken but feeling a bit clucked up about where to start? Don’t worry – I’ve been there too! As someone who’s spent way too many hours trying to get those feathers just right, I’m excited to share some simple techniques that’ll have you drawing chickens that actually look like chickens (and not weird ducks with identity issues).
Adobe Stock has over 813,383 chicken drawing images available – that’s a LOT of chicken art! But you don’t need to browse through all those to create your own masterpiece Let’s break this down into some easy-to-follow steps that’ll work whether you’re a complete beginner or just looking to improve your poultry portraiture skills
What You’ll Need for Your Chicken Drawing
Before we dive in let’s gather our supplies
- Paper (sketch paper works great, but regular printer paper is fine)
- Pencil (a standard #2 pencil is perfect)
- Eraser (trust me, you’ll need it!)
- Coloring supplies (optional – colored pencils, markers, or crayons)
Nothing fancy required – that’s the beauty of drawing chickens. They’re pretty forgiving subjects!
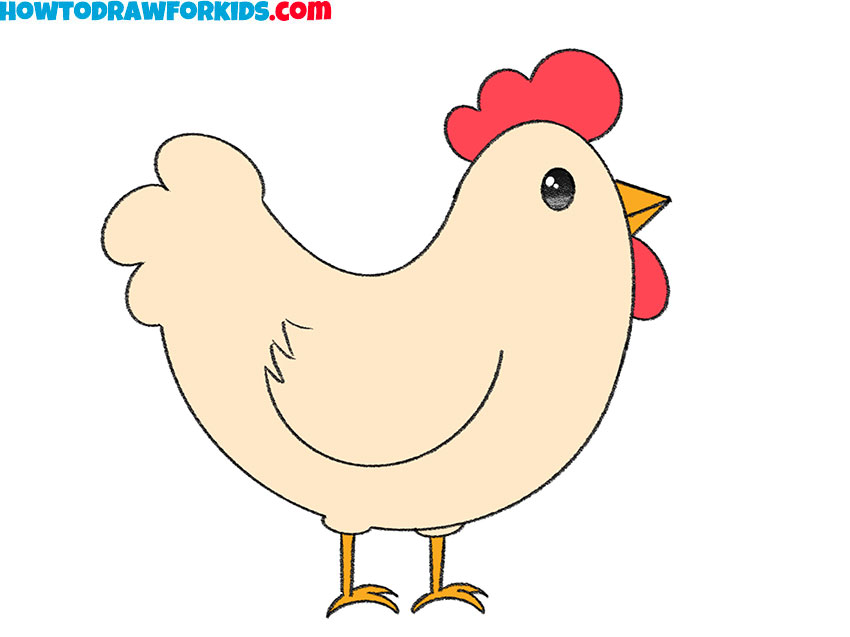
Step-by-Step Chicken Drawing Tutorial
Step 1: Start with the Head and Neck
Begin with a curved line to form the head and the back of the chicken’s long neck. This is basically the foundation of your chicken’s silhouette.
For the eye, draw several successively smaller circles near the top of the head The smallest circle will be the pupil – go ahead and shade it in! This immediately gives your chicken some personality
Step 2: Add the Beak and Comb
Use curved lines that meet at gentle points to create the triangular portions of the chicken’s beak. Then draw a round shape below the beak.
For that distinctive chicken look, add the comb (that red fleshy bit on top of their heads) using a series of “U” shaped lines to form a scalloped shape above the beak. This is what really makes your bird look chicken-y!
Step 3: Create the Neck and Back
Use a series of “U” shaped lines to draw the feathery bottom of the chicken’s neck. From there, extend a long curved line for the chicken’s back.
At the bottom of the back, draw a small “U” shaped feather as a starting point for the tail area.
Step 4: Draw the Wing
Draw another “U” shaped line beside the first one from Step 3. Then, connect it to the neck with a long curved line to enclose the chicken’s wing.
To add texture and make it look more realistic, add some connected “U” shaped lines within the wing. These suggest feather details without making you draw every single feather (which would be a nightmare!).
Step 5: Form the Belly
Extend a long curved line from the front of the neck to outline the chicken’s belly. This should create a nice round shape – chickens aren’t exactly known for their slender figures!
Step 6: Add Tail Feathers
Continue the long line using a series of overlapping curved lines to create the tail feathers. These can be slightly pointed at the ends to give that classic feathered look.
Step 7: Complete the Body
Draw more overlapping tail feather lines, and extend one line to the middle of the wing to completely enclose your chicken’s body. At this point, you should have a recognizable chicken shape!
Step 8: Detail the Feathers and Add a Foot
To add texture to the belly and chest, draw small, “U” shaped lines that suggest feathers. Don’t go overboard – just enough to give the impression of feathery texture.
Now for the tricky part – the foot! Draw one foot poised and bent in mid-step using overlapping curved lines. Add pointed, curved claws at the tip of each toe. Chicken feet look kinda weird and dinosaur-like, so don’t worry if they seem a bit strange!
Step 9: Add the Second Foot
Draw the remaining foot flat on the ground using long curved lines that double back on themselves to form the leg and toes. Add curved triangles on the tip of each toe to form the claws.
And voilà! Your basic chicken outline is complete!
Coloring Your Chicken Drawing
The fun part – adding color! Chickens come in tons of different colors, so you’ve got options:
- Traditional farm chickens are often reddish-brown with a red comb and yellow beak
- Some chickens are solid white, blonde, cream, gray, or black
- Others have interesting patterns like speckles or even checkerboard patterns!
I typically use several shades of brown for the body, bright red for the comb, and yellow for the beak. But feel free to get creative – there’s no such thing as an incorrect chicken color!
Common Challenges When Drawing Chickens (And How to Fix Them)
Let’s be honest, some parts of drawing chickens can be frustrating. Here’s how to handle the tough spots:
1. The Proportions Look Off
If your chicken looks more like a turkey or ostrich, check your proportions. The head should be relatively small compared to the plump body. The neck should be medium length – not too long (that’s more swan-like) and not too short.
2. The Feathers Look Too Uniform
Chickens have lots of texture! Instead of drawing each feather individually (which would take forever), use those “U” shaped lines of varying sizes to suggest feather groups. Some areas like the wings and tail can have more defined feathers.
3. The Feet Look Weird
Chicken feet ARE weird! They’re scaly, bony things with three toes pointing forward and one pointing backward. If you’re struggling, simplify them to just the basic shape and add minimal detail.
Taking Your Chicken Drawing to the Next Level
Once you’ve mastered the basic chicken, why not try:
- Different poses: pecking, roosting, running
- Adding a background: barnyard, nesting box, free-range field
- Drawing a whole chicken family: hens, roosters, and little chicks!
Why Drawing Chickens Is Actually Pretty Great
I’ve always found there’s something strangely satisfying about drawing chickens. They’re farmyard favorites that everyone recognizes, but they’ve also got these quirky features that make them fun to draw. Plus, they’re symbols of rural life around the world!
For kids, chicken drawings are fantastic because they combine simple shapes with just enough detail to be challenging without being overwhelming. And let’s be honest – chickens are kinda funny looking, which makes the drawing process more enjoyable.
Frequently Asked Questions About Drawing Chickens
How do I make my chicken look more realistic?
Pay attention to the feather texture and shading. Real chickens have overlapping feathers that create shadows and dimension. Adding some light shading under the wing, neck, and belly can instantly make your chicken look more three-dimensional.
What’s the difference between drawing a hen and a rooster?
Roosters (male chickens) have larger, more dramatic combs on top of their heads, longer and more colorful tail feathers, and often have those distinctive wattles hanging from their chins. Hens are generally more rounded and less flashy.
My chicken looks more like a duck/turkey/random bird. Help!
Focus on the distinctive chicken features: the comb on top of the head, the rounded body shape, and those characteristic feet. The beak is also shorter and stronger than a duck’s bill, which helps distinguish them.
Final Thoughts on Drawing Chickens
Drawing chickens doesn’t have to be complicated! By breaking it down into simple shapes and following these steps, you can create a chicken drawing that’s both recognizable and charming.
Remember, art is supposed to be fun, so don’t stress if your chicken doesn’t look exactly like the examples. Each drawing has its own personality – just like real chickens do! The more you practice, the better your chicken drawings will become.
So grab your pencil and get clucking – I mean sketching! And when you’re done, maybe try drawing a whole farm scene with your chicken as the star. Before you know it, you’ll be the chicken-drawing expert among your friends!
Happy drawing, and remember – even if your chicken looks a little funky, that’s just part of its charm. We’ve all been there!
What You Will Need
In order to complete this project, you’ll need the following equipment:
- an HB graphite pencil
- a 3B graphite pencil
- an eraser
- drawing paper


How to Draw a Rooster
In this part of the tutorial, we’ll be working on a sketch of an adult male chicken and exploring its outward difference from an adult female—a hen.
The ancient Greeks believed that even lions were afraid of roosters, as evidenced by several of Aesops Fables. The rooster is also one of the signs of the Chinese zodiac; it is associated with loyalty and keen observation.
With the HB pencil, I start with the rough shape of the head, and then add the beak. Be sure to leave enough space for the rest of the bird on the sheet of paper!


I add the shapes for the comb and wattle to the bird’s head.


I add a rough trapezium-like shape for the bird’s neck.


I add the shape of the rooster’s body.


A rooster has a large tail that consists of long feathers; I mark the area where it should be located and the direction of feathers.


Let’s draw the bird’s feet. I outline the fluffy thighs first.


Then I add the remaining parts of the feet (the shanks), using lines and small circles to mark the joints.
Our rooster has three main toes (they are longer) and one small back toe.


I refine the head of the bird, adding the significant details: the eye, the ear (at the side of the head), and the earlobe just near it. Then I define the points of the comb.
By the way, chickens have full-color vision, just like we do! Also, they can distinguish more than 100 faces of members of their species.


I refine the contours of the bird’s body, making it stouter. Feel free to erase the unnecessary pencil lines as you go.


I draw the feet, based on the framework. The rooster should have spurs at the back of the feet and claws at the tips of the toes.


I add the wing, also marking the contour of the long feathers that are hanging down (they are called saddle feathers).


It’s time to refine the tail of the rooster. Actually, the feathers of different parts of a chicken’s body have different names; for example, the long, curling, showy feathers of the rooster’s tail are called sickles.
I draw the feathers that are closer to the body.


I add the curling sickles; don’t be afraid to make them long and opulent.


With light pencil lines, I mark the feathers on the rooster’s body. The long, thin feathers around the neck are called hackles.


With the HB graphite pencil, I apply some graphite hatching to the drawing, paying particular attention to the head, wing, and tail details.
The shanks have a subtle relief and may be slightly fluted, so I emphasize this feature.


I increase the contrast, using the softer 3B pencil. The sketch is complete!


You may ask, what is the difference in the appearance between a rooster and a hen? Let’s look into it.
A hen has a seemingly heavier body. The feet are shorter, and the tail can’t boast of long, showy feathers—the hens feathers are short and mainly straight. The comb is smaller, too.
The shows the general proportions of an adult female chicken. We won’t be repeating the whole drawing process all over again because it’s very similar to sketching our rooster—so just grasp the main features of the hens appearance.


The feathering of a hen usually creates a smoother, softer impression. It’s important to accentuate the hackles—they create a variety in covering.
All chickens have buds on their legs from which spurs can grow. In most hens, they remain latent, but sometimes they become long and prominent.


The pattern of the plumage varies from breed to breed. Alternating darker and lighter spots is a sure option to achieve a credible look!


