Hey there, seafood lovers! Today, I’m super excited to share my insider tips on cooking those amazing Key West pink shrimp. As someone who’s been experimenting with these sweet little creatures for years, I’ve got some awesome tricks up my sleeve that’ll make your mouth water!
Why Key West Pink Shrimp Are Special
Before we dive into the cooking part lemme tell you why these shrimp are seriously the bomb
- They’ve got this naturally sweet taste that’ll knock your socks off
- They’re sustainably harvested from the Gulf of Mexico (Mother Nature thanks you!)
- You can get ’em all year round – no waiting for “shrimp season”
- That gorgeous pink color makes your dishes look Instagram-worthy
Prep Work: Getting Your Shrimp Ready
First things first, we gotta prep these babies right:
- Give ’em a good rinse under cold water
- Decide if you wanna keep the shells (pro tip: shells = more flavor!)
- Remove that vein along the back (nobody wants that in their dinner!)
5 Killer Ways to Cook Key West Pink Shrimp
1. Classic Garlic Butter Shrimp (My Personal Fave!)
What you’ll need
- 1 pound Key West pink shrimp
- 3 tbsp butter (the real deal, not margarine!)
- 3 garlic cloves, minced
- 1 tbsp lemon juice
- Red pepper flakes (if you’re feeling spicy)
- Parsley for that fancy touch
How to make it:
- Melt that butter in a pan
- Toss in garlic till it smells amazing
- Add shrimp and cook 2-3 mins each side
- Finish with lemon juice and garnish
2. Tropical Shrimp Tacos
Ingredients:
- 1 pound shrimp
- Olive oil
- Chili powder & smoked paprika
- Tortillas
- Cabbage slaw
- Avocado
- Lime wedges
The sauce
- Sour cream
- Lime juice
- Hot sauce (go wild!)
3. Quick & Easy Shrimp Scampi
You’ll need:
- 1 pound shrimp
- Butter & olive oil
- Garlic
- White wine (or chicken broth if you’re not into wine)
- Lemon juice
- Linguine
4. Fresh Shrimp Salad
Perfect for those hot summer days:
- Cooked & chilled shrimp
- Mixed greens
- Cherry tomatoes
- Avocado
- Corn
- Red onion
- Light vinaigrette
5. Old-School Shrimp Boil
Great for parties:
- 2 pounds shrimp
- Corn on the cob
- Baby potatoes
- Old Bay seasoning
- Lots of lemon
- Melted butter for dipping
Pro Tips From My Kitchen to Yours
-
Don’t Overcook!
- These guys cook FAST
- Look for that C-shape curl
- They should be pink and opaque
-
Fresh vs. Frozen
- Fresh is awesome if you can get it
- But frozen works great too
- Thaw properly in fridge or cold water
-
Perfect Pairings
- Citrus is your friend
- Garlic makes everything better
- Try tropical fruits like mango
Common Mistakes to Avoid ❌
- Cooking them too long (they’ll get rubbery)
- Using too high heat
- Forgetting to devein
- Not patting them dry before cooking
Storage Tips
- Fresh shrimp: Use within 2 days
- Keep them on ice in the fridge
- Frozen shrimp last about 3 months
My Final Thoughts
I gotta say, Key West pink shrimp are seriously one of the best ingredients to work with. They’re super versatile, cook up quick, and taste amazing no matter how you prepare them. Whether you’re a cooking newbie or a seasoned chef, these shrimp won’t let you down!
Remember, cooking should be fun! Don’t stress too much about getting everything perfect – these little pink beauties are pretty forgiving. Just don’t overcook them, and you’ll be golden!
Got any questions about cooking Key West pink shrimp? Drop ’em in the comments below! I’d love to hear about your shrimp cooking adventures too!
Happy cooking, y’all!
#KeyWestShrimp #Seafood #Cooking #FoodBlog #Recipes
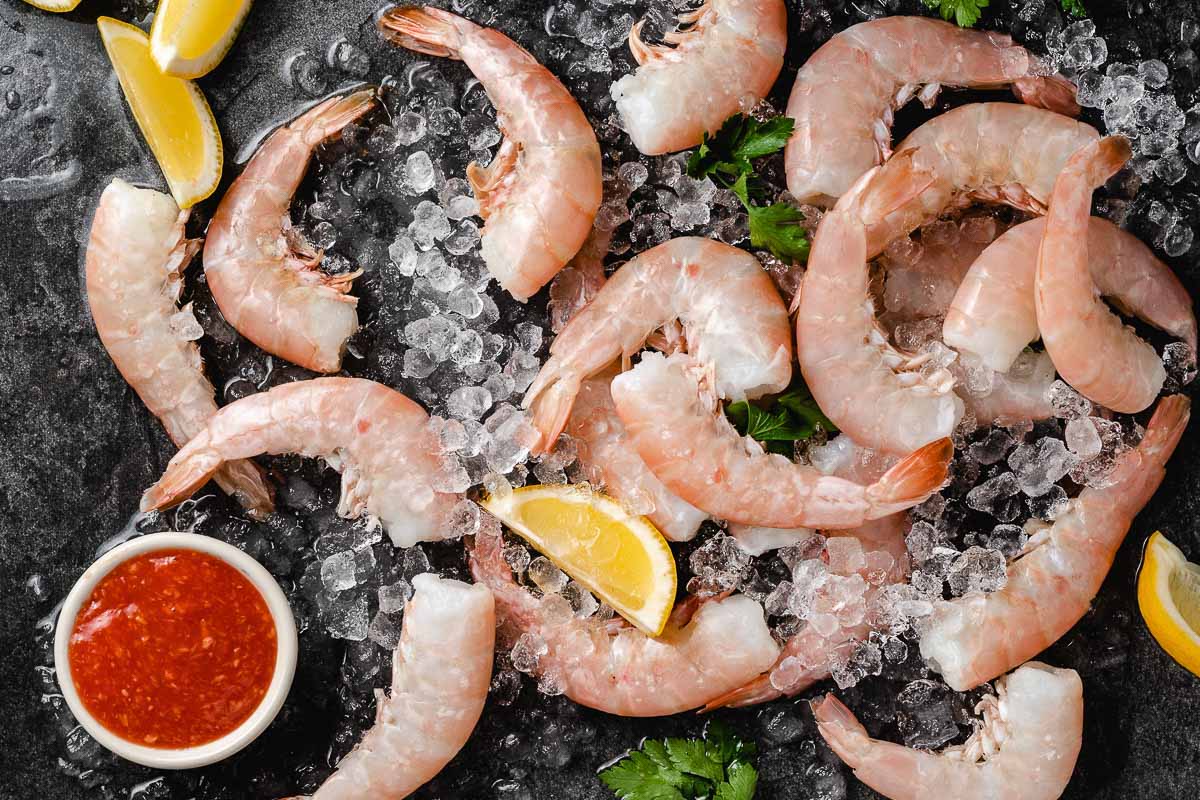
Choice of Key West Pink Shrimp
Although just about any larger style shrimp will work, we decided to go with the Key West Pink Shrimp offered at Seafood Market due to their freshness and sweetness. A few size options are available yet the larger the better so we chose the 21-25, which basically means you’ll get between 21 and 25 shrimp per pound. One pound is all we needed and it had just enough shrimp to do six kabobs.
- 1 pound large shrimp
- 1 fresh, whole lemon
- Soy Sauce
- Worcestershire Sauce
- Mustard (spicy, Dijon, or regular yellow)
- Honey
- Italian seasoning
- Salt/pepper
- Extra virgin olive oil
- Red wine vinegar
“Kebab” is basically the original, proper, British spelling and term that has since been adopted by Americans who have transformed the spelling to meet our pronunciation of the term appropriately. Neither option is considered ‘wrong’ or ‘right’ however we chose to use ‘kabob’ within this article as most of our readers are American.
“Skewer” is technically the term for a long metal pole used for cooking meet atop an open flame. This same term is also used for the smaller wood sticks we use for making our kabobs. Often times the term ‘skewer’ is also used to describe the kabob itself within the American culture.
We simply eye-balled our amount of the ingredients. Ultimately you only need enough total liquid to submerge all your shrimp. To save on costs, we only mostly submerged our shrimp, and then flipped them after about 20 minutes of time in the marinade. Use about twice the amount of soy sauce to Worcestershire sauce, a few squeezes of mustard, a few tables spoons of olive oil, a small dose of the red wine vinegar, and just a bit of honey.
Add a few heavy shakes of the Italian seasoning, a proper few pinches of salt, and a modest amount of pepper, and stir it all up until the mustard fully dissolves into the mix.
Thanks to the wise guidance of a nearby chef, we waited till our shrimp were in the marinade to take half a lemon and squeeze it atop the bowl. I can’t recall the exact reasoning for this move, but it has something to do with how the acidity can affect the marinade if mixed in thoroughly.
I suppose I’ll have to give away our experiment results here; de-shell the shrimp. Or better yet, buy shelled and divined shrimp. However, leaving the tail on does make for a better meal-time experience as they are easier to pull off the kabobs and eat without a fork.
Once your shrimp are ready, plunge them on into the marinade. If you’ve enough marinade to fully submerge your shrimp, let them sit for at least an hour. If you’re not in a hurry you can let them sit and marinate for up to three hours for maximum flavor. Leaving the shrimp in the liquid for more than three hours can lead to mushy, soft shrimp after grilling.
If you’re like us and didn’t want to waste quite that much amount of marinade ingredients (as much is wasted), rotate your shrimp at roughly the halfway point during the marinating time so the shrimp on top is now on the bottom.
As these shrimp will cook quite quickly on the grill, you’ll want to use vegetables that can also cook quickly. Great options are squash, zucchini, and mushrooms. If you happen to use onions, be sure to go with a thin variant such as the red onion. Don’t make the mistake we did. Without much thought, we threw a few sweet yellow onion slices onto our kabobs and those bits of onion hardly cooked, yielding themselves to a special place on the plate to be recycled for a future meal.
When cutting our squash and zucchini we went quite thin in order to allow for faster cooking. Prior to putting your veggies on the kabob, toss them in a bit of oil and then sprinkle some salt on. This both adds to the flavor and helps them cook a bit quicker, keeping up with the shrimp cook time.
Bring your grill to medium heat, clean the grill gates thoroughly, and finally, before placing your skewers, fold up a paper towel and add a good amount of olive oil to the top of it. Rub the oil lightly onto the grill going in the direction of the gates. This will help prevent your kabobs from sticking to the gates.
Our shrimp were medium-sized in the grand scheme of shrimp size scales. Hence, we only left our skewers on for roughly 3 minutes on each side. Once you can see that the shrimp are no longer opaque, they are likely done. For our ‘shell on’ skewers, we left them on for just an extra 30 seconds before removing them.
Shell on vs. shell off, the experiment
For us, grilled shrimp is among our favorite flavors to put on the plate. We’ve done kabobs in past but always cooked them with the shell off. Prior to cooking our shrimp kabobs this time around, we did some research to determine whether or not to grill the shrimp with their shells and determined many foodies claimed how great the shrimp would taste if the shell were left on. Hence, we prepared six kabobs, three with four ‘shell-on’ shrimp and another three with ‘shell-off’ shrimp. We then staggered them on the grill to assure an evenly cooked experiment.
Our immediate thought was the shell being left on would cost the shrimp the great “grilled” flavor however the theory was that by leaving the shell on, the shrimp would maintain more of both the natural flavors along with our marinade flavor while keeping in more moisture, protecting the inner shrimp from the hot flames of the grill. Sounds good right? Well, you’ll have to skip down to the conclusion to see what we preferred.
Key West Pink Shrimp with Sweet Corn and Lime Crema
FAQ
How to cook pink Key West shrimp?
- Heat butter in a skillet over medium heat.
- Add garlic and sauté until fragrant.
- Toss in the shrimp and cook for 2-3 minutes per side, until pink and opaque.
- Add lemon juice and red pepper flakes, stirring to coat.
- Garnish with parsley and serve with crusty bread or over pasta.
How pink should shrimp be cooked?
When properly cooked, the exterior should be pink with red tails, and the flesh should be slightly opaque and a little “white” in color. Here’s where it gets confusing because a “little white” may vary from cook to cook. If it is bright white in color, there’s a good chance the shrimp are overcooked.