Hey plant lovers! I’m super excited to share my experience and tips on braiding shrimp plants. As someone who’s worked with these beauties for years at our garden center, I can tell ya that a well-braided shrimp plant is truly a showstopper. Let’s dive into everything you need to know!
What’s a Shrimp Plant Anyway?
Before we get our hands dirty with braiding lemme introduce you to this amazing plant
- Scientific name: Justicia brandegeana
- Native to: Guatemala, Honduras, and Mexico
- Size: Usually grows 3-4 feet tall and wide
- Zones: Thrives in USDA zones 8-11
- Special feature: Those awesome shrimp-like bracts in pink, rusty red, yellow, or lime green
Best Time to Braid Your Shrimp Plant
Timing is everything, folks! Here’s when you should braid
- Spring through fall (warm seasons)
- When stems are actively growing
- Before or just as bracts begin to emerge
- Avoid winter braiding (stems get too stiff)
What You’ll Need
Grab these supplies before starting
- Clean, sharp gardening scissors or snips
- Soft twine, raffia, or decorative ribbon
- Optional: A funnel or windsock shaft for support
- Gardening gloves (if you’re fancy like that!)
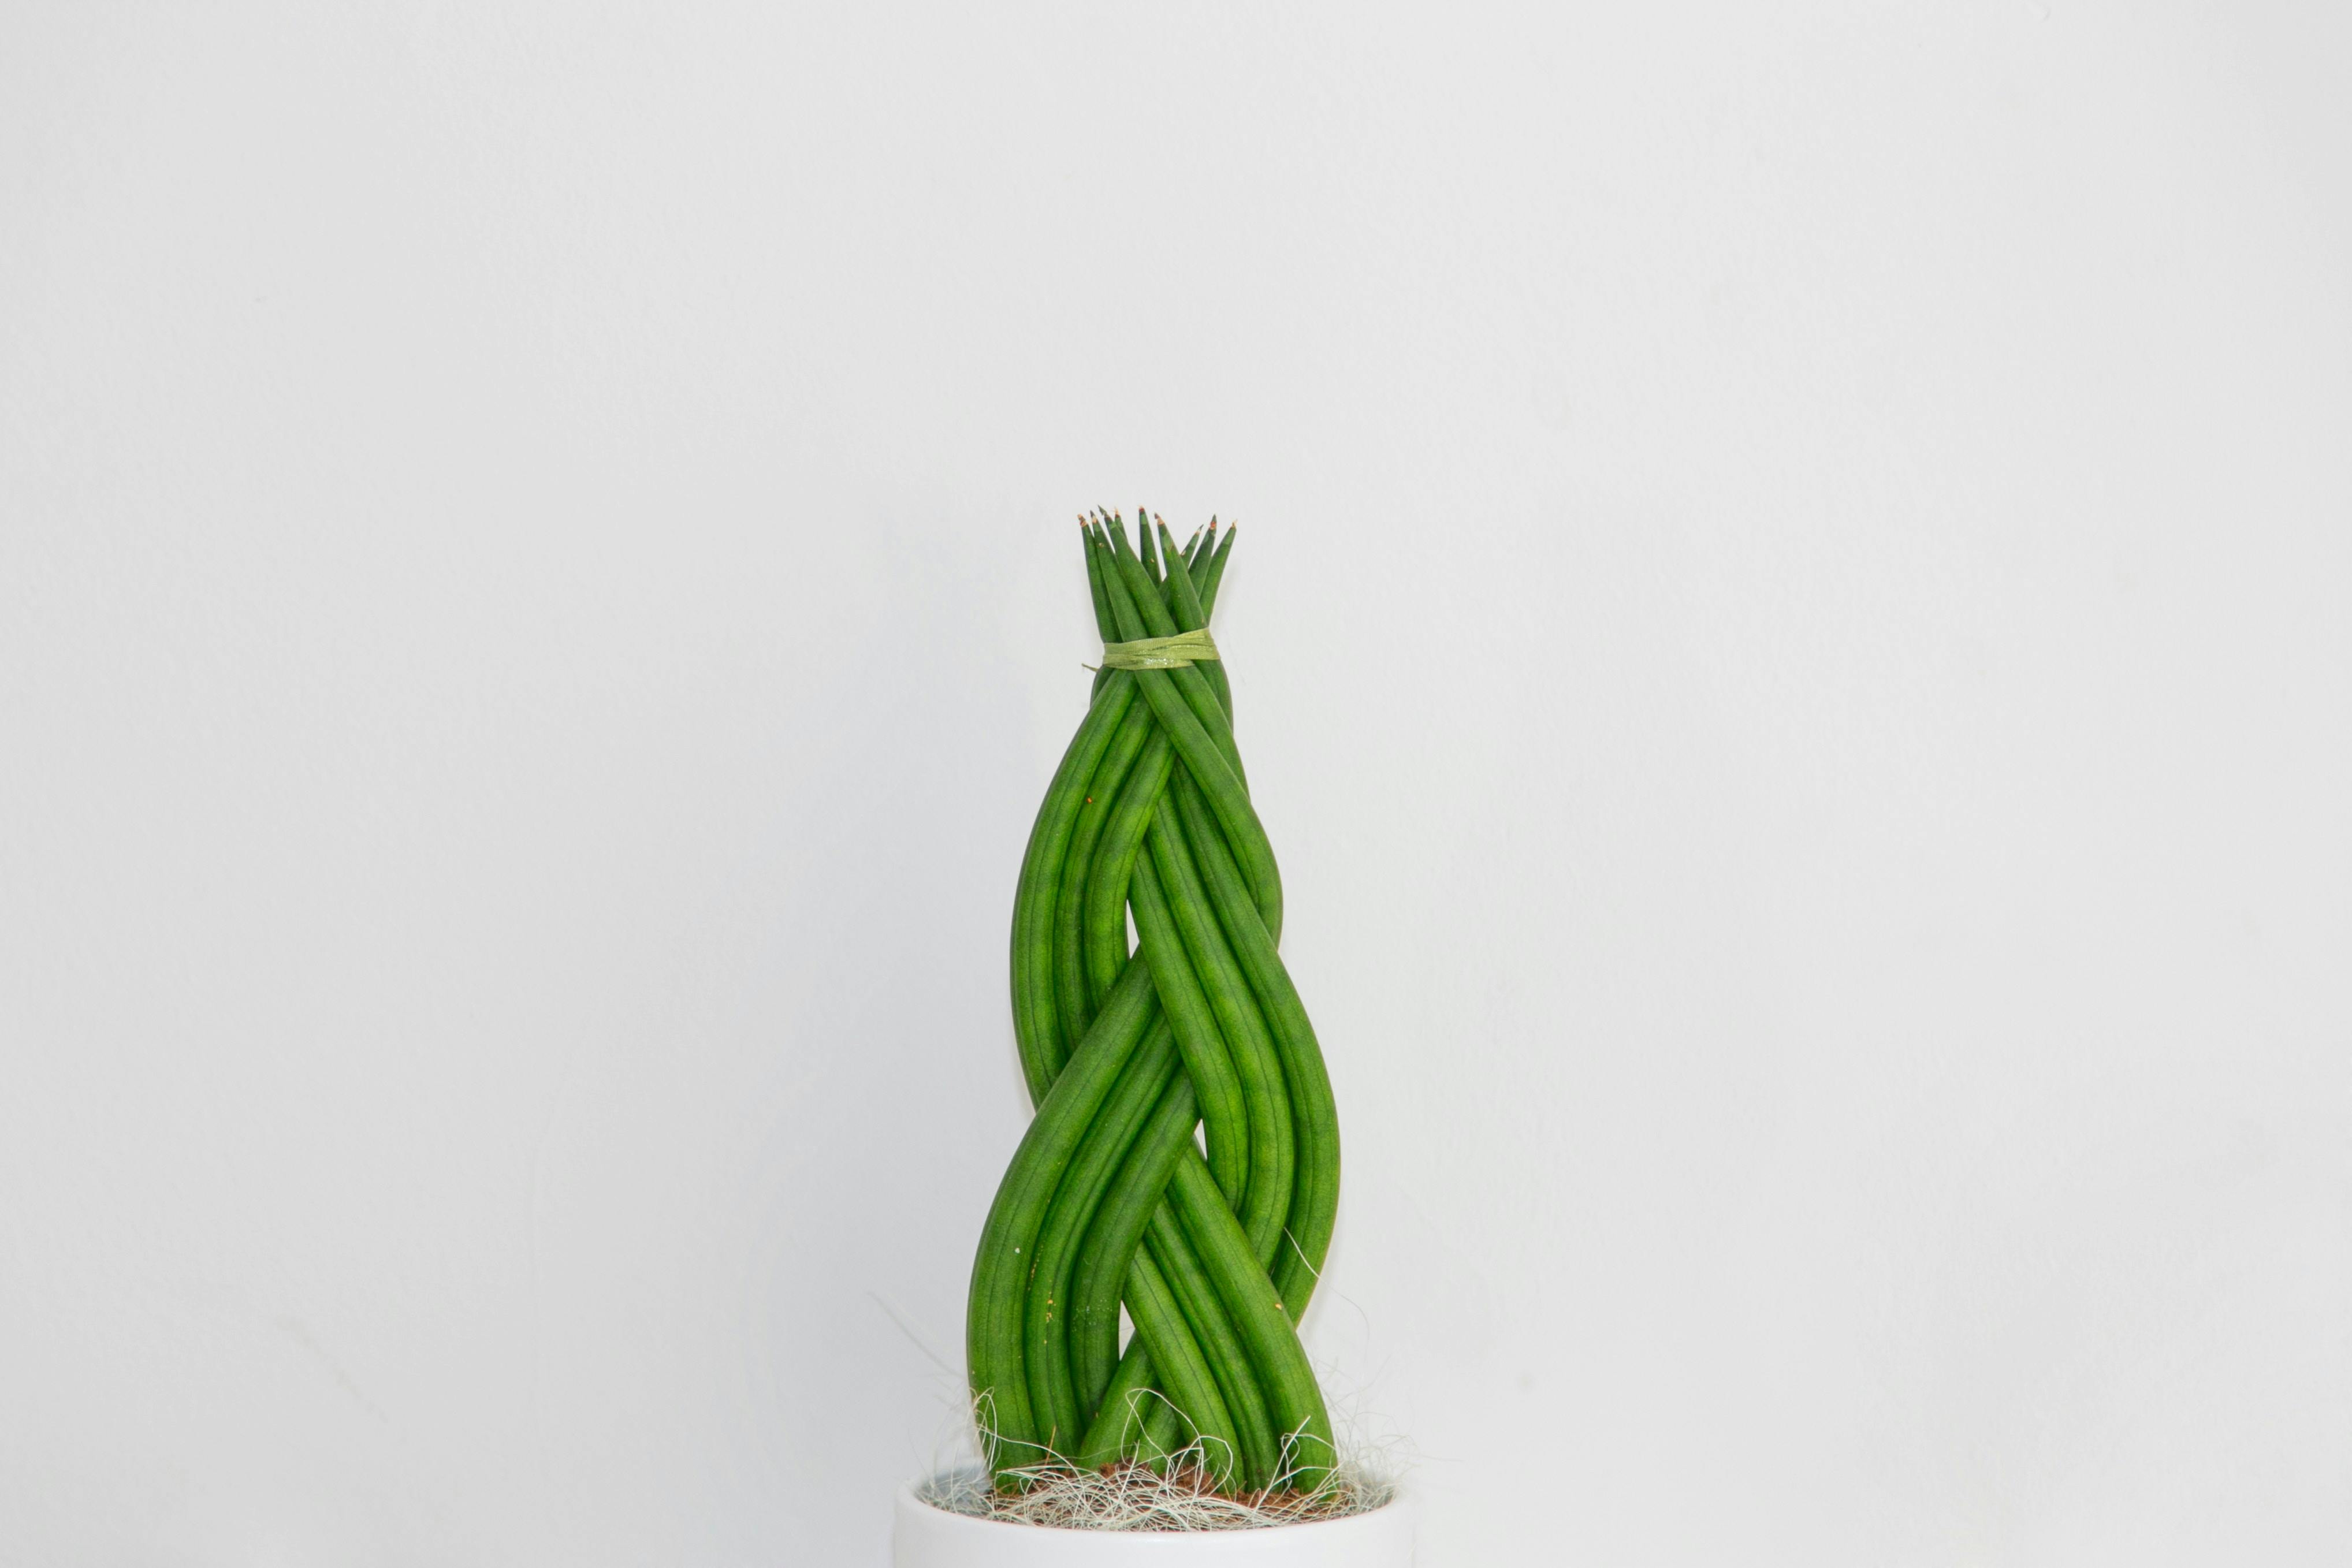
Step-by-Step Braiding Guide
1. Prep Work
- Choose 3-5 healthy stems of similar length (12-18 inches)- Remove leaves and small shoots from lower half- Trim any dead or damaged parts- Make sure stems are flexible enough to work with2. The Braiding Process
-
Start at the Base
- Gather your chosen stems together
- Hold them firmly at the bottom
- Make sure they’re evenly spaced
-
Begin the Braid
- Take the right stem over the middle
- Left stem goes under the middle
- Keep repeating this pattern
- Rotate occasionally to maintain tightness
-
Secure Your Work
- Wrap base with twine or raffia
- Tie off bottom end
- Trim any loose pieces
Pro Tips for Success
Y’all, here’s what I’ve learned from experience:
- Don’t braid too tight – plants need breathing room!
- Check braids monthly for new growth
- Trim faded flowers to encourage more blooms
- Keep soil consistently moist but not waterlogged
- Give partial to full sun for best results
Ongoing Care
Here’s how to keep your braided beauty thriving:
Water Requirements
- Keep soil moist but not soggy
- Water when top inch feels dry
- Increase watering during growing season
Light Needs
- Partial to full sunlight
- Morning sun is ideal
- Protect from harsh afternoon rays
Maintenance
- Regular pruning encourages fullness
- Remove spent flowers
- Check braid ties monthly
- Fertilize during growing season
Common Problems & Solutions
Sometimes things don’t go as planned. Here’s what to watch for:
| Problem | Solution |
|---|---|
| Snapping stems | Use younger, more flexible stems |
| Loose braids | Retie and adjust regularly |
| Crowded growth | Don’t force too many stems together |
| Fading flowers | Trim old blooms, adjust sunlight |
Why You’ll Love a Braided Shrimp Plant
These babies are awesome because:
- They’re totally unique conversation starters
- Perfect for both indoor and outdoor spaces
- Attract hummingbirds and butterflies
- Low maintenance once established
- Can bloom almost year-round
Final Thoughts
Braiding a shrimp plant might seem tricky at first, but trust me, it’s totally worth it! With these steps and a bit of practice, you’ll have a gorgeous braided specimen that’ll make your neighbors jealous. Remember, it’s okay if your first attempt isn’t perfect – these plants are pretty forgiving.
And hey, if you’re feeling stuck or have questions, drop ’em in the comments below. I love helping fellow plant enthusiasts create something beautiful!
Happy braiding, y’all!
Would you like me to explain or break down any part of this guide in more detail?
Light
Shrimp plants will grow in full sun to partial shade, but placing shrimp plants where they will receive morning sun is ideal. These plants need bright sunlight, but the intense afternoon sun in tropical areas will cause the flowers to fade.
Propagating Shrimp Plants
Propagation is the fastest way to multiply your shrimp plants. The best time to do it is in the spring when the plant is about to enter a growing phase.
The most effective propagation method is to use cuttings. It can take several weeks to a few months before roots develop from your cutting. You’ll need sharp shears or scissors, a well-draining potting mix, a pot, a plastic bag, and rooting hormone.
Follow these steps to propagate your shrimp plant:
- Pick a mature, disease-free shrimp plant to cut for propagation.
- Cut a 4- to 6-inch long stem with at least three sets of leaves just below a leaf node.
- Dip the cut end of the plant in a rooting hormone.
- Plant cutting in a pot with a well-draining potting mix with bright, indirect sunlight.
- Place a plastic bag over the cutting to maintain humidity.
- Remove the plastic bag occasionally to provide air circulation and water the cutting consistently.
- Transfer the plant to a larger pot or your garden once roots start to form.
How to braid a shrimp plant? How to care for a shrimp plant? How to propagate a shrimp plant?
FAQ
How to make shrimp plant bushy?
With vivid yellow bracts, golden shrimp plant excels in warm climates. Prune hard after the last frost to encourage bushiness, removing up to two-thirds of growth. Throughout the growing season, cut back leggy stems and spent flowers to enhance blooming and maintain shape.
How to start a shrimp plant from a cutting?
- Pick a mature, disease-free shrimp plant to cut for propagation.
- Cut a 4- to 6-inch long stem with at least three sets of leaves just below a leaf node.
- Dip the cut end of the plant in a rooting hormone.
- Plant cutting in a pot with a well-draining potting mix with bright, indirect sunlight.
How do you care for a braided shrimp plant?
Soil: Shrimp plants do best in well-drained acidic soil. Boost the soil with shrub food if the soil is low in organic nutrients. Water: Like many tropical plants, the shrimp plant will grow best in high humidity. It prefers evenly moist soil but should not be overly wet.
How do I prune a shrimp plant?
Prune your shrimp plants during the spring or early summer when the new growth emerges. Focus on removing dead or damaged branches, spent flowers, and leggy growth to keep the plant looking its best. Additionally, you can pinch back the tips of the stems to promote branching and create a fuller, more vibrant display.