Hey there, fellow food lovers! I’ve been grilling shrimp for years and lemme tell you – oven grilling is a game-changer. Today I’m gonna share my foolproof method for getting restaurant-quality grilled shrimp right in your kitchen. No outdoor grill needed!
Why Choose Oven Grilling for Shrimp?
Before we dive in, here’s why I love grilling shrimp in the oven:
- It’s super convenient – works all year round, rain or shine
- You get better temperature control (no more burnt shrimp!)
- Less mess to clean up
- Perfect for cooking large batches
- No fancy equipment needed
What You’ll Need
Basic Equipment:
- Rimmed baking sheet
- Aluminum foil
- Paper towels
- Mixing bowl
Key Ingredients:
- Fresh or frozen shrimp (16/20 or larger size recommended)
- Olive oil or butter
- Your favorite seasonings
- Salt and pepper
Step-by-Step Guide to Oven Grilled Shrimp
1. Prep Your Shrimp
- Thaw frozen shrimp under cold running water
- Pat them dry with paper towels (super important!)
- Remove shells and devein if needed (or leave shells on for extra flavor)
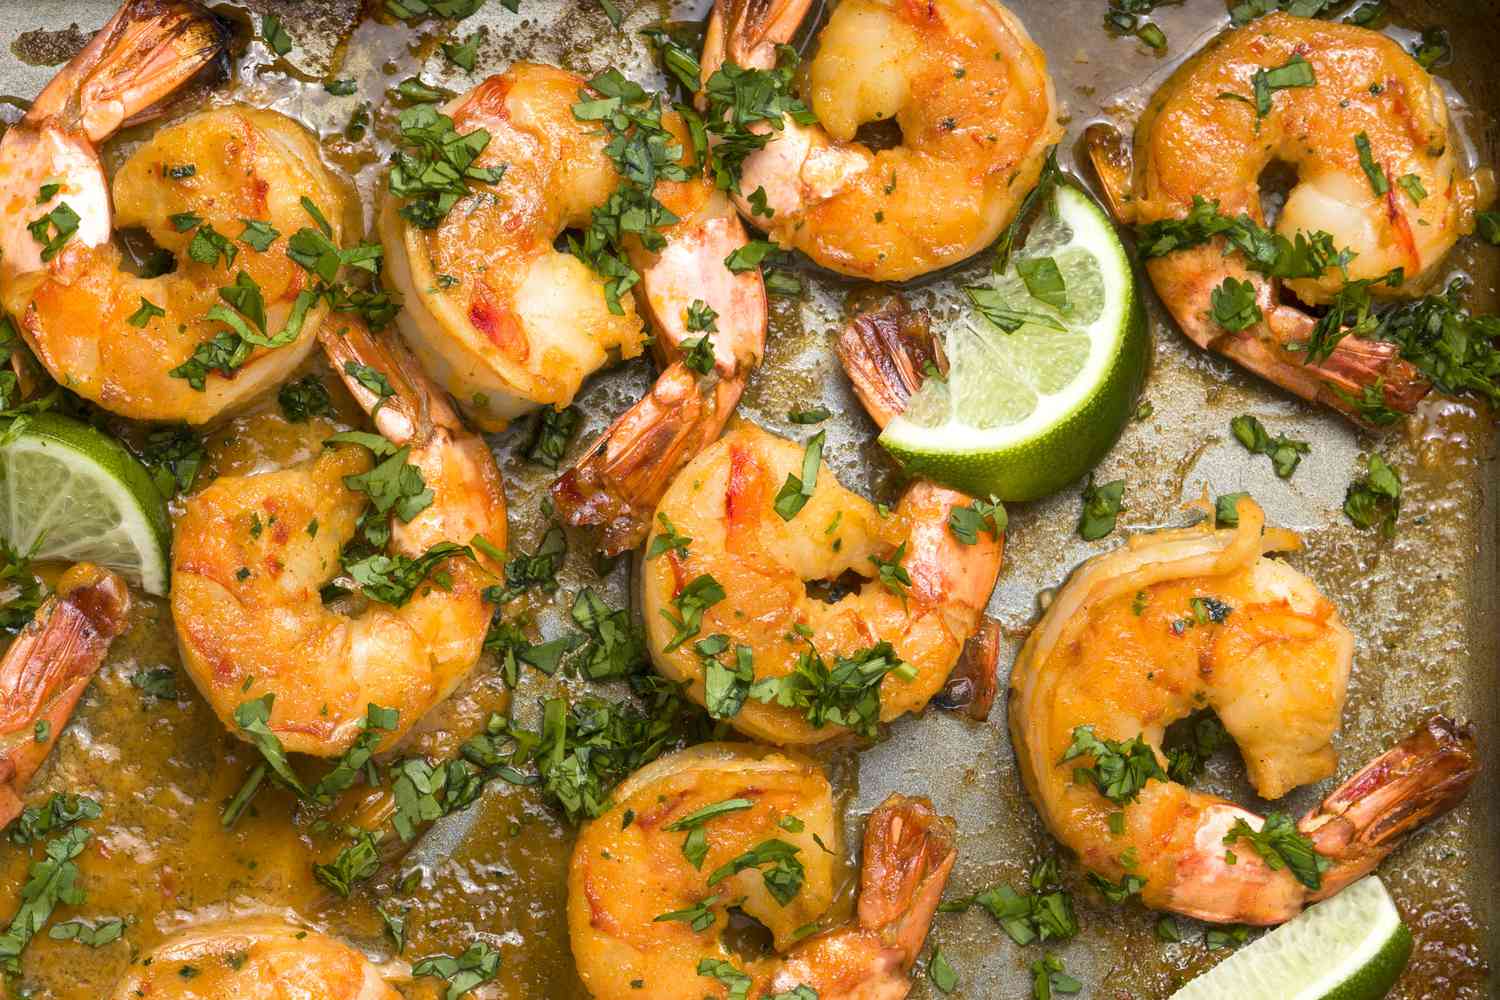
2. Season Those Bad Boys
- Toss shrimp with olive oil or melted butter
- Add your favorite seasonings
- My go-to simple seasoning mix:
- 1 tbsp olive oil
- 2-3 minced garlic cloves
- Salt and pepper
- Squeeze of lemon juice
3. Get That Oven Ready
- Preheat to 425°F (this temp is crucial!)
- Line your baking sheet with foil
- Give it a light oil spray
4. Cook Those Shrimp
- Arrange shrimp in a single layer (don’t crowd ’em!)
- Pop in the oven for 5-7 minutes
- No need to flip – they cook perfectly on one side
Pro Tips from My Kitchen to Yours
- Watch the Time: Shrimp cook FAST! Over-cooking = rubber bands
- Size Matters: Bigger shrimp (16/20 count) work best for oven grilling
- Keep it Simple: Don’t overcomplicate the seasonings
- Pat Dry: Seriously, don’t skip this step – it’s key for getting that nice sear
Tasty Variations to Try
1. Garlic Butter Heaven
- 3 tbsp melted butter
- 4 minced garlic cloves
- 1 tsp Italian herbs
- Pinch of red pepper flakes
2. Spicy Cajun Style
- 2 tbsp olive oil
- 1 tbsp Cajun seasoning
- 1 tsp paprika
- Squeeze of lime
3. Asian-Inspired
- 2 tbsp soy sauce
- 1 tbsp honey
- 1 tsp ginger
- 1 clove minced garlic
Serving Suggestions
Your oven-grilled shrimp will be amazing with:
- Fresh crusty bread for sauce-soaking
- Over a bed of rice or pasta
- On top of fresh salad greens
- Stuffed in tacos
- Added to pasta dishes
Storage Tips
- Best eaten fresh, but leftovers keep for 2-3 days in the fridge
- Store in airtight container
- Reheat gently in microwave (30 secs) or just eat cold!
Common Mistakes to Avoid
- Overcrowding the pan
- Skipping the pat-dry step
- Cooking too long
- Using too small shrimp
FAQs
Q: Can I use frozen shrimp?
A: Yup! Just thaw ’em first for best results.
Q How do I know when they’re done?A They’ll turn pink and form a “C” shape. If they’re a tight “O” they’re overcooked.
Q Shell on or off?A Your choice! Shell-on = more flavor but messier eating, Shell-off = easier to eat but can dry out faster
Well, there ya have it – everything you need to know about grilling shrimp in your oven! Give it a try and lemme know how it turns out. Trust me, once you master this method, you’ll never look back. Happy cooking!
Would you like me to explain any part in more detail?
HOW TO THAW FROZEN SHRIMP
To thaw frozen shrimp, place the frozen shrimp in a large bowl and run cold water over the shrimp until the bowl is full. Set the bowl aside and let the shrimp sit for 20 to 30 minutes, or until the shrimp are completely thawed.
With all your new-found shrimp knowledge, you should try making our easy Shrimp Quesadillas! Or the ever-classy Shrimp Cocktail!
HOW TO COOK PAN-SEARED SHRIMP ON THE STOVE
The first thing you want to do to prepare your shrimp for cooking on the stovetop is to pat them dry with a paper towel. The paper towels will absorb the excess moisture from the exterior of the shrimp, which is necessary to enable a good pan sear.
I like to lay a few sheets of paper towels down on a work surface, lay my shrimp across the paper towels in a single layer, and then bring in another couple of paper towels and press it gently over the tops of the shrimp. This method is much faster than patting dry each and every individual shrimp!
If you love pan-seared shrimp, try our Shrimp Po Boys next!
Next, it is on to the oil and the seasoning! For the oil, you can use either olive oil, avocado oil, or canola oil. Transfer your shrimp to a large bowl and drizzle with your oil of choice.
For the seasoning, you have options! You can keep it simple with salt and pepper, or take it up a notch with Italian seasoning, minced garlic, lemon zest, and more. Shrimp takes on a vast amount of flavors well, so it really depends on the dinnertime vibes youre shooting for. For this simple pan-seared shrimp recipe, in particular, we will keep it straightforward with salt, pepper, Italian seasoning, and garlic powder.
If this is your kind of recipe, be sure to check out our BBQ shrimp next!
Add your seasoning to the bowl and toss the shrimp until evenly coated in both the oil and seasoning. Set the shrimp aside, and get your pan hot and ready with oil.
The larger the pan, the better for cooking shrimp on the stovetop. Like any time youre pan-searing a protein, your protein needs room to “breathe.” If you overcrowd your pan with shrimp, the shrimp will steam rather than sear.
When cooking shrimp on the stove, we prefer oil over butter because of oils higher smoke point. However, if youd like to infuse the flavor of butter into your stove-top shrimp, add 1 tablespoon of butter to the hot oil just before you add the shrimp.
Once your pan and oil are good and hot, add your shrimp in a single layer and sear for about two minutes. Then, youll turn the shrimp and sear for about one to two minutes more.
These shrimp would be perfect for our shrimp fajitas!
Once your shrimp have finished cooking, remove them from the pan immediately so that the residual heat from the pan does not continue to cook your shrimp.
Dont know what to do with your perfectly cooked shrimp? Try our Shrimp Pesto Pasta!