Making homemade gravy can seem intimidating, but it doesn’t have to be. With just a few simple ingredients like beef broth, butter and flour, you can make rich, flavorful gravy from scratch in minutes.
In this comprehensive guide, I’ll walk you through everything you need to know to make gravy using beef broth without cornstarch We’ll cover
- The basics of gravy and why homemade is better
- How to make gravy with beef broth and flour
- Tips for best results and avoiding lumps
- Flavor variations with herbs, wine and more
- Storing, freezing and reheating leftovers
Let’s get started!
Why Make Homemade Gravy?
Before we get into the specifics let’s discuss why homemade gravy is so much better than the canned or packet varieties
Richer, fuller flavor – By making it yourself with quality ingredients like beef broth, herbs and spices, you can create so much more depth of flavor. The difference is night and day!
Thick and luxurious texture – Getting that velvety, cling-to-your-spoon consistency is easy with just a bit of flour. With packaged mixes, the texture is often thin and watery.
Customizable – Jazz it up with wine, fresh herbs, roasted garlic or other flavorings. Make it your own!
Cost effective – Homemade costs just pennies per serving compared to prepared alternatives.
Now let’s learn how to make this gravy from beef broth!
How to Make Gravy with Beef Broth and Flour
Making gravy with beef broth as the base and flour as a thickener is simple and foolproof. Here’s a step-by-step overview:
Ingredients
- Beef broth – about 2 cups
- Butter – 2 Tbsp
- Flour – 3 Tbsp
- Seasonings like garlic powder, herbs, salt and pepper
Steps
- Melt butter in a saucepan over medium heat
- Whisk in flour until lightly browned
- Gradually whisk in beef broth
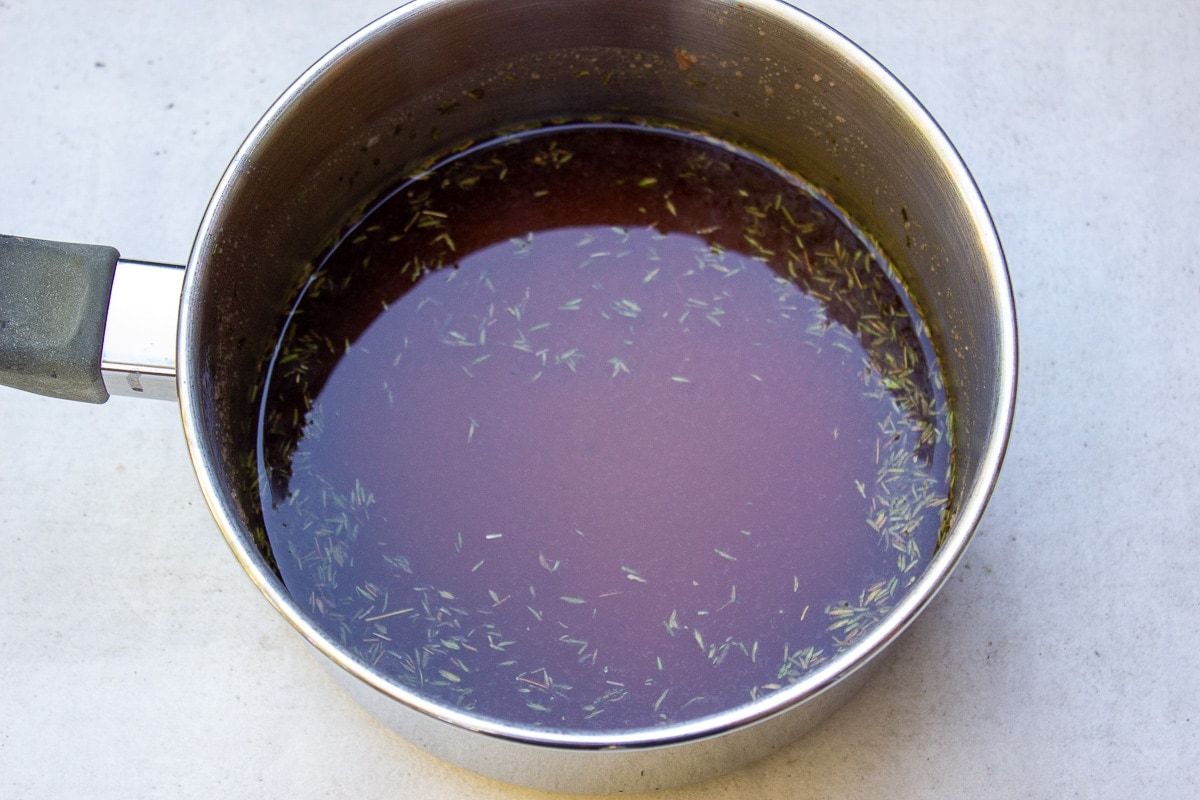
- Bring to a boil, then reduce to a simmer
- Cook 5-10 minutes until thickened
- Season with salt, pepper and any other flavors
And that’s it – easy peasy! Now let’s get into more tips and details.
Tips for the Best Homemade Gravy
Follow these tips and tricks for smooth, lump-free gravy every time:
Whisk vigorously when adding the flour and broth to prevent lumps. Use a wire whisk if you have one.
Start with cold broth for a smoother consistency than hot broth. The heat from the roux will warm it up.
Simmer gently once thickened to cook out the raw flour taste.
Add broth gradually instead of all at once so the flour has time to thicken the liquid properly.
Season well with salt, pepper and herbs/spices. Taste and adjust until the flavors really sing.
Strain if needed to remove any errant lumps. Use a fine mesh strainer.
That’s all you need to know technique-wise to make flawless gravy every time. Now let’s look at some flavor variations.
Gravy Flavor Variations
One of the great things about homemade gravy is how versatile it is when it comes to flavors. Here are some tasty additions to try:
- Fresh herbs like rosemary, thyme and sage
- Minced garlic or roasted garlic for extra richness
- Wine – red, white or Marsala all add depth
- Mushrooms – slice and sauté before making the gravy
- Bacon grease instead of butter for a smoky note
- Umami boosters like soy sauce, Worcestershire or tomato paste
- Spices such as paprika, cumin or nutmeg
- Cheese – stir in something like Parmesan at the end
Don’t be afraid to experiment with flavors until you find combinations you love. The possibilities are endless!
How to Store, Freeze and Reheat Leftover Gravy
One of the bonuses of homemade gravy is that it stores, freezes and reheats beautifully. Here are some tips:
Storing: Let cool completely, then transfer to an airtight container. It will keep in the fridge for 3-4 days. The flour will cause it to thicken over time.
Freezing: Let cool, then transfer to freezer bags or containers. It will keep frozen for 2-3 months.
Reheating: Thaw if frozen. Warm it gently in a saucepan over medium-low heat, stirring frequently. Add a splash of broth if too thick. Can also be reheated in the microwave.
Having ready-made gravy in the fridge or freezer is awesome meal prep! Just a quick reheat away from deliciousness.
Frequently Asked Questions
What if my gravy turns out lumpy? Strain it through a mesh strainer to remove lumps. Then simmer a bit longer if too thin.
Can I use beef stock instead of broth? Yes, beef stock and broth are interchangeable. Stock has a deeper flavor.
Is all-purpose flour gluten free? No, unfortunately all-purpose flour contains gluten. Substitute a GF blend instead.
How can I thicken my gravy if it’s too thin? Simmer uncovered for longer to reduce and thicken it. Can also make a slurry with cornstarch/water.
What meats go well with beef gravy? Roast beef, steaks, meatloaf, chops and chicken are all great with beef gravy!
How long does homemade gravy last? About 3-4 days refrigerated. Can be frozen for up to 3 months.
How to Make Brown Gravy Without Drippings?
Most people make brown gravy from pot roast, steak, beef tenderloin, and even bacon drippings. However, there are dozens of other tasty solutions if you don’t have drippings. For me, this is usually the case when I want to make it ahead of time and have it ready for serving.
Below, you’ll find two methods to make a homemade beef gravy recipe without drippings. The first is made with flour and the second is made with cornstarch:
If you’re a fan of bold flavor, making gravy with beef broth and flour is the way to go. Slightly browned butter gives the mixture a rich, caramelized flavor, while its flour base helps the classic brown gravy store and reheat better.
The most important thing when it comes to making DIY beef gravy with flour is to thoroughly cook the butter and flour before adding the remaining ingredients. If you skip this step, you will end up with beef gravy with raw flour taste, and let’s face it, no one wants that.
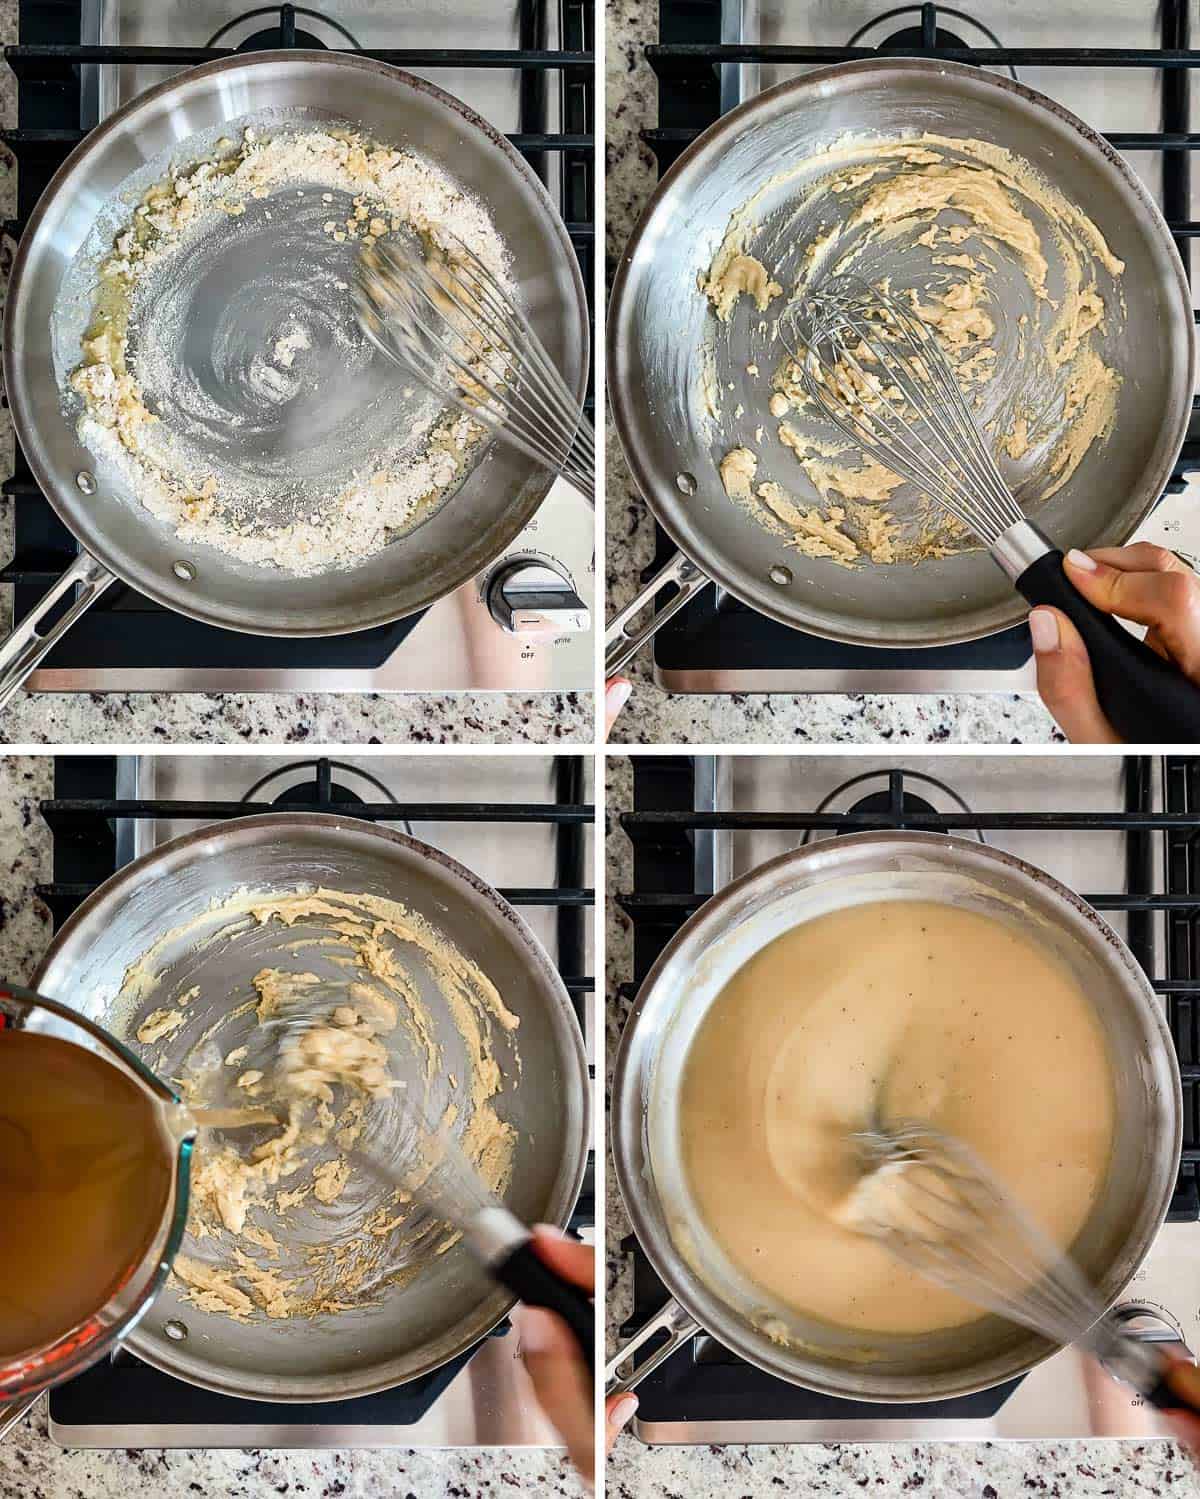
- Prepare the flour roux: Melt the butter over medium heat in a medium saucepan or skillet. Then, add the all-purpose flour to the pan and cook, constantly whisking, until the flour mixture turns light golden brown (~3 minutes). The secret here is to be patient as you constantly whisk the mixture with a wire whisk (affiliate link). Initially the mixture will clump up and collect on the whisk, but it should loosen and turn brown as you continue whisking.
- Thicken the beef broth: Pour the beef broth into the pan, ¼ cup at a time. Whisk it thoroughly after each pour. Once you add the beef broth, continue to whisk the liquid until it thickens (3-4 minutes).
- Add seasoning: Stir in the seasonings. Taste your beef broth flour gravy and add in more as necessary.
- Simmer the beef stock gravy: Turn the heat to medium-low and let it simmer for 5-7 minutes, stirring occasionally.
Making beef gravy with cornstarch from scratch is quicker and easier. You use the same set of ingredients, except that you substitute plain flour with cornstarch.
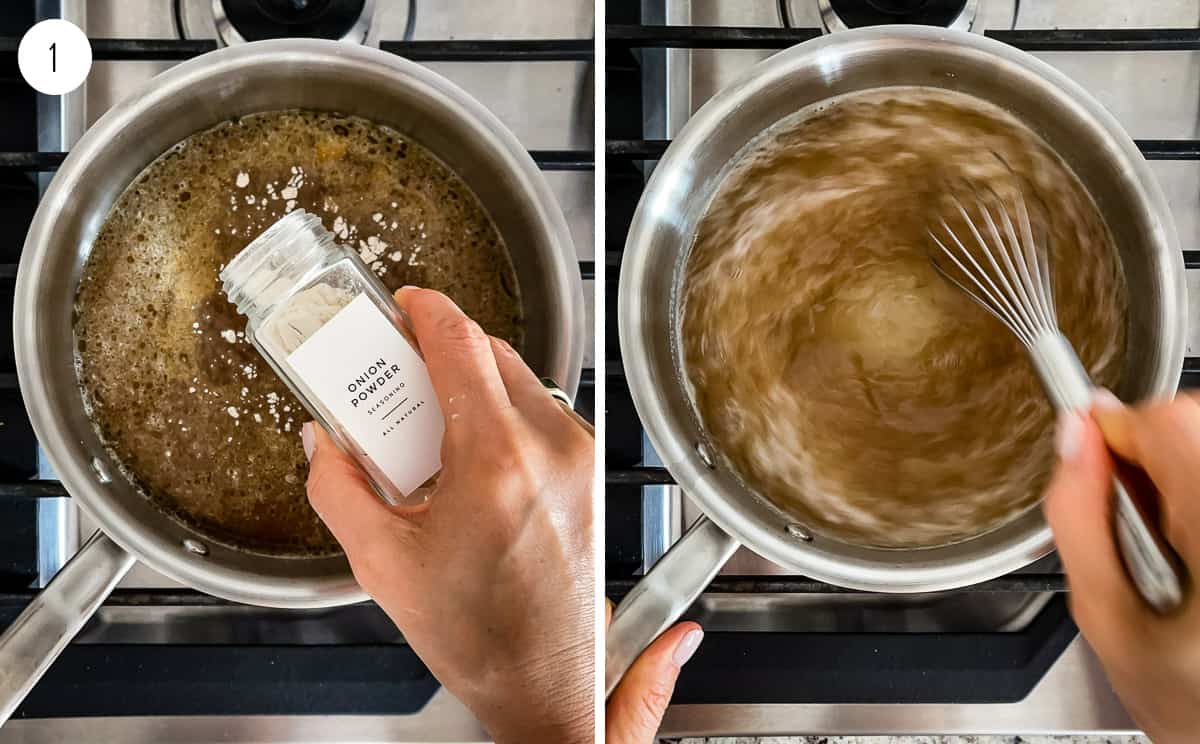
- Boil the mixture: Melt butter in a medium-sized saucepan over medium-high heat. Once melted, stir in the beef broth, Worcestershire sauce, and seasonings. Bring the beef mixture to a boil, then let it simmer for 2-3 minutes, stirring occasionally.
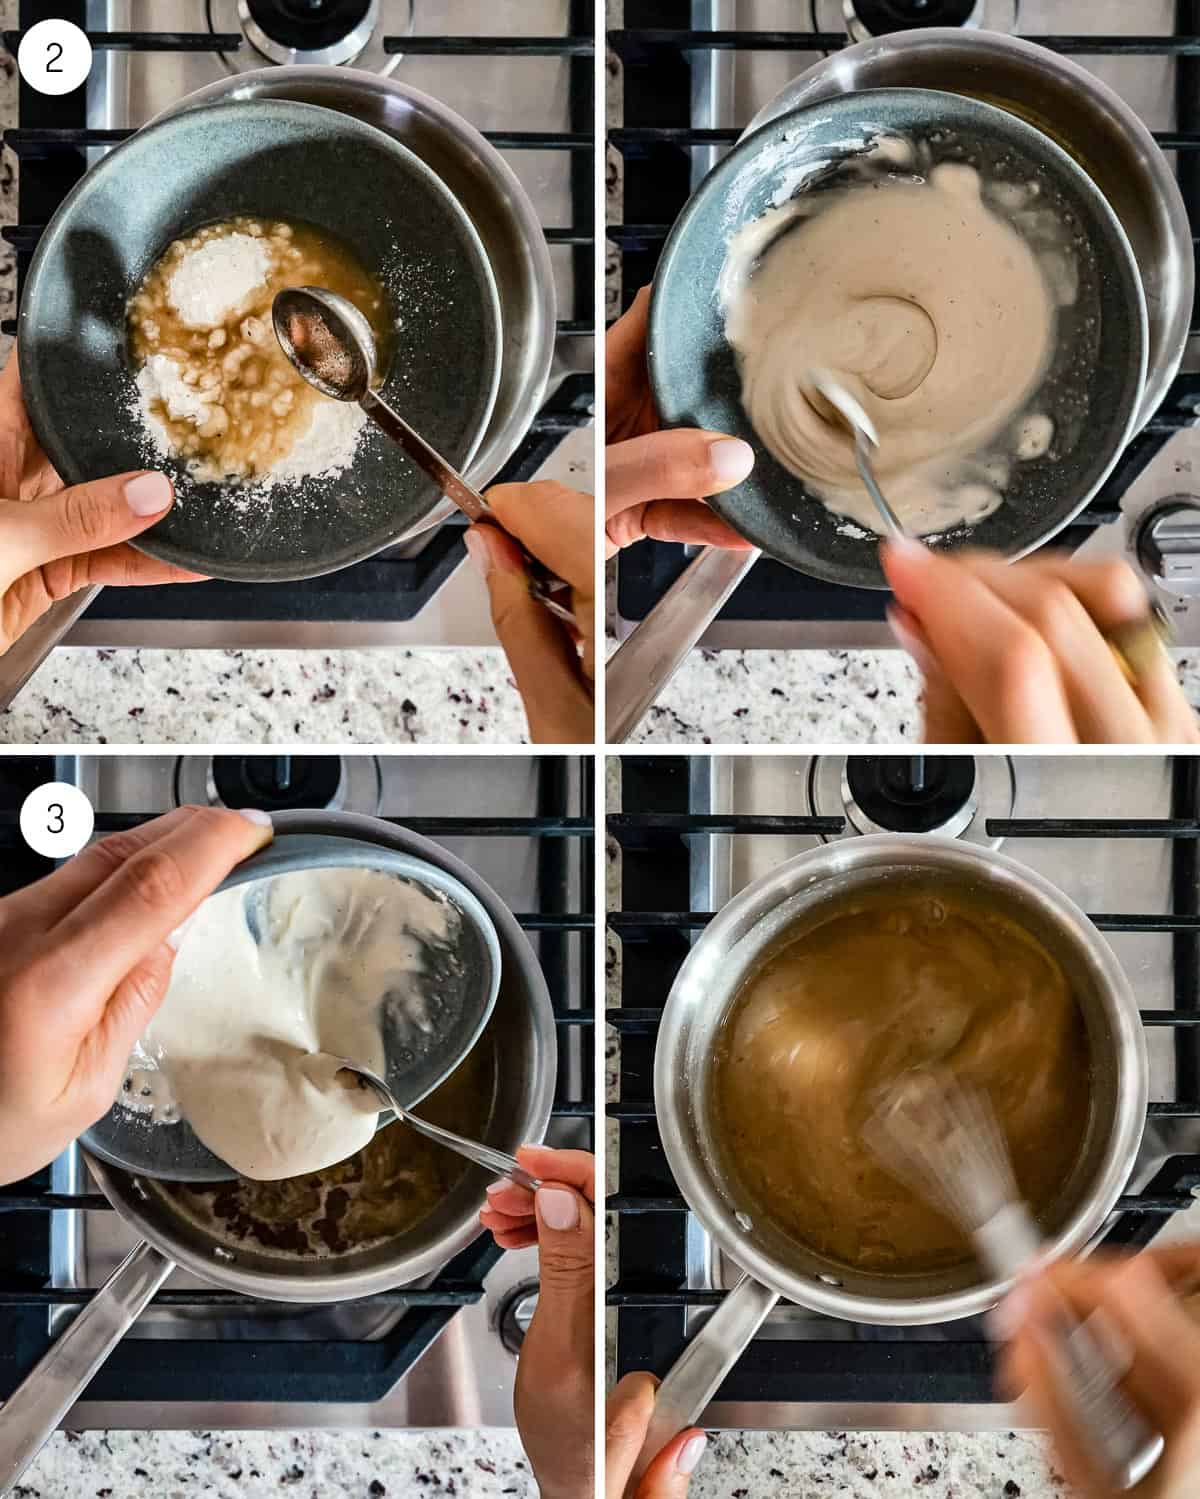
- Prepare a cornstarch slurry: While it simmers, place the cornstarch in a medium-sized ramekin or measuring bowl. Then, transfer 4 tablespoons of the hot liquid to the ramekin and whisk it until it forms a paste. If it doesn’t form a paste right away, you can add more liquid until it does.
- Thicken the beef base gravy: While whisking constantly, slowly pour the cornstarch paste into the beef mixture. Continue stirring until the gravy reaches your desired consistency (2-3 minutes). Keep a close eye on it, as this happens quickly. Please note that heating beef gravy with cornstarch for too long will thin it out. So, it is best to remove it from the heat as soon as it reaches your desired level of thickness. If it thins out, you can thicken it by making a small amount of cornstarch slurry and stirring it into the gravy.
- Serve: Transfer the quick beef gravy into a cup or gravy boat and use it in your recipe.
How to Make Beef Gravy with Drippings
Drippings from your roast meat is ideal for the best gravy. Use that glorious broth left over from cooking your meat for your gravy. Use as much as you can and try to scrape up those little beef bits from the bottom of your roasting pan, slow cooker, or Instant Pot before turning it into gravy.