Hey there, fellow seafood lovers! I’ve been cooking shrimp for years, and I know firsthand how intimidating it can be to deal with head-on shrimp Today, I’m gonna share my tried-and-true method for peeling cooked shrimp with heads. Trust me, once you get the hang of it, you’ll be a pro in no time!
Why Keep the Heads On?
Before we dive in let me tell you why cooking shrimp with heads on is totally worth the extra effort
- Enhanced flavor (the heads contain lots of yummy goodness)
- Better presentation for fancy dishes
- Perfect for making amazing seafood stock
- More bang for your buck (you can use every part)
What You’ll Need
- Bowl of ice
- Paper towels
- Small paring knife (optional)
- Clean workspace
- Your cooked head-on shrimp
Step-by-Step Guide to Peeling Cooked Head-on Shrimp
1. Keep Those Shrimp Cold
First things first, dump your cooked shrimp on some ice. This keeps them fresh and makes them easier to handle. Nobody wants warm, mushy shrimp, right?
2. The Head Removal
Here’s where the fun begins! You’ve got two options:
Method A (My Favorite):
- Hold the shrimp body with one hand
- Grip the head with your other hand’s thumb and index finger
- Twist and pull – the head should pop right off!
Method B (The Knife Method)
- Use a sharp knife
- Cut at the joint where head meets body
- Place heads aside (don’t throw them away!)
3. Peeling the Shell
Now for the main event:
- Start where you removed the head
- Slide your thumb under the shell where it meets the legs
- Pull up and over with your index finger
- Keep going until you reach the tail
- The legs should come off with the shell – neat, huh?
4. The Tail Decision
You’ve got choices here:
- Leave it on for prettier presentation
- Take it off for easier eating
To remove:
- Hold the peeled shrimp body firmly
- Pinch the tail end
- Give it a gentle but firm pull
- Pop! Off it comes
5. Clean-up Time
- Give your peeled shrimp a quick rinse
- Pat them dry with paper towels
- They’re ready to eat or use in your recipe!
Pro Tips from My Kitchen to Yours
- Watch out for those sharp points! There’s one on top of the head (rostrum) and another on the tail (telson)
- Save those heads and shells in the freezer – they make killer seafood stock
- If you’re getting pricked too much, wear kitchen gloves
- Work in small batches to keep the shrimp cold
Bonus: What to Do with Shrimp Heads and Shells
Don’t toss those “leftovers”! Here’s what I do with mine:
- Make amazing seafood stock
- Create flavorful sauces
- Add to soups and stews
- Freeze for later use
Common Mistakes to Avoid
We all make ’em, but here’s how to avoid the biggest ones:
- Don’t let your shrimp get warm while peeling
- Don’t throw away the heads and shells
- Don’t rush – take your time to avoid mangling the meat
- Don’t forget to devein if that’s your preference
When to Skip Peeling
Sometimes, you might wanna leave those shells on:
- Grilling shrimp (shells protect the meat)
- Making peel-and-eat shrimp
- Serving whole for presentation
- Creating stock-based dishes
Final Thoughts
Look, I know peeling head-on shrimp can seem like a pain, but it’s totally worth it! The flavor is amazing, and you’re getting the most out of your seafood purchase. Plus, once you get the hang of it, it’s kinda therapeutic – just me and my shrimp, peeling away!
Remember, practice makes perfect. Your first few might look a bit rough, but keep at it! Before you know it, you’ll be peeling shrimp like a pro chef.
Got questions about peeling shrimp? Drop ’em in the comments below! I’d love to help you out with any tricky situations you run into.
Happy peeling, everyone!
P.S. Don’t forget to save those heads and shells – seriously, your future soups will thank you!

Is it necessary to devein shrimp?
I personally grew up eating cooked shrimp that wasn’t deveined, and I honestly couldn’t tell the difference. If you are planning on cooking the shrimp and don’t mind the intestinal vein, it’s not necessary to remove it.
I typically don’t bother to devein smaller or medium-sized shrimp. Some chefs prefer to devein jumbo or large shrimp because the vein can be bigger and potentially produce a sandy, grit texture. I would also recommend removing it if you plan on eating the shrimp raw for nigiri or sashimi so you don’t have a gritty texture or bitter taste.
How to devein shrimp with shells still on (w/ a toothpick)
The easiest way to devein shrimp with shells and heads on is to use a toothpick. This is the cleanest way possible and doesn’t damage the shells. My mom taught me this toothpick process:
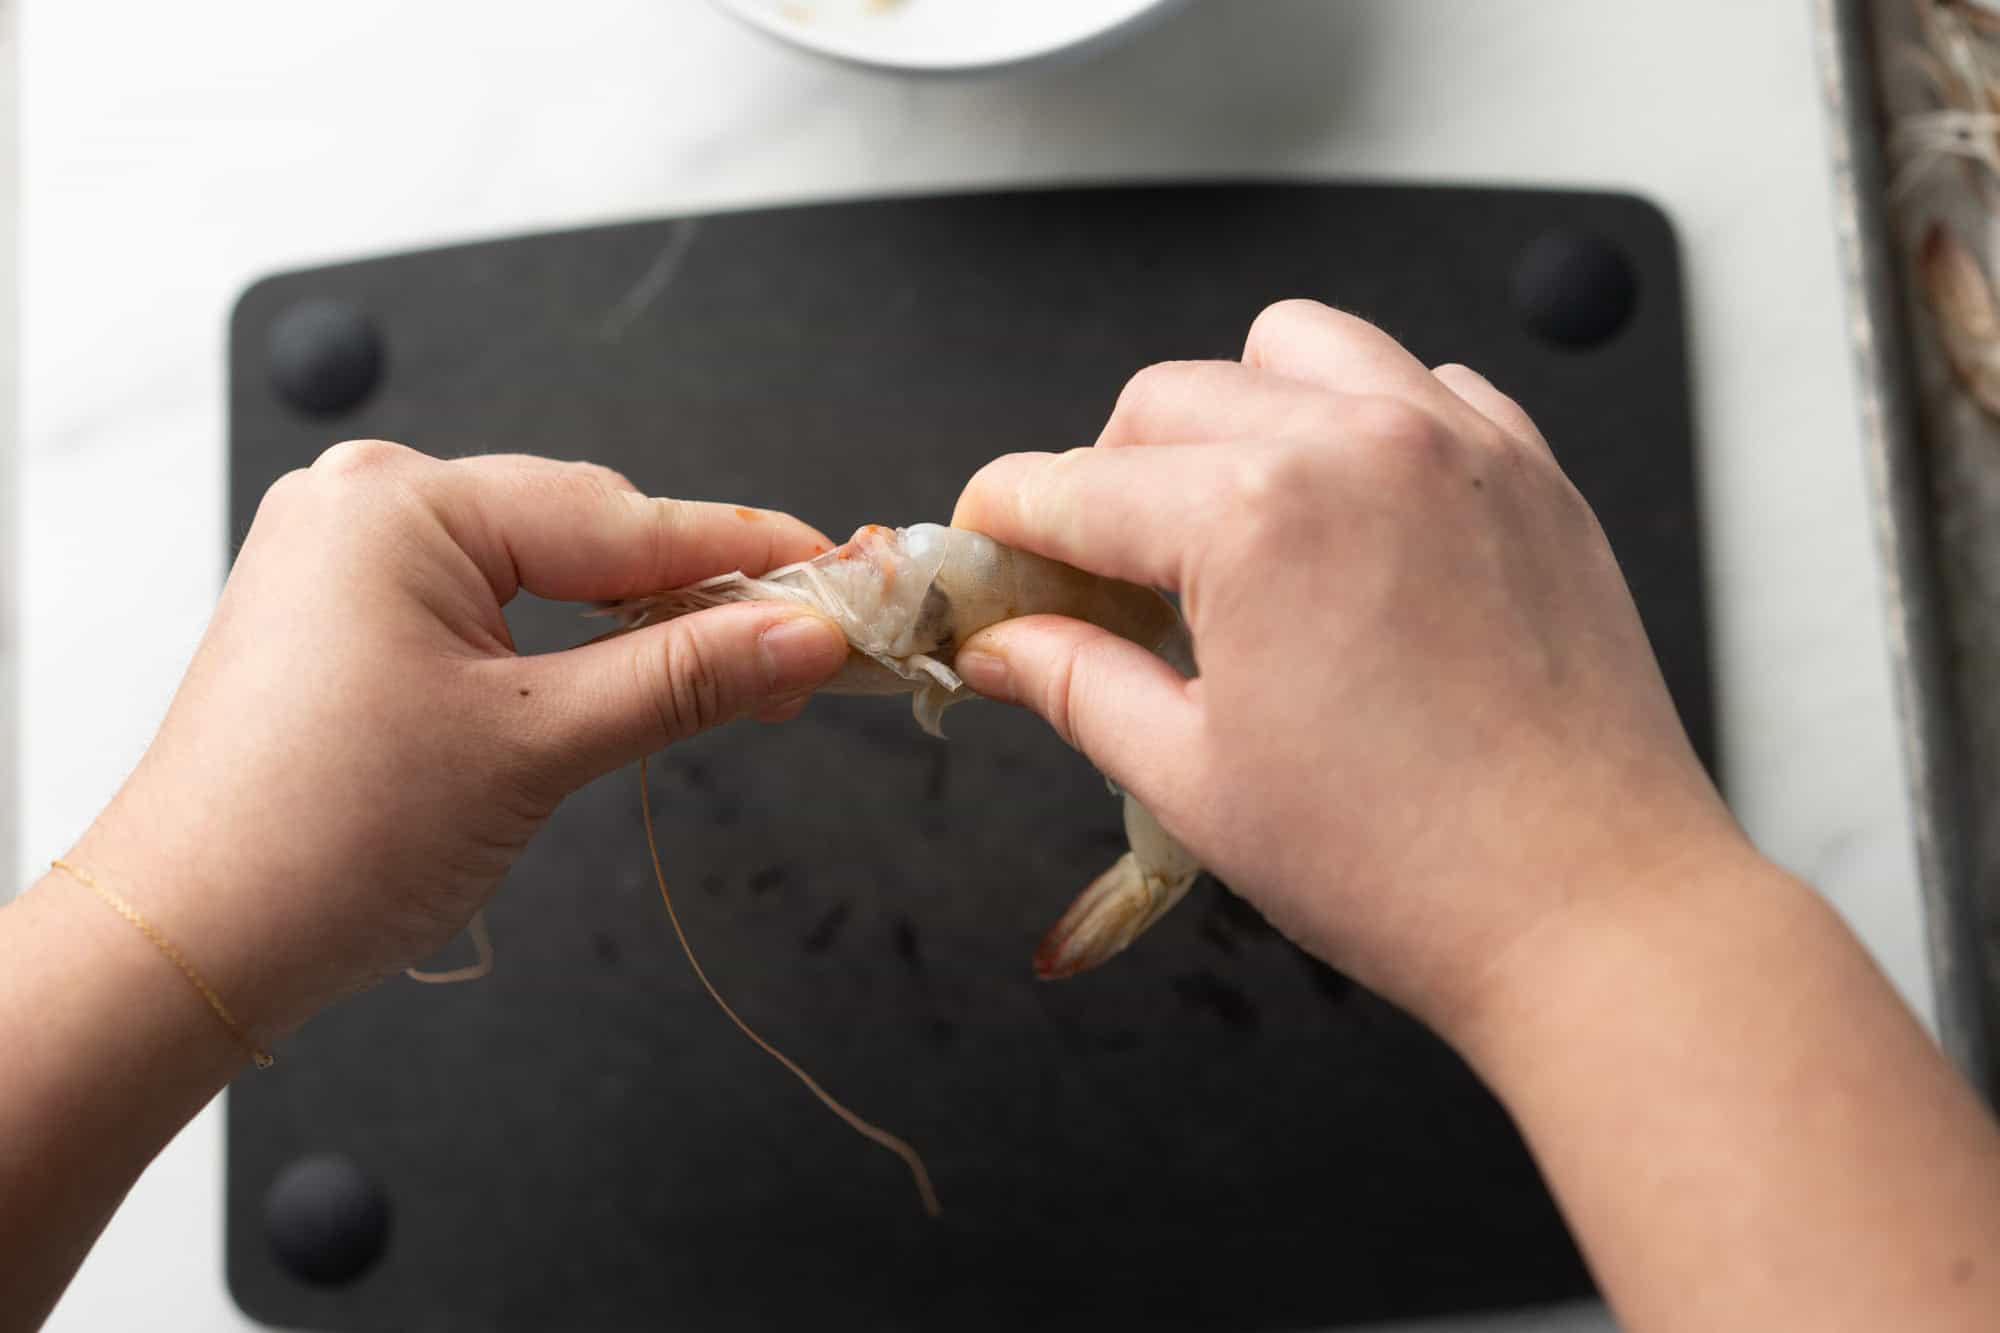
1. Optionally, remove the head by twisting and pulling it off. This method also works if you leave the head on.
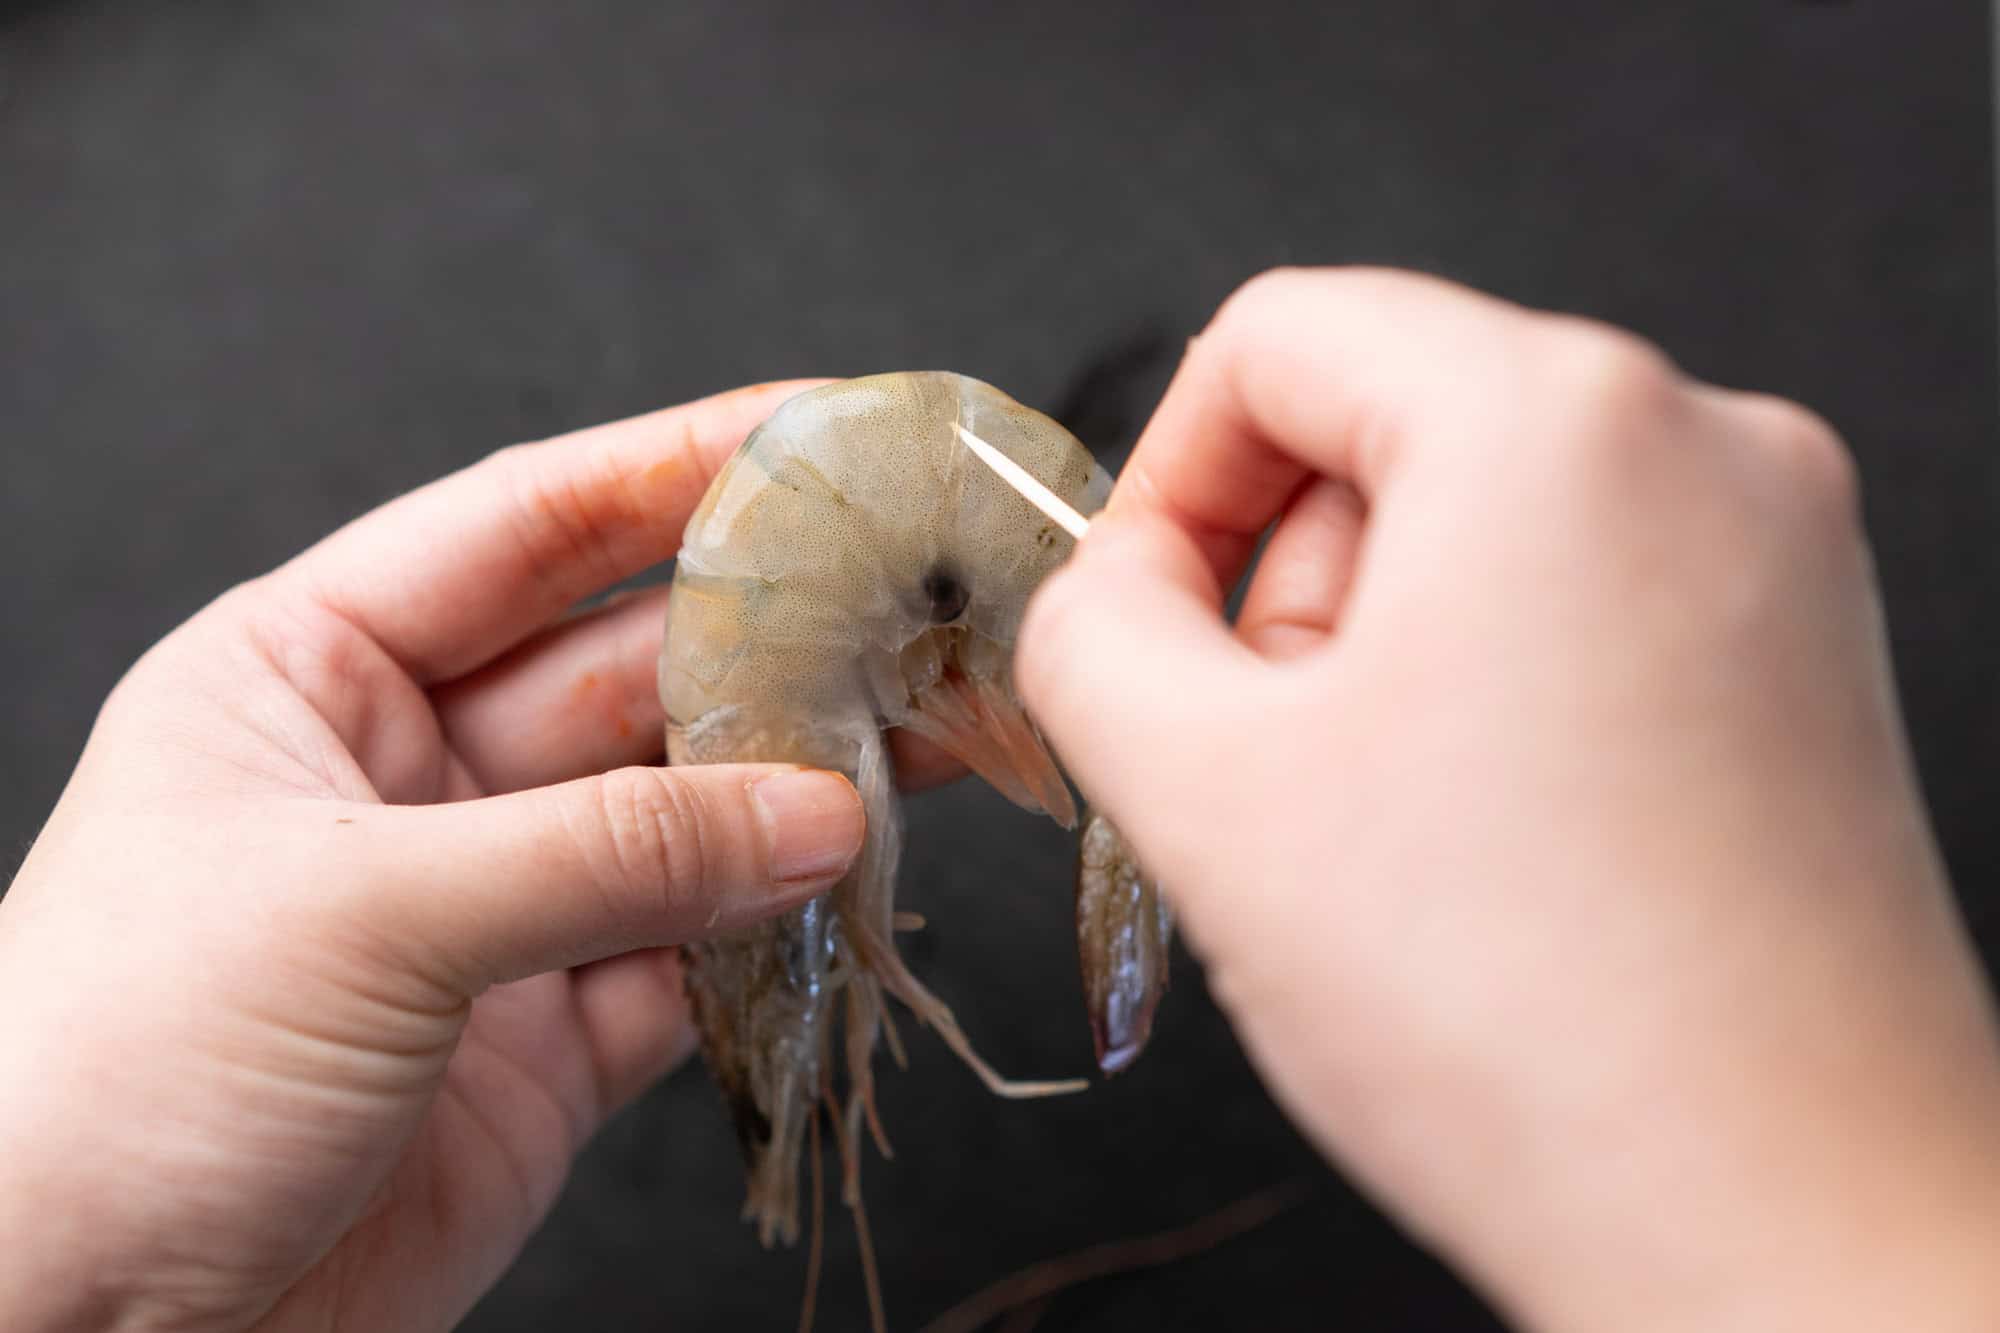
2. Locate the back of the shrimp where the intestinal vein is. Find the joint between the second and the third shell segment from the head.
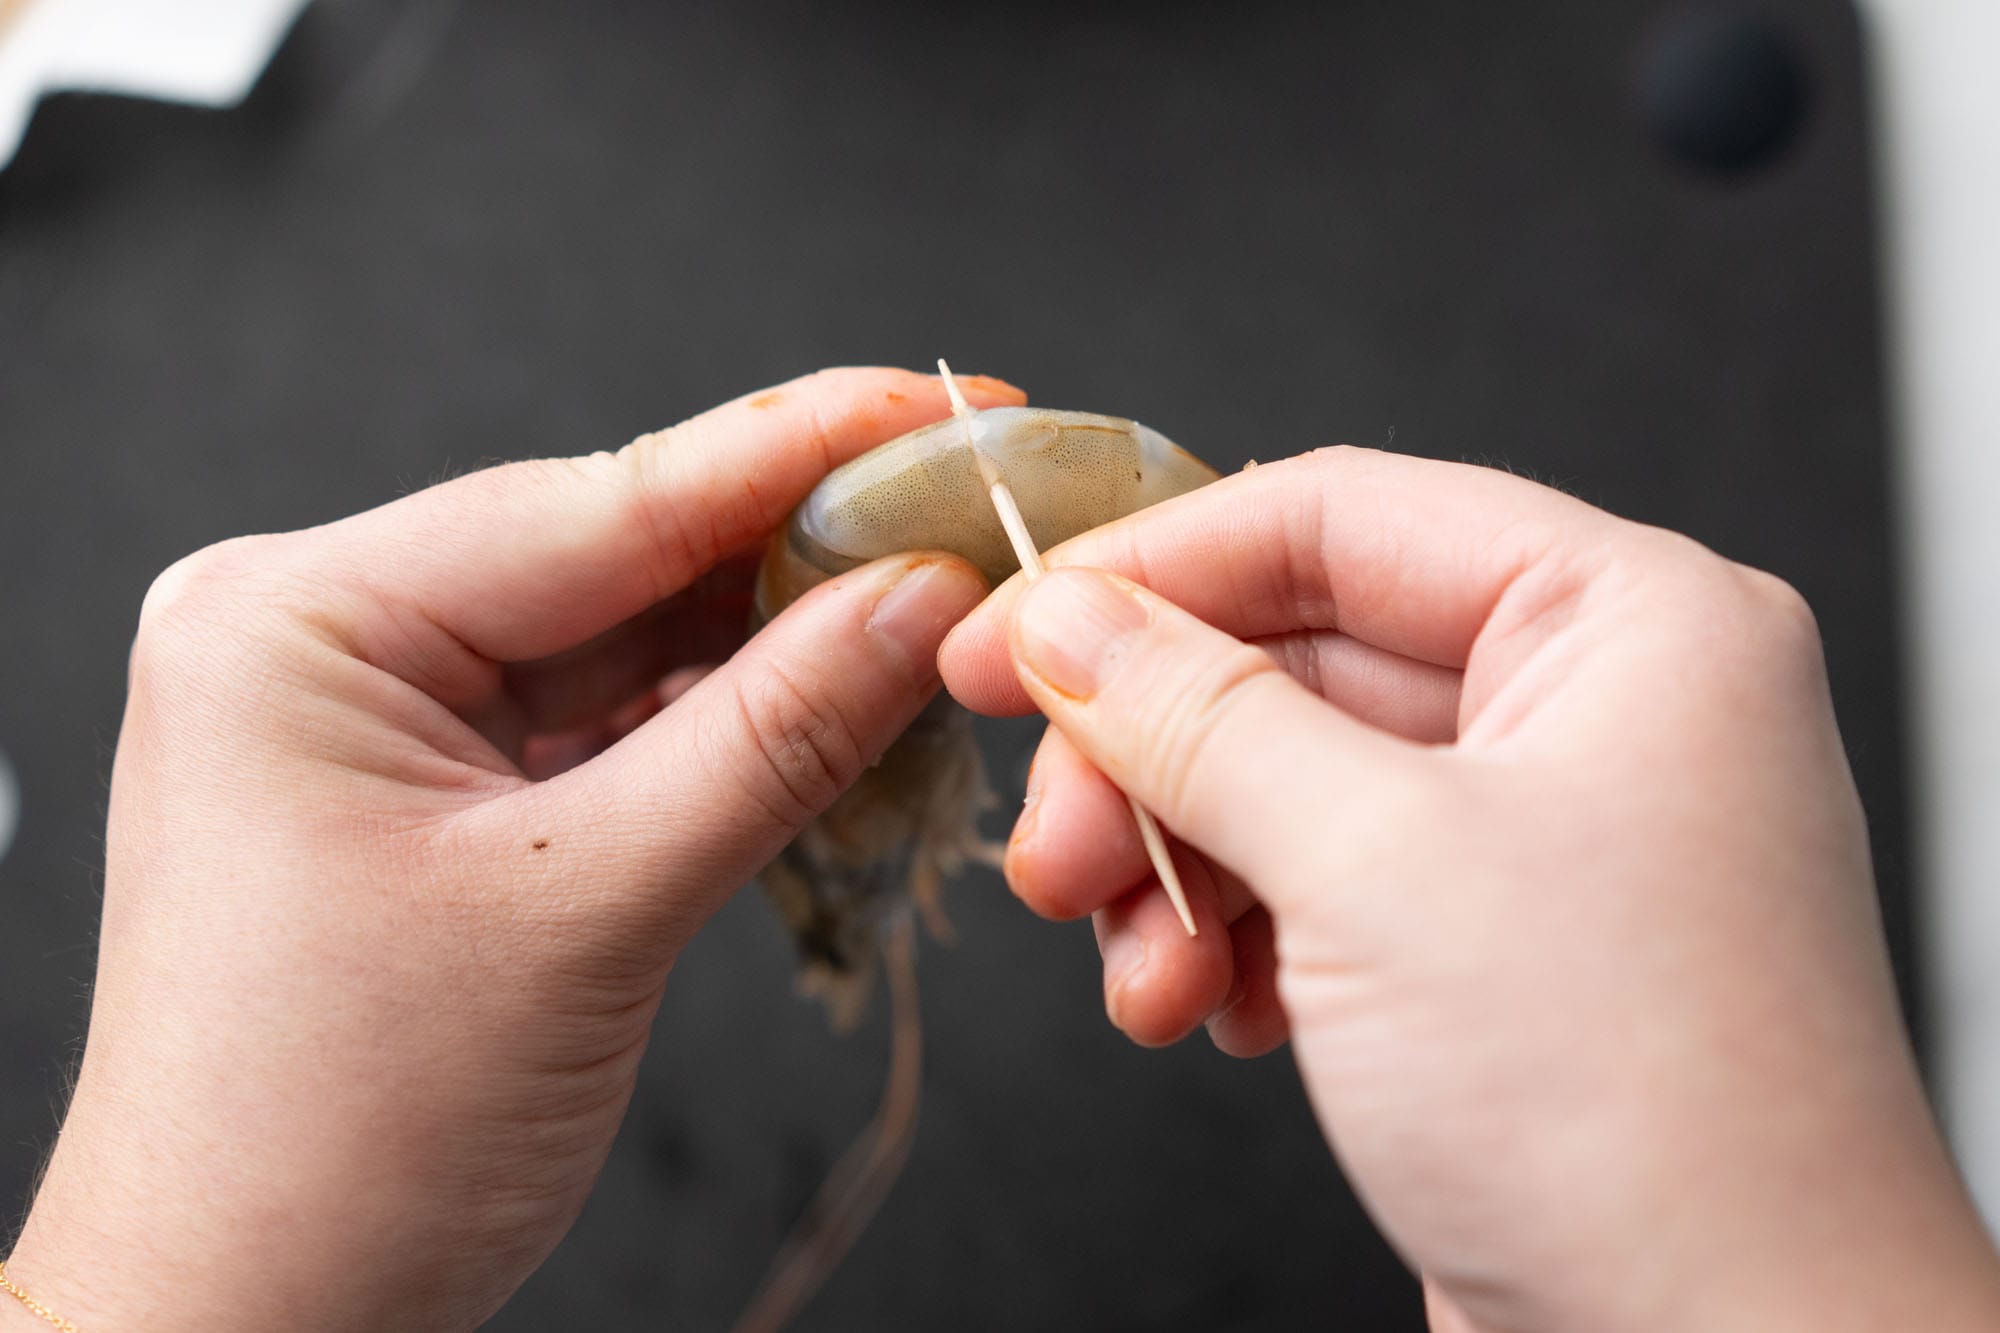
3. If you can see the vein, pierce the area underneath with a toothpick. If you can’t see the vein, pierce the joint between the shell segments with a toothpick between ⅛ and ¼-inch deep–this should be under where the shrimp intestinal vein sits.
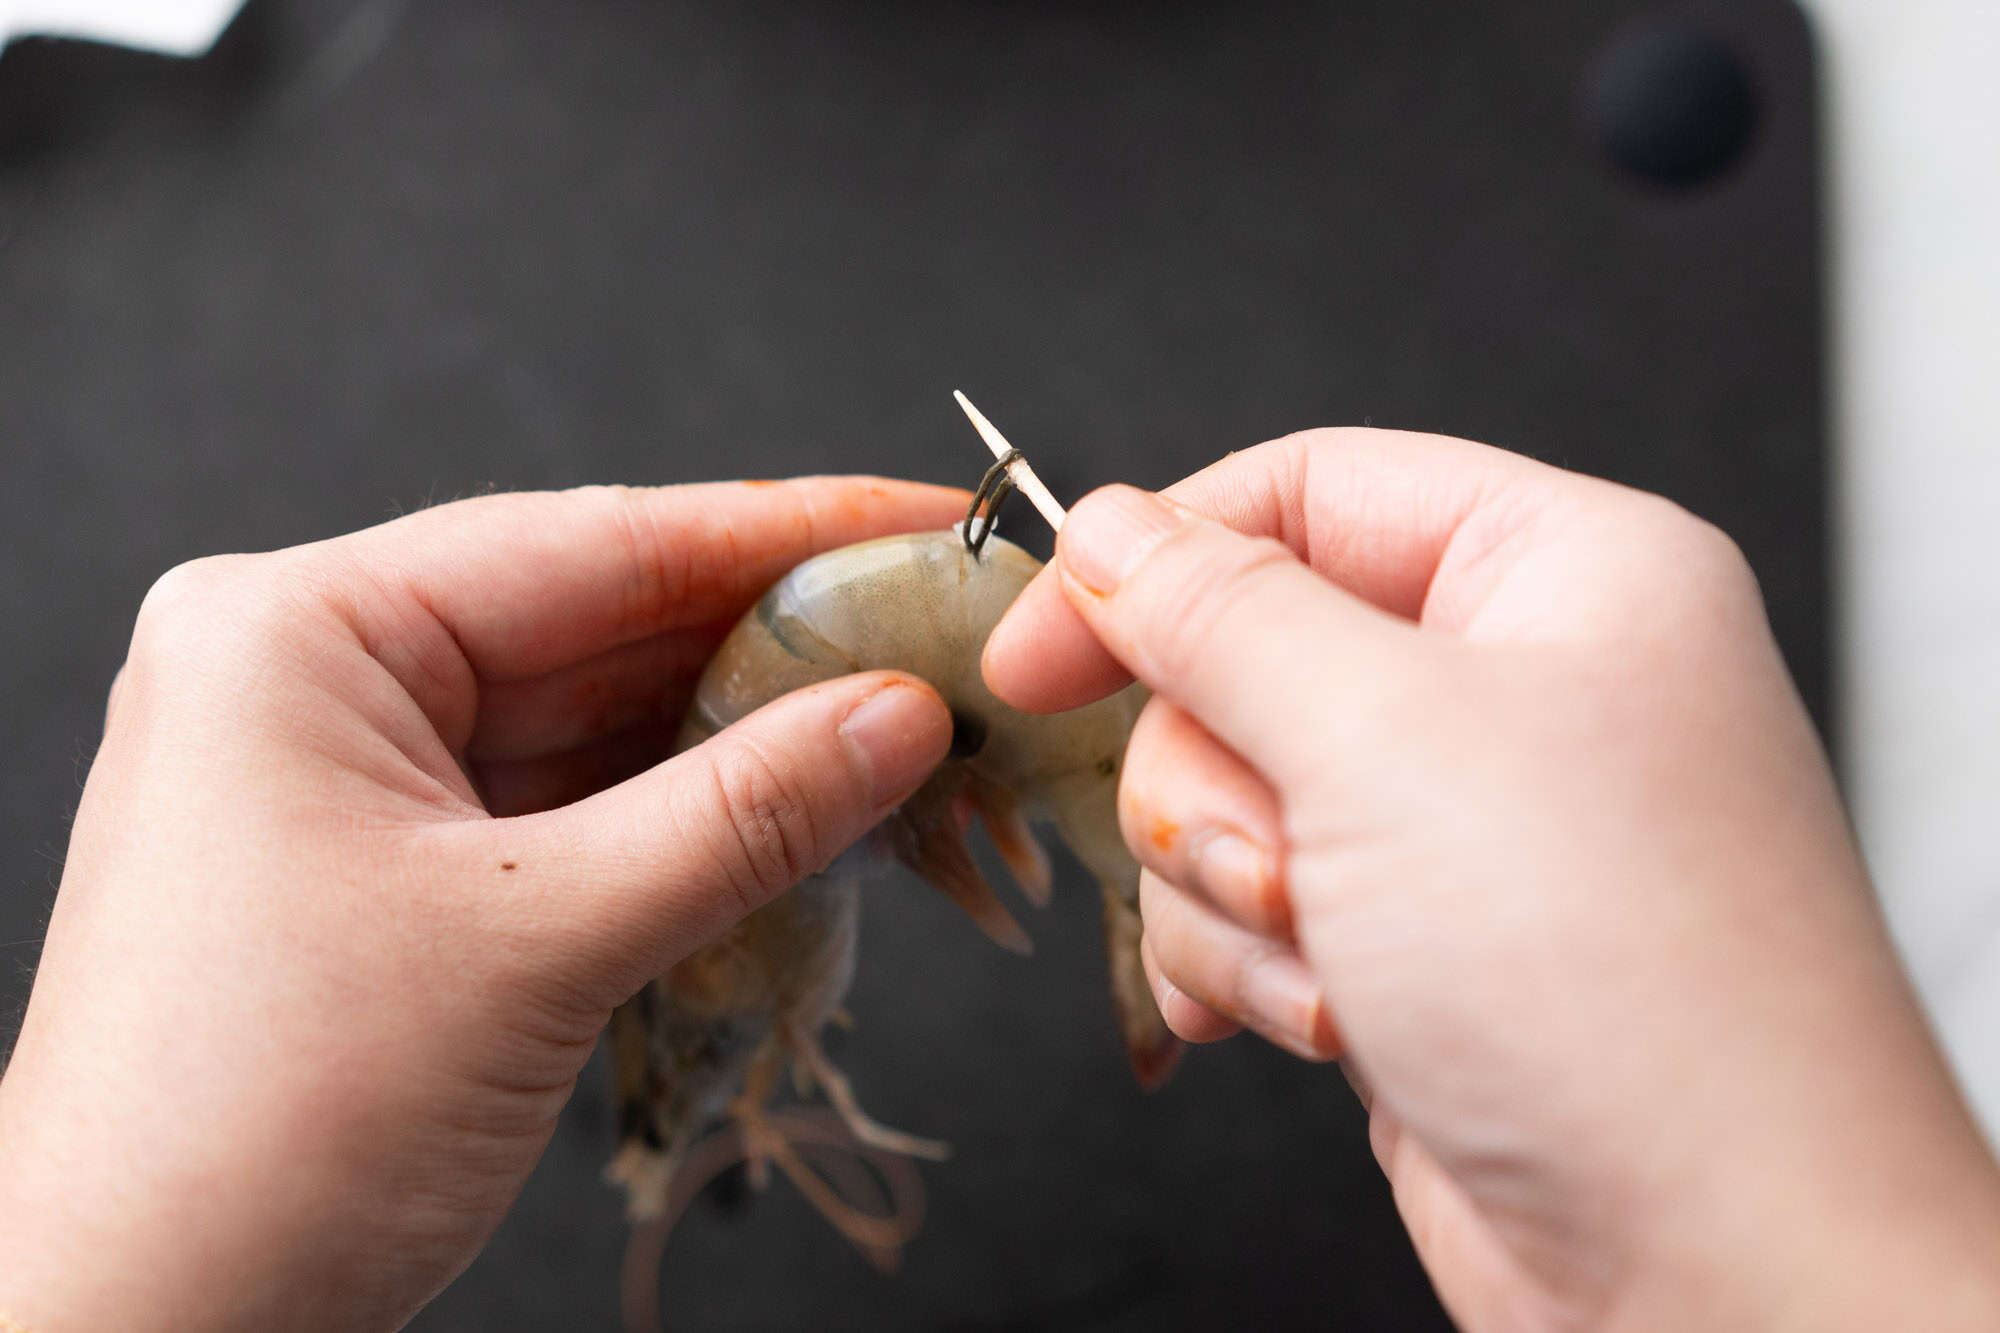
4. Gently lift the toothpick and vein above the shell and pull the remaining vein out in one piece.
How to Peel and Devein Shrimp Like a Pro | Food Network
FAQ
What is the dark line on the underside of shrimp?

The dark line on the underside of a shrimp, often referred to as the “vein,” is actually the shrimp’s digestive tract, specifically the alimentary canal. It’s safe to eat, but many people prefer to remove it because it can be gritty and visually unappealing.