Hey there, fellow seafood lovers! As someone who’s been cooking shrimp for years, I know the struggle of deveining shrimp while keeping that flavorful shell intact. Today, I’m gonna share my tried-and-true method for this tricky but totally doable kitchen task.
Why Keep the Shell On?
Before we dive in (pun intended!). let’s talk about why you might want to keep the shell
- Shell adds amazing flavor to your dishes
- Protects the shrimp from overcooking
- Keeps the moisture locked in
- Perfect for grilling or shell-on recipes
- More economical than buying pre-peeled shrimp
Do You Really Need to Devein?
Here’s the truth – it’s not always necessary! According to chef Eric Ripert, if you’re working with tiny shrimp, you can skip deveining since there’s usually nothing visible to remove. However, for larger shrimp, removing that intestinal tract (yep, that’s what the “vein” actually is!) can make your dish more appetizing.
Tools You’ll Need
Keep it simple! You only need
- Sharp kitchen scissors or paring knife
- Clean workspace
- Paper towels
- Bowl for cleaned shrimp
Step-by-Step Guide to Deveining Shell-On Shrimp
1. Prep Your Workspace
First things first, make sure everything’s clean and ready to go. I like having a bowl for the cleaned shrimp and some paper towels handy.
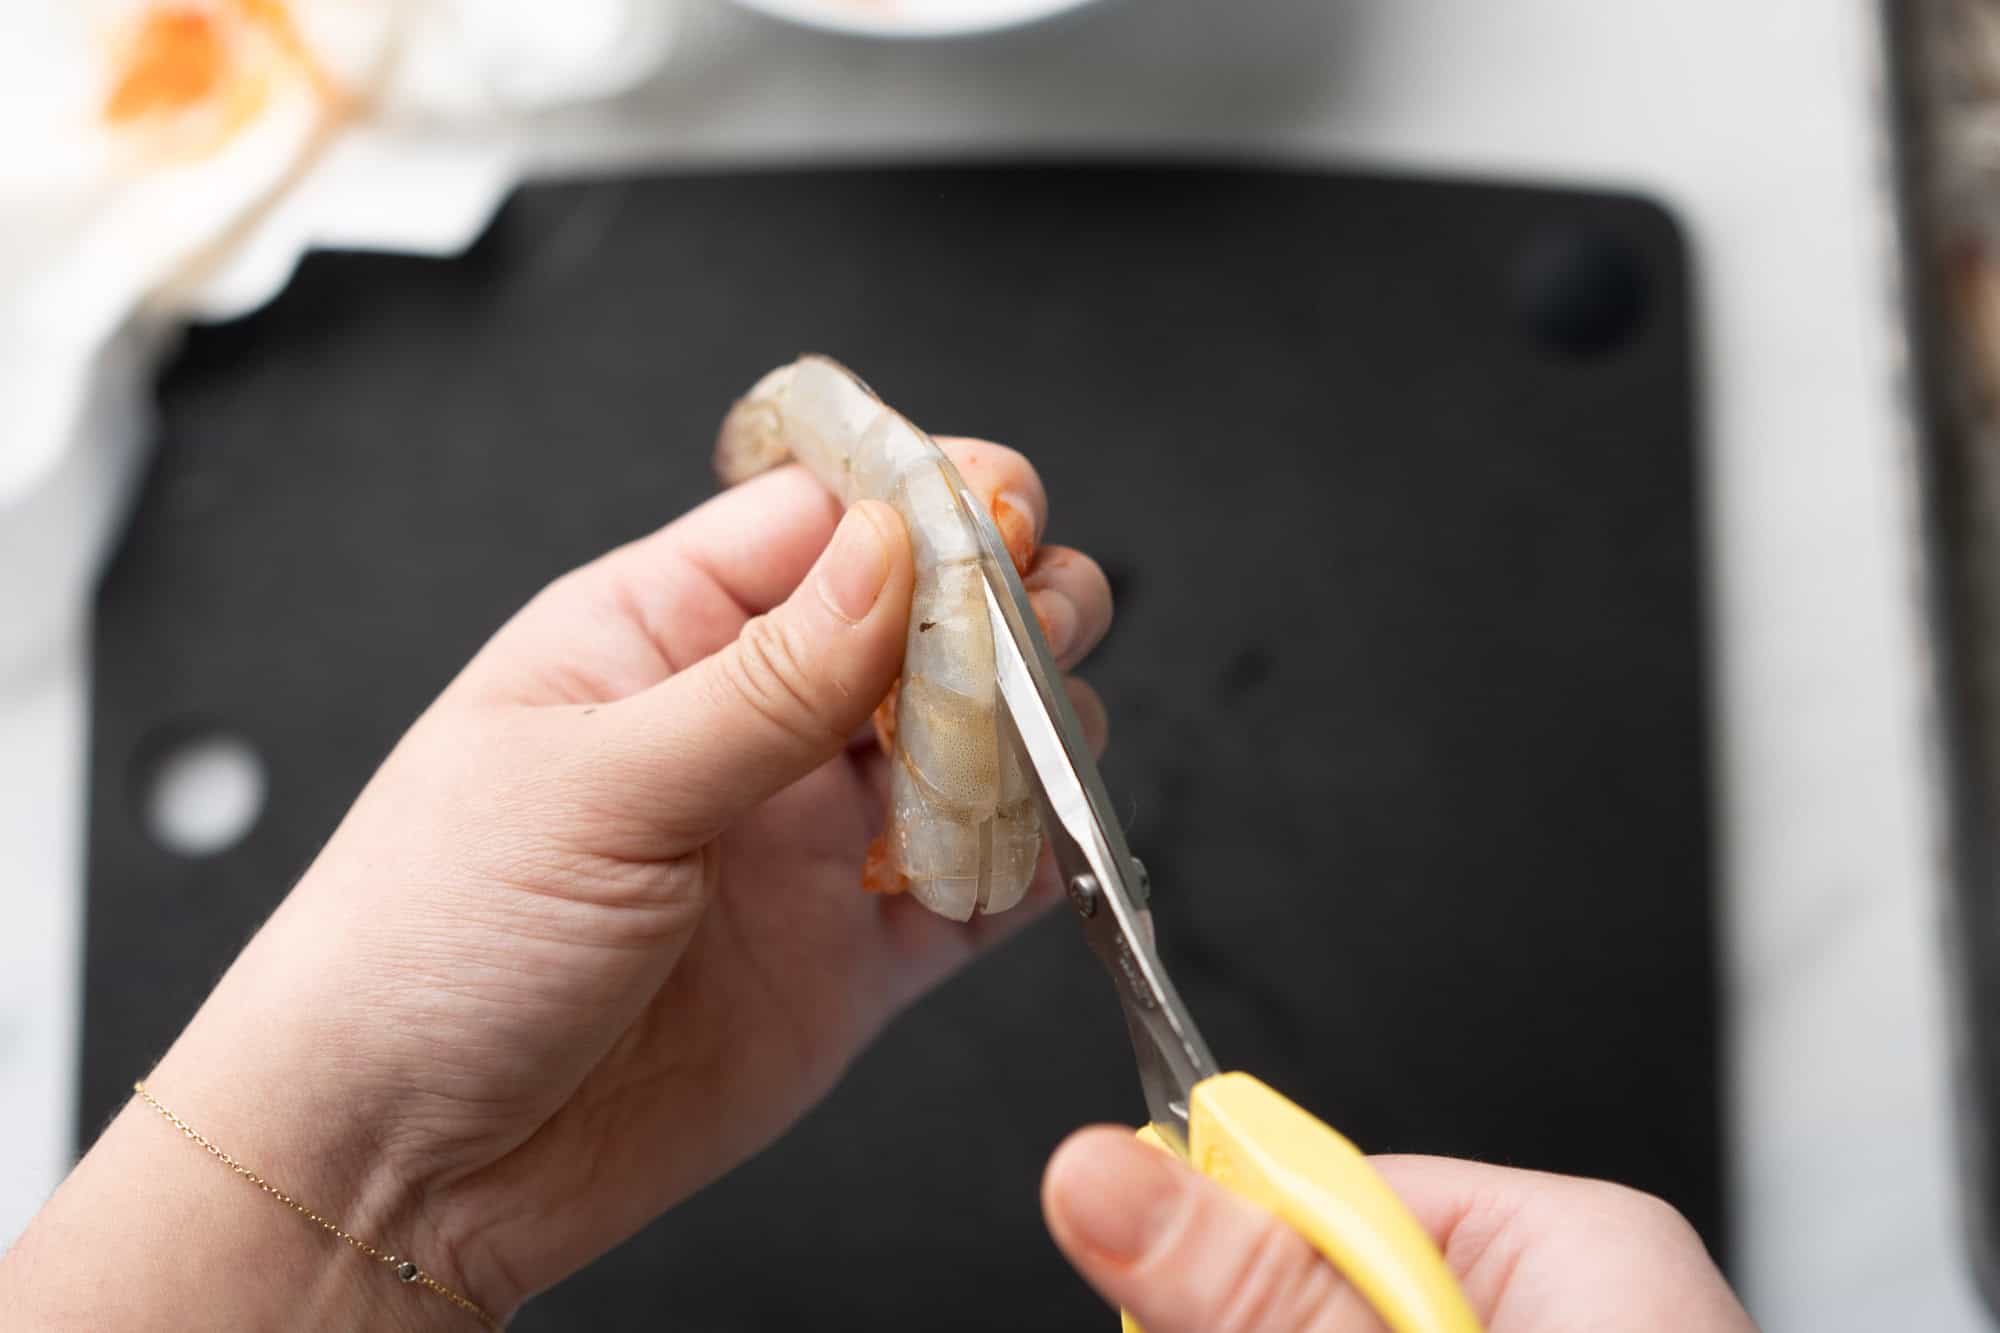
2. Make the Cut
Here’s where the magic happens
- Hold the shrimp with the curved back facing up
- Using scissors or a sharp knife, carefully cut along the back through the shell
- Make a shallow cut (about ⅛ inch deep) from head to tail
- Don’t cut all the way through – just enough to expose the vein
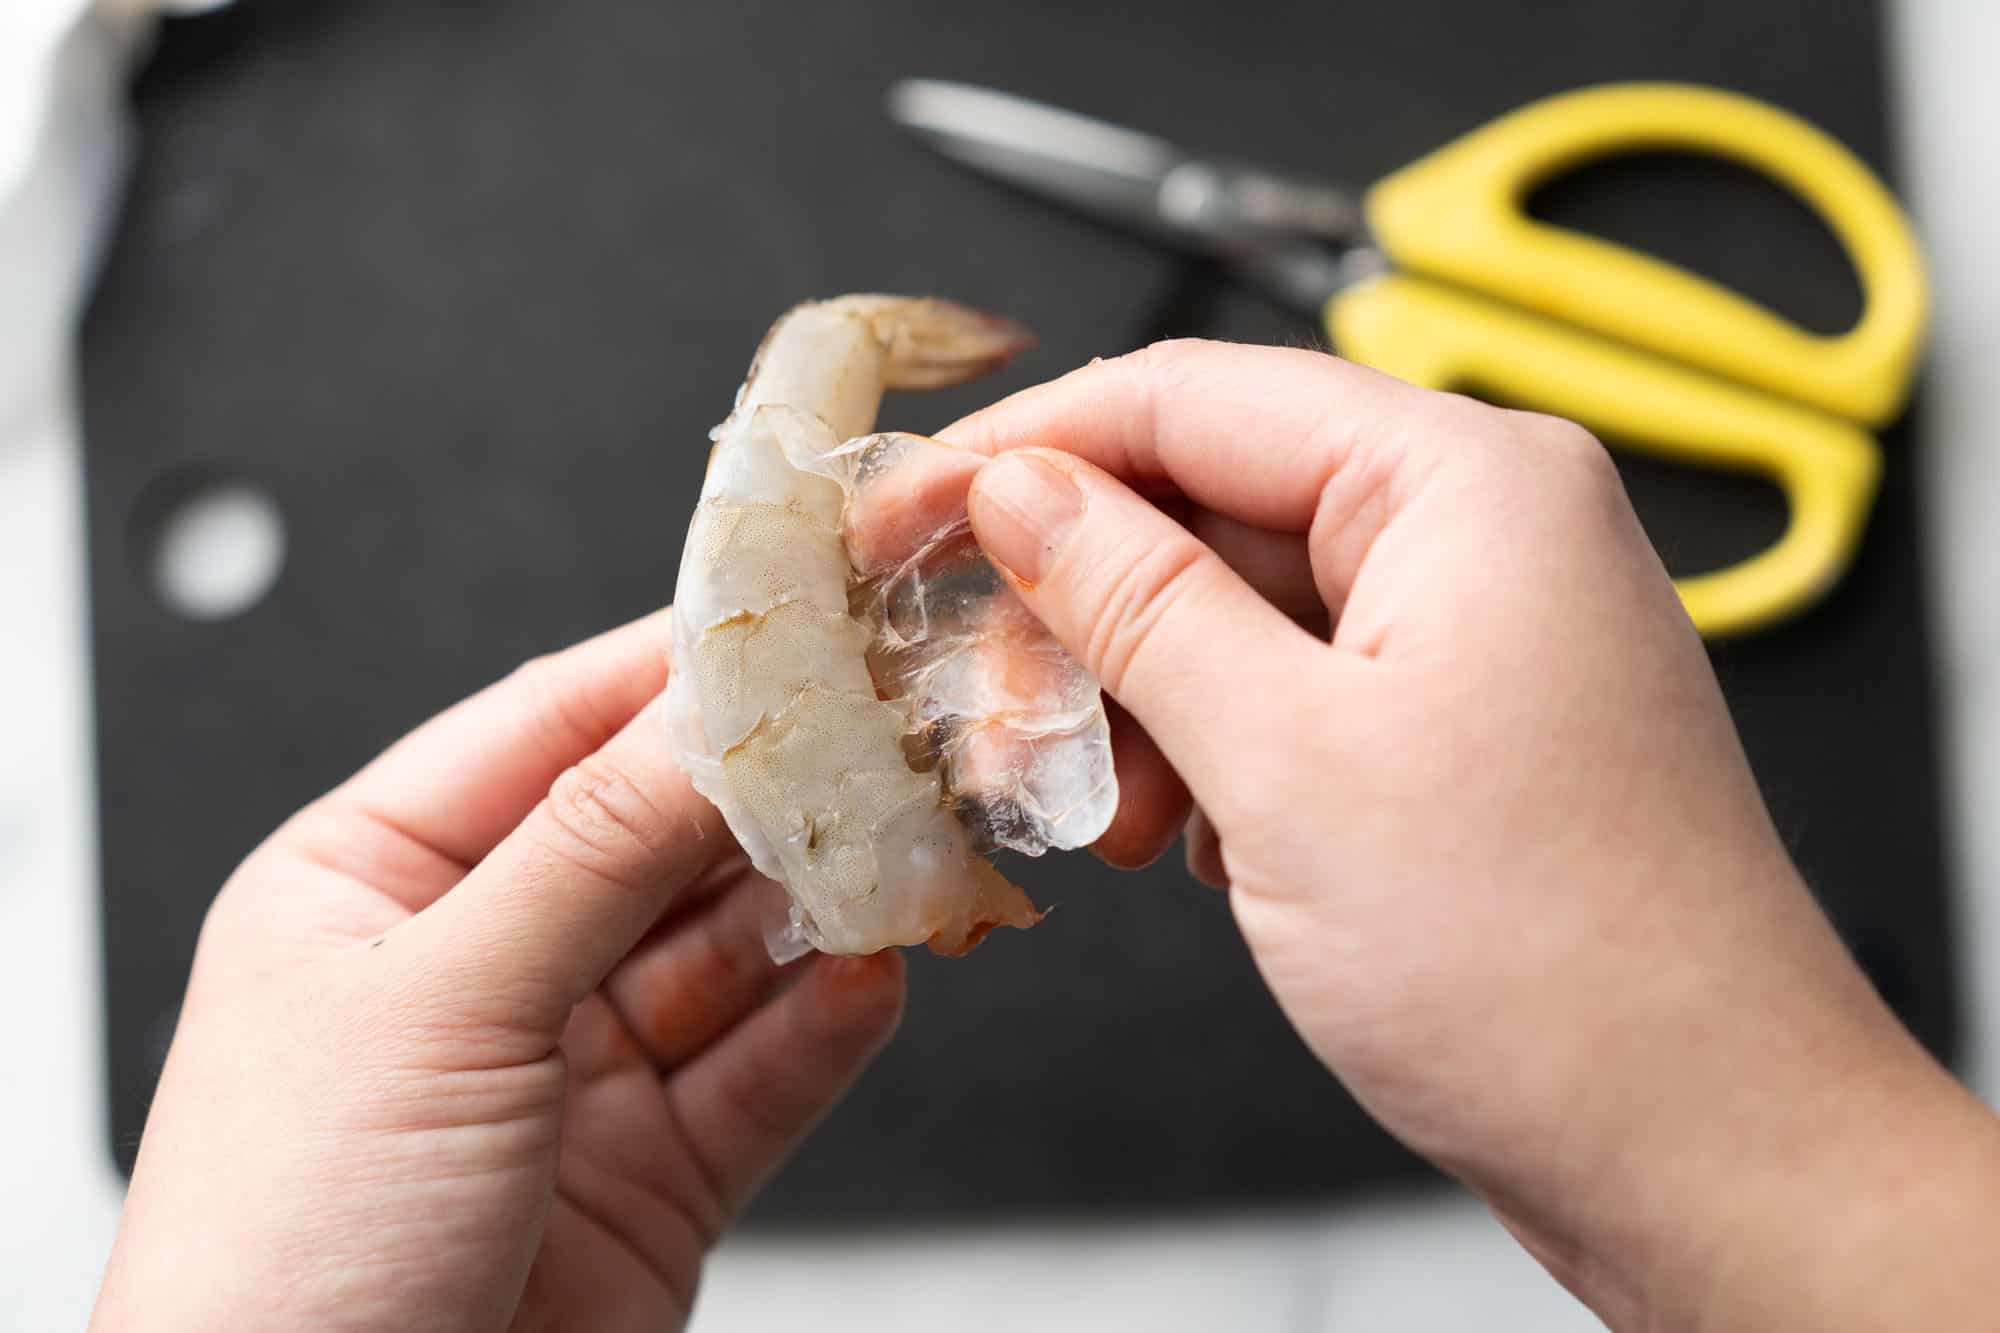
3. Remove the Vein
Now for the fun part:
- Use your knife tip or fingers to gently lift out the dark vein
- If it breaks, no worries! Just remove what you can see
- Rinse the shrimp under cold water to clean the cut
4. Optional: Andrea Nguyen’s Pro Tip
Here’s a cool trick from chef Andrea Nguyen – after deveining, give your shrimp a quick salt massage:
- Toss shrimp with a little salt
- Gently rub it in
- Rinse quickly
- Pat dry
This takes like 10 seconds but helps “refresh” the shrimp and firms up the flesh. Pretty neat, right?
Common Mistakes to Avoid
Let’s keep it real – here are some oopsies I’ve made so you don’t have to:
- Cutting too deep (you’ll end up splitting the shrimp)
- Using dull scissors (makes the job WAY harder)
- Forgetting to rinse after deveining
- Trying to devein frozen shrimp (thaw them first!)
When to Skip Deveining
You can probably skip deveining when:
- Using very small shrimp (like the 51-60 count size)
- Cooking shrimp thoroughly (to 145°F)
- Making quick, casual dishes
Tips for Different Shrimp Sizes
| Shrimp Size | Deveining Approach |
|---|---|
| Extra Large (26-30 count) | Definitely devein |
| Large (31-35 count) | Recommended |
| Medium (36-40 count) | Your choice |
| Small (41-50 count) | Usually unnecessary |
| Tiny (51-60 count) | Skip it |
Storage Tips
After deveining:
- Use within 24 hours if keeping shell on
- Store in an airtight container
- Keep refrigerated at 40°F or below
- Don’t refreeze if previously frozen
Recipe Ideas for Shell-On Shrimp
Now that you’re a pro at deveining, try these yummy ideas:
- Grilled Garlic Shrimp
- Traditional Shrimp Boil
- Asian-Style Steamed Shrimp
- Shell-On Shrimp Scampi
FAQ
Q: Will leaving the shell on make it harder to eat?
A: Nah, just provide some extra napkins and maybe a finger bowl!
Q: Can I devein frozen shrimp?
A: Please don’t! Thaw them first for best results.
Q: What if I can’t see the vein?
A: If you can’t see it, don’t worry about it!
Final Thoughts
Look, deveining shrimp while keeping the shell on might seem tricky at first, but with a little practice, you’ll be doing it like a pro! Don’t stress too much about getting it perfect – even professional chefs sometimes skip this step depending on the dish.
Remember, cooking should be fun, not stressful. If you’re not confident about deveining at first, start with larger shrimp – they’re easier to handle. And hey, if you mess up a few shrimp along the way, no biggie! We’ve all been there.
Now get out there and show those shrimp who’s boss! And if you’ve got any cool tips or tricks for deveining shrimp, drop ’em in the comments below – I’d love to hear ’em!
Happy cooking, everyone!
P.S. Don’t forget to check out our other seafood prep guides if you found this helpful!

How to peel shrimp shells fast (w/ shears)
Peeling shrimp shells can be time-consuming, and the fastest way I’ve found to unpeel them is using a pair of kitchen shears.
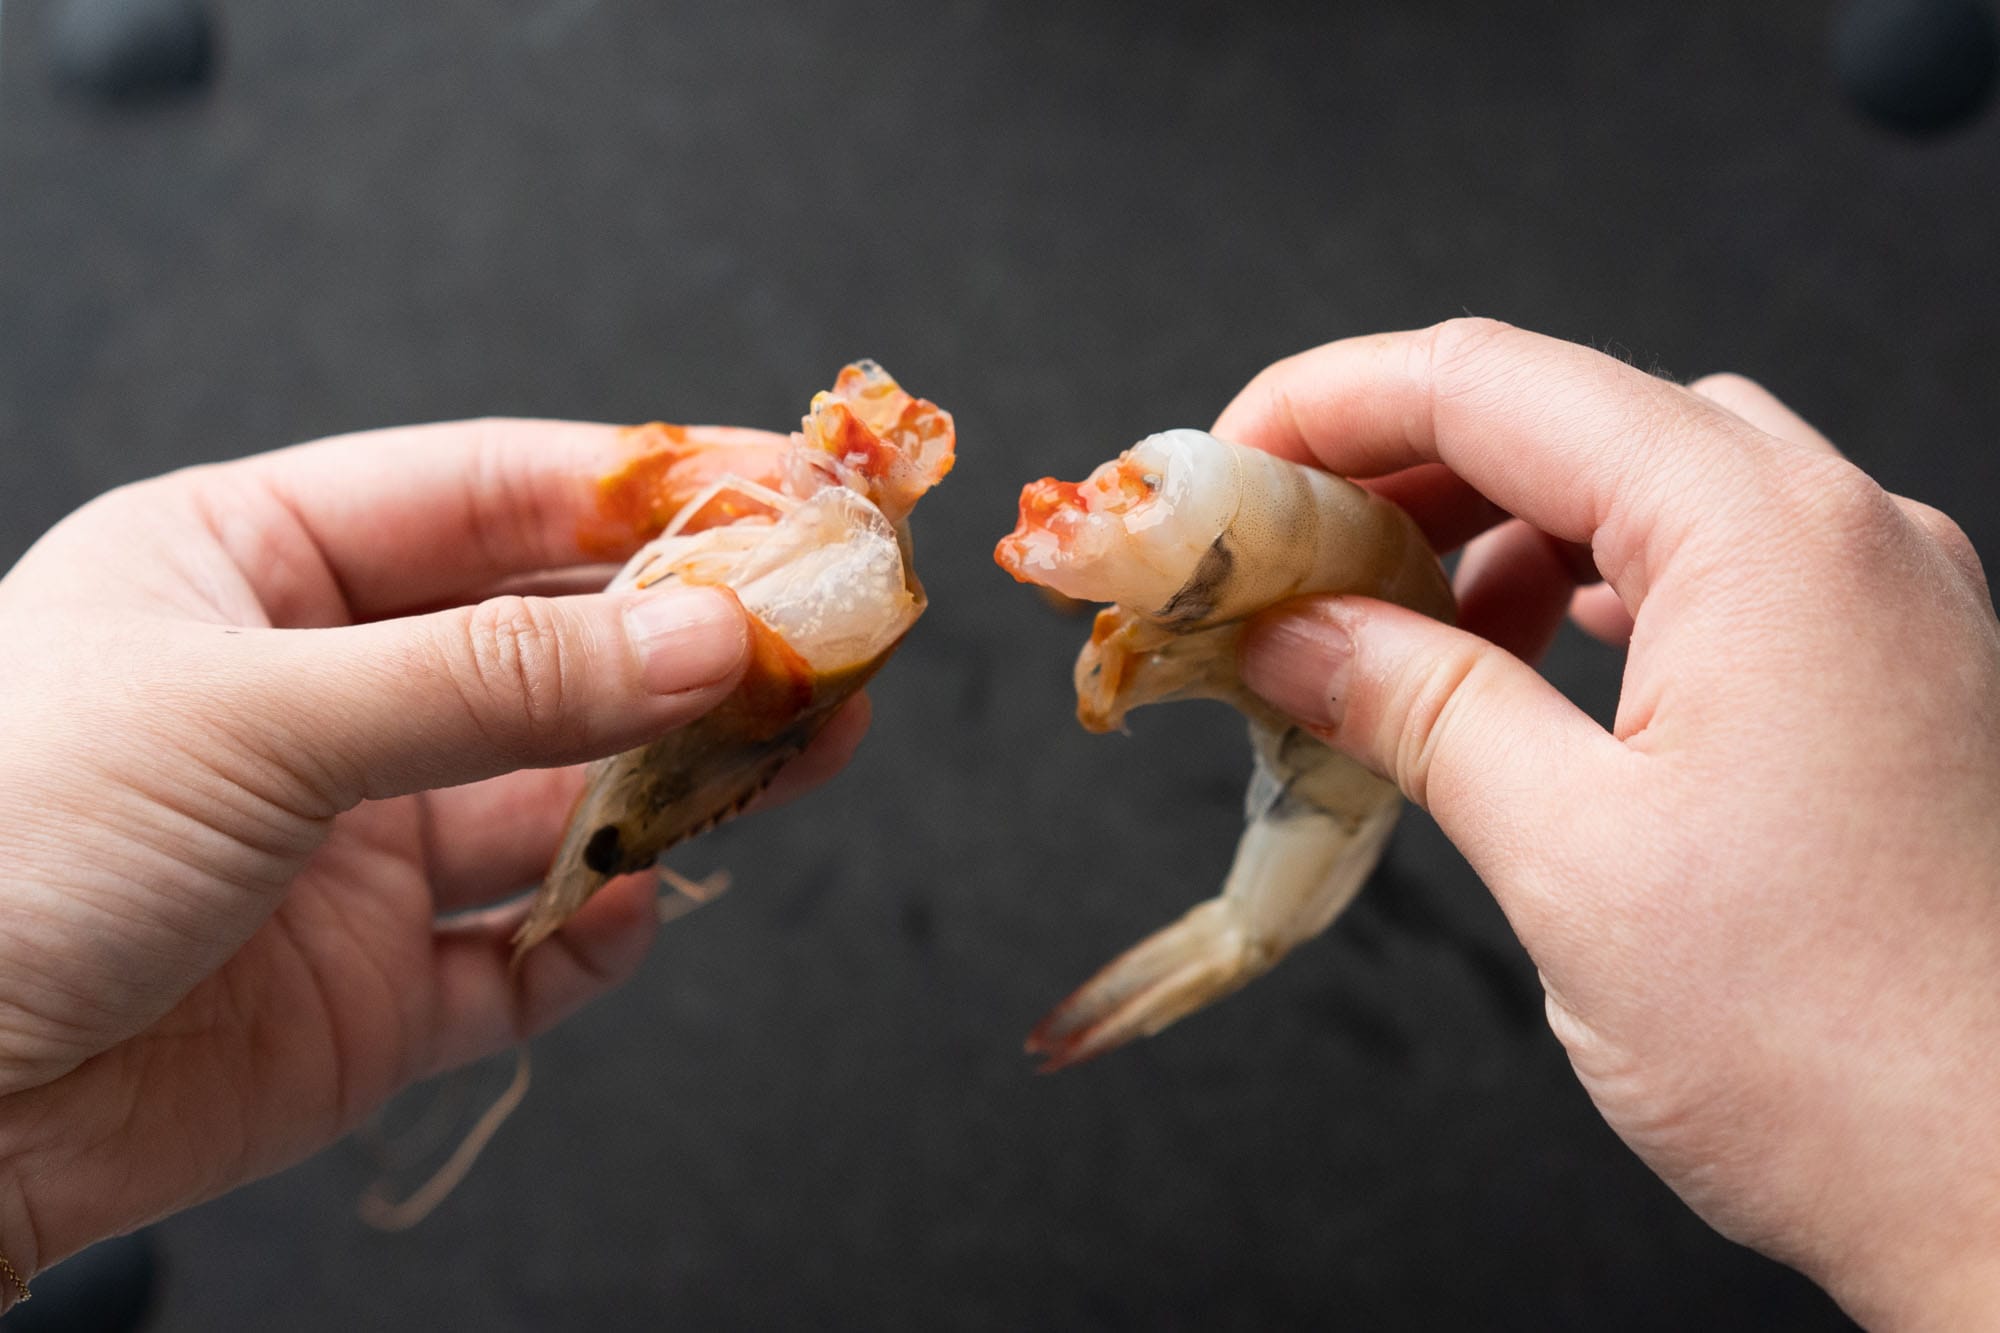
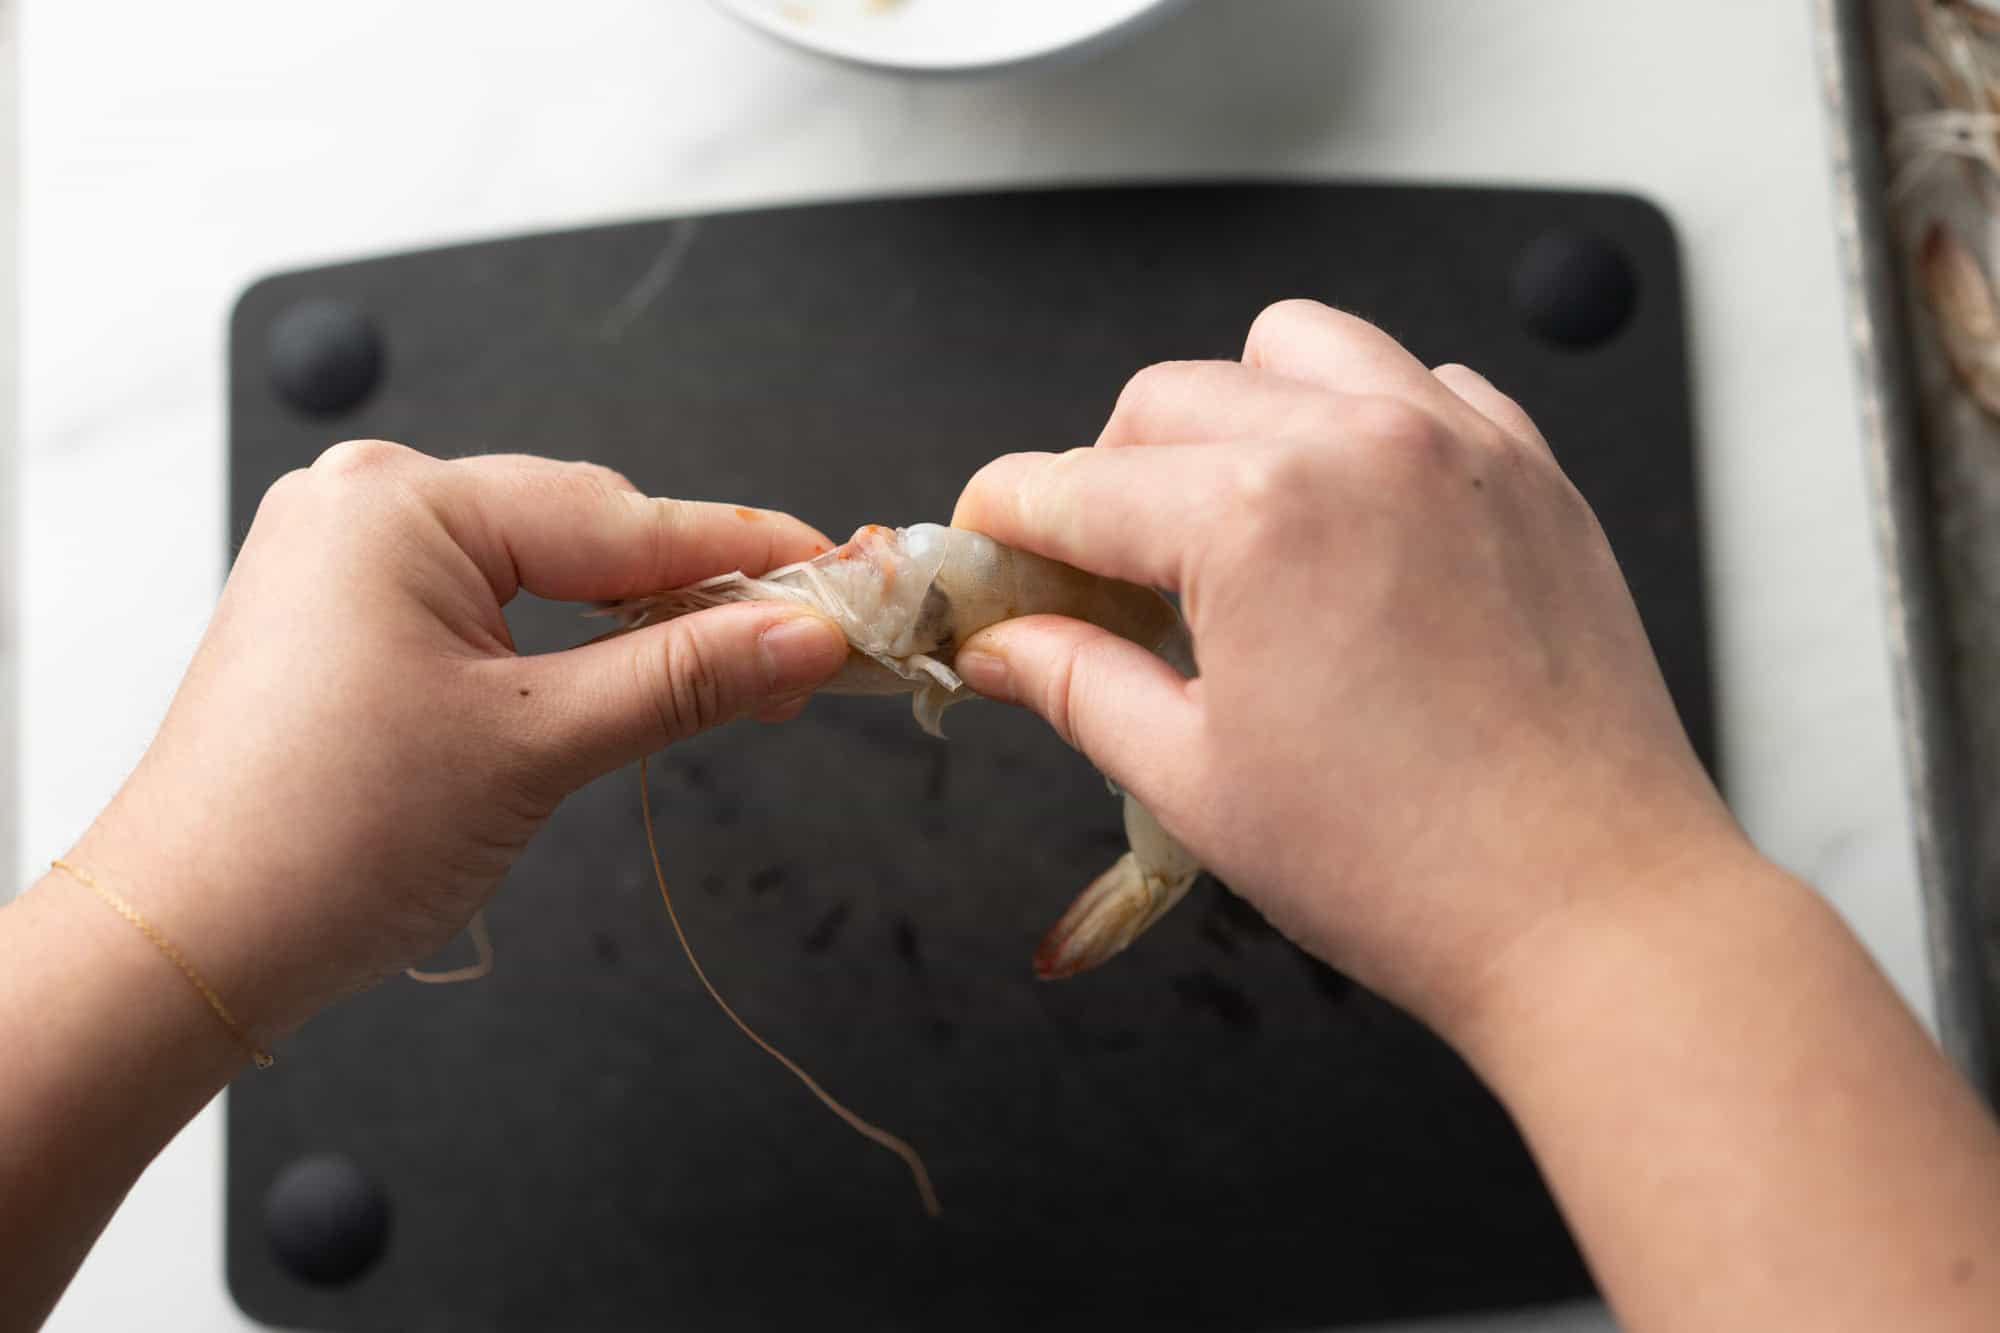
1. Remove the head by twisting and pulling it off the body.
2. Cut alongside the top center of the shrimp using shears, where the shell is the hardest, and the intestinal tract is located. The smaller your shear tips the easier it will be. Try not to cut deeper than 1/4″ into the flesh.
3. Once you reach the tail, peel off the shell from the meat and discard the shell.
While there are dedicated shrimp peeling tools you can buy online that make it easy to peel and devein shrimp at the same time, I don’t like buying single-use tools for the kitchen. Alternatively, if you don’t have kitchen shears, you can also use your fingers and manually remove the shells. A pro tip is to keep the shells to. make seafood stock.
How to devein shrimp with shells still on (w/ a toothpick)
The easiest way to devein shrimp with shells and heads on is to use a toothpick. This is the cleanest way possible and doesn’t damage the shells. My mom taught me this toothpick process:
1. Optionally, remove the head by twisting and pulling it off. This method also works if you leave the head on.
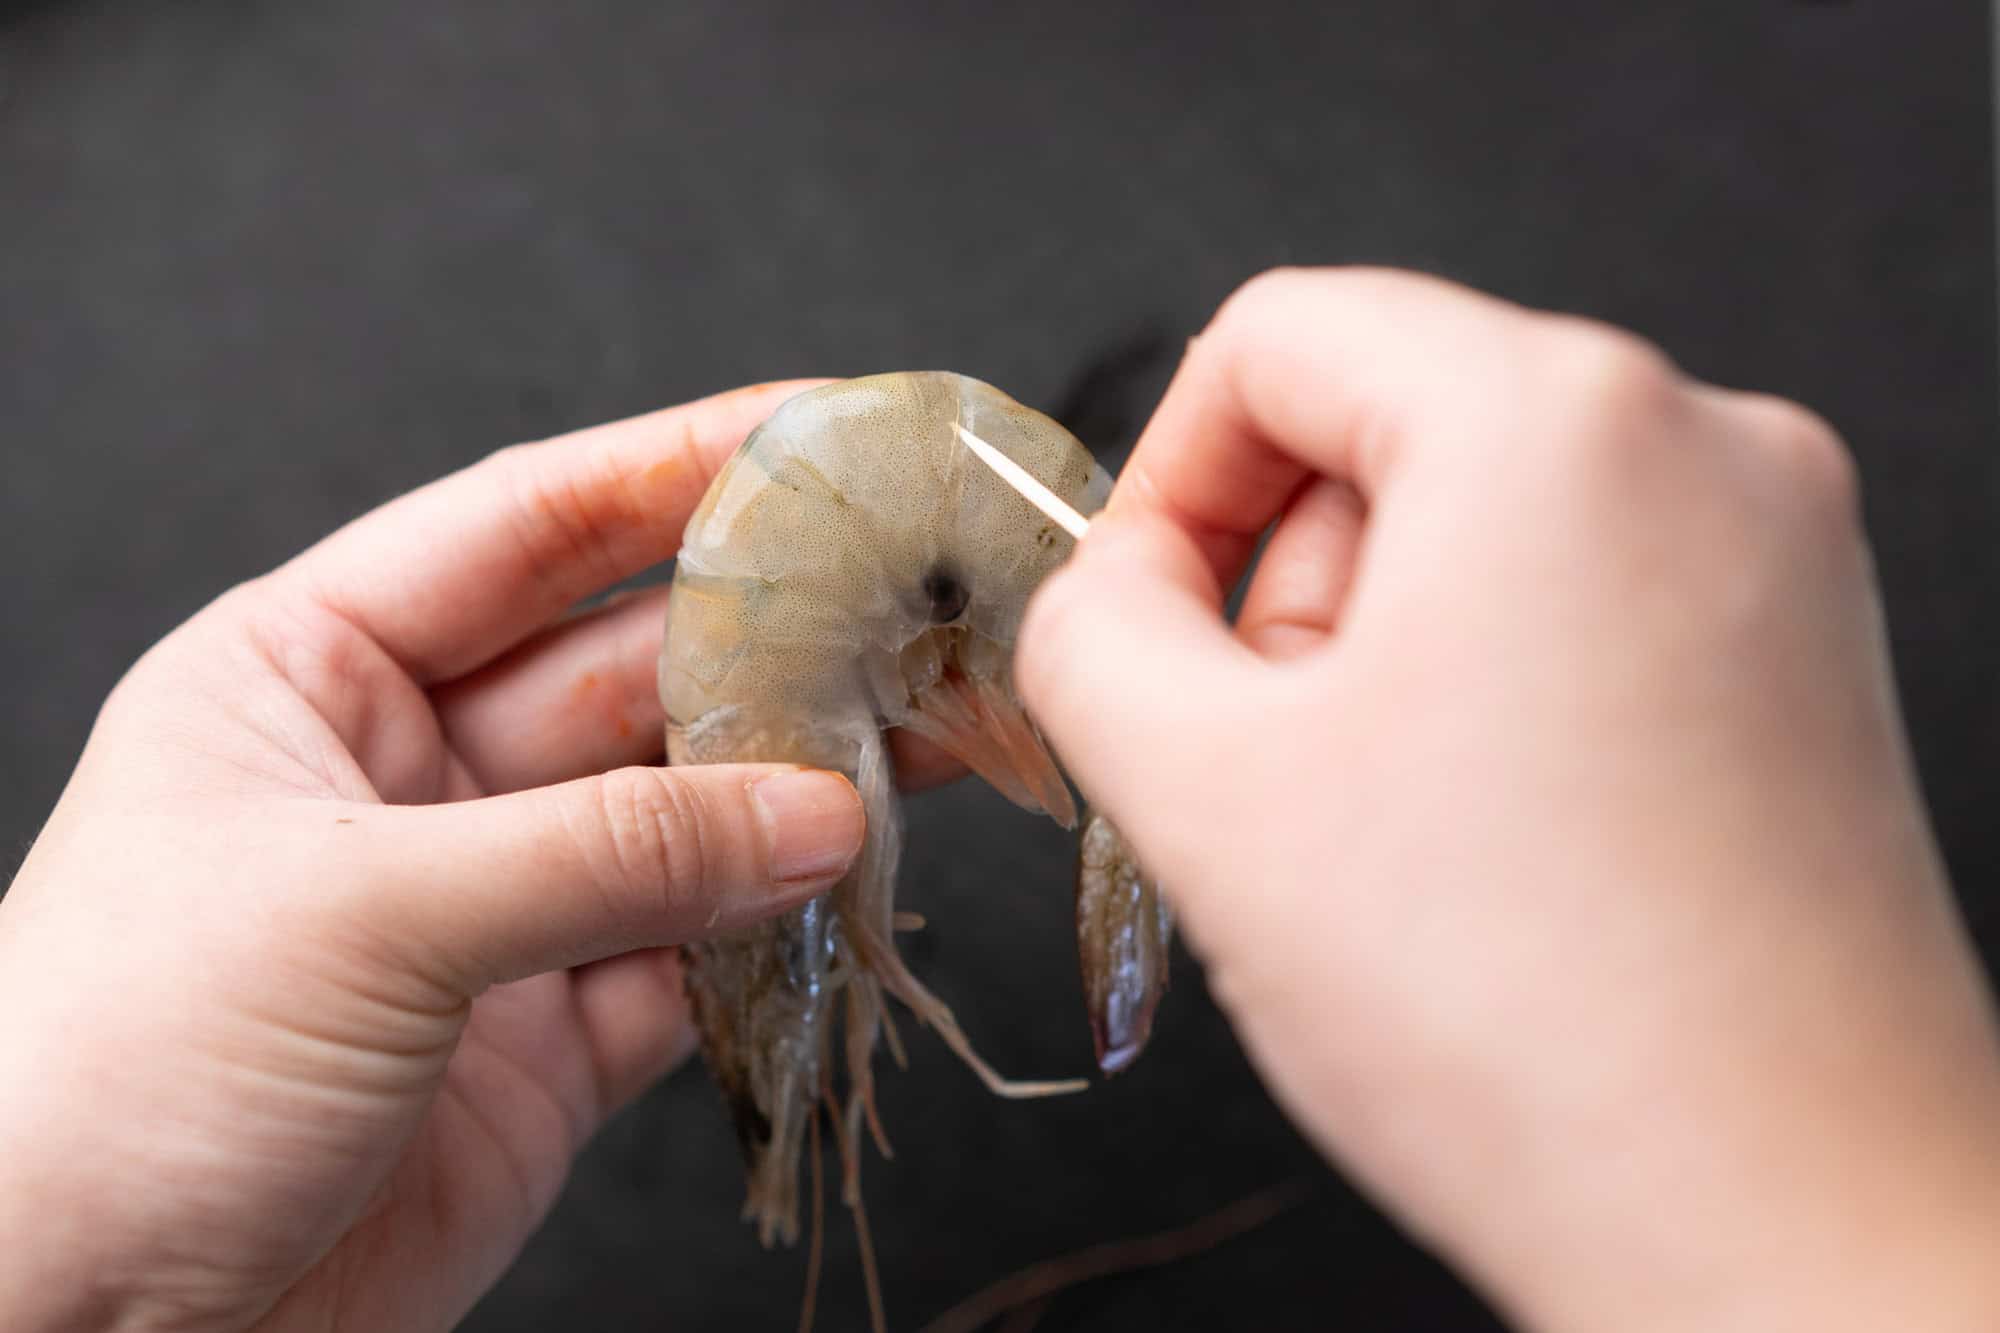
2. Locate the back of the shrimp where the intestinal vein is. Find the joint between the second and the third shell segment from the head.
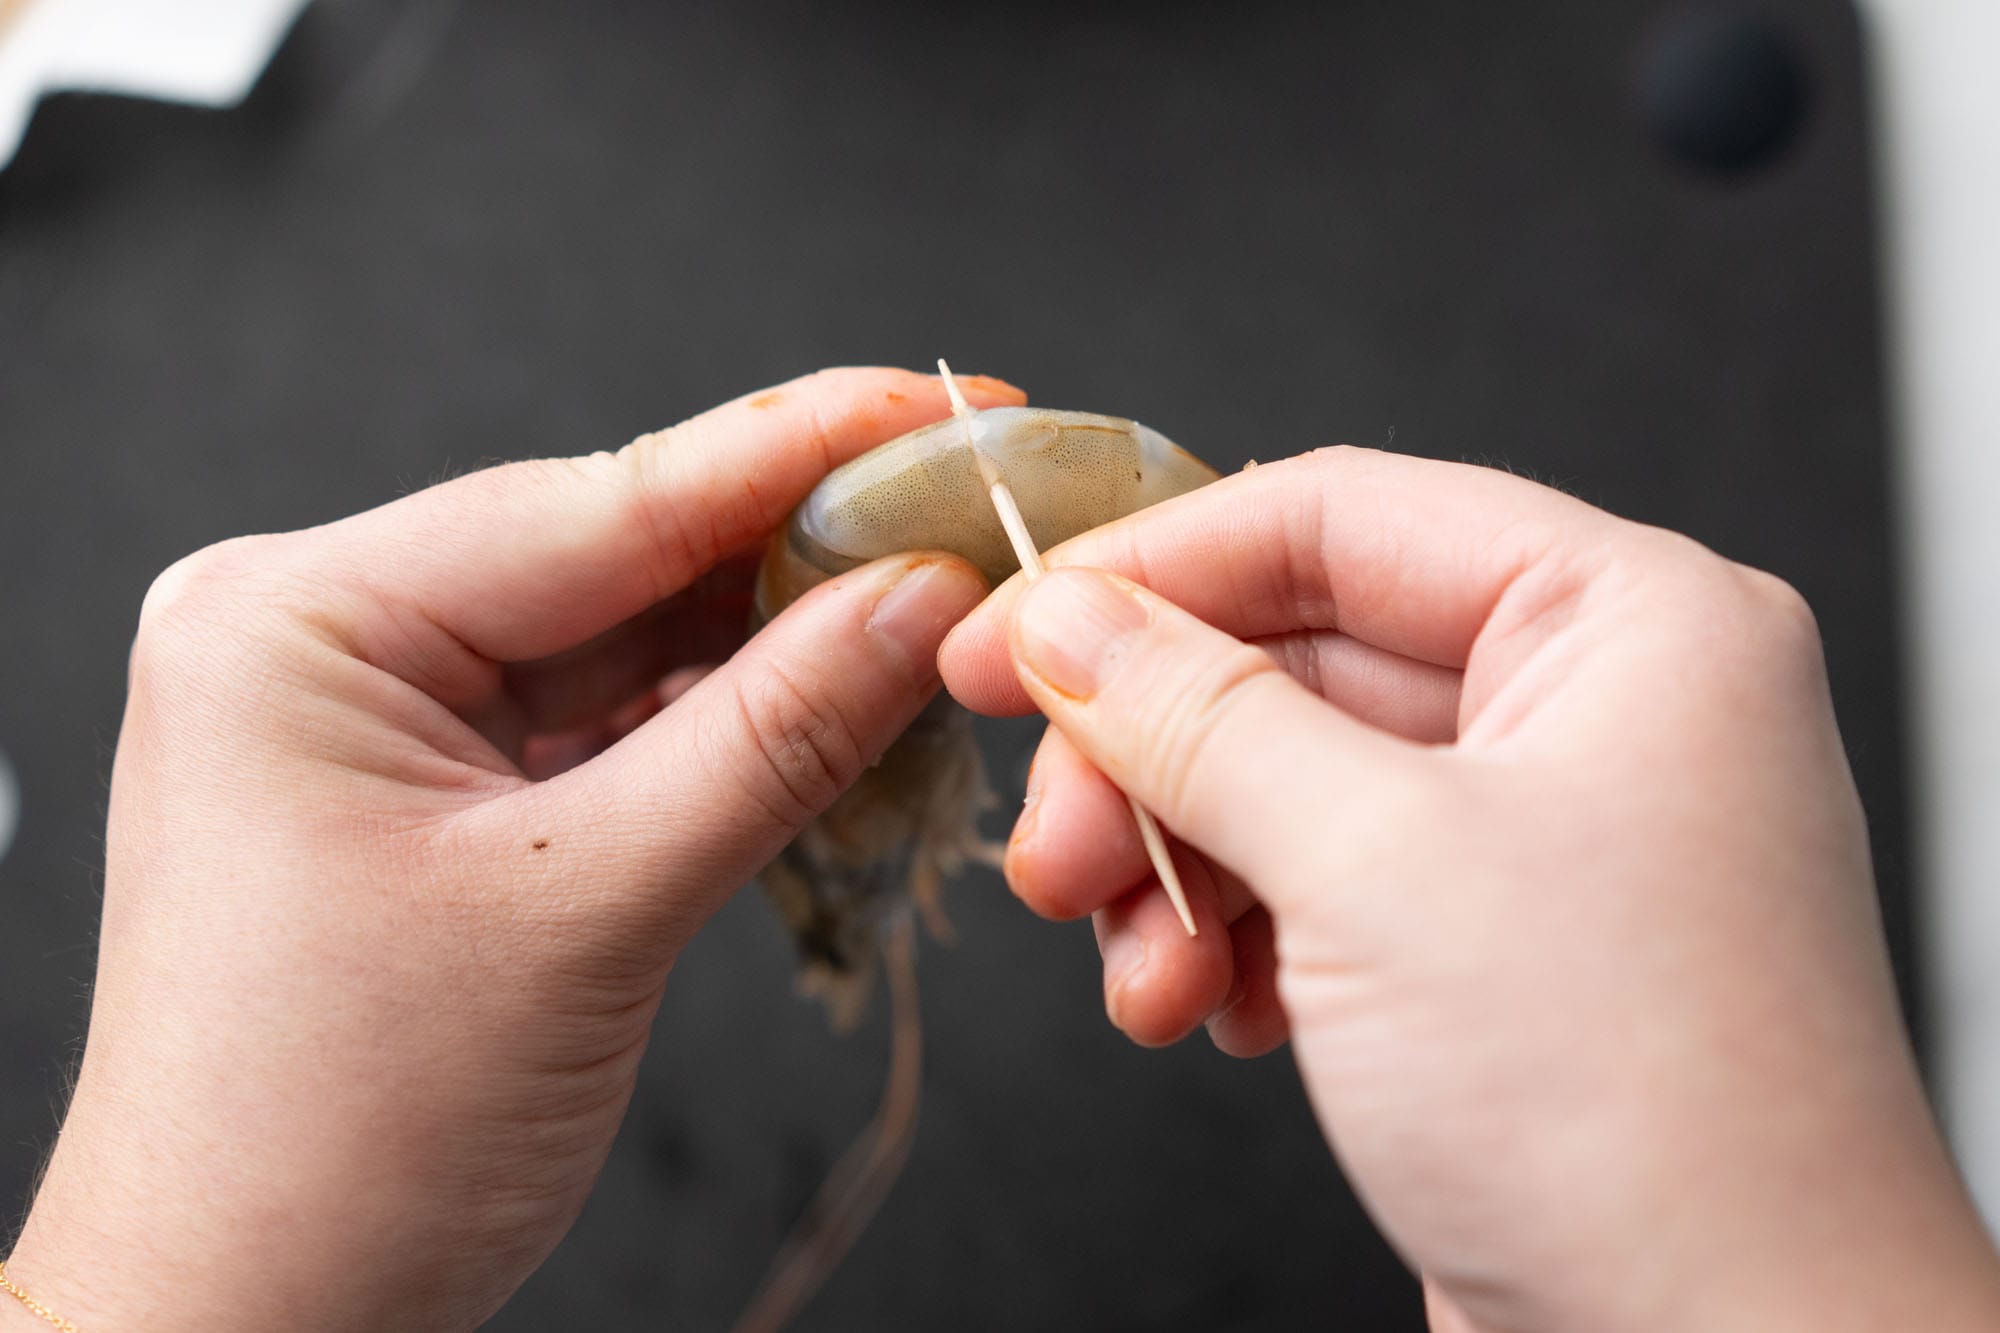
3. If you can see the vein, pierce the area underneath with a toothpick. If you can’t see the vein, pierce the joint between the shell segments with a toothpick between ⅛ and ¼-inch deep–this should be under where the shrimp intestinal vein sits.
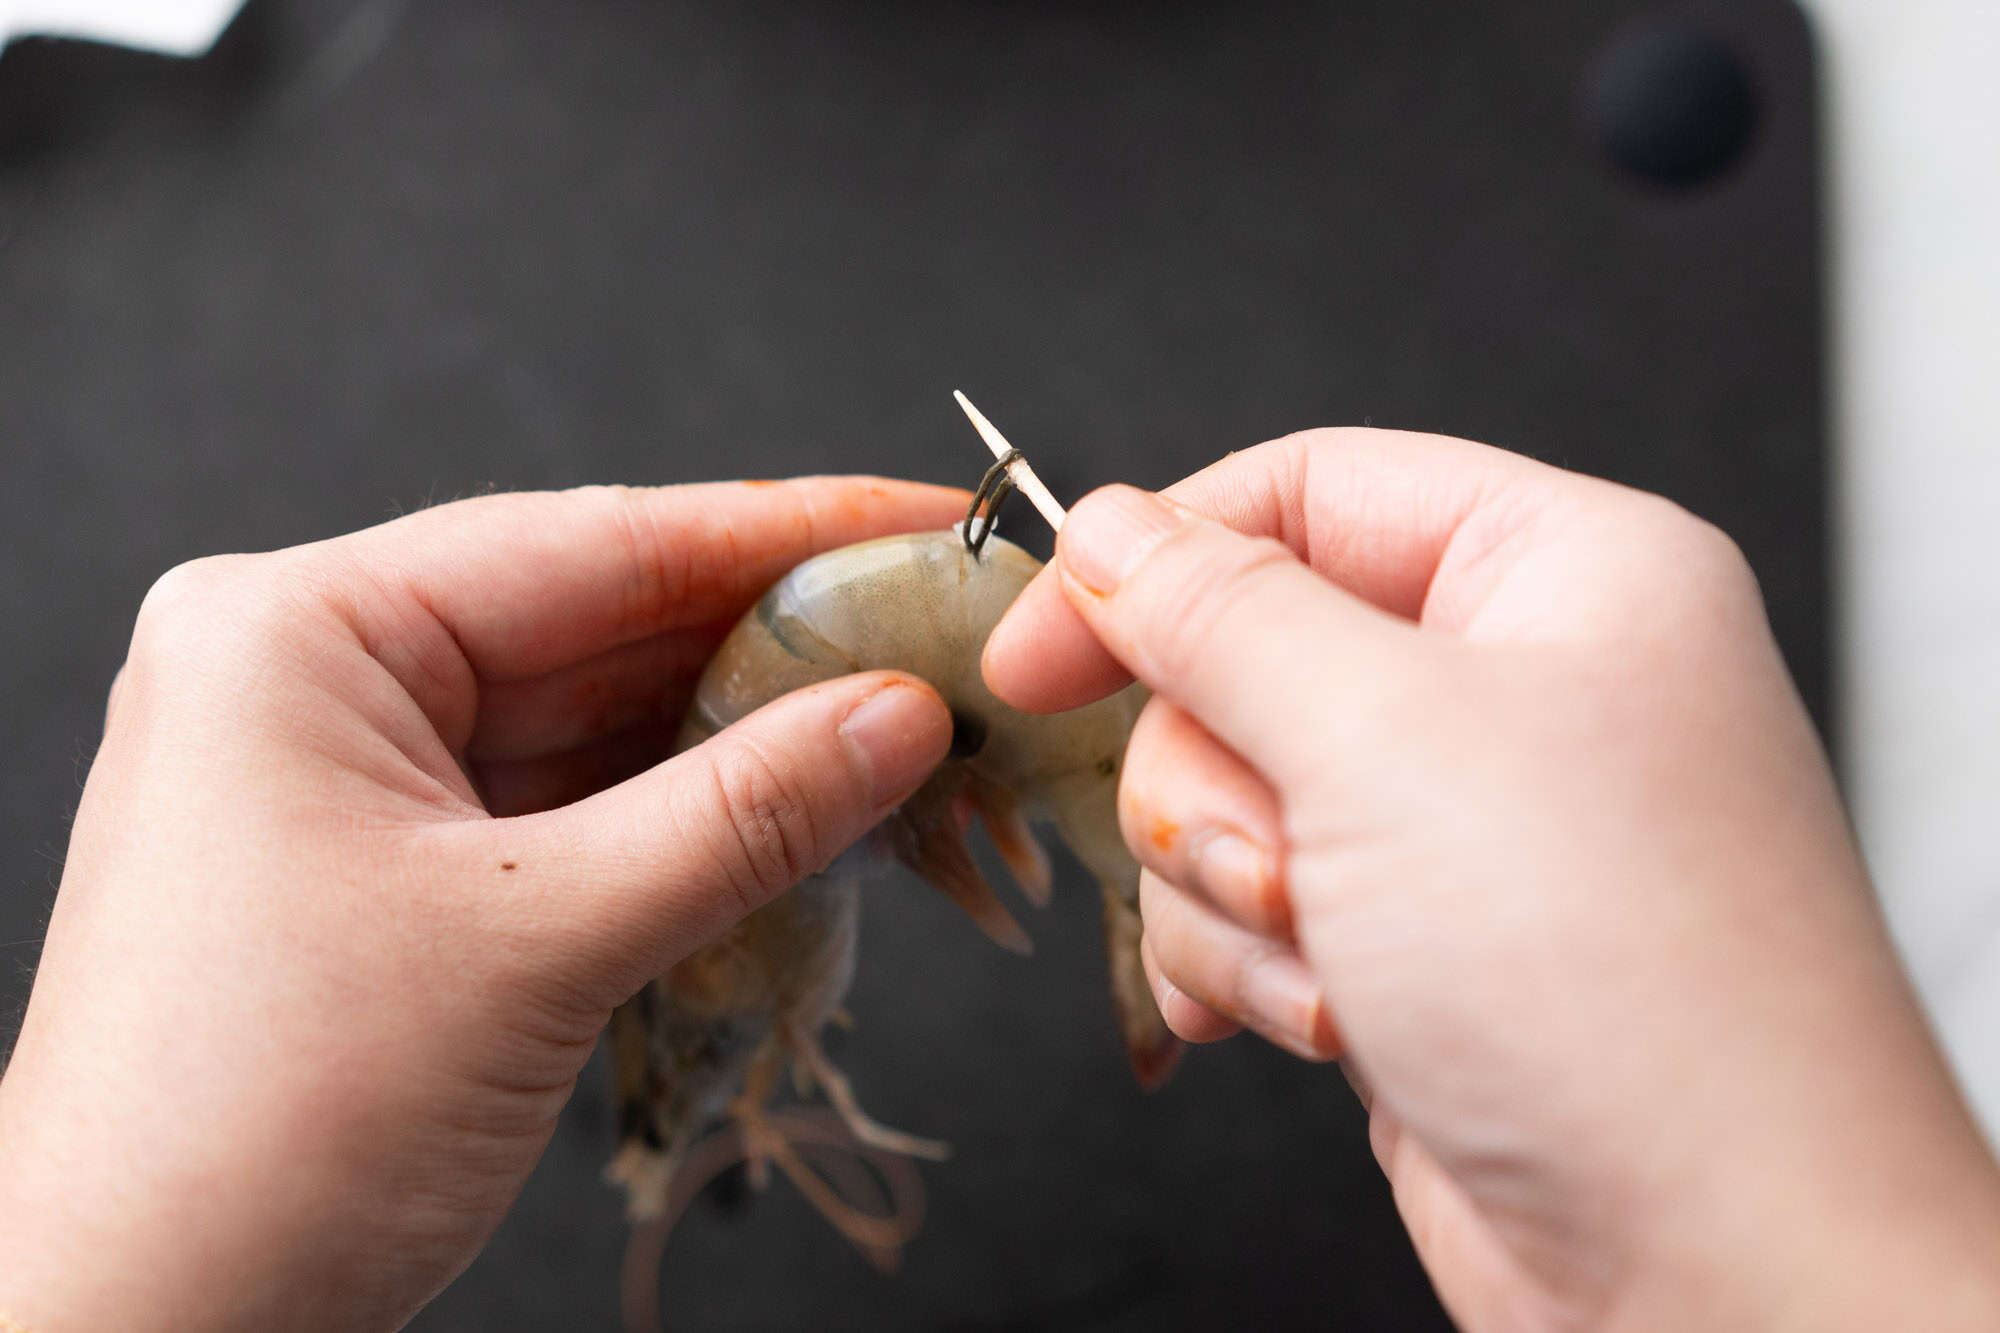
4. Gently lift the toothpick and vein above the shell and pull the remaining vein out in one piece.