The main entities include
- Skinning (multiple occurrences across all sources)
- Chicken (appears throughout all content)
- Knife (mentioned repeatedly as an essential tool)
- Skin (central topic in all sources)
- Feathers (mentioned frequently as what comes off with the skin)
- Wings, legs, breast, back (chicken parts mentioned repeatedly)
- Plucking (contrasted with skinning in multiple sources)
Now I’ll write the article incorporating these entities appropriately
Ever stared at a chicken and wondered if there’s a way to avoid the tedious plucking process? I’ve been there and let me tell ya – skinning might be your answer. When I first tried skinning instead of plucking, it was a game-changer for my homesteading routine.
In this guide, I’ll walk you through the entire process of skinning a chicken step by step. No fancy jargon, just practical advice from someone who’s skinned more chickens than I care to count!
Why Choose Skinning Over Plucking?
Before we get our hands dirty, let’s talk about why you might wanna skin a chicken rather than pluck it:
- Time-saving: While it might not be lightning fast as some claim, skinning generally takes less time than plucking, especially without a plucking machine
- Less mess: No need for scalding water or dealing with flying feathers everywhere
- Simpler equipment: You don’t need specialized equipment like a plucking machine
- Better for older birds: Older chickens often have tougher skin that’s harder to pluck
The main downside? You lose the skin, which means:
- No crispy chicken skin for eating
- Potentially slightly drier meat when roasting (though this can be mitigated)
- Less fat in your final product
What You’ll Need to Skin a Chicken
Getting ready is half the battle! Here’s what you should have on hand:
- Sharp knife – dullness is your enemy here!
- Clean cutting board (non-wooden is better for meat)
- Work area with running water nearby
- Garbage bag for disposing of skin, feathers, and unwanted parts
- Bowl for collecting the meat
- Gloves if you prefer (some folks like latex gloves for this job)
Step-by-Step Guide to Skinning a Chicken
Step 1: Prepare and Kill Your Chicken
If you’ve already slaughtered your chicken, you can skip ahead. If not:
- Place the chicken in a killing cone
- Let it relax for a couple minutes
- Extend the neck and make a clean cut on the side of the throat above the jaw
- Wait until the chicken stops moving and most blood has drained
Step 2: Start the Skinning Process at the Belly
- Lay the chicken on its back on your cutting board with the head facing you
- Find the opening in the skin from where you made the kill cut
- Make a small vertical cut at the top of this opening
- Use your hands to tear the skin down the belly of the chicken
- Continue tearing all the way down to the vent area
Remember – most of skinning is done by tearing, not cutting. Your knife is mostly just to help get things started!
Step 3: Separate the Throat from the Skin
- Grab the throat and pull the skin around it
- The head can remain attached for now
- If needed, use your knife to cut the skin around the head, but usually you can just tear it
Step 4: Skin the Chicken’s Legs
This part’s pretty straightforward:
- Grab the loose skin from the chest area
- Pull it down and around the legs
- When it gets hard to tear, make a small cut with your knife to create a new starting point
- Continue tearing down to the joint
- Sometimes the skin of the feet will come off too – that’s fine
- Repeat on the other leg
Step 5: Tackle the Wings (The Tricky Part!)
Wings are definitely the most challenging part of skinning a chicken. Here’s how I handle them:
- Turn the chicken onto its belly
- Hold the piece of skin you’ve already loosened from the neck area
- Pull it down the back to the wing line
- Work on one wing at a time, slowly
- Use your knife to make small cuts to help tear the skin around the joints
- The first part of the wing is relatively easy
- The second part (after the joint) is harder – use your knife more carefully here
- For the third part with the large flight feathers, just cut it off entirely since there’s no meat
Step 6: Finish Skinning the Back
- With the chicken still on its belly and wings skinned, gather the skin in your hand
- Pull it down the back of the chicken to the tail
- When you reach the tail, give a final tug to pull the skin off completely
Congrats! The skinning part is done. Now we’ll move on to cleaning and processing.
Step 7: Remove Feet and Head
- To remove feet, bend the joint and find the valley between bones
- Cut between the bones, bend and pull to remove each foot
- For the head, simply pull, bend, and cut between the bones to disconnect from the neck
Step 8: Gut the Chicken
- Lay the chicken on its back with the tail pointing toward you
- Make a tiny cut between the vent and breastbone (be careful not to cut intestines!)
- Use your hands to enlarge the opening
- Separate the windpipe and esophagus from the neck
- Reach inside the opening you made, hook your finger around the windpipe, and carefully pull all the intestines out
- Make a cut on either side of the tail
- Bend the tail backward and pull it off
Step 9: Final Cleaning and Storage
- Wash the skinned chicken thoroughly with cold water
- Place it in a plastic bag
- Refrigerate for 24 hours
- After that, either cook it, vacuum seal it for freezing, or can it
Tips for Success
- Keep your knife sharp – a dull knife makes this job way harder and more dangerous
- Work slowly your first few times – speed comes with practice
- Consider fasting your chicken 12 hours before butchering to empty the crop
- Don’t worry about perfection – as long as the meat is clean, you’re good
Common Questions About Skinning Chickens
Is skinning faster than plucking?
For most people, skinning is somewhat faster than hand-plucking, but probably not dramatically so. The main advantage is avoiding the scalding and feather mess.
Will skinned chicken meat be drier?
It can be, especially if roasting whole. That’s why skinned chicken is often better for recipes where you’ll be adding moisture, like in a pressure cooker, slow cooker, or in soups and stews.
What can I do with the skin and feathers?
Some folks bury them in their garden as they make great fertilizer. Others dispose of them in the trash or compost them.
Can you skin all types of chickens?
Yes! Though the process might be slightly easier with younger birds. Older laying hens and roosters can be a bit tougher to work with, but the process is the same.
Final Thoughts
Skinning a chicken might seem intimidating at first, but after doing it a couple times, you’ll find it becomes second nature. It’s a practical skill for any homesteader or anyone looking to process their own meat.
I’ve found that skinning works especially well for older birds that I plan to use in soups, stews, or pressure-cooked dishes. For young, tender birds that I want to roast whole, I might still opt for plucking.
Either way, processing your own chickens gives you complete control over your food source and connects you to a traditional skill that’s been practiced for generations. Give it a try and see if it works for your homesteading needs!
Have you tried skinning chickens? What method works best for you? I’d love to hear about your experiences in the comments below!

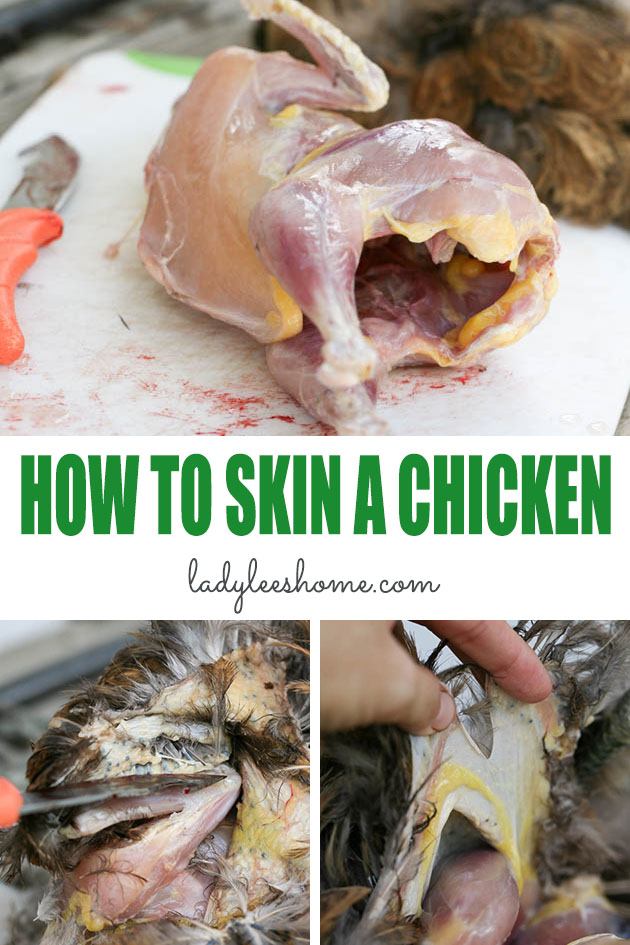
How to Skin a Chicken Step-by-Step…
These chickens do move (just like any other normal chicken), so their meat is a bit tougher. Instead of roasting, I now process most of my chicken meat in the pressure cooker to soften it a bit before I use it (for BBQ pulled chicken, chicken chili, chicken tacos, and so on…).
Since I’ve been doing that, I found that I don’t have a use for the chicken’s skin (it’s soft after processing) so I decided to try and skin my chickens instead of plucking them in hopes to save some processing time and mess.
I’m sure that there is more than one way to skin a chicken but I’m going to take you with me and show you how I do this. It will help you understand the basics of how to skin a chicken. After doing it a few times you’ll probably change things around according to what’s comfortable for you.
Since we are at it with a dead chicken and bloody knife, we’ll just go ahead and butcher the chicken and send it to the fridge.
Here is what we are going to go over…
- Skinning a chicken vs. plucking a chicken.
- Equipment needed for skinning a chicken.
- Kill your chicken.
- Skin down the belly of the chicken.
- Separate the throat from the skin.
- Skin the chicken’s legs.
- Skin the chicken’s wings.
- Skin the chicken’s back.
- Remove the chicken’s feet and head.
- Gut the chicken and remove the chicken’s tail.
- Wash your chicken and refrigerate.
Separate the Throat from the Skin
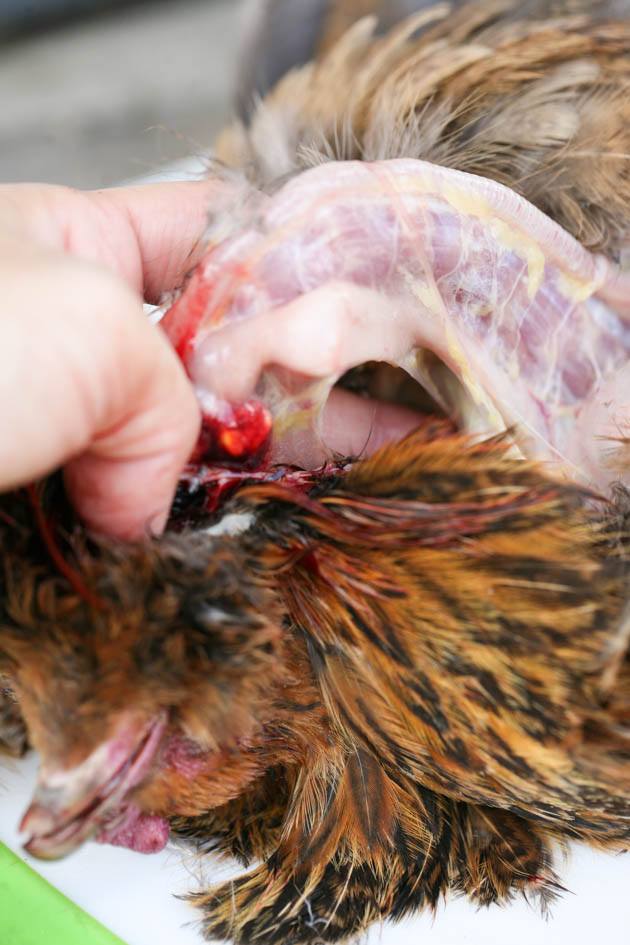
The next thing that I do is separate the throat from the skin.
I just grab the throat and pull the skin around it. The head is still connected, I don’t remove it in the process (you can if you’d like to).
Sometimes I need help from the knife to cut the skin around the head but most of the time I can just tear it.
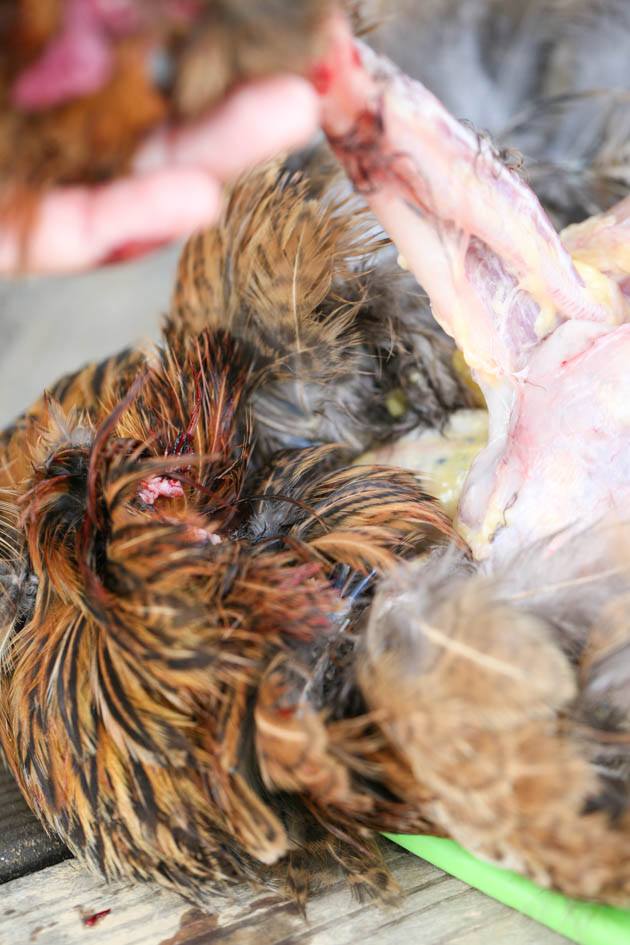
I leave the head and the throat as they are and go to work on the legs.