Have you ever craved perfectly grilled chicken but dreaded the hassle of firing up the outdoor grill? Same here! As a busy home cook, I’m always looking for shortcuts that don’t sacrifice flavor. That’s why I’m obsessed with grilling chicken in my air fryer – it’s a total game-changer that delivers that smoky flavor and juicy texture without all the mess and time of traditional grilling.
In this guide I’ll walk you through everything you need to know about creating mouth-watering air fryer grilled chicken that will have your family asking for seconds. Let’s dive in!
Why You Should Be Grilling Chicken in Your Air Fryer
Before we get to the how-to. let’s talk about why the air fryer is quickly becoming everyone’s favorite way to “grill” chicken
- Quick Cooking Time: Your chicken will be ready in just 20-25 minutes, compared to 30-40 minutes on a traditional grill
- Healthier Option: Requires less oil than traditional methods, giving you lower fat content while still achieving a tasty, crunchy exterior
- Consistent Results: Even cooking temperatures ensure uniform doneness – no more partially raw or burnt pieces!
- Super Easy Cleanup: Most air fryers have removable, dishwasher-safe parts (goodbye, scrubbing grimy grill grates!)
- Year-Round Grilling: No more letting weather dictate your dinner plans
- Enhanced Flavor: The air fryer preserves moisture, keeping your chicken juicy while achieving that crispy exterior we all crave
When I first tried grilling chicken in my air fryer, I was skeptical. But after that first bite into a perfectly juicy chicken breast with a crispy, flavorful exterior, I was converted!
What You’ll Need
Getting started is simple Here’s what you’ll need
Ingredients:
- Boneless, skinless chicken breasts (or thighs if you prefer)
- 1-2 tablespoons olive oil
- Seasonings of your choice (we’ll cover some amazing options below)
Equipment:
- Air fryer
- Meat thermometer
- Tongs
- Paper towels
- Small bowl for mixing seasonings
Preparing Your Chicken
The key to amazing air fryer grilled chicken starts with proper preparation:
Step 1: Even It Out
If your chicken breasts are thicker than ½ inch, you’ll want to even them out for consistent cooking. You can either:
- Butterfly them with a sharp knife, or
- Pound them with a meat mallet until they’re an even thickness
This step is technically optional, but I never skip it. Even thickness = even cooking = juicier chicken!
Step 2: Pat Dry
Use paper towels to pat the chicken dry. This simple step helps the oil and seasonings stick better and promotes that nice crispy exterior.
Step 3: Oil It Up
Drizzle about 1 tablespoon of olive oil over both sides of your chicken. You can use your hands to ensure it’s evenly coated. The oil helps the seasonings stick and promotes browning.
Step 4: Season Generously
Now for the fun part – seasoning! Here are three amazing seasoning combinations to try:
Basic Seasoning Blend
- 1 teaspoon kosher salt
- ½ teaspoon black pepper
- ½ teaspoon garlic powder
- ¼ teaspoon Italian seasoning
- ¼ teaspoon paprika
Spicy Kick Blend
- 1 teaspoon chili powder
- 1 teaspoon Italian seasoning
- 1 teaspoon garlic powder
- 1 teaspoon onion powder
- Salt and pepper to taste
Sweet & Savory Marinade
- ¼ cup soy sauce
- 2 tablespoons honey
- 1 tablespoon ginger
Mix your chosen seasonings in a small bowl and then sprinkle or rub them evenly over both sides of your chicken.
Air Fryer Setup and Cooking Process
Now that your chicken is prepped and seasoned, it’s time to fire up that air fryer!
Setting Up Your Air Fryer:
-
Preheat: Set your air fryer to 375°F-400°F and preheat for about 3-5 minutes. This ensures your chicken starts cooking immediately when placed inside.
-
Prep the Basket: Lightly spray your air fryer basket with oil to prevent sticking.
-
Arrange for Airflow: Place your chicken in a single layer in the air fryer basket, making sure pieces aren’t touching. This allows the hot air to circulate properly. If you’re cooking multiple pieces, you might need to work in batches.
Cooking Process:
-
Cook at the Right Temperature:
- For thinner cuts: 375°F
- For thicker or bone-in chicken: 400°F
-
Timing Guidelines:
Chicken Cut Temperature Cooking Time Boneless Breasts 375°F 18-20 minutes Bone-in Breasts 400°F 25-30 minutes Thighs (Boneless) 375°F 20-25 minutes Thighs (Bone-in) 400°F 25-30 minutes Drumsticks 400°F 25-30 minutes -
To Flip or Not to Flip: While many recipes call for flipping the chicken halfway through cooking, it’s not always necessary in an air fryer. If your chicken is in a single layer, the hot air will circulate around it for even cooking. However, if you want those nice grill marks on both sides, go ahead and flip it halfway through.
-
Check Temperature: The most reliable way to know if your chicken is done is by using a meat thermometer. Chicken should reach an internal temperature of 165°F to be safe for consumption.
-
Rest: This step is crucial! Once done, let your chicken rest in the air fryer (turned off) for about 5 minutes before slicing. This allows the juices to redistribute throughout the meat, resulting in juicier chicken.
Tips for Perfect Air Fryer Grilled Chicken
After many trial-and-error attempts (and some admittedly dry chicken disasters), I’ve learned these tricks for foolproof results:
-
Don’t Overcrowd: Work in batches if necessary. Overcrowding leads to steaming rather than “grilling.”
-
Monitor Closely: Different air fryer models can vary in cooking time. The first time you make this recipe, check on your chicken a few minutes early.
-
For Extra Flavor: Marinate your chicken for at least 30 minutes (or up to 24 hours) before cooking. Just remember to pat it dry before air frying.
-
For Crispy Exterior: A light spray of oil on the outside of the seasoned chicken right before air frying can enhance crispiness.
-
Grill Mark Hack: To achieve those coveted grill marks, use seasonings with a bit of sugar content. The sugar caramelizes under heat, contributing to visual appeal and adding flavor.
Serving Suggestions
The versatility of air fryer grilled chicken is one of its best features! Here are some of my favorite ways to serve it:
- Slice it up for salads (it’s amazing on a Caesar salad)
- Serve it with air fryer vegetables for a complete, healthy meal
- Use it in wraps or sandwiches
- Pair it with mashed potatoes and green beans for a classic dinner
- Slice it for pasta dishes or casseroles
Storage and Reheating
Made too much? No problem! Air fryer grilled chicken stores and reheats beautifully:
- Refrigerator: Store in an airtight container for 3-5 days.
- Freezer: Once cooled, store in freezer-safe containers or bags for up to 3 months.
- Reheating: For best results, reheat in the air fryer at 350°F for 3-4 minutes, or until warmed through.
Troubleshooting Common Issues
Even with the best recipes, things sometimes go wrong. Here’s how to fix common problems:
-
Dry Chicken: Your cooking time might be too long or temperature too high. Remember that air fryers can vary, so reduce cooking time by 2-3 minutes next time.
-
Undercooked Chicken: If your chicken isn’t reaching 165°F, continue cooking in 2-minute increments until it reaches the safe temperature.
-
Chicken Sticking to Basket: Make sure to spray the basket with oil before adding the chicken.
-
Smoke from Air Fryer: This often happens when there’s excess fat dripping. For fattier cuts, add a tablespoon of water to the bottom of your air fryer to prevent smoking.
Grilling chicken in an air fryer is seriously one of the easiest and most rewarding cooking methods I’ve discovered. You get all the juicy flavor and crispy exterior of grilled chicken without having to deal with an actual grill. Plus, it’s ready in about 20 minutes – perfect for those busy weeknights when you want something healthy and delicious without spending hours in the kitchen.
Frequently Asked Questions
Can I use frozen chicken in the air fryer?
While possible, it’s best to use thawed chicken for more even cooking. If you must use frozen, add about 5-7 minutes to the cooking time and check the internal temperature carefully.
Do I need to preheat my air fryer?
Yes! Preheating helps ensure even cooking from the start and helps develop that crispy exterior.
Can I use bone-in chicken?
Absolutely! Just adjust the cooking time accordingly (usually 5-10 minutes longer).
How do I know if my chicken is done without a meat thermometer?
While a thermometer is best, you can also cut into the thickest part – the meat should be completely white with clear (not pink) juices.
Can I stack chicken in the air fryer?
No, for best results, arrange chicken in a single layer. Cook in batches if needed.
What’s your favorite seasoning for chicken? I’d love to hear your creative combinations in the comments below!

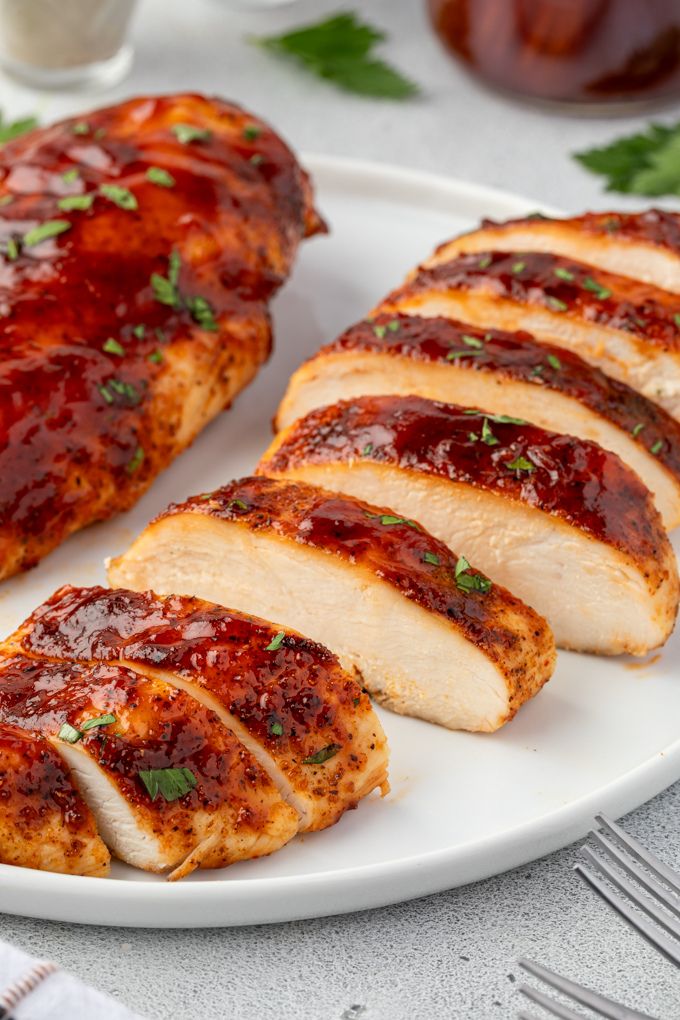
How to make bbq chicken in air fryer
Making bbq chicken in the air fryer is so quick and easy, and it’s a great alternative if you’re not comfortable using a grill or if it’s so hot outside that you’d rather cook indoors!
This recipe covers air fryer bbq chicken breasts, but it also includes instructions for legs, thighs and wings below.
Air fryer bbq chicken wings
If you love bbq chicken wings, follow the instructions as outlined for my air fryer chicken wings. Cook until internal temperature reaches 170 degrees, then brush with bbq sauce and cook 2-3 minutes more or until internal temperature is 175 degrees.
You can create barbecued meals in the air fryer with ease. This air fryer bbq chicken is crisp on the outside, juicy on the inside, with a flavorful homemade bbq sauce. This is a great option if you’re not comfortable grilling or if it’s too hot to cook outdoors, and it’s even quicker and easier. It takes 5 minutes of prep, it cooks up in 20 minutes and there’s no preheating necessary.
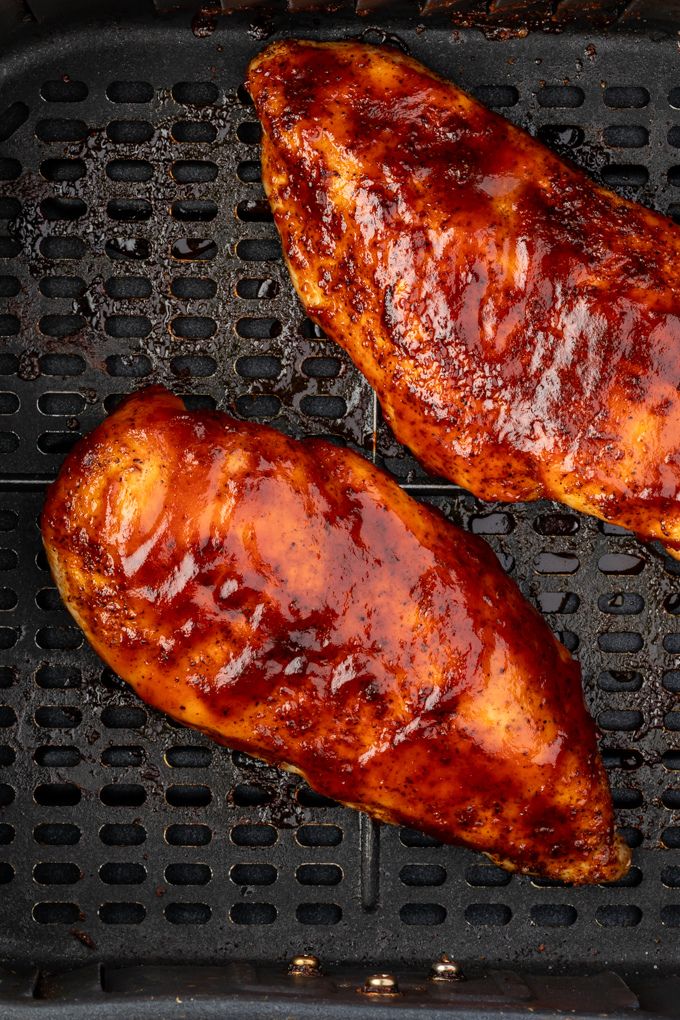
It’s completely fine to put bbq sauce (or any sauce) in the air fryer. Simply brush bbq sauce over chicken breast when it reaches 160 degrees and cook an additional 2-3 minutes until the internal temperature of the chicken reaches 165 degrees.
Store air fryer bbq chicken in an air tight container in the refrigerator for up to 3 days.
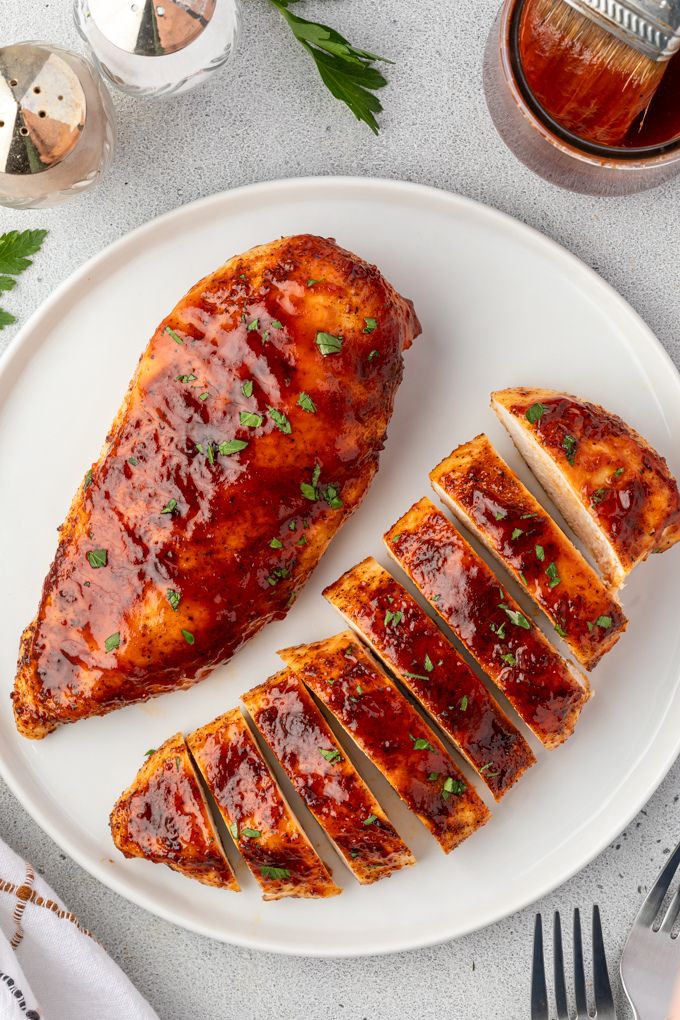
There are so many delicious ways to serve up this air fryer bbq chicken as outlined below.
- Pro tip: Allow the chicken breasts to come to room temperature prior to cooking, and make sure that they are the same thickness for even cooking.
- All air fryers vary, so treat the cooking time listed as a guide. Be sure to adjust the cooking time accordingly depending on the size of your chicken breasts.
- Change things up with my bbq chicken rub, your favorite seasonings or store bought bbq sauce.
- Cooking time for air fryer bbq chicken legs and thighs. Season as instructed. Cook at 380 degrees for 10 minutes, flip the chicken and cook 8-12 minutes or until internal temperature reaches 170 degrees. Brush with bbq sauce and cook 2-3 minutes more or until internal temperature is 175 degrees.
- Cooking time for air fryer bbq chicken wings. Follow the instructions as outlined for air fryer chicken wings. Cook until internal temperature reaches 170 degrees, then brush with sauce and cook 2-3 minutes more or until internal temperature is 175 degrees.