Ever found yourself craving those juicy, flavor-packed chicken kabobs but don’t have access to a grill? Maybe it’s pouring rain outside, you live in an apartment with no outdoor space, or perhaps you just don’t own a grill. Don’t worry – I’ve been there too, and I’ve got some fantastic solutions that’ll satisfy your kabob cravings without stepping foot outside!
After experimenting with various indoor cooking methods for years, I’m excited to share my favorite techniques for making mouthwatering chicken kabobs in your kitchen. Trust me, with these methods, you’ll never feel limited by the absence of a traditional grill again.
Why You Can Totally Make Amazing Kabobs Indoors
Before we dive into the specific methods, let me assure you – yes, you absolutely CAN make delicious chicken kabobs without a grill! Many people think kabobs are exclusively outdoor food, but that’s just not true With the right techniques, your indoor kabobs can be just as juicy, flavorful, and satisfying as anything cooked over open flames
The secret is understanding how to adapt grilling techniques to indoor cooking methods, And the best part? You probably already have everything you need in your kitchen!
What You’ll Need for Indoor Chicken Kabobs
Let’s gather our essentials before we start cooking:
The Right Chicken
- Boneless, skinless chicken breasts or thighs (thighs tend to be juicier)
- Cut into uniform 1-1.5 inch cubes for even cooking
Skewers
- Wooden skewers (soak in water for at least 30 minutes to prevent burning)
- Or metal skewers (no soaking required, but they’ll get hot!)
Marinade Basics
- Olive oil (2-3 tablespoons)
- Acidic component (lemon juice, lime juice, or vinegar)
- Your favorite spices (garlic powder, onion powder, paprika, cumin, etc.)
- Salt and pepper to taste
Colorful Vegetables
- Bell peppers (any color)
- Red onions
- Cherry tomatoes
- Zucchini
- Mushrooms
Equipment Options
Depending on your preferred method, you’ll need one of these:
- Oven and baking sheet
- Broiler
- Stovetop grill pan
- Air fryer
Preparation: The Foundation of Great Kabobs
Regardless of which cooking method you choose, proper preparation is key to flavorful kabobs:
1. Marinate Your Chicken
The marinade isn’t just for flavor – it also helps keep your chicken moist during cooking, which is super important when you’re not using a grill.
My Go-To Simple Marinade:
- 3 tablespoons olive oil
- 2 tablespoons lemon juice
- 2 cloves minced garlic (or 1 teaspoon garlic powder)
- 1 teaspoon paprika (smoked paprika adds great flavor!)
- 1 teaspoon dried oregano
- ½ teaspoon salt
- ¼ teaspoon black pepper
Mix all ingredients in a bowl, add your chicken cubes, and let them marinate for at least 30 minutes, but several hours or overnight in the refrigerator is even better!
2. Prep Your Vegetables
Cut your vegetables into pieces similar in size to your chicken. This ensures everything cooks at roughly the same rate.
3. Assemble Your Kabobs
Thread your marinated chicken and vegetables onto skewers, alternating between meat and vegetables. Don’t pack them too tightly – leave a little space between pieces to ensure even cooking.
Method 1: Oven-Baked Chicken Kabobs
This is probably the easiest and most foolproof method. Your oven provides consistent, even heat that cooks the kabobs thoroughly without much fuss.
Step-by-Step Instructions:
- Preheat your oven to 400°F (200°C).
- Line a baking sheet with parchment paper or aluminum foil for easy cleanup.
- Arrange your kabobs on the baking sheet, making sure they don’t touch.
- Bake for 20-25 minutes, turning the kabobs halfway through the cooking time.
- Check that the chicken reaches an internal temperature of 165°F (74°C) using a meat thermometer.
Pro Tip: For a bit more color, you can turn on the broiler for the last 2-3 minutes of cooking time. Just watch them carefully so they don’t burn!
Method 2: Broiling Chicken Kabobs
If you’re looking for that charred, grilled-like exterior, broiling is your best friend. This method uses direct, high heat that most closely mimics a grill.
Step-by-Step Instructions:
- Position your oven rack so it’s about 4-6 inches from the broiler.
- Preheat your broiler on high.
- Line a baking sheet with foil and place a rack on top if you have one.
- Arrange kabobs on the rack or directly on the foil-lined sheet.
- Broil for 8-10 minutes, then flip and broil for another 8-10 minutes.
- Watch them closely! Broilers can burn food quickly if left unattended.
Warning: This method requires a bit more attention than baking, as broilers can vary in intensity. Keep an eye on your kabobs to prevent burning!
Method 3: Stovetop Grill Pan Kabobs
A grill pan is a fantastic investment if you love grilled foods but can’t always use an outdoor grill. It gives you those beautiful grill marks and a similar flavor profile.
Step-by-Step Instructions:
- Heat your grill pan over medium-high heat until very hot.
- Lightly brush with oil to prevent sticking.
- Place kabobs on the hot pan, being careful not to overcrowd.
- Cook for about 4-5 minutes per side, rotating to ensure all sides get grill marks.
- Total cooking time should be around 15-20 minutes, depending on the size of your chicken pieces.
Pro Tip: If your skewers are too long for your pan, you can actually remove the handles from wooden skewers after threading (just cut them off with kitchen scissors) or use shorter skewers made specifically for stovetop cooking.
Method 4: Air Fryer Chicken Kabobs
If you’ve got an air fryer, you’re in luck! This method is quick, efficient, and creates a wonderful texture with minimal effort.
Step-by-Step Instructions:
- Preheat your air fryer to 375°F (190°C).
- Depending on your air fryer size, you may need to cut skewers to fit or cook kabobs in batches.
- Place kabobs in the air fryer basket in a single layer, making sure they don’t overlap.
- Cook for 12-15 minutes, flipping halfway through.
- Check that chicken reaches 165°F (74°C) before serving.
Air Fryer Advantage: This method is the fastest of all options and requires minimal cleanup!
Flavor Enhancements: Taking Your Indoor Kabobs to the Next Level
Without the smoky flavor that comes from an outdoor grill, you might want to add some extra flavor boosters:
1. Smoked Paprika Is Your Friend
This spice adds a wonderful smoky flavor that mimics that grill taste. Add a teaspoon to your marinade or sprinkle it on before cooking.
2. Try Different Marinades
Experiment with these flavor profiles:
- Mediterranean: Olive oil, lemon juice, garlic, oregano, and a touch of yogurt
- Asian-Inspired: Soy sauce, honey, ginger, garlic, and a splash of rice vinegar
- Spicy: Olive oil, lime juice, chili powder, cumin, and a bit of honey
- BBQ Style: Your favorite BBQ sauce thinned with a bit of apple cider vinegar
3. Add a Glaze
In the last few minutes of cooking, brush on a complementary glaze:
- Honey + soy sauce
- Balsamic reduction
- Thinned BBQ sauce
- Sweet chili sauce
4. Serve with a Dipping Sauce
A good sauce can elevate your kabobs:
- Tzatziki (yogurt-cucumber sauce)
- Chimichurri
- Peanut sauce
- Garlic aioli
Common Problems & Solutions
Even with these methods, you might encounter some challenges. Here’s how to troubleshoot:
Problem: Dry Chicken
Solution: Marinate longer, use chicken thighs instead of breasts, or slightly reduce cooking time.
Problem: Uneven Cooking
Solution: Cut all pieces to uniform size, and don’t pack kabobs too tightly.
Problem: Vegetables Cook Faster Than Chicken
Solution: Cut vegetables slightly larger than chicken, or consider par-cooking the chicken before skewering.
Problem: Wooden Skewers Burning
Solution: Soak longer (1 hour minimum), or wrap exposed ends in foil.
FAQ: Your Indoor Kabob Questions Answered
Q: Can I prep my kabobs ahead of time?
A: Yes! You can marinate the chicken and assemble kabobs up to 24 hours in advance. Keep them covered in the refrigerator until ready to cook.
Q: How do I know when my chicken is done without a meat thermometer?
A: Cut into the thickest piece – if the juices run clear (not pink) and the meat is white throughout, it’s likely done. But honestly, a meat thermometer is your best bet for perfect kabobs every time.
Q: Can I use this same method for beef or lamb kabobs?
A: Absolutely! Just adjust cooking times based on your preferred doneness. Beef can be cooked to medium-rare (145°F), while lamb is typically best at medium (160°F).
Q: What’s the best way to serve kabobs?
A: I like to serve them over rice, couscous, or with warm pita bread. A fresh salad on the side completes the meal perfectly!
Q: Can I leave the skewers on when serving?
A: You can, but I usually remove the chicken and vegetables from the skewers before serving. It’s easier to eat and prevents any potential mishaps with sharp skewers.
Complete Indoor Chicken Kabob Meal Ideas
Turn your kabobs into a complete meal with these serving suggestions:
Mediterranean Feast
- Lemon-herb chicken kabobs
- Served with hummus and warm pita
- Side of Greek salad
- Tzatziki sauce for dipping
Asian-Inspired Dinner
- Teriyaki chicken kabobs
- Served over steamed rice
- Side of quick-pickled cucumber salad
- Sprinkle of sesame seeds and green onions
Tex-Mex Night
- Chili-lime chicken kabobs
- Served with Spanish rice
- Side of black bean and corn salsa
- Avocado crema for dipping
The Bottom Line on Indoor Chicken Kabobs
I hope I’ve convinced you that making chicken kabobs without a grill isn’t just possible – it can actually be preferable in many ways! Each of these methods offers unique advantages, and you might find you prefer one over the others depending on what equipment you have and what texture you’re aiming for.
The key takeaways:
- Marinate your chicken well for maximum flavor and moisture
- Cut ingredients uniformly for even cooking
- Don’t overcook (use that meat thermometer!)
- Experiment with different flavors and sauces
- Have fun with it!
Indoor cooking gives you the freedom to enjoy delicious kabobs year-round, regardless of weather or living situation. And honestly, sometimes I prefer these methods over traditional grilling because they’re more consistent and less prone to flare-ups.
So next time you’re craving kabobs but don’t have access to a grill, don’t despair! Grab those skewers, fire up your oven, broiler, grill pan, or air fryer, and get cooking. Your taste buds will thank you!

How to Cook Burgers without a Grill
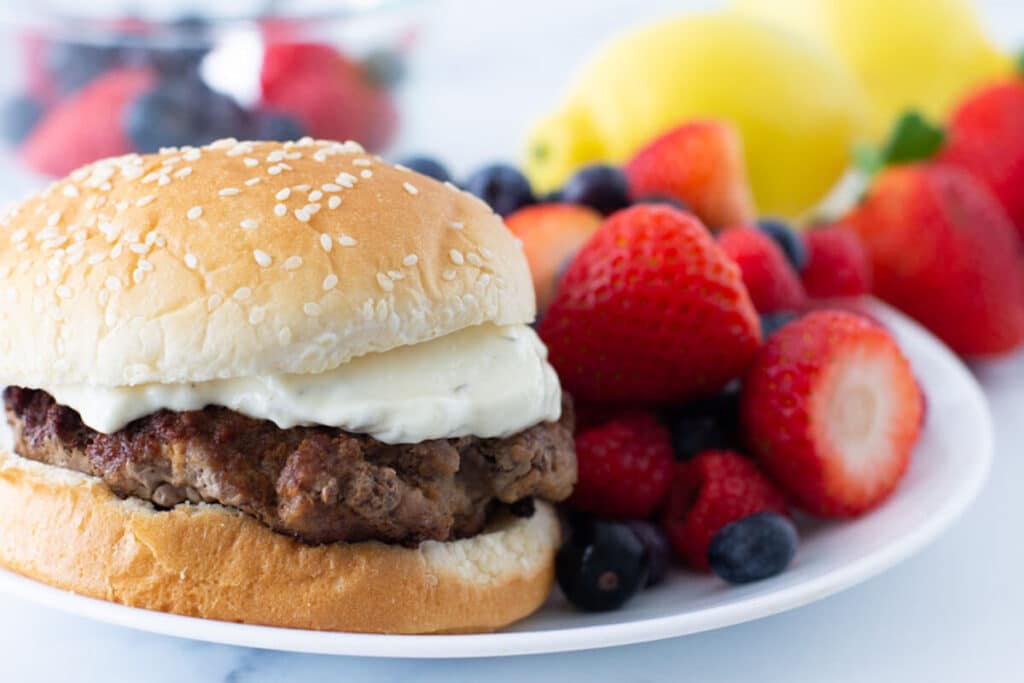
Its hard to beat a grilled burger but sometimes the grill just isnt an option.
You can cook burgers without a grill, either in the oven or on the stovetop. One of my favorite cooking resources, The Kitchn, recommends cooking in the oven at 400F for about 15 minutes.
Alternatively, cook in a cast iron pan on the stovetop at a high temperature until the burgers are done to your liking.
Make sure to add plenty of seasoning as you wont have that signature smoky flavor from the grill!
Want a great burger recipe to test out these methods? Checkout my roundup of the Best Homemade Burger Recipes.
Cooking Kabobs in the Oven
If youd like to make kabobs without a grill, cooking kabobs in the oven is an excellent choice.
Simply preheat your oven to 450F. If youre using wooden skewers, make sure to soak them in water for at least 30 minutes, just as you would for outdoor grilling. Then skewer your meat and veggies.
For steak kabobs, cook for 8-10 minutes (for medium rare) and check for desired doneness. Chicken kabobs will take closer to 20-30 minutes. The exact cooking time will depend on the size of your chicken pieces, so please check with a meat thermometer to ensure the inside has reached 165F.