Are you tired of your delicious chicken wings sticking to the pan when you bake them? I know the frustration all too well – you spend time preparing perfect wings only to lose half the crispy skin when you try to remove them from the baking sheet Well, I’ve got good news for you! After testing multiple methods, I’ve compiled the ultimate guide to cooking chicken wings in the oven without the dreaded sticking problem.
Why Do Chicken Wings Stick to the Pan?
Before diving into solutions, let’s understand why chicken wings tend to stick in the first place:
- Moisture: Excess moisture is the number one culprit
- Direct contact: Wings sitting directly on a hot metal surface
- Lack of preparation: Not using the right techniques or tools before baking
Essential Tools for Non-Stick Oven-Baked Wings
Having the right equipment makes a huge difference when baking chicken wings:
| Must-Have Tools | Why It Helps |
|---|---|
| Baking sheet | The foundation of your wing operation |
| Parchment paper/aluminum foil | Creates a non-stick barrier |
| Wire rack | Allows air circulation and minimizes contact |
| Paper towels | For drying wings thoroughly |
| Tongs | For flipping wings without damaging the skin |
| Meat thermometer | Ensures perfect doneness (165°F) |
Preparation: The Secret to Non-Stick Success
1. Dry Those Wings!
The most critical step that many people overlook is thoroughly drying your chicken wings
- Remove wings from packaging and pat completely dry with paper towels
- For extra-crispy results, let wings air dry in the refrigerator for 1-2 hours (or even overnight)
- Remember: moisture = steam = soggy wings that stick!
2. The Wire Rack Method (Highly Recommended)
According to chef Dennis Littley from Ask Chef Dennis, “Using a wire rack over a baking sheet is one of the best ways to keep wings from sticking, as it allows air to circulate, preventing them from sitting in their own juices and getting soggy.”
This setup offers three major advantages
- Minimizes contact between wings and any surface
- Allows fat to drip away during cooking
- Ensures even air circulation for consistent crispiness
3. Lining Options
If you don’t have a wire rack, the next best options are:
- Parchment paper: Excellent non-stick properties, though wings won’t get as crispy on the bottom
- Silicone baking mat: Reusable and effective at preventing sticking
Avoid using aluminum foil directly without greasing it first, as chef Littley warns, “foil tends to cling to the skin, especially if the wings aren’t properly oiled.”
4. The Baking Powder Secret
This is seriously a game-changer! Lightly coating your wings with aluminum-free baking powder (not baking soda!) helps in two ways:
- Creates a drier surface that won’t stick to the pan
- Raises the pH level of the skin, helping it break down and get extra crispy
Mix about 1-2 teaspoons of baking powder with your seasonings and toss the wings until evenly coated.
5. Oil Is Your Friend
A light coating of oil acts as another barrier against sticking:
- Use oils with high smoke points like vegetable or canola oil
- Apply using a brush or spray bottle for even coverage
- Don’t drench the wings – a light coating is all you need
Step-by-Step: Perfect Non-Stick Oven-Baked Wings
Now that we understand the principles, let’s put it all together:
-
Preheat your oven to 400-425°F (200-220°C)
This high temperature is crucial for crispy skin development. -
Prepare your baking sheet
Line with parchment paper and place a wire rack on top (if using). If using parchment directly, consider a light spritz of cooking spray. -
Dry and season the wings
- Pat wings completely dry with paper towels
- In a bowl, combine:
- 1 tsp salt
- 1 tsp pepper
- 1 tsp garlic powder
- 1 tsp paprika
- 1-2 tsp baking powder (aluminum-free)
- Toss wings in the mixture until evenly coated
- Add a light coating of oil if desired
-
Arrange wings properly
- Place wings in a single layer with space between each
- Avoid overcrowding the pan – use two baking sheets if necessary
-
Bake with care
- Bake for 40-45 minutes total
- Flip wings halfway through cooking for even browning
- Wings are done when internal temperature reaches 165°F and skin is golden and crispy
-
Let them rest
Allow wings to rest for a few minutes before removing from the rack or pan. This helps them release more easily.
Troubleshooting Sticky Wing Problems
If you’re still experiencing sticking issues:
- Wings stuck to parchment: Let them cool slightly before attempting removal
- Wings stuck to rack: Ensure rack was properly greased beforehand
- Wings not crispy enough: Your oven temperature might be too low or wings had too much moisture
Creative Flavor Ideas for Your Non-Stick Wings
Once you’ve mastered the non-stick technique, experiment with these flavor combinations:
- Buffalo Style: Equal parts hot sauce and melted butter
- Honey Garlic: Honey, soy sauce, and minced garlic
- Lemon Pepper: Fresh lemon zest, lemon juice, and cracked black pepper
- BBQ: Your favorite barbecue sauce brushed on during the last 5 minutes
- Garlic Parmesan: Melted butter, minced garlic, and grated Parmesan
Healthier Options
Wanna make your wings a bit healthier? You can definitely reduce the oil! The baking powder technique helps achieve crispiness with minimal added fat. You might not get the exact same level of crispiness, but they’ll still be delicious and less likely to stick.
Storage and Reheating
Got leftovers? (Which is rare in my house!) Here’s how to handle them:
- Storage: Cool completely and refrigerate in an airtight container for up to 3 days
- Reheating: For best results, reheat in a 350°F oven for 10-15 minutes until hot and crispy again
Final Thoughts
Cooking chicken wings in the oven without sticking really comes down to proper preparation and technique. With the right tools and methods, you’ll achieve perfectly crispy wings that release cleanly from the cooking surface every time.
Remember these key points:
- Dry wings thoroughly before cooking
- Use a wire rack whenever possible
- Don’t forget the baking powder trick
- Ensure proper spacing between wings
- Cook at high temperature (400-425°F)
I used to think truly crispy, non-stick wings were only possible with deep frying, but these oven methods have completely changed my mind. Not only are they easier and healthier, but they’re also way less messy!
So next time you’re craving wings, skip the delivery and try these techniques. Your taste buds (and the person washing the dishes) will thank you!
FAQ: All Your Oven-Baked Wing Questions Answered
Q: How long should I bake chicken wings in the oven?
A: At 400-425°F, wings typically take 40-45 minutes total. Always check for an internal temperature of 165°F.
Q: Can I use frozen wings?
A: Fresh wings work best, but if using frozen, thaw them completely first and pat them very dry to remove excess moisture.
Q: Is it necessary to flip the wings while baking?
A: Yes! Flipping halfway through ensures even cooking and browning on all sides.
Q: What’s the best way to tell when wings are done?
A: Wings are done when they reach an internal temperature of 165°F and have golden, crispy skin.
Q: Can I make chicken wings healthier by using less oil?
A: Absolutely! The baking powder method helps create crispiness with minimal oil.
Q: Can I bake wings in advance and reheat them later?
A: Yes! Store cooled wings in the refrigerator and reheat in a 350°F oven for 10-15 minutes until hot and crispy again.
Now go make some wings that’ll make your friends think you’ve been hiding a deep fryer somewhere! Happy cooking!

Nonstick spray vs. parchment paper: Which one wins?
Both nonstick spray and parchment paper are good options, but each has its strengths. Nonstick spray is a go-to for convenience — just a quick spritz on your baking sheet and youre good to go. For best results, coat the pan evenly before arranging the wings, and dont skimp on the spray. Remember not to use it on a nonstick baking sheet, as it can damage the coating over time. This method works pretty well, though sometimes I still get some sticking.
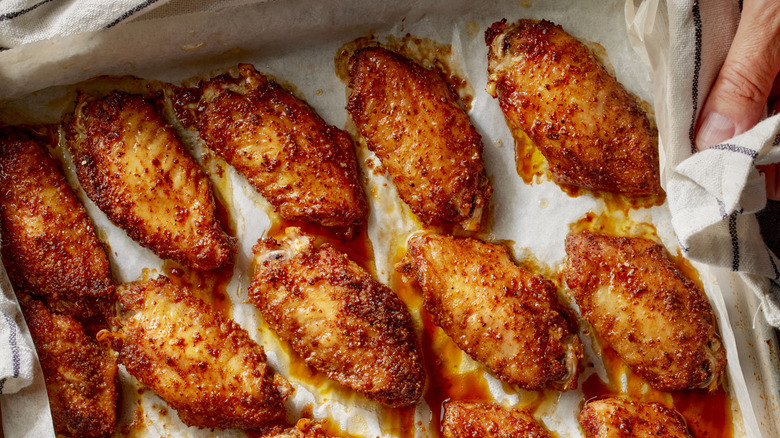
Parchment paper is a favorite for its versatility. Not only does it prevent sticking, but it also eliminates the need for scrubbing stubborn bits off the pan afterward. Parchment creates a smooth, nonstick surface thats perfect for sticky marinades. Plus, its disposable, making cleanup almost effortless. To use parchment paper, simply cut a sheet to fit your baking tray, lay it down, and place your wings on top. The problem with parchment is that I almost always end up with my wings coming up with a little bit of paper.
If youre torn between the two, consider combining them. Spraying nonstick spray on parchment paper ensures an extra layer of protection, especially for heavily coated or sticky wings. This hybrid method is a game-changer for avoiding sticking while also making cleaning up afterwards way easier.