Have you ever craved that perfect balance of tangy and sweet flavors from your favorite Chinese restaurant, but didn’t want to wait for delivery? I’m gonna let you in on a little secret – making sweet and sour chicken at home is actually super easy, and it tastes WAY better than takeout. Plus, you’ll save money and know exactly what’s going into your meal.
Today I’m sharing my go-to method for making this classic dish in about 15-30 minutes (depending on how organized you are in the kitchen). Trust me once you try this recipe, you’ll never call for takeout again!
Why You’ll Love This Recipe
Before diving into the how-to, let me tell you why this homemade sweet and sour chicken recipe is gonna rock your world
- It’s quick – ready in as little as 15 minutes (though realistically plan for 30 if you’re not a speed demon in the kitchen)
- It’s healthier than restaurant versions which are often deep-fried
- The sauce has the perfect balance of sweet and tangy flavors
- It’s versatile – you can easily add veggies or pineapple
- It’s family-friendly – even picky eaters love this dish!
One reader commented: “My daughter is 20. This is HER comfort meal and has been since you posted it years ago! Something to celebrate? Bad day? Birthday? We are making this sweet and sour chicken!”
What You’ll Need
Let’s gather our ingredients! For this recipe, you’ll need:
For the Chicken:
- 1 to 1.25 pounds boneless skinless chicken breasts, cut into 1-inch cubes
- 3 tablespoons cornstarch (or all-purpose flour works too)
- Salt and pepper to taste
- 3-4 tablespoons olive or vegetable oil
For the Sweet and Sour Sauce:
- ¾ cup granulated sugar
- ½ cup apple cider vinegar
- ¼ cup ketchup
- 2 tablespoons low-sodium soy sauce
- 1 tablespoon sesame oil
- 1 tablespoon brown sugar
- 2-3 cloves garlic, minced
- 2 tablespoons cold water
- 1 tablespoon cornstarch
Optional Add-ins:
- Bell peppers (green, red, or a mix)
- Onion
- Celery
- Pineapple chunks (fresh or canned in juice, not syrup)
- Green onions and sesame seeds for garnish
Step-by-Step Instructions
Alright, let’s get cooking! I’m breaking this down into super simple steps:
Making the Sweet and Sour Sauce:
-
In a medium saucepan, combine the granulated sugar, apple cider vinegar, ketchup, soy sauce, sesame oil, brown sugar, and minced garlic. Whisk everything together.
-
Bring this mixture to a boil over medium-high heat.
-
While that’s heating up, in a small bowl, mix together the cold water and cornstarch to create a slurry.
-
Once the sauce is boiling, add the cornstarch slurry and reduce heat to low.
-
Let the sauce simmer for about 5 minutes until it thickens, whisking occasionally.
Pro Tip: If you want to save time, you can make the sauce a day or two ahead and store it in the fridge!
Preparing and Cooking the Chicken:
-
Place your chicken pieces in a large zip-top bag or bowl.
-
Add the cornstarch (or flour), salt, and pepper.
-
Seal the bag and shake well, or toss in the bowl, until all chicken pieces are evenly coated.
-
Heat 3-4 tablespoons of oil in a large skillet over medium-high heat.
-
Add the coated chicken to the hot oil and cook for about 5-7 minutes, stirring occasionally, until the chicken is golden brown and cooked through (no pink inside).
Pro Tip: Don’t overcrowd your pan! If necessary, cook the chicken in batches to ensure it gets crispy rather than steamed.
Putting It All Together:
-
If you’re adding vegetables like bell peppers, onions, or celery, you can either:
- Add them to the skillet after the chicken is mostly cooked, OR
- Stir-fry them separately and combine at the end
-
Once the chicken (and veggies if using) are cooked, reduce the heat to low.
-
Pour the sweet and sour sauce over everything in the skillet.
-
Stir gently to coat all the pieces evenly.
-
Let everything simmer together for 2-3 minutes to allow the flavors to combine.
-
If adding pineapple, stir it in during the last minute of cooking just to heat through.
-
Garnish with sliced green onions and sesame seeds if desired.
Serving Suggestions
This sweet and sour chicken is best served hot over a bed of steamed white rice. Some other great options include:
- Serve with brown rice for a healthier option
- Pair with noodles like chow mein
- Add a side of fresh spring rolls
- Include a simple veggie side like steamed broccoli
Tips for Success
I’ve made this recipe about a billion times, and I’ve learned a few tricks along the way:
-
Chicken prep tip: Cut your chicken into evenly-sized pieces so they cook at the same rate.
-
For crispier chicken: The cornstarch coating is key – it creates that light, crispy exterior without deep frying.
-
Sauce adjustments: If you find the sauce too sweet, add a bit more vinegar. Too sour? Add a touch more sugar or a splash of pineapple juice.
-
Rice timing: Start your rice before you begin cooking the chicken so everything finishes at the same time.
-
Make it spicy: Add red pepper flakes or a bit of sriracha to the sauce if you like some heat.
Common Questions
Can I use chicken thighs instead of breasts?
Absolutely! Boneless, skinless chicken thighs work great and are often more juicy and flavorful.
How do I store leftovers?
Store in an airtight container in the refrigerator for up to 5 days. The sauce might thicken in the fridge, but it’ll loosen up when reheated.
Can I freeze this dish?
Yes, you can freeze it for up to 3 months. Just thaw overnight in the fridge before reheating.
Is there a way to make this healthier?
You can reduce the sugar amount slightly, add more vegetables, and serve with brown rice or cauliflower rice.
Can I make this gluten-free?
Yes! Just make sure to use gluten-free soy sauce or tamari.
Variations to Try
Once you’ve mastered the basic recipe, you might wanna try these tasty variations:
Pineapple Sweet and Sour Chicken
Add 1/2 cup of pineapple chunks and use some of the juice in your sauce for extra tropical flavor.
Veggie-Packed Version
Add bell peppers, onions, carrots, snow peas, or broccoli for extra nutrition and color.
Crispy Battered Chicken
For a more takeout-style dish, try dipping the chicken in beaten egg before coating in cornstarch or flour.
Honey Sweet and Sour
Replace some of the sugar with honey for a different flavor profile.
What People Are Saying
Nancy Cooper shared: “Absolutely delicious! Made several servings over rice with one recipe. Next time I will be adding some vegetables, like snow peas or even adding some cashews.”
Another reviewer noted: “This is an absolutely awesome recipe! Love it every time, tastes like restaurant quality.”
Conclusion
Making sweet and sour chicken at home is seriously one of the best kitchen skills you can learn. It’s faster than delivery, tastes fresher, and you can customize it exactly to your liking. The sweet and tangy sauce paired with juicy chicken is just irresistible!
I make this at least once a month in my house, and there are NEVER leftovers. Even my pickiest family members clean their plates!
Give this recipe a try next time you’re craving Chinese food, and I promise you’ll be amazed at how simple it is to create this takeout favorite in your own kitchen. Your family will think you’re a culinary genius, and only you’ll know how easy it actually was!
What’s your favorite Chinese takeout dish to make at home? Drop me a comment below – I’d love to hear about your kitchen adventures!
Remember to start your rice before you begin cooking so everything is ready at the same time. Enjoy your homemade sweet and sour chicken!

How to Make It
Whisk the sugar, vinegar, chicken broth, ketchup, soy sauce, and cornstarch in a medium bowl until well combined. Set aside.
There are a couple of ways to make baked sweet and sour chicken. I’ve done them both and they work great, so choose your favorite option:

Option 1: Chicken Pieces
- Preheat the oven to 325 degrees. Cut the meat into bite-sized pieces, place them in the baking dish and pour the sauce over the top.
- Every 20 minutes, give it all a stir while it’s baking. It should be fully cooked in 60 minutes.
Option 2: Whole Chicken Breasts
- Preheat the oven to 325 degrees. Place the whole chicken breasts in a baking dish and cover them with the sauce. Bake them for an hour and a half, turning them one to two times while they bake.
- Once the baked chicken is cooked through and the sauce is thick and caramelized take it out of the oven. Allow it to cool for a few minutes and then cut the meat into bite-sized pieces. Return it back to the sauce and stir to coat it evenly.
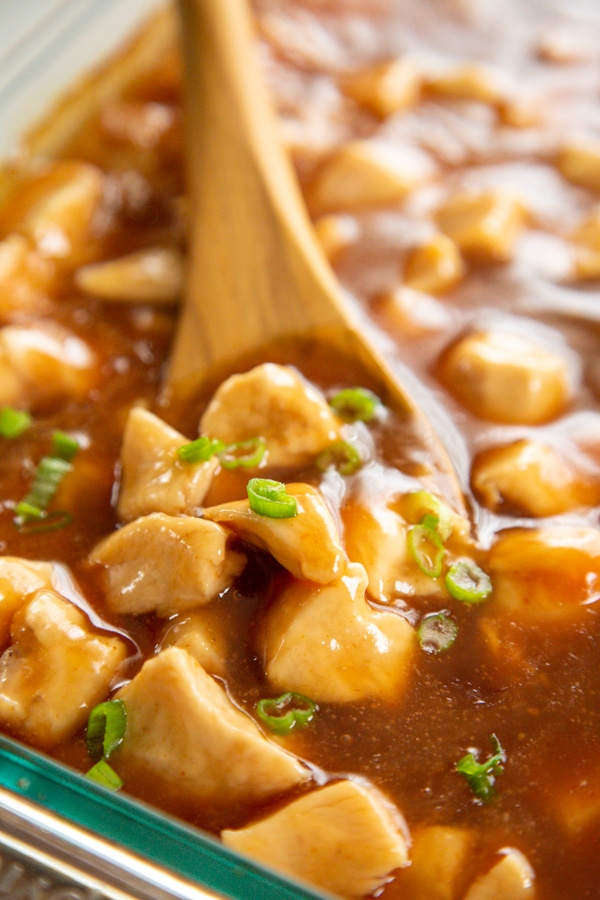
- When you mix up the sauce, the consistency will be light and the color will be bright, but don’t worry. It will darken and thicken up as it bakes in the oven.
- To get a nice golden color, you can turn on the broiler in the last 5 to 10 minutes of the cooking time. This will further caramelize the sauce and deepen the color.
- If, for some reason, your sauce isn’t thick enough once it’s baked just remove the meat and add some more cornstarch to the sauce and whisk to combine. You can do this right in the baking dish.
- This recipe makes a lot of sauce, which we love. Once it’s ready to serve, I usually transfer the extra sauce to a small mason jar to have on the side so everyone can add more if they want it.
- The finished dish holds well. Often, I make it early and cover it with foil to keep it warm until everyone is ready to eat.
- The leftovers keep well in the refrigerator for up to four days. Reheat them on the stove top in a skillet or in the microwave.

I love the flavor of the apple cider vinegar but you can use the same amount of rice vinegar if you prefer.
You can use boneless skinless chicken thighs instead of chicken breasts. Depending on the size you may need to adjust the baking time.
For added texture, sprinkle some sesame seeds over the top for garnish. Or add some sliced green onions.
My family loves this dinner with some cooked broccoli, red bell peppers, and white rice or brown rice on the side. You could also add some pineapple chunks.
If you have leftovers, I also like to wrap the sauce and chicken up in tortillas with some shredded cheddar cheese, too.

The next time you get a Chinese food take-out craving I hope you’ll give this one a try. It’s a family favorite at our house and I love that it’s lighter and saves us a few bucks, too. XOXO San
I love recreating our favorite restaurant dishes at home so you might like to try these recipes, too.