Are you tired of watching your hard-earned money disappear into your chickens’ beaks? I was too until I discovered the magic of fermenting chicken feed It’s been a total game-changer for my flock and my wallet!
Fermenting chicken feed is like creating a sourdough starter for your birds This simple process can cut your feed costs by up to 50% while making your chickens healthier and more productive. It’s a win-win that every backyard chicken keeper should know about
In this article, I’ll walk you through exactly how to ferment chicken feed in six easy steps, plus share all the amazing benefits you’ll see in your flock. Let’s dive in!
The Amazing Benefits of Fermenting Chicken Feed
Before I get into the “how-to” part let me share why fermenting chicken feed is worth your time
- Saves money – Your chickens will eat less because fermented feed is more nutritious and filling
- Healthier birds – The fermentation process creates beneficial probiotics and unlocks nutrients
- Better digestion – Fermented feed is easier for your chickens to digest
- Less poop – Since they absorb more nutrients, they produce less waste
- Stronger immune systems – Probiotics strengthen your chickens’ natural defenses
- Thicker eggshells – Many chicken keepers report stronger shells and tastier eggs
- Increased egg production – The extra nutrition can boost laying
- Less waste – Chickens gobble up fermented feed and spill less
- Shinier feathers – Birds look healthier and more vibrant
- Destroys mold spores – The fermentation process kills harmful mold that might be in dry feed
My flock absolutely LOVES their fermented feed. Even my pickiest hens race to get it first!
What You’ll Need to Ferment Chicken Feed
Let’s gather our supplies. The good news is you probably have most of these items already:
-
Container with loose-fitting lid – Size depends on your flock size:
- 5-gallon bucket for large flocks
- 1-gallon container for 10-20 chickens
- Half-gallon jar for 6 or fewer birds
-
Stirring stick or spoon – I use a paint stick because food doesn’t stick to it
-
Shallow feeding container – Something your chickens can reach into without jumping in
-
Scoop – A 1-cup measure works well for tracking consumption
-
Distilled water – Or tap water that’s been left out for 24 hours to remove chlorine
-
Chicken feed – Regular feed, crumbles, pellets, or whole grains (more on this below)
Best Chicken Feed Types for Fermenting
You can ferment almost any type of chicken feed:
- Whole grains – Best option! They have more nutrients that are unlocked during fermentation
- Chicken crumbles – Works well and becomes easier to digest
- Chicken pellets – Will work but gets mushier than other options
- Chicken scratch – Can be fermented but isn’t as nutritious as other options
- Mixed feeds – Many folks combine pellets with whole grains like oats, wheat, barley, sunflower seeds, and flax
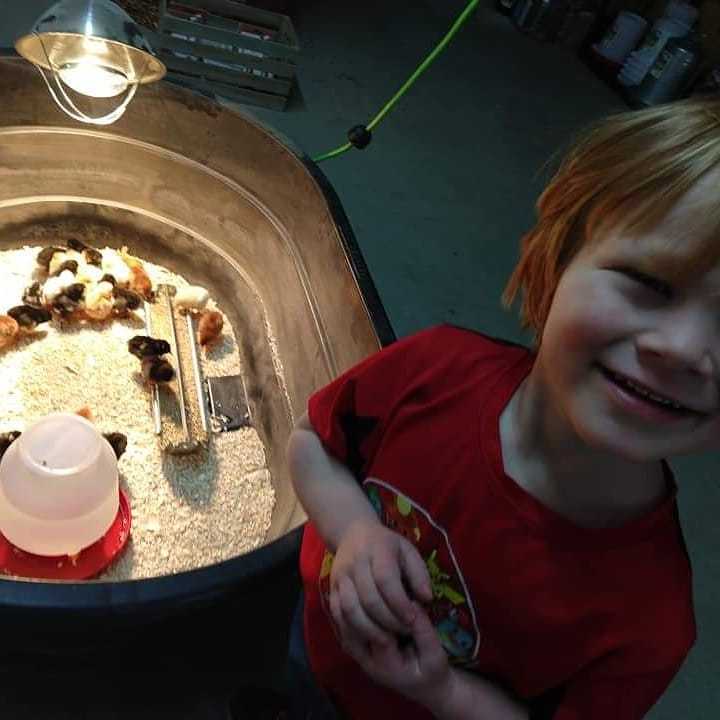
You can even ferment chick starter for your baby chicks! The probiotics are great for them too.
How to Ferment Chicken Feed: 6 Simple Steps
Now let’s get to the actual process of fermenting your chicken feed:
Step 1: Add Feed to Your Container
Fill your container about halfway with dry chicken feed. Don’t overfill it! The feed will expand quite a bit during fermentation.
For pellets or crumbles, I’d recommend filling only about 1/3 of your container since they swell more than whole grains.
Step 2: Add Water to Cover the Feed
Pour in enough distilled water (or dechlorinated water) to cover the feed by about 1-2 inches. The chlorine in tap water can kill the beneficial bacteria we’re trying to grow, so it’s important to either:
- Use distilled water
- Let tap water sit out for 24 hours to allow chlorine to evaporate
- Boil tap water for 20 minutes and let it cool to room temperature
Some people add a splash of apple cider vinegar (with “the mother”) to jump-start the fermentation process, but this is optional.
Step 3: Stir and Cover
Give everything a good stir, then cover the container with a loose-fitting lid. The lid should be tight enough to keep out dust and insects but loose enough to let gases escape during fermentation.
Important: The feed must stay completely submerged under water at all times to prevent mold growth.
Step 4: Stir Regularly and Monitor
Stir your fermenting feed about three times a day – morning, noon, and evening works well. This helps speed up the fermentation process.
Check the water level daily and add more if needed to keep the feed completely covered.
Within 24 hours, you should start seeing tiny bubbles forming at the surface. This is carbon dioxide being released as the beneficial bacteria multiply – it’s a good sign!
Step 5: Wait for Fermentation
Your feed will be ready in about 2-3 days, depending on the temperature. Warmer temperatures speed up fermentation.
How do you know when it’s ready? Use your senses:
- Sight: Look for lots of bubbles when you stir
- Smell: It should have a pleasant, slightly sweet yeasty or yogurt-like smell (not sour or alcoholic)
If it smells like alcohol, it’s fermented too long and should be discarded.
Step 6: Strain and Feed to Your Chickens
Once your feed is properly fermented (usually day 2-3), it’s time to feed your flock:
- Scoop out what you need for feeding
- Strain excess liquid back into the fermenting container (you can use this liquid to start your next batch)
- Add the strained feed to your feeding container
- Let your chickens enjoy!
- After feeding, add fresh dry feed and water to your fermenting container to start the next batch
How Much Fermented Feed Per Chicken?
When first introducing fermented feed, give your chickens their regular portions. You’ll likely notice they eat less of it since it’s more filling and nutritious.
For my flock of mixed standard and bantam chickens (about 10-20 birds), I use about a cup of fermented feed at each feeding. But every flock is different, so observe your birds and adjust accordingly.
Maintaining Your Fermentation System
To keep your fermentation going continuously:
- After removing feed for the day, add an equal amount of dry feed back to the container
- Check water level and top off if needed
- Stir well and cover
- The next batch will ferment faster (often in just 2 days) because of the established beneficial bacteria
This creates a perpetual fermentation system that gets more efficient over time!
Troubleshooting Common Issues
Kahm Yeast
Don’t panic if you see a thin white film forming on top of your fermenting feed. This is likely Kahm yeast – it’s not harmful, just a bit unsightly and sometimes smelly.
Kahm yeast appears as a white film with trapped bubbles underneath. It gets wrinkly and grayish over time.
To manage Kahm yeast:
- Skim it off before feeding
- Keep your ferment in a cooler area
- Every few months, completely clean out your container and start fresh
Mold
If you see fuzzy growth or colored patches (green, blue, black), that’s mold – NOT Kahm yeast. Moldy feed should be discarded immediately.
To prevent mold:
- Keep feed completely submerged under water
- Use clean containers and tools
- Stir regularly
- Don’t let fermentation go too long
Reluctant Chickens
Some chickens might be hesitant to try fermented feed at first. If your flock seems uninterested:
- Mix a small amount of fermented feed with their regular feed
- Gradually increase the proportion of fermented feed
- Be patient – they’ll likely come around once they get used to it
- If needed, temporarily restrict access to dry feed to encourage them to try the fermented feed
Fermented Feed Through the Seasons
You might need to adjust your fermenting process with the seasons:
- Summer: Fermentation happens faster in warm weather. Check more frequently and be ready to feed it sooner.
- Winter: Keep your fermenting container in a warmer area (like a garage or basement) to maintain the fermentation process.
I personally ferment outside during summer and move my operation to the garage during winter to avoid nasty smells in the house.
Fermented Feed Tips for Success
After fermenting chicken feed for years, I’ve picked up these helpful tips:
- Start small – Begin with a small batch until you get the hang of it
- Consistency matters – Try to feed at regular times each day
- Watch the water ratio – Too much water makes sloppy feed; too little risks mold
- Trust your nose – If it smells bad (sour or alcoholic), don’t feed it
- Clean periodically – Every few months, thoroughly clean your fermenting container
- Label your containers – If you’re fermenting different types of feed
- Store appropriately – Keep fermenting feed away from direct sunlight and extreme temperatures
FAQs About Fermenting Chicken Feed
How long does fermented chicken feed last?
Properly fermented feed should be fed within 24 hours of being ready. The fermentation process itself takes 2-3 days.
Can baby chicks eat fermented feed?
Yes! You can ferment chick starter just like regular feed. It’s easier for them to digest and provides beneficial probiotics.
Do I need special equipment to ferment chicken feed?
Nope! Basic kitchen items work perfectly. The only “special” consideration might be using dechlorinated water.
Will fermented feed freeze in winter?
Yes, it can freeze if left outside in freezing temperatures. Keep it in a garage or other protected area during winter.
Can I add herbs or other supplements to my fermented feed?
Absolutely! Many chicken keepers add herbs like oregano, thyme, or garlic for additional health benefits.
My Personal Experience with Fermenting Chicken Feed
I’ve been fermenting chicken feed for my flock for several years now, and I’ll never go back to just dry feed. My feed costs have dropped by about 40%, and my chickens look amazing!
One unexpected benefit I found was that during molting season, my chickens recovered much faster when eating fermented feed. Their new feathers came in shinier and healthier-looking.
The only downside for me has been dealing with the occasional Kahm yeast smell, which is why I keep my fermentation buckets in the garage. A small price to pay for all the benefits!
Ready to Start Fermenting?
Fermenting chicken feed is one of the easiest and most rewarding things you can do for your flock. With just a few simple supplies and a little bit of time, you can provide your chickens with super-nutritious feed that saves you money and helps them thrive.
Why not give it a try? Your chickens (and your wallet) will thank you!
Have you tried fermenting chicken feed for your flock? I’d love to hear about your experiences in the comments below!

Fermented Chicken Feed Using Mason Jars
I started my chicken journey in earnest back in 2018, after I finally (10 years after I planted the idea) got the buy-in from my husband. Looking back, I think he came around because I’d convinced him that if we had a few chickens, we’d save money on those delicious (expensive) pastured eggs we had come to love. I’m just going to say it right now – DO NOT BUY BACKYARD CHICKENS TO SAVE MONEY ON EGGS. You will be sorely disappointed if you think your overall expenditures will in any way go down with backyard chickens. Even the most careful and money conscious among us will end up spending more on those sweet little fluffy butts (fun fact: chicken keepers often call chickens “fluffy butts”) than they ever spent on the most organic, pastured of eggs, especially if you add in the monetary value of your time.

Here’s the thing, after four years of chicken keeping, I (and anyone else who does it) will probably tell you that the value comes from the incredible joy of the hobby, personally knowing your hens, and the satisfaction in cooking up that perfect, nutrient rich, creamy dreamy egg (with flavor and texture better than any grocery store egg you’ve ever eaten) that came straight from your favorite girl, Princess Lay-a. Truly, knowing exactly where (and who) my food comes from makes me so happy, not to mention that I can rest assured that the chicken who laid that egg is happily and healthily bopping around in my backyard at that very moment.

All that said, I’m coming at this from a hobbyist perspective. I have a handful of named hens in my backyard.
Certainly, a larger scale operation is very different, and I can’t speak to having any experience in that, but maybe those of you with a bigger farm/more land/more chickens can give that perspective in the comments section.


Jars usually not included
Youre away from FREE shipping – $4.99 for smaller orders
Hooray! You unlocked FREE shipping.
Your cart is empty
Add note to shipper
Guaranteed Secure Shopify Checkout
Enter payment information and coupons on next page.
