Are you intimidated by cooking chicken livers? Don’t worry – I was too! But after years of experimenting, I’ve perfected the art of baking chicken livers that are tender, flavorful, and not at all rubbery. In this comprehensive guide, I’ll share everything you need to know about transforming this affordable protein into a delicious meal your family will actually enjoy.
Chicken livers might not be everyone’s first choice at the dinner table, but when prepared correctly they’re a nutritional powerhouse that deserves a spot in your meal rotation. Plus they’re budget-friendly and surprisingly versatile!
Why Bake Chicken Livers Instead of Frying?
Before diving into the how-to, let’s talk about why baking is often the superior method:
- Healthier preparation – Uses less oil than frying
- Even cooking – The oven’s consistent temperature ensures uniform doneness
- Less mess – No oil splatter to clean up afterward
- Hands-off cooking – Once they’re in the oven, you can focus on preparing side dishes
Plus, baking helps preserve the natural flavors while minimizing that “metallic” taste some people associate with liver.
Essential Ingredients for Baked Chicken Livers
The beauty of baked chicken livers lies in their simplicity. Here’s what you’ll need:
- 1 pound fresh chicken livers
- 1 large onion, thinly sliced (don’t skip this!)
- 1 tablespoon extra-virgin olive oil
- 1 teaspoon salt
- ½ teaspoon garlic powder
- ½ teaspoon onion powder
- ½ teaspoon paprika
- 2 teaspoons dried oregano or Italian seasoning
These basic ingredients create a delicious foundation, but feel free to experiment with different seasonings based on your preference!
Preparing Chicken Livers for Baking
The prep work is crucial for achieving the best results:
1. Clean and Trim
First. give your chicken livers some attention
- Rinse the livers under cold running water
- Inspect each piece carefully for any green or yellow spots (bile stains), which can taste bitter
- Trim away any visible fat, connective tissue, or discolored areas
- Cut larger pieces into smaller, similarly-sized pieces for even cooking
- Pat them dry with paper towels (this helps seasonings stick better)
Don’t forget to wash your hands thoroughly after handling raw chicken livers!
2. Consider Soaking (Optional but Recommended)
If you’re sensitive to the sometimes strong flavor of liver, try this trick:
- Soak in milk: Place cleaned livers in milk or buttermilk for about an hour before cooking
- Why it works: The milk helps draw out impurities and mellows the flavor
While I personally don’t think this step is necessary for chicken livers (which are milder than beef or calf liver), many home cooks swear by it!
The Perfect Baking Method
Now for the main event – let’s get baking!
Step 1: Preheat and Prep
- Preheat your oven to 350°F (175°C)
- Grease a 9×13 baking dish
Step 2: Layer and Season
- Place your thinly sliced onions at the bottom of the baking dish
- Arrange the cleaned chicken livers on top of the onion bed
- Drizzle everything with olive oil
- Sprinkle all the seasonings (salt, garlic powder, onion powder, paprika, and oregano) over the livers and onions
- Use tongs or clean hands to toss everything, ensuring even coating
Step 3: Cover and Bake
- Cover the baking dish with aluminum foil
- Bake covered for 20 minutes
- Remove the foil, give everything a good stir
- Continue baking uncovered for another 10-15 minutes
Step 4: Check for Doneness
Perfectly baked chicken livers should:
- Reach an internal temperature of 165°F (74°C) when checked with a meat thermometer
- Look tender but cooked through
- Still maintain some moisture (overcooked livers become dry and rubbery)
Remember that livers will continue cooking slightly after you remove them from the oven, so it’s better to err on the side of less cooking time rather than more.
Flavor Variations to Try
Once you’ve mastered the basic recipe, why not get creative? Here are some exciting flavor profiles to experiment with:
Mediterranean Style
- Add lemon zest
- Use oregano and cumin
- Serve with tzatziki sauce and pita bread
Asian-Inspired
- Marinate in soy sauce, ginger and sesame oil
- Garnish with scallions and sesame seeds
- Serve with rice
Spicy Kick
- Add cayenne pepper or chili powder
- Serve with a cooling yogurt or avocado dip
Bacon-Wrapped Luxury
- Wrap individual liver pieces in bacon before baking
- Increase cooking time slightly to crisp the bacon
- Secure with toothpicks if needed
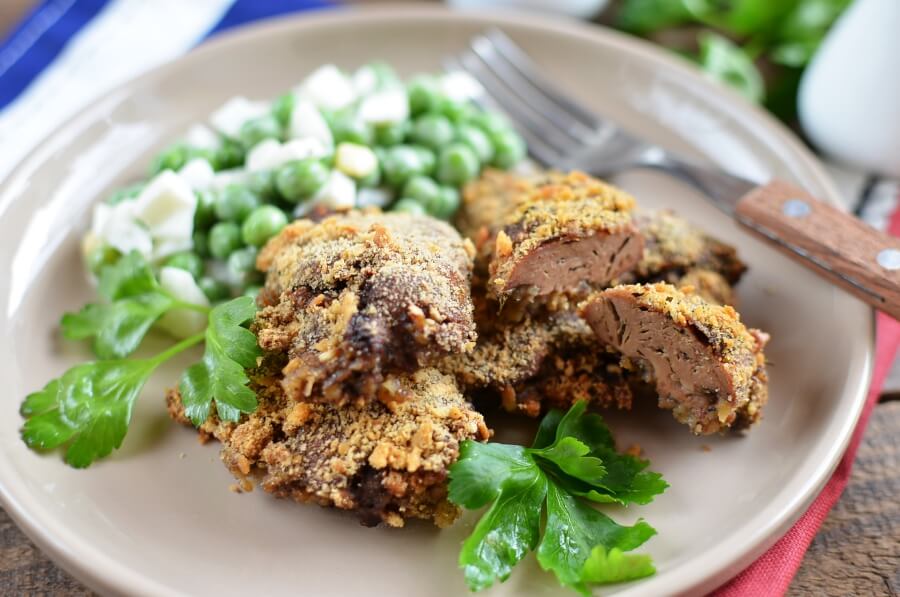
Serving Suggestions
Baked chicken livers pair beautifully with:
- Cilantro lime rice or cauliflower rice
- Mashed potatoes
- Roasted vegetables
- Fresh salad
- Crusty bread for soaking up the delicious juices
The combination of the caramelized onions and tender livers creates an amazing flavor that complements many side dishes!
Troubleshooting Common Issues
Even experienced cooks sometimes run into challenges with liver. Here’s how to solve them:
| Problem | Possible Cause | Solution |
|---|---|---|
| Bitter taste | Bile residue | Better trimming, milk soaking |
| Rubbery texture | Overcooking | Shorter cooking time, check temperature |
| Too dry | Overcooking or high heat | Cover with foil, lower temperature |
| Unevenly cooked | Different sized pieces | Cut livers into uniform sizes |
Health Benefits Worth Mentioning
While we’re focusing on taste, it’s worth noting that chicken livers are incredibly nutritious:
- Excellent source of iron
- High in vitamin A
- Rich in B vitamins, especially B12
- Good protein content
- Contains essential minerals
One serving (about 1/4 of this recipe) contains approximately 182 calories, 20g of protein, and 9g of fat – making it a protein-rich option for health-conscious eaters.
Storage and Leftovers
If you have leftover baked chicken livers:
- Store in an airtight container in the refrigerator for 3-4 days
- Reheat gently in the microwave or in a covered pan on low heat
- Avoid reheating more than once
Final Thoughts
Baking chicken livers doesn’t have to be intimidating! With the right preparation and cooking technique, you can create a delicious, nutrient-dense meal that’s easy on your wallet. The key is not to overcook them and to pair them with complementary flavors like caramelized onions.
Even if you’ve been hesitant to try liver in the past, this baked method might just change your mind. The tender texture and rich flavor, especially when combined with sweet caramelized onions, creates a dish that’s worth adding to your cooking repertoire.
So next time you’re at the meat counter, don’t pass by those chicken livers – grab a pound and give this baking method a try. Your taste buds (and your wallet) will thank you!
FAQs About Baking Chicken Livers
Can I bake frozen chicken livers?
While possible, it’s not recommended. Thaw them completely in the refrigerator first for best results.
How do I know when chicken livers are fully cooked?
They should reach an internal temperature of 165°F. A slight pinkness in the center is okay as long as they reach this temperature.
Can I add vegetables to the baking dish?
Absolutely! Bell peppers and mushrooms work particularly well alongside the onions.
What if I don’t have a meat thermometer?
You can cut into one of the larger pieces – it should be cooked through but still tender, not raw or bloody.
Can I make this recipe ahead of time?
Yes, but chicken livers are best enjoyed fresh. If making ahead, slightly undercook them, then reheat gently.
Video Baked Chicken Livers Recipe
Recommended ⇒ All My ![]() Russian Recipes With Step By Step Photos
Russian Recipes With Step By Step Photos

⇓ Check Out My Newest Recipes ⇓
How to Prepare Chicken Livers For Cooking:
To prepare right chicken livers for cooking is very important to have a tasty dish! The milk is absorbing strong specific liver taste and liver will be very pleasant mild liver taste. This technique with milk good to use when cooking wild game or some fish also.
- Wash liver in cold water and dry on paper towel. Cut off sinew, fat and especially bile. On the photo, I marked N1 – bile and N2 green spots from bile. The bile must be removed very carefully (try don’t break it). If you don’t remove bile, your dish has a bitter taste and will be impossible to eat.


2. Cut the liver in bite even pieces and place in very cold milk. Leave for 30 minutes in the refrigerator. Dry in a paper towel and our liver ready to cook.

-
Preheat oven to 400ºF or 200ºC
1. Grease the pan with little butter and vegetable oil. Add black pepper and all spice to the liver. Bake 20 minutes. Don’t add salt to liver yet!

2. Cut onion into rings. Coat onion with flour.
Tip. Don’t throw away the hard end of the onion, just place in zip lock bag and keep in the refrigerator. Great use to make stock or broth!

3. Grease skillet with little butter and vegetable oil. Saute onion. When onion will be done, add black pepper, salt, and all spices.

4. Add sour cream and saute for 15-20 minutes. Taste the sauce, it needs to taste not like raw sour cream.

5. When liver will be cooked, turn off oven. Baked chicken liver sometimes has a few small pink spots, don’t worry! Mix liver in the pot and add salt and spices.

6. Add the sauce to the liver. Taste for salt and spices. Place pot in the oven for 20 minutes (oven still warm from the cooking liver). We don’t really cook the dish, we just let liver and sauce exchange flavors.

Let dish rest for 5-10 minutes before serving.

Recommended ⇒  Russian No-Knead Bread Simple Recipe With Instant Dry Yeast.
