Have you ever bitten into a chicken breast that was so juicy, so tender that it practically melted in your mouth? If you’re tired of dry, disappointing chicken breasts, it’s time to discover the game-changing cooking technique that’s revolutionizing home kitchens sous vide chicken breast.
I’ve been experimenting with sous vide cooking for years now, and I can honestly say that nothing has transformed my chicken breast game more dramatically. In this complete guide, I’ll walk you through everything you need to know about this foolproof method that delivers restaurant-quality results every single time.
What Exactly is Sous Vide Chicken Breast?
Sous vide chicken breast is chicken that’s been cooked using the sous vide method – a technique where food is vacuum-sealed in a bag and cooked in a water bath at a precisely controlled temperature The term “sous vide” comes from French, meaning “under vacuum,” which perfectly describes the process
Unlike traditional cooking methods that use high heat and often result in overcooked exteriors and undercooked interiors, sous vide brings the entire chicken breast to the exact same temperature throughout. This means perfectly even cooking from edge to edge with no dry spots!
How Sous Vide Chicken Breast Works
The sous vide process for chicken breast follows these basic steps
- Season: Salt, pepper, herbs, or whatever seasonings you prefer
- Seal: The seasoned chicken is vacuum-sealed in a food-safe pouch
- Cook: The sealed bag is submerged in a water bath with an immersion circulator that maintains a precise temperature
- Finish: After cooking, the chicken is briefly seared to create a crispy, flavorful exterior
What makes this method so revolutionary is that the chicken breast never gets hotter than the water temperature. This precise temperature control eliminates the risk of overcooking and results in chicken that’s juicier than you ever thought possible.
The Benefits of Sous Vide Chicken Breast
If you’re wondering why so many chefs and home cooks are obsessed with sous vide chicken breast, here are the key benefits:
- Unmatched juiciness: The sealed environment retains moisture that would normally be lost to evaporation
- Perfect doneness every time: No more guesswork or anxiety about undercooked or overcooked chicken
- Edge-to-edge tenderness: The entire breast cooks to the exact same temperature
- Enhanced flavor: Seasonings infuse deeply during the extended cooking time
- Reduced shrinkage: Chicken maintains its size better than with high-heat methods
- Forgiving timing: Once the chicken reaches temperature, it can remain in the bath for hours without overcooking
- Food safety: Extended cooking at specific temperatures ensures proper pasteurization
As J. Kenji López-Alt from Serious Eats notes, “If there’s one dish that most dramatically shows the differences between sous vide and traditional cooking methods, it’s chicken breast.”
Temperature Guide for Sous Vide Chicken Breast
The beauty of sous vide is that you can choose your preferred texture by selecting different temperatures. Here’s a handy guide:
| Temperature | Result | Texture |
|---|---|---|
| 140°F (60°C) | Very tender and juicy | Extremely soft, smooth texture that melts between your teeth |
| 145°F (63°C) | Tender and juicy | Moist with a tender, resilient chew (my personal favorite) |
| 150°F (66°C) | Firm but juicy | Traditional texture, slightly more fibrous but still moist |
| 155°F (68°C) | Well-done but moist | Similar to traditional cooking but juicier |
| 160°F (71°C) | Traditional well-done | Firm and stringy but still more moist than conventional cooking |
Most sous vide enthusiasts (including myself) prefer the 145-150°F range, which delivers exceptional juiciness while ensuring food safety.
Food Safety and Sous Vide Chicken
Many people worry about cooking chicken to temperatures lower than the commonly recommended 165°F. But here’s the thing: food safety is actually a function of both temperature AND time.
The USDA temperature guidelines are designed to kill harmful bacteria instantly at 165°F. However, the same pathogen reduction can be achieved at lower temperatures when held for longer periods.
For example, chicken held at 145°F for 8.5 minutes is just as safe as chicken that reaches 165°F instantaneously. Since sous vide cooking typically involves holding temperatures for an hour or more, you can safely enjoy juicier chicken at these lower temperatures.
As Kenji explains, “At 136°F (58°C), it takes a little over an hour for the bacteria to slowly wither to death in the heat.” This is the bacterial equivalent of “shoving a stick of dynamite into an anthill.”
How Long to Cook Sous Vide Chicken Breast
Timing is flexible with sous vide, but here are general guidelines for boneless chicken breasts:
- 1-2 hours: Standard cooking time for most chicken breasts
- Up to 4 hours: Still excellent quality
- Beyond 4 hours: Texture becomes increasingly soft and can become mushy
The thickness of your chicken will affect timing too. For thicker cuts or bone-in breasts, aim for the higher end of the range.
One important note: These times assume the chicken has already reached the target temperature. Plan to add about 30-45 minutes for the chicken to come up to temperature from refrigerated, or 1-2 hours from frozen.
Step-By-Step Guide to Perfect Sous Vide Chicken Breast
Ready to try it yourself? Here’s my fool-proof method:
What You’ll Need:
- Chicken breasts (bone-in, skin-on preferred for better flavor)
- Salt and pepper
- Optional herbs and aromatics (thyme, rosemary, lemon slices, garlic)
- Sous vide immersion circulator
- Container for water bath
- Vacuum sealer and bags (or ziplock bags)
- Cast iron or stainless steel skillet for finishing
Step 1: Preheat Your Water Bath
Set your immersion circulator to your desired temperature (I recommend 145-150°F for most uses).
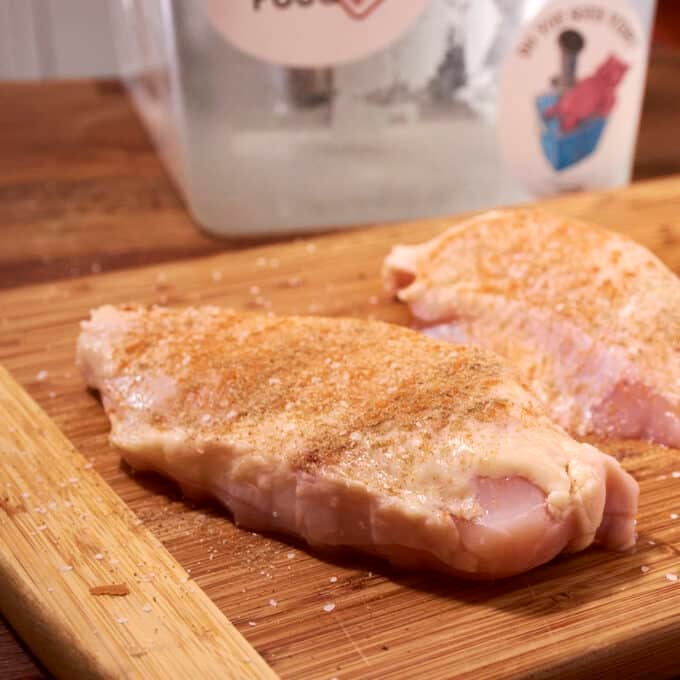
Step 2: Season the Chicken
Season your chicken breasts generously with salt and pepper. Add any herbs or aromatics you like.
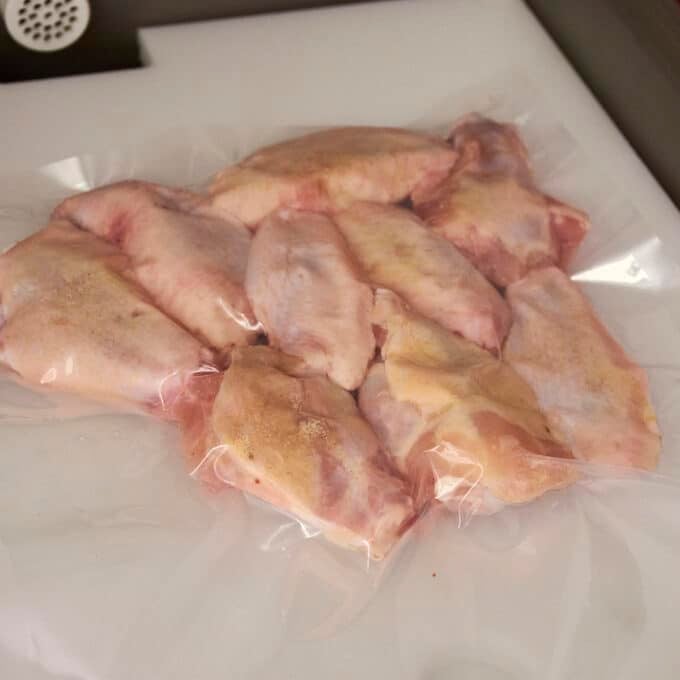
Step 3: Bag and Seal
Place the seasoned chicken in your vacuum bag. If using bone-in, skin-on breasts, arrange them in a single layer. Seal the bag using your vacuum sealer or the water displacement method if using ziplock bags.
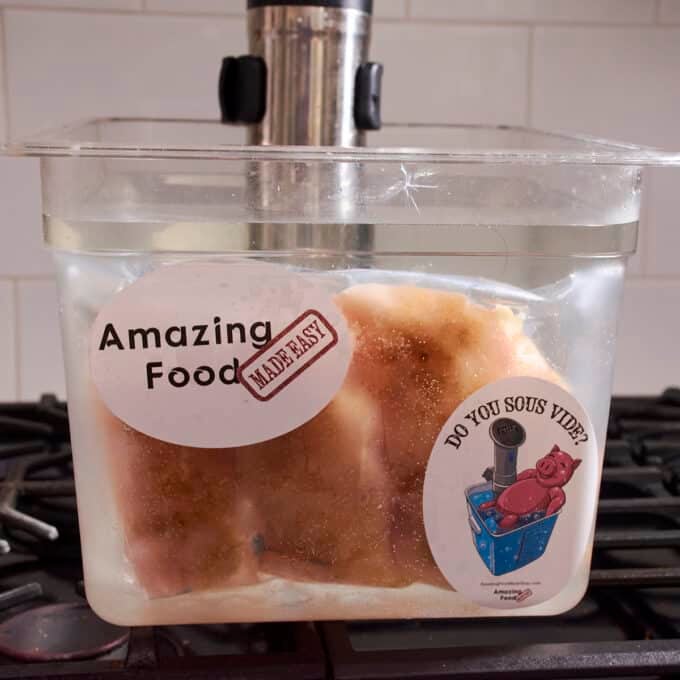
Step 4: Cook
Submerge the sealed bag in your preheated water bath. Make sure the chicken is fully submerged. Cook for 1-2 hours for boneless breasts or 2-4 hours for bone-in.
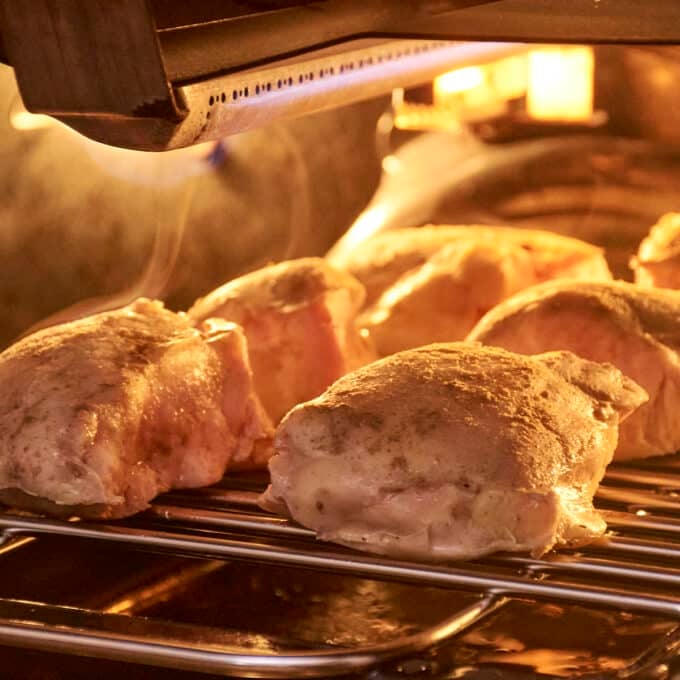
Step 5: Finish
Once cooked, remove the chicken from the bag and pat completely dry with paper towels. This step is crucial for good browning!
For crispy skin, heat a skillet with a tablespoon of high smoke-point oil over medium-high heat until shimmering. Place the chicken skin-side down and press gently to ensure good contact. Sear for 1-2 minutes until golden brown and crispy.
Step 6: Rest and Serve
Let the chicken rest for a few minutes before slicing to allow the juices to redistribute.
Common Mistakes to Avoid
Even though sous vide chicken breast is fairly foolproof, there are a few pitfalls to watch out for:
- Not drying the chicken thoroughly before searing: Results in steaming rather than browning
- Cooking too long: Beyond 4 hours, texture can become mushy
- Improper bag sealing: Can lead to water entering the bag
- Too high water temperature: Will overcook your chicken just like conventional methods
- Not seasoning adequately: The gentle cooking requires proper seasoning
- Overcrowding when searing: Leads to poor browning and overcooking
Creative Sous Vide Chicken Breast Ideas
Once you’ve mastered basic sous vide chicken breast, try these variations:
- Lemon-Herb: Add lemon slices, thyme, and garlic to the bag
- Mexican-Inspired: Season with cumin, chili powder, and lime zest
- Asian Fusion: Include ginger, garlic, and a splash of soy sauce
- Mediterranean: Add olives, sun-dried tomatoes, and fresh herbs
- BBQ Style: Brush with your favorite BBQ sauce before the final sear
Is Sous Vide Chicken Breast Worth It?
After years of cooking chicken both traditionally and sous vide, I can confidently say that sous vide produces the best chicken breast I’ve ever had. The difference is most dramatic with chicken breast compared to almost any other meat.
While the technique requires some specialized equipment and more time, the results are truly transformative. If you enjoy chicken breast regularly, investing in a sous vide setup will revolutionize your meals.
As one convert put it, “Once you discover just how delicious properly cooked chicken can be, you’ll never go back to your old ways!”
FAQs About Sous Vide Chicken Breast
Can I sous vide frozen chicken breast?
Yes! Simply add about 1 hour to your cooking time. This is one of the great advantages of sous vide.
Do I need to brine chicken before sous vide?
It’s not necessary, but brining can enhance flavor and moisture retention even further. A 30-minute to 2-hour brine before sous vide will give excellent results.
How do I prevent the chicken bag from floating?
Use a sous vide container with a lid, or weigh down the bags with ceramic weights or even heavy spoons.
Can I store sous vide chicken after cooking?
Absolutely! Rapidly chill the cooked (but not seared) chicken in an ice bath, then refrigerate for up to 7 days. When ready to eat, reheat in a 135°F water bath for about 30 minutes, then sear and serve.
Can I make a pan sauce with sous vide chicken?
Unlike traditionally cooked chicken, sous vide doesn’t create fond (browned bits) in the pan, so traditional pan sauces aren’t possible. However, the bag juices make an excellent sauce base!
Sous vide chicken breast is truly a revelation for anyone who’s struggled with dry, overcooked poultry. The technique might seem fancy or complicated at first, but it’s actually one of the easiest, most foolproof cooking methods once you get the hang of it.
I’d love to hear about your experiences with sous vide chicken breast! Have you tried it? What temperature do you prefer? Drop me a comment below with your thoughts or questions.

Why Sous Vide Chicken?
It always turns out juicier! This isn’t just opinion, it’s science. With sous vide you can cook chicken at a lower temperature and it’ll still be just as safe to eat. So instead of 165°F you can cook it at 140°F… in beef terms, that’s going from a well-done steak to a medium-rare steak, they are barely the same meal!
It’s easy for food prep! Because the chicken is in a sealed bag and cooked to pasteurization, if you chill it afterwards you can keep it in the fridge for a week or two. This means you can spread out your food prep even further and always have some tasty chicken in the fridge ready to be heated up and enjoyed.
It’s healthier! What’s the first step in most chicken recipes? “Add oil to the pan”. But with sous vide it’s not needed, especially if you skip the sear or sear under the broiler. Removing all the oil is very important for many people out there.
It’s always perfect! With sous vide you are cooking at the temperature you want the food at, this means there’s no stress about pulling it out at the “right” time. Once the chicken is pasteurized it’s ready to come out…or you can wait 15 more minutes…or an extra hour…you have a few hours of leeway so when life throws you a curveball and delays dinner by an hour, you don’t have to stress out!
It’s completely replicable! Because sous vide is so exact, you can easily tweak the recipes to meet your exact needs. Prefer it a little more done, then just increase the temperature a few degrees. There’s no more guessing, and it will turn out amazing, and exactly the same, every time!
It’s easy to cook directly from frozen! If you portion, bag, and freeze your chicken ahead of time you can easily grab a bag and pop it into the sous vide machine. It takes about 50% longer but there’s no need to thaw, so if you forget to take it out a day early (like I ALWAYS forget to do) you don’t have to stress!
It’s all hands off! Sure, seeing a recipe that takes 2 to 3 hours sounds intimidating, but the hands-on time is only a few minutes. Do you know what I do while the chicken is cooking? Do yard work, play video games, read a book, take the dog for a walk, or just sit and relax! All sous vide recipes should have the instruction, “place the chicken in the sous vide machine and then go enjoy life for a few hours knowing your chicken will be ready when you are!”
How To Sous Vide Chicken
Chicken is one of the easiest things to sous vide. It works well with both bone-in and boneless, skin-on and skinless. It improves breasts, thighs and wings and can even be used on whole chickens when they are spatchcocked.
Sous viding chicken follows the standard sous vide process.
Trim and portion the chicken. Get the chicken ready like you normally would. I personally don’t do too much but I know some people like to trim the fat, remove the skin, or cut it into serving portions – whatever you would normally do when you are cooking chicken using other methods.
Season the chicken with salt and spices. Most spice rubs you use with chicken also work well with sous vide. You may want to go a little lighter than normal because sous vide can intensify the flavors occasionally. You’ll also want to avoid raw garlic, onion, or ginger because the low temperature means it’ll still taste raw at the end. Woody herbs like rosemary, sage, or thyme can also be added to the bags.
Bag the chicken. Place the chicken in a sous vide bag or Ziploc Brand Freezer Bag and seal it. It should be in a single layer, otherwise it’ll affect the cook times. Even though sous vide means “under pressure” the vacuum doesn’t matter nearly as much as the precise temperatures.
Preheat the sous vide machine. I have my preferred chicken temperatures below, but they usually range from 140°F to 160°F. As mentioned above, sous vide is safe at lower temperatures because it is so precise. Try a few different temperatures and find what works best for your preferences, then you can replicate it every time!
Cook the chicken until pasteurized. This is the most important step! Chicken needs to be cooked until it is safe to eat. This can be done by heating it to 165°F and held for 1 second, or to 140°F and held for 30 minutes. The timing in my sous vide recipes are designed to ensure your food is cooked long enough to be pasteurized, and more time and temperature options are provided below. This is also why you want to ensure the chicken is in a single layer, otherwise the middle may not be safe to eat. If you are curious, here is more about sous vide chicken and safety.
Sear the chicken (optional). The final step is to sear or finish the chicken. This is completely optional, though searing does add nice color and texture. I tend to sear when there is skin, or if the chicken is the star of a dish. For things like stir fries, Chinese Garlic Chicken, or Chicken Parmesan I don’t worry about it. Before searing, make sure to thoroughly dry off the chicken so it will brown as quickly as possible. Remember, your chicken is already perfectly cooked, don’t sear it too long and ruin that!