Are you staring at a package of chicken tenderloins wondering how to transform them into something delicious without much fuss? Pan-searing is honestly one of the quickest and most reliable methods I’ve found for cooking these tender cuts of meat. Today, I’m gonna share my tried-and-true method for cooking chicken tenderloins in a pan that delivers moist, flavorful results every single time
Chicken tenderloins are super versatile and cook up in minutes, making them perfect for those hectic weeknight dinners when you need something tasty without spending hours in the kitchen. So let’s dive right into this simple yet delicious cooking technique!
What You’ll Need
Before we start cooking let’s gather everything we need
Ingredients:
- 1 pound chicken tenderloins
- 3-4 tablespoons olive oil (divided)
- Salt and pepper to taste
- Seasonings of your choice (I’ll share my favorite blend below)
- Half a lemon for juicing
Equipment:
- Non-stick skillet or frying pan
- Tongs or spatula
- Meat thermometer (optional but helpful)
- Paper towels
My Favorite Seasoning Blend
While you can absolutely keep things simple with just salt and pepper, this seasoning blend adds amazing flavor to chicken tenderloins:
- 2 teaspoons paprika
- 2 teaspoons garlic powder
- 2 teaspoons onion powder
- 1 teaspoon Cajun seasoning
- 1 teaspoon chili powder
This combination creates a slightly spicy, super flavorful crust that complements the chicken perfectly Feel free to adjust according to your taste preferences!
Step-by-Step Cooking Process
1. Prepare and Season the Chicken
First things first, take your chicken tenderloins out of the refrigerator about 15 minutes before cooking. Cooking them from room temperature helps them cook more evenly.
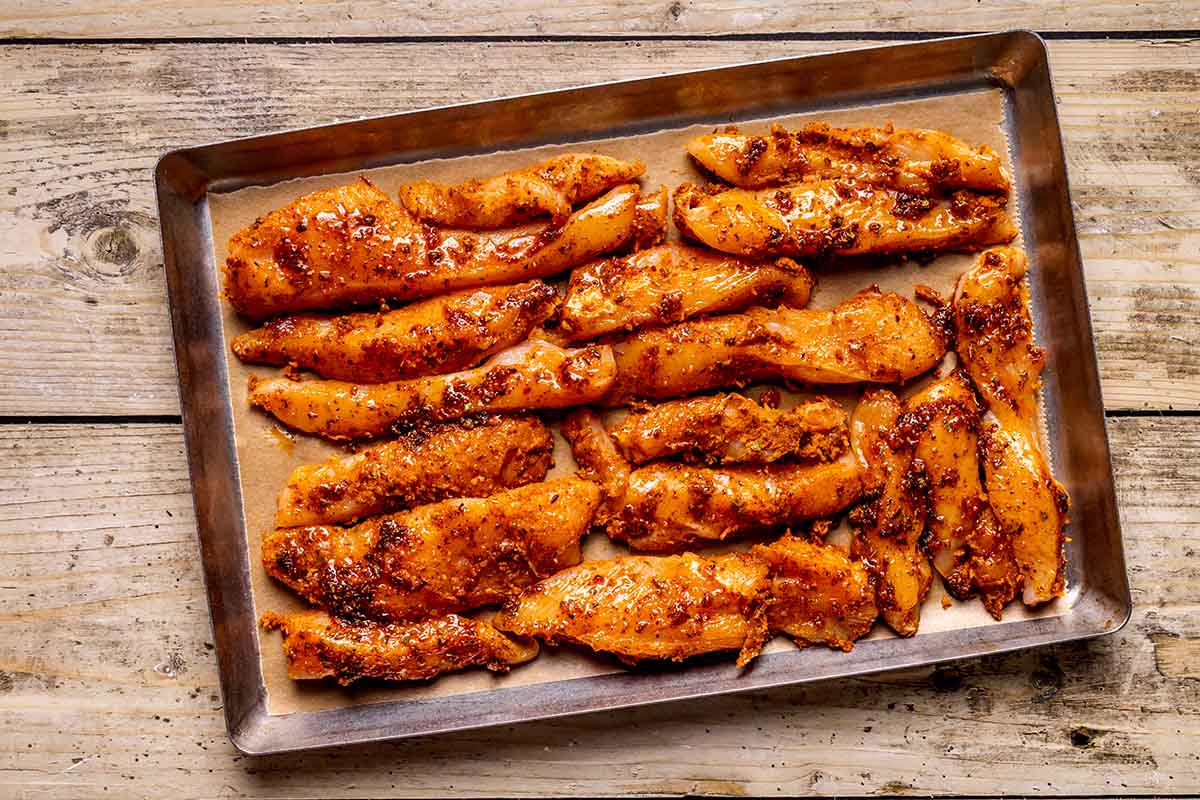
Place the tenderloins in a bowl and add 3 tablespoons of olive oil, salt, and pepper. Mix well to coat all pieces evenly. Then add your seasonings (either my blend above or your own favorites) and toss thoroughly until each tenderloin is well-coated.
If you’re thinking ahead, you could actually marinate the chicken for 30 minutes or even overnight in the refrigerator for more flavor penetration. But honestly, even a quick seasoning right before cooking works great too!
2. Preheat Your Pan
Place your non-stick skillet or frying pan over medium-high heat and let it preheat for a couple minutes. The pan should be hot enough that a drop of water sizzles when it hits the surface.
This preheating step is crucial! A properly preheated pan will give you that gorgeous golden-brown crust we’re aiming for.
3. Add Oil to the Pan
Once your pan is hot, add the remaining tablespoon of olive oil and swirl it around to coat the bottom of the pan evenly. This prevents the chicken from sticking and helps create that beautiful sear.
4. Cook the First Side
Carefully place your seasoned chicken tenderloins in the hot pan in a single layer. Make sure not to overcrowd the pan – if necessary, cook in batches rather than piling them all in at once.
Let them cook undisturbed for about 4-5 minutes on the first side. This is where patience comes in handy! Resist the urge to move them around or flip them too early. We want that beautiful golden crust to form.
5. Flip and Finish Cooking
After 4-5 minutes, use tongs or a spatula to flip each tenderloin to the other side. At this point, I like to squeeze some fresh lemon juice over the chicken – it adds brightness and helps keep the meat juicy.
Cook the second side for another 3-4 minutes until both sides are evenly browned and the chicken is cooked through.
6. Check for Doneness
To be absolutely sure your chicken is perfectly cooked, use a meat thermometer to check the internal temperature. Chicken should reach 165°F (75°C) to be safe to eat. Insert the thermometer into the thickest part of a tenderloin for an accurate reading.
If you don’t have a thermometer, you can cut into one of the thicker pieces to check. The meat should be completely white throughout with no pink areas, and the juices should run clear.
7. Rest and Serve
Once cooked, transfer the chicken tenderloins to a plate lined with paper towels to absorb any excess oil. Then let them rest for about 3-5 minutes before serving.
This resting period is super important! It allows the juices to redistribute throughout the meat, resulting in juicier, more flavorful chicken. If you cut into it immediately, all those precious juices will run out onto your plate instead of staying in the meat where they belong.
Common Questions & Helpful Tips
Can I use frozen chicken tenderloins?
Yes, but I don’t recommend cooking them directly from frozen. For best results, thaw them completely in the refrigerator before cooking. This ensures even cooking and better flavor absorption.
If you’re in a hurry, you can quick-thaw them in cold water (never hot), but make sure they’re completely thawed before pan-searing.
How do I prevent my chicken from drying out?
Chicken tenderloins can dry out quickly if overcooked. Here’s how to keep them juicy:
- Don’t overcook! Use a timer and a meat thermometer.
- The lemon juice helps maintain moisture while adding flavor.
- Let the chicken rest after cooking.
- Consider brining your chicken beforehand if you have time (soak in salt water for 15-30 minutes).
What can I serve with pan-seared chicken tenderloins?
These versatile tenderloins pair well with almost anything! Some of my favorite sides include:
- A simple green salad
- Roasted vegetables
- Mashed potatoes or rice
- Pasta tossed with butter and herbs
How do I store leftovers?
Allow the chicken to cool completely, then store in an airtight container in the refrigerator for up to 4 days. These leftovers are great sliced up in salads, wraps, or pasta dishes!
Variations to Try
Once you’ve mastered the basic technique, try these delicious variations:
Lemon Herb Chicken Tenderloins
- Add 1 teaspoon each of dried oregano, thyme, and rosemary to your seasoning mix
- Use extra lemon juice and add some zest too
- Finish with fresh chopped herbs
Sweet and Spicy Tenderloins
- Add 1 tablespoon brown sugar to your seasoning blend
- Increase the chili powder or add a pinch of cayenne
- Drizzle with honey during the last minute of cooking
Garlic Parmesan Tenderloins
- Double the garlic powder in your seasoning
- Sprinkle with grated parmesan cheese after flipping
- Let it melt during the final cooking minutes
Troubleshooting Common Issues
My chicken is browning too quickly
If your chicken is getting too dark on the outside before it’s cooked through, your heat is too high. Lower the temperature to medium and consider covering the pan for a few minutes to help cook the inside without burning the exterior.
My chicken is sticking to the pan
This usually happens when:
- The pan wasn’t hot enough when you added the chicken
- You tried to flip the chicken too soon
- You didn’t use enough oil
Make sure your pan is properly preheated and wait until the chicken naturally releases from the pan before flipping.
My chicken looks done on the outside but is still pink inside
This is where a meat thermometer really comes in handy! If this happens, lower your heat to medium-low and cover the pan, allowing the chicken to cook through without burning the outside.
Why I Love This Method
Pan-searing chicken tenderloins has become my go-to method for several reasons:
- It’s FAST – dinner on the table in under 25 minutes
- It creates amazing flavor through the browning process (thank you, Maillard reaction!)
- The chicken stays juicy inside while getting crispy outside
- It’s versatile – you can change up the seasonings based on what cuisine you’re craving
- It doesn’t heat up my kitchen like using the oven
Final Thoughts
Mastering how to cook chicken tenderloins in a pan is seriously one of the most useful cooking skills you can develop. It’s quick enough for busy weeknights but can be dressed up for company too.
The key points to remember are: proper seasoning, preheating your pan, not disturbing the chicken while it’s searing, checking for doneness, and allowing it to rest. Follow these simple steps, and you’ll have perfectly cooked chicken tenderloins every time!
Happy cooking!
Suggested Side Dishes
These homemade chicken tenders are so easy to make, which means putting together a side or two is no problem! Serve them with these Crispy Sauteed Potatoes instead of fries, or go for quick Air Fryer Green Beans.
For more of a BBQ-inspired meal, use leftover tenders to make this Chicken Macaroni Salad.
Love bacon? Try this recipe for Crispy Air Fryer Brussels Sprouts with Bacon!
Other Helpful Tips
- If you cant find chicken tenders, you can also buy chicken breast and slice it into strips yourself.
- For a thicker gravy, dissolve some flour in water and slowly add it to the liquid while it cooks, stirring frequently.
- Make large batches of these chicken tenders to keep around and reheat for even quicker meals throughout the week.
These pan fried chicken tenders are the perfect weeknight meal, especially if you have to stop at home, whip something up, and disperse again for your evening activities. With a quick side or two, you can have a full and healthy meal in just 20 minutes!
- Add various spices and seasonings to the flour mixture for even more flavor. Paprika, garlic powder, onion powder, chili powder, oregano, and thyme would all be delicious options, but feel free to experiment with anything you have on hand!
- Chicken thighs can also be substituted if you prefer darker meat. Just be aware these tenders will be on the shorter side.
- These homemade chicken tenders are great to use as a topping for a salad or inside a wrap.
- Serve with whatever kind of dipping sauce you like!