Looking to achieve that perfect golden-brown, crispy-on-the-outside, juicy-on-the-inside fried chicken? You’re not alone! One of the most common questions that pops up when folks are deep frying chicken is: how long do you fry chicken in a deep fryer?
The quick answer is that it typically takes between 5-15 minutes depending on the chicken pieces you’re cooking. But there’s so much more to consider if you want truly amazing deep-fried chicken! Let’s dive deeper into the art and science of perfectly timing your fried chicken.
Quick Summary of Frying Times
Before we get into all the details, here’s a handy reference for those of you who just need the basic timing info:
| Chicken Piece | Boneless, Skinless | Bone-in, Skin-on |
|---|---|---|
| Chicken breasts | 5-7 minutes | 8-10 minutes |
| Chicken thighs | 5-7 minutes | 8-10 minutes |
| Chicken legs | N/A | 7-10 minutes |
| Chicken wings | N/A | 5-7 minutes |
Remember: the most important thing isn’t just time, but making sure your chicken reaches an internal temperature of 165°F (74°C) for food safety.
Factors That Affect Frying Time
The cooking time for your chicken doesn’t just depend on a timer Several factors can influence how long it takes
1. Oil Temperature
The ideal temperature range for frying chicken is between 350°F and 375°F (175°C-190°C) This sweet spot ensures that
- If too hot: The outside will burn before the inside cooks through
- If too cold: The chicken absorbs too much oil and gets greasy
I always keep a good deep-fry thermometer handy to monitor this. Trust me, it’s worth the investment!
2. Size and Type of Chicken Pieces
The cooking time varies significantly based on what you’re frying
- Chicken breasts: These are usually the thickest pieces and take longer, especially bone-in
- Chicken thighs: Dark meat takes a bit longer than white meat of the same size
- Chicken legs/drumsticks: The bone conducts heat differently
- Chicken wings: These cook relatively quickly due to their smaller size
3. Bone-in vs. Boneless
This makes a huge difference! Bone-in chicken typically takes 2-3 minutes longer than boneless cuts of similar size. Why? The bone actually insulates the meat around it, requiring more time for heat to penetrate.
4. Whether You’ve Marinated or Brined
Marinating or brining your chicken beforehand will affect cooking time slightly, but more importantly, it helps keep the meat juicy during the high-heat frying process.
Step-by-Step Guide to Deep Frying Chicken
Let me walk you through the whole process to get your timing just right:
Choosing the Right Equipment
For best results, you need:
- A deep fryer OR a heavy-bottomed pot with high sides (like a Dutch oven)
- A deep-fry thermometer (super important!)
- A slotted spoon or spider for safely removing chicken
- A wire rack placed over a baking sheet for draining
Preparing Your Chicken
- Clean and dry the chicken: Rinse under cold water and pat thoroughly dry with paper towels
- Season generously: At minimum, use salt and pepper, but a mix with paprika, garlic powder, and onion powder works great
- Let it rest: Allow seasoned chicken to sit at room temperature for about 30 minutes
- Dredge in flour: For extra crispy chicken, dip in beaten egg then coat in seasoned flour
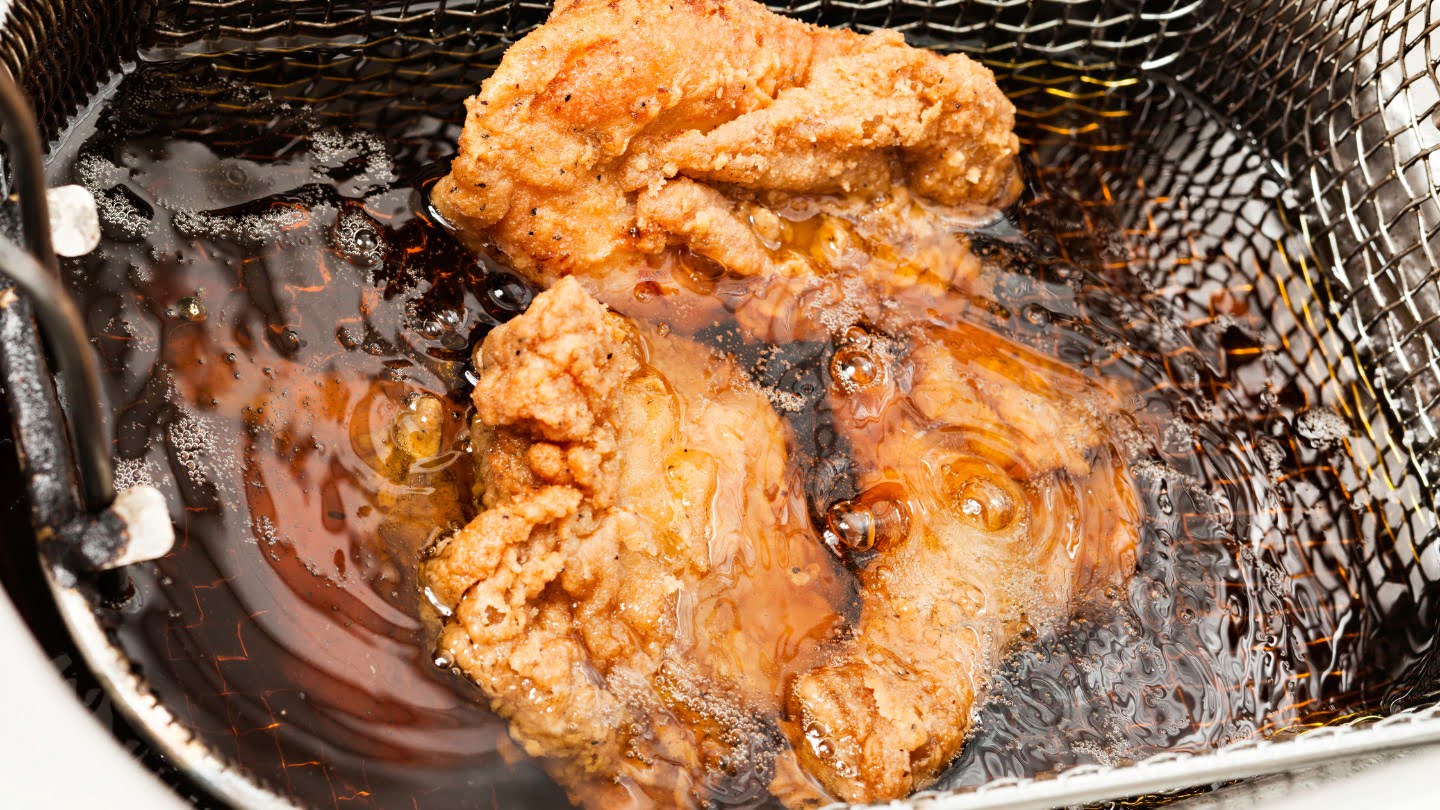
The Actual Frying Process
- Heat the oil: Bring oil to 350-375°F (175-190°C)
- Test the oil: Drop a small piece of bread in—it should bubble vigorously and brown in about 60 seconds
- Add chicken carefully: Use tongs to slowly lower pieces into the oil to prevent splashing
- Don’t overcrowd: Fry in batches if necessary, leaving plenty of space between pieces
- Maintain temperature: Keep an eye on your thermometer and adjust heat as needed
- Flip as needed: Turn larger pieces halfway through cooking time for even browning
Checking for Doneness
This is where many people go wrong! Here’s how to know when your chicken is perfectly done:
- Use a meat thermometer: Insert into the thickest part (without touching bone) – it should read 165°F (74°C)
- Visual check: The exterior should be golden brown and crispy
- Cut test: If you don’t have a thermometer, cut into the thickest part—juices should run clear with no pinkness
- Touch test: Properly cooked chicken feels firm when pressed
Common Mistakes to Avoid
We all make mistakes! Here are some I’ve definitely made (and learned from):
- Not drying the chicken properly: Excess moisture causes dangerous oil splattering
- Frying cold chicken straight from fridge: Let it come to room temperature first
- Constantly adjusting the heat: This leads to uneven cooking
- Opening the fryer lid too often: This drops the oil temperature
- Crowding the fryer basket: This lowers oil temperature and makes chicken steam instead of fry
Troubleshooting Your Fried Chicken
Having issues? Here are some solutions:
- Chicken burning on outside, raw inside: Your oil is too hot! Lower the temperature.
- Greasy, soggy chicken: Oil not hot enough. Increase temperature and make sure to drain properly.
- Coating falling off: Didn’t dry chicken enough or didn’t let the coating set before frying.
- Inconsistent results: Invest in a better thermometer and time each batch.
Safety Tips for Deep Frying
Safety first, folks! Deep frying involves hot oil, which can be dangerous:
- Never leave a deep fryer unattended
- Keep a fire extinguisher nearby (NEVER use water on an oil fire)
- Use long tongs or a spider tool to handle the chicken
- Keep children and pets away from the cooking area
- Don’t wear loose clothing that could catch fire
- Make sure your workspace is dry to prevent slipping
Beyond the Basics: Elevating Your Fried Chicken Game
Once you’ve mastered the timing, you can get creative:
- Double-frying technique: Fry at a lower temp (325°F) for 7-8 minutes, rest for 5 minutes, then fry again at 375°F for 2-3 minutes for extra crispiness
- Buttermilk soak: Marinate in buttermilk for 4+ hours before frying for tenderness
- Spice variations: Add cayenne for heat, herbs for freshness, or even a touch of sugar for subtle sweetness
- Post-fry seasoning: Toss in your favorite seasoning mix immediately after frying while still hot
Serving and Enjoying
After all that work, don’t rush the final steps:
- Drain properly: Place fried chicken on a wire rack (not paper towels, which can make it soggy)
- Rest briefly: Let it rest for 5 minutes to allow juices to redistribute
- Serve hot: Fried chicken is best enjoyed fresh and hot
- Pair wisely: Classic sides include coleslaw, mashed potatoes, biscuits, or corn on the cob
Final Thoughts
Deep frying chicken is both an art and a science. The perfect frying time depends on so many factors that there’s no one-size-fits-all answer. However, with the guidelines I’ve provided, you should be able to achieve delicious results every time.
Remember, practice makes perfect! Don’t be discouraged if your first few attempts aren’t restaurant-quality. Each time you fry chicken, you’ll get better at judging the right timing by look, sound, and smell.
FAQ: Common Questions About Deep Frying Chicken
Q: Can I reuse the oil from my deep fryer?
A: Yes, you can strain it through a fine-mesh sieve or cheesecloth and reuse it 3-5 times, as long as it hasn’t darkened or developed an off smell.
Q: What’s the best oil for deep frying chicken?
A: Neutral oils with high smoke points work best: peanut oil, vegetable oil, or canola oil are excellent choices.
Q: How do I prevent the chicken from sticking to the deep fryer basket?
A: Make sure the basket is clean and dry, and don’t overcrowd it. You can also lightly dust the chicken with flour before placing it in the basket.
Q: Can I deep fry frozen chicken?
A: It’s not recommended as it can cause dangerous oil splatter and uneven cooking. Always thaw completely first.
Remember, the journey to perfect fried chicken is ongoing – enjoy the process and the delicious results along the way!
Coat the Chicken with Flour

Add flour in a large shallow bowl.

Generously coat each piece of seasoned chicken in flour on all sides.
Set aside for a moment.

In a large skillet, add canola oil so that it’s about 1/2-inch deep in the pan.
TIP – Depending on the size of your skillet, you may need to add additional canola oil.
Also, if frying the chicken in multiple batches, additional oil may be needed.

Heat the skillet on medium heat.

Add a pinch of flour to the oil.
When the flour starts to sizzle…

…carefully add each piece of flour-coated chicken into the pan.
Leave space in between the pieces of chicken so not to overcrowd the pan.
Depending on the size of the skillet, a second batch may be needed to finish frying any remaining pieces of the chicken.

Using a cooking or carving fork, turn the chicken regularly as it turns a golden color.

Try to poke the fork into the outside edges of the skin when turning the chicken rather than in the middle of the meat (so the juices don’t run out).
When turning the chicken, a cooking fork tends to keep the crispy skin looking nicer, than when using tongs.
If the oil starts to bubble quickly or splatter out of the skillet, turn the heat down.

Keep an eye on the chicken to see if it’s turning a dark brown color (rather than a golden color) or cooking too quickly.
If so, turn the heat down a little bit.
Continue to fry the chicken until all sides are a medium to dark golden color, and the chicken is thoroughly cooked (about 30 to 40 minutes).
The larger pieces of chicken like the breasts, may take the longest time to cook.
HOW TO MAKE THIS RECIPE
A printable recipe with the measurements and instructions is located at the bottom of this post.

Lay the pieces of raw chicken on a large plate.


…salt, evenly on each side of the chicken.