Are you tired of serving up disappointing, soggy chicken wings? I know I was! After years of trial and error (and many batches of less-than-perfect wings), I’ve finally mastered the art of making consistently crispy chicken wings that stay that way from the first bite to the last.
Whether you’re planning a game day feast, casual get-together, or just craving some delicious wings for dinner, I’m gonna share all my best tips and tricks to ensure your chicken wings come out crispy, juicy, and absolutely delicious every single time.
Why Do Chicken Wings Get Soggy?
Before diving into solutions, it’s important to understand why wings get soggy in the first place:
- Excess moisture: Water content in the chicken skin prevents proper crisping
- Improper cooking temperature: Too low heat creates steam instead of crisp
- Overcrowding: Wings placed too close together trap moisture
- Incorrect storage: Covered hot wings create condensation
- Sauce timing: Adding sauce too early can soften the crispy exterior
The Physics of Perfectly Crispy Chicken Wings
Creating delicious, crispy chicken wings is actually a science! It all comes down to three key principles:
- Heat application: Proper temperature is crucial for crispy skin
- Airflow: Good circulation helps moisture evaporate
- Moisture reduction: Less moisture = more crisp
By understanding and controlling these factors, you’ll get wings that are crispy on the outside while staying juicy on the inside
Choosing the Right Wings
It all starts with selecting the right wings:
- Size matters: Look for medium-sized wings (5-7 count per pound is ideal)
- Quality counts: Free-range organic chicken without hormones or antibiotics tastes better
- Pre-cut saves time: Wings already separated into flats and drumettes reduce prep work
- Fresh vs frozen: Fresh is best, but if using frozen, thaw completely and dry thoroughly
Essential Pre-Cooking Step: Drying Your Wings
The absolute MOST important step for crispy wings is getting them dry before cooking. This isn’t just a suggestion—it’s mandatory!
How to properly dry your wings
- Remove wings from packaging and place in a large bowl
- Pat THOROUGHLY with paper towels, pressing firmly
- For extra crispiness, you can leave wings uncovered in the refrigerator for 1-2 hours (or overnight) to air dry
- Blot again before seasoning and cooking
The Secret Ingredient: Baking Powder
One game-changing trick is using baking powder in your wing preparation, Here’s why it works
- Baking powder (NOT baking soda!) alters the pH of the chicken skin
- It helps break down proteins in the skin for better browning
- It creates tiny air bubbles that help achieve a crispy texture
Important note: Always use aluminum-free baking powder to avoid any metallic taste. Rumford brand is recommended.
Cooking Methods Compared
Let’s look at the most popular methods for cooking wings:
Deep Frying
Pros:
- Traditional crispy texture
- Quick cooking time (15-20 minutes)
- Classic flavor
Cons:
- Higher in calories and fat
- Messy cleanup
- Requires large amounts of oil
Baking
Pros:
- Healthier option with less fat
- Easier cleanup
- Can cook large batches at once
- More hands-off cooking process
Cons:
- Takes longer (up to 1 hour)
- Requires some techniques to achieve similar crispiness to fried
Air Frying
Pros:
- Crispy results with minimal oil
- Faster than baking (about 20-25 minutes)
- Healthier than deep frying
Cons:
- Limited capacity
- Not everyone has an air fryer
My Foolproof Baked Chicken Wings Recipe
This is my go-to method that produces consistently crispy wings every time:
Ingredients:
- 4 pounds chicken wings, split at joints, tips removed
- 2 tablespoons aluminum-free baking powder
- 3/4 teaspoon salt
- 1/2 teaspoon black pepper
- 1 teaspoon paprika
- 1 teaspoon garlic powder
Instructions:
-
Prep the wings: Pat wings VERY dry with paper towels. This is super important!
-
Season properly: In a small bowl, combine baking powder, salt, pepper, paprika, and garlic powder. Sprinkle over wings and toss to coat evenly.
-
Set up for success: Position your oven rack in the upper-middle position and preheat to 425°F. Line a baking sheet with aluminum foil and place a wire rack on top. Spray rack with non-stick spray.
-
Arrange wings properly: Place wings skin-side up on the rack, making sure they don’t touch each other. This ensures air can circulate around each wing.
-
Bake strategically: Bake for about 40-60 minutes, turning the wings every 20 minutes. Total cooking time depends on wing size.
-
Rest before saucing: Let wings rest for 5 minutes before tossing in your favorite sauce. This helps maintain crispiness.
Common Mistakes to Avoid
Even with the best intentions, these mistakes can lead to soggy wings:
- Skipping the drying step: This is the #1 cause of soggy wings!
- Overcrowding the pan: Wings need space for air circulation
- Using the wrong oven temperature: Too low = steam = soggy
- Saucing too early: Add sauce right before serving
- Covering hot wings: Creates steam that softens the crispy coating
How to Keep Wings Crispy for Serving
If you’re hosting a party, keeping wings crispy until serving time can be challenging:
- Keep warm at low temp: Hold cooked wings in a 160°F oven until ready to serve
- Sauce at the last minute: Only toss wings in sauce right before serving
- Avoid covered containers: Never store hot wings in covered containers
- Individual dipping options: Provide separate ramekins of sauce to prevent double-dipping and soggy wings
Delicious Sauce Options
What’s a wing without a great sauce? Here are some crowd-pleasing options:
Classic Buffalo Sauce
- 1/3 cup Frank’s Hot Sauce
- 4 tablespoons butter, melted
- 1 1/2 teaspoons cayenne pepper (adjust to taste)
Sweet and Spicy Buffalo Sauce
- 1/3 cup Frank’s Wings Hot Sauce
- 1 1/2 cups light brown sugar
- 1 tablespoon water
Other Popular Options
- Honey BBQ
- Ranch
- Blue cheese
- Garlic parmesan
- Teriyaki
- Lemon pepper dry rub
Serving Suggestions
Complete your wing experience with these perfect accompaniments:
- Celery and carrot sticks (the coolness balances the spicy wings)
- Blue cheese or ranch dressing
- Cold beer (pilsner works great with wings)
- Other game day favorites like nachos, meatballs, or dips
Storage Tips for Leftover Wings
If you somehow have leftovers (it’s rare in my house!), here’s how to store and reheat them:
- Cooling: Let wings cool completely before storing
- Separate sauce: If possible, store wings separate from sauce
- Refrigeration: Store in an uncovered container in the fridge for up to 3 days
- Reheating: For best results, reheat in a 375°F oven on a wire rack for 10-15 minutes until crispy again
Final Thoughts
The key to non-soggy, perfectly crispy chicken wings isn’t a single trick but rather a combination of techniques: thorough drying, using baking powder, proper spacing, correct temperature, and smart sauce timing.
I’ve tried countless methods over the years, and the techniques shared here consistently produce the best results. My family now begs for my homemade wings instead of restaurant ones!
Remember, patience is crucial – properly drying the wings and taking the time to cook them correctly makes all the difference between soggy disappointments and crispy perfection.
What’s your favorite wing sauce? Do you have any additional tips for keeping wings crispy? I’d love to hear your thoughts and experiences in the comments below!
FAQ: More Crispy Wing Wisdom
Q: Can I make crispy wings ahead of time for a party?
A: Yes! Cook them fully, let cool slightly, then keep warm in a 160°F oven. Only add sauce right before serving.
Q: What’s the difference between baking powder and baking soda for wings?
A: NEVER use baking soda on wings! It will give them a metallic, bitter taste. Only use aluminum-free baking powder.
Q: How can I tell when my wings are done cooking?
A: Wings should reach an internal temperature of 165°F and have crispy, golden-brown skin.
Q: Can I get crispy wings in an air fryer?
A: Absolutely! Air fryers are great for crispy wings. Cook at 380°F for about 20-25 minutes, shaking the basket occasionally.
Q: Why do restaurant wings stay crispy even with sauce?
A: Restaurants often double-fry their wings and use specialized hot sauces designed to coat without soaking in too much.
Now go forth and make amazing, non-soggy wings that’ll have everyone coming back for more!

What Ingredients do I need for Baked Chicken Wings?
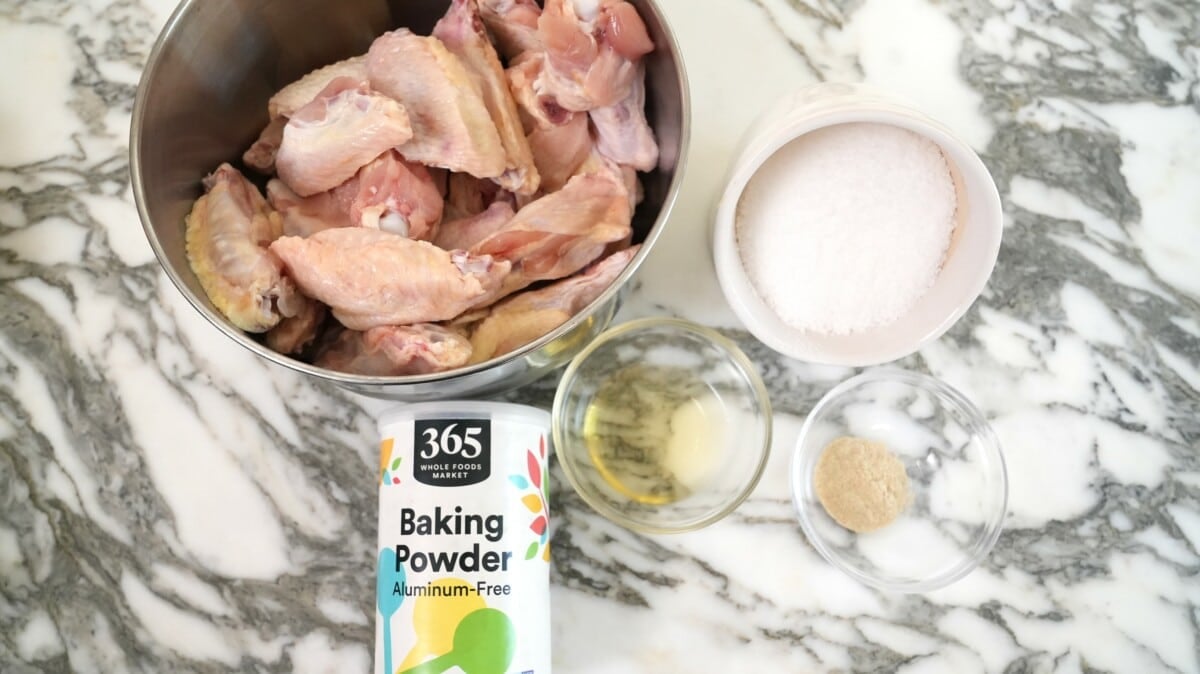
You only need 5 ingredients to make delicious, crispy Baked Chicken Wings!
- chicken wings – Try to use wings of similar sizes, as this will help ensure your wings bake evenly.
- baking powder – This is my secret ingredient to the crispiest Baked Chicken Wings! Ensure that the baking powder is aluminum-free (many brands will say this on the label).
- kosher salt
- white pepper – I recommend using white pepper over black pepper because I personally find that the finer grind of white pepper works better in the seasoning. You can substitute with black pepper if you prefer.
- neutral oil – My go to neutral oil is avocado oil but you can also use canola or vegetable oil.
OPTIONAL – Toss in Your Favorite Sauce!
This is optional but if you prefer a sauced wing, take your Baked Chicken Wings and toss them in your favorite sauce (like my Raising Cane’s Sauce!)
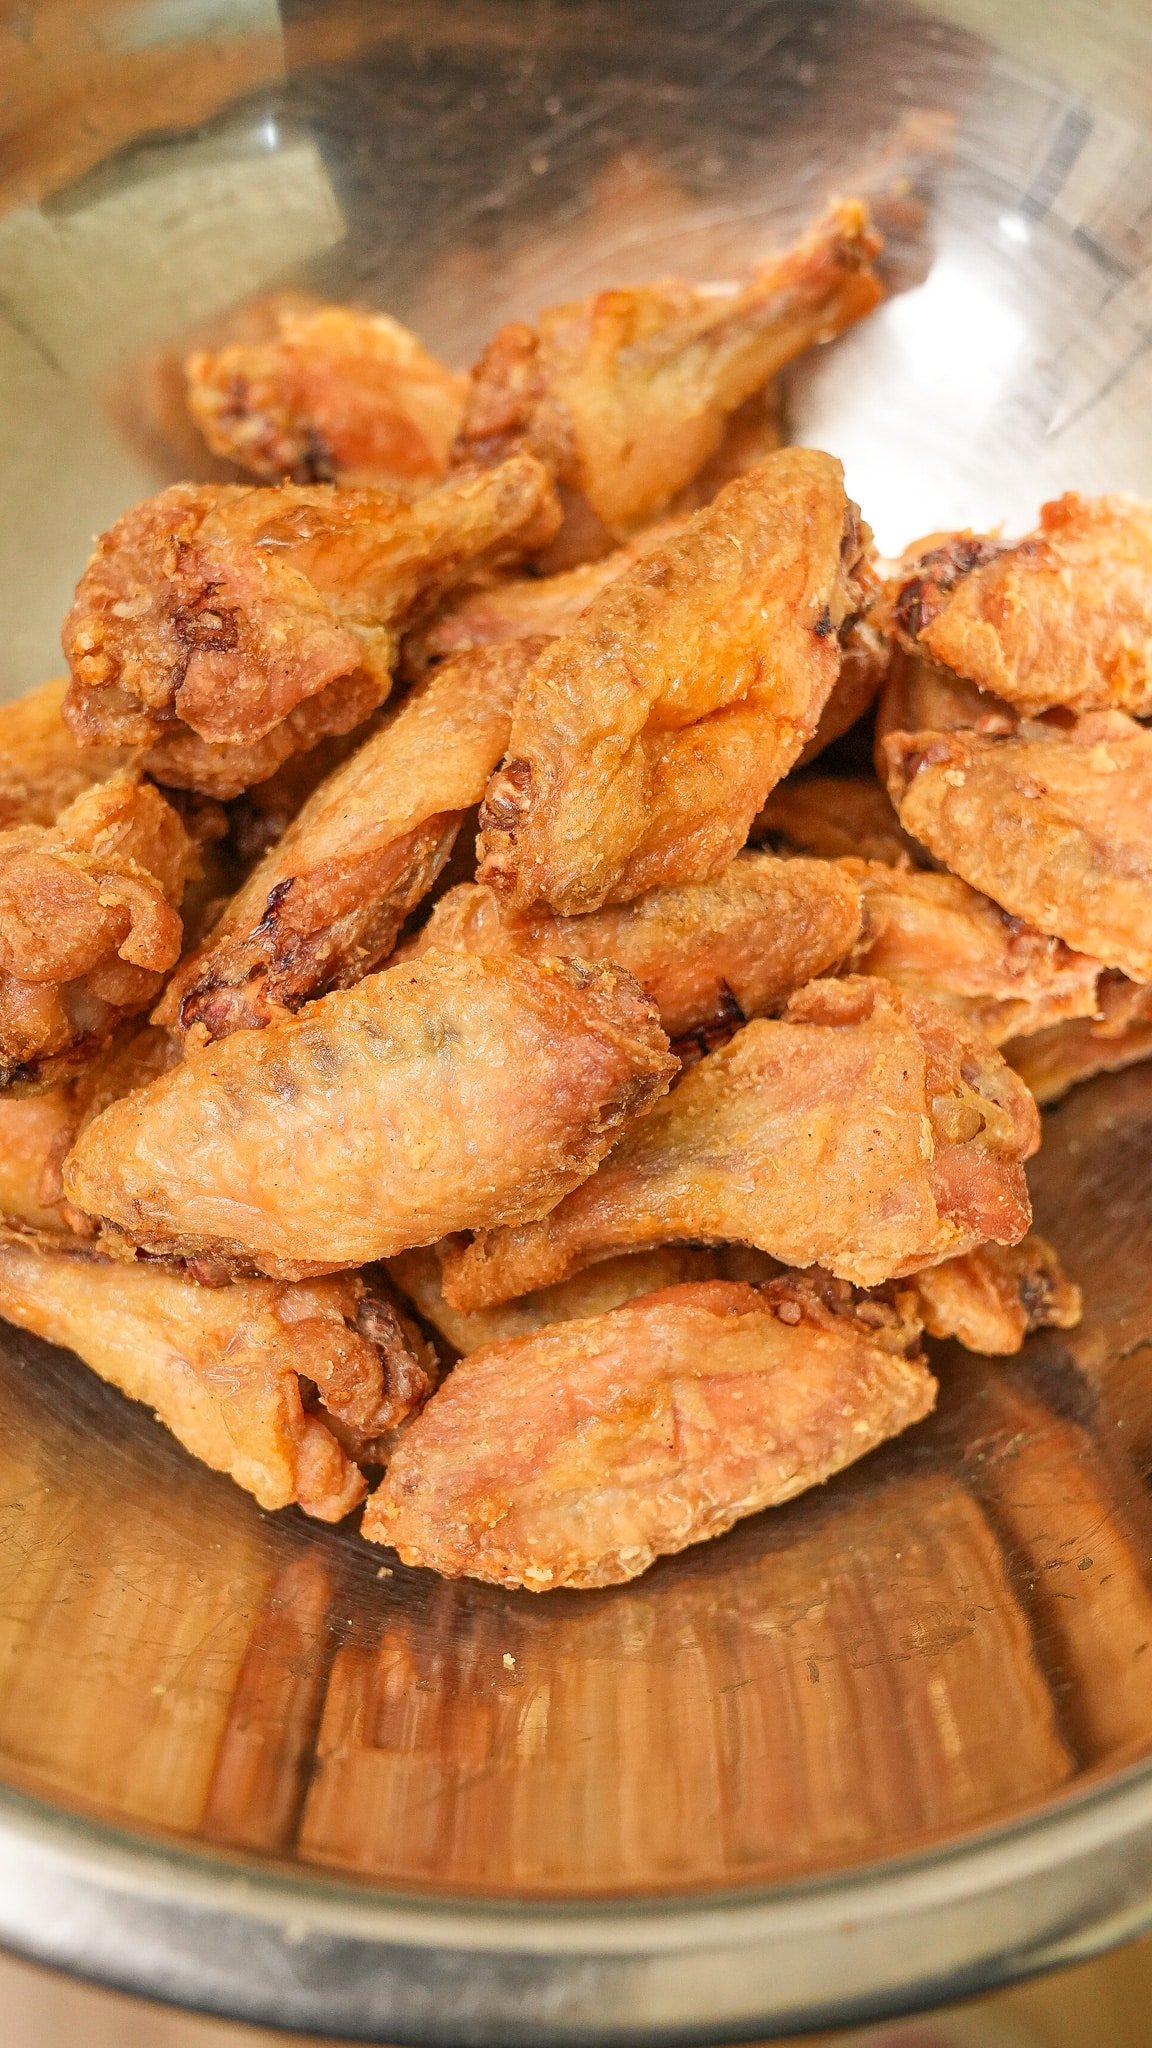
If you want to skip this step, you can eat them plain – I personally prefer them this way, as you get to taste the crispy, perfectly salted chicken skin!