Ever looked at an egg and wondered how that turns into a fluffy baby chicken? I’ve been there too! Hatching eggs and watching little chicks peck their way into the world is one of the most rewarding experiences for any chicken keeper Whether you’re a complete newbie or looking to expand your flock, this guide will walk you through everything you need to know about turning that humble egg into an adorable chirping chick.
What You’ll Need Before You Start
Before jumping into the exciting world of chicken hatching let’s get prepared. Here’s what you’ll need
- Fertilized eggs (can’t make babies from store-bought eggs!)
- Either a broody hen OR an incubator
- Patience (21 days worth!)
- A brooder setup for after hatching
- Chick starter feed
- Clean water source with chick waterer
- Proper bedding materials
Understanding Fertilized Eggs: The Beginning of Life
First things first – you can’t just take any egg from the grocery store and expect a chick Those eggs aren’t fertilized! To get a fertilized egg, you need
- Hens (obviously)
- A rooster (the critical ingredient many backyard flocks don’t have)
When a rooster and hen mate, the rooster’s sperm fertilizes the yolk inside the hen before the shell forms around it. That tiny fertilized cell is what eventually develops into a chick.
If you already have chickens but no rooster, you can purchase fertilized eggs from local farmers, online forums, or specialty hatcheries. Just remember that shipped eggs have a lower hatch rate due to handling during transit.
Two Paths to Baby Chickens: Nature vs. Technology
There are two main ways to hatch chicken eggs:
The Natural Way: Using a Broody Hen
If you’re lucky enough to have a broody hen (a mama chicken who’s determined to sit on eggs until they hatch), this is by far the easiest method. Here’s why:
- The hen maintains perfect temperature and humidity
- She turns the eggs automatically
- No electricity or special equipment needed
- She’ll even raise the chicks for you after hatching!
Breeds like Silkies, Cochins, Brahmas, and Orpingtons make excellent broody hens. They’ll sit like glued to those eggs for the full 21 days, only getting up briefly to eat, drink, and poop.
The Technological Way: Using an Incubator
If you don’t have a broody hen, or just want more control over the process, an incubator is your next best option. Modern incubators make the process relatively simple by maintaining:
- Temperature (99-102°F for forced-air models)
- Humidity (45-50% initially, 65% for the final 3 days)
- Egg turning (some do this automatically)
We’ve had great success with Brinsea incubators, though they are a bit pricey. For beginners, something simple like the Brinsea Mini Advance works great for small batches of eggs.
The 21-Day Journey: From Egg to Chick
Once you’ve got your fertilized eggs and chosen your hatching method, the magic begins! Here’s what happens during those 21 days:
Days 1-7: The Beginning
During the first week, not much seems to happen from the outside, but inside that egg, incredible development is occurring:
- Day 1: First signs of development begin
- Day 2: Blood vessels start to form
- Day 3-4: The heart begins beating
- Day 5: The embryo starts to look less alien-like
- Day 7: The comb begins to form, and the beak starts developing
This is a good time for your first “candling” – where you shine a bright light behind the egg in a dark room to see development inside. You should see veins and a small dark spot (the developing embryo).
Days 8-14: Growth Spurt
The middle week is when things really get exciting:
- Days 8-10: Feathers begin developing
- Days 11-12: The embryo is now moving around
- Days 13-14: Scales, claws, and beak become more defined
By day 14, you can candle again and should see the egg looking much darker with a large air cell at the top.
Days 15-21: Final Countdown
The home stretch is when the chick finalizes its development:
- Days 15-17: The chick positions itself for hatching
- Day 18: The embryo fills most of the egg space (stop turning eggs now!)
- Day 19-20: The chick absorbs remaining yolk for nutrition
- Day 21: Hatching day!
On day 18, if you’re using an incubator, stop turning the eggs and increase humidity to about 65%. This is called “lockdown” – don’t open the incubator again until after hatching.
Hatching Day: The Big Moment
When day 21 arrives, get ready for some excitement! Here’s what to expect:
- First, you’ll notice a small crack or “pip” in the shell
- The chick will continue to rotate inside, pecking a line around the shell
- This process can take 12-24 hours – don’t rush to help!
- Eventually, the chick will push itself out of the shell
It’s SUPER tempting to help a struggling chick, but resist unless absolutely necessary. That struggle strengthens their muscles and prepares them for life outside the egg. Only assist if a chick has been stuck in the same position for many hours.
After Hatching: The First 48 Hours
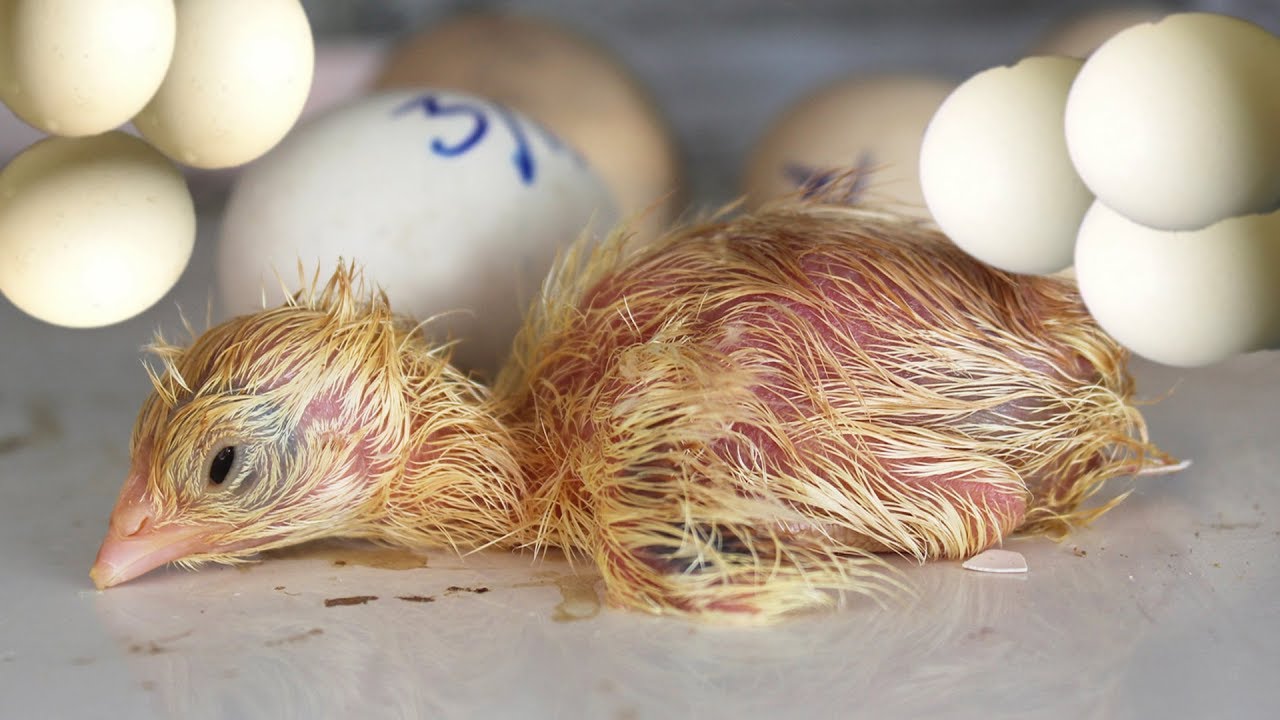
Once your chicks have hatched, they’ll look wet and exhausted – that’s normal! Here’s what happens next:
- The chick will dry off and become fluffy (this takes a few hours)
- They don’t need food or water for the first 24-48 hours (they’ve absorbed yolk nutrients)
- They’ll sleep a lot, occasionally perking up to explore
If you used an incubator, you’ll need to transfer chicks to a brooder once they’re dry and fluffy. If a broody hen hatched them, she’ll take care of everything!
Setting Up a Proper Brooder
A brooder is simply a warm, safe place for your chicks to grow during their first weeks. Here’s what you need:
- Heat source (heat lamp or heating plate) – start at 95°F
- Chick waterer (with marbles or pebbles to prevent drowning)
- Chick feeder with starter feed (18-20% protein)
- Clean bedding (pine shavings work well)
- Draft-free container with tall sides
I recommend a heating plate over a heat lamp if possible – they’re safer and use less electricity. Plus, chicks can go under them when cold and come out when warm, just like they would with a mother hen.
Caring for Chicks Week by Week
Each week brings new developments and slightly different care requirements:
Weeks 1-2: The Vulnerable Stage
- Temperature: 95°F first week, then reduce by 5°F each week
- Feed: Chick starter (medicated if not vaccinated for coccidia)
- Space: Not much needed yet, they’re small!
- Care: Check for “pasty butt” (droppings stuck to vent) daily
During this time, chicks will sleep a lot but gradually become more active. Their legs are still weak, so make sure bedding isn’t slippery.
Weeks 3-4: Getting Stronger
- Temperature: Around 85°F
- Feed: Continue with starter feed
- Space: More room to move around
- Care: Start handling them regularly to socialize
By now, they’ll have most of their wing feathers and will be much more active. This is a great time to bond with them through gentle handling.
Weeks 5-6: Growing Up Fast
- Temperature: Down to 75°F
- Feed: Still on starter feed
- Space: Much more room needed now
- Care: Supervised outdoor time possible in good weather
Their feathers are filling in nicely, and they’re starting to look more like mini chickens than fuzzy balls!
Weeks 7-8: Almost Grown
- Temperature: 65-70°F (or room temperature)
- Feed: Transition to grower feed (16-18% protein)
- Space: They need lots of space to run around
- Care: Preparing for integration with adult flock if applicable
By 8 weeks, your chicks will be fully feathered and ready to handle cooler temperatures. They’re not quite ready for egg-laying yet (that comes around 18-24 weeks), but they’re well on their way to chickenhood!
Common Problems and Solutions
Even with the best care, things can go wrong. Here are some common issues:
Pasty Butt
- Problem: Droppings stick to vent, blocking elimination
- Solution: Gently clean with warm, damp cloth
Splayed Legs
- Problem: Legs slide outward, making walking difficult
- Solution: Provide non-slip surfaces and correct with “hobbles” made from bandage
Wry Neck
- Problem: Head twisted to one side
- Solution: Can sometimes be corrected with vitamin E supplements, but often requires euthanization
Low Hatch Rate
- Problem: Few eggs hatching successfully
- Solution: Check incubator settings, egg quality, and handling procedures
Making a Baby Chicken: Success Rates
Let’s be honest – not every fertilized egg will become a chick. Here’s what to expect:
- Natural incubation (broody hen): 75-90% success rate
- Artificial incubation (home incubator): 50-80% success rate
- Shipped eggs: 30-70% success rate
Don’t be discouraged if not all eggs hatch! Even experienced chicken keepers don’t get 100% hatch rates.
Final Thoughts: Is Hatching Eggs Right for You?
Making baby chickens from eggs is incredibly rewarding, but it does require commitment. Consider these factors:
- Time: 21 days of incubation plus 8+ weeks of chick care
- Space: You’ll need room for brooding and eventually housing
- Cost: Incubator, brooder setup, feed, etc.
- Gender uncertainty: About half will be roosters (which many areas don’t allow)
If you’re ready for the commitment, hatching your own chicks creates a special bond and connection to your flock that buying grown chickens just can’t match. There’s nothing quite like watching a chick you’ve hatched grow into a beautiful, egg-laying hen!
I still remember the first time I successfully hatched chicks – I was literally jumping up and down with excitement when I saw that first pip in the shell! Even after many hatches, that magic never really goes away.
So, are you ready to turn those eggs into fluffy baby chickens? With the right preparation and a little patience, you’ll be hearing those adorable “cheep-cheep” sounds before you know it!
Remember – the journey from egg to chicken is one of nature’s most amazing processes, and there’s something truly special about being part of it. Good luck with your hatching adventure!
What to do on Hatch Day
The last three days of incubation are the most nerve-wracking as you wait for the eggs to hatch! In a normal hatch, all the eggs should hatch within 24 hours of each other. However, not all the eggs will hatch at the exact same time. Smaller eggs will hatch sooner than larger eggs and the rate of development of the embryo will dictate when each egg hatches.
The first sign to look for when waiting for the eggs to hatch is to watch for external pips on the eggshells. You may have seen eggs with internal pips when you candled them at lockdown, and if you didn’t, don’t sweat it! An internal pip just means that the chick has broken into the air cell of the egg, which is the first step in the hatching process. Once the chick starts to use up the oxygen in the air cell, it will make an external pip in the eggshell (typically towards the blunt end of each egg).
When you see the first pip in an egg, you will want to decrease the incubator temperature by .5-1°F. Breaking through the eggshell and hatching is hot work for a young chick. Decreasing the incubator temperature slightly will prevent the chicks from overheating as they hatch.
After a chick has pipped the eggshell, it will take a long break. Breaking through the eggshell with its egg tooth (located at the very tip of a young chick’s beak) is very hard work and the chick needs a break before it moves onto the next step of hatching. After the chick has rested, it will start to unzip the rest of the eggshell.
Unzipping requires that the chick rotates around in the egg and breaks the eggshell so that it can free itself from the egg. Once unzipped, the chick will struggle and kick to come completely free itself of the eggshell. As hard as this struggle can be to watch, don’t help the chick! It needs to build up its muscles so that it can walk and grow properly.
The two best pieces of advice during this stage: don’t help a chick hatch from its egg and don’t open the incubator if chicks are hatching or there are pips in unhatched eggs. The proper humidity and temperature are crucial for the chicks to hatch properly. If the humidity gets too low, then the shell membrane that is exposed around the pip will dry out and trap the chick inside the egg. A healthy chick will not need help hatching.
Helping a chick hatch can be dangerous. Even after a chick pips the eggshell, its abdomen is still fully enclosing the egg yolk. If you go to help a chick out before it is ready to hatch, it could bleed to death.
After a chick has kicked free of its egg, it will stumble around the incubator and cause general havoc. Don’t worry, all that movement, jostling, and cheeping encourages the other chicks to hurry up and hatch. Chicks who have just hatched need to stay in the warm incubator while they fluff out.
When a chick is fluffed out, that means its down feathers have dried after hatching and it looks fluffy and soft. Chicks should not be removed from the incubator until they are fluffed out and all the eggs have hatched. Once all chicks have hatched and fluffed out, you can open the incubator and move the chicks to a brooder! The brooder should be prepared with heat, food, and water.
If you are experiencing a draggy hatch where all the eggs don’t hatch within 24 hours of each other, you may consider removing chicks who have fluffed out so that they can start eating and drinking in the brooder. However, chicks can survive on the absorbed egg yolk for up to 48 hours, so don’t rush with removing the chicks from the incubator if you don’t have to.
For eggs that haven’t pipped or hatched, you can wait two or three more days after hatch day to see if they will be late hatchers. If an egg is going on 24 days of incubation with no signs of pipping or hatching, then it more than likely is not going to hatch. It may be an egg that you kept in the clutch after the lockdown candling because you weren’t sure if the embryo was developing or not. Or it could be an egg that had a fully developed embryo that was never able to hatch.
At this point, you can remove the eggs that didn’t hatch from the incubator and candle them. Look to see if the embryo fills the entire egg, which means it was fully developed, or for movement. If you see movement, you will want to continue to let the egg incubate. If you see an internal pip but no movement, more than likely the embryo died before it finished hatching.
You will want to discard any eggs that never hatched, or you can dissect the eggs to try and determine why they didn’t hatch. A few scenarios that might cause a chick not to hatch include:
- Humidity was too high
- It got trapped in the shell because humidity was too low
- Insufficient ventilation during incubation
- Insufficient or improper turning
- Breeder flock dietary deficiencies
- Incubator contamination
- Lethal genes
- Improper storage of the hatching eggs prior to incubating
- Eggs got chilled too long during incubation
- Improper positioning for hatching
- Poor eggshell quality
How to Incubate Chicken Eggs
Now comes the fun part, putting those eggs in the incubator! However, there are a few important steps you should take when preparing the eggs for incubation.
First, you will want to candle all the eggs and mark them for identification. Marking each egg for identification will help you keep track of which eggs are developing throughout the incubation process. You may also choose to outline the air cell to help keep track of humidity levels. As an egg incubates, the air cell will gradually increase in size if the humidity levels are correct and enough moisture is evaporating from the egg. Weighing the eggs and keeping track of each egg’s weight loss can also help you monitor the humidity levels throughout incubation.
When candling the eggs prior to setting them in the incubator, look for these things:
- hairline cracks in the eggshell
- splotchy shells
- double yolks
- blood spots (usually seen as a dark spot inside the egg)
- misplaced air cells (the air cell should be located at the blunt end of the egg)
Eggs with hairline cracks, splotchy shells, double yolks, or blood spots should not be incubated as they will more than likely not fully develop and could even rot in the incubator. Eggs with misplaced air cells can still be incubated, however, those eggs are less likely to hatch properly.
If you are turning the eggs manually, it is a good idea to mark one side of each egg with an X and the other side of each egg with an O. This can help you keep track of how much you rotate the eggs during each turning. You never want to rotate the egg in a complete circle, which can break the chalazae which holds the yolk in place within the egg.
Once the eggs are candled and marked, you can set them in the incubator. If you properly tested your incubator for 24 hours, it should be at the proper temperature and humidity levels. Open the incubator and place the eggs in the incubator. Different models of incubators will have the eggs positioned in different ways. No matter the incubator, always make sure the pointy end of the egg rests slightly lower than the blunt end of the egg. If the eggs are placed on their sides, the pointy end will naturally rest lower than the blunt end. Close the incubator once all the eggs have been set. Over the next 30 minutes, monitor the incubator to make sure it returns to the proper temperature and humidity levels.
Also make sure that all the eggs turn properly when they are turned for the first time. If you manually turn your eggs, you will want to do so three to five times a day for the first two weeks of incubation. Make sure you set a reminder to turn those eggs! For the last week of incubation, turning the eggs frequently is not as important, but it should still be done at least twice a day.
It is important that the incubator maintains a stable humidity level throughout incubation. If the humidity gets too low, too much moisture will evaporate from the eggs causing the embryo to get stuck inside of the shell. If the humidity gets too high, not enough moisture will evaporate from the eggs and the embryo will develop too fast to mature properly. Use a hydrometer to test the humidity in your incubator frequently. Most incubators have a water reservoir that you need to fill in order for correct humidity levels to be maintained. You will need to refill the water reservoir as needed throughout incubation as water evaporates from the reservoir.
Here are some tips for further adjusting the humidity in the incubator:
- Increase or decrease the water surface area of the water reservoir to increase or decrease humidity levels.
- Open or close some of the ventilation vents on the incubator to increase or decrease humidity.
- Use warm water to increase the humidity levels.
- Moist sponges or small towels can also help increase humidity levels.
- Keep the humidity levels moderate in the incubating room.
After you set the eggs, don’t open the incubator unless you are manually turning the eggs or need to refill the water reservoir. The fewer times you open the incubator, the more stable the incubator can keep the temperature and humidity and the better hatch rate you will get.
The next time you will be candling the eggs will be after seven or ten days of incubation. Some folks choose to candle on day seven, which is exactly one week into the incubation period. Others prefer to wait until day ten, which is about halfway through the incubation period.
When you are ready to candle the eggs on day seven or ten, prepare a secure place to set the eggs while you candle them all. Quickly but carefully remove them all from the incubator and close the incubator. Candle the eggs and discard any eggs that show no signs of development. Here is what to look for when candling eggs at day seven or ten:
- Web of blood vessels around dark spot on the yolk – that means an embryo is developing.
- Clear – if the egg looks the same as when you set it, it was not fertile and is not developing.
- Blood ring – a blood ring will look like a narrow red ring within the egg and it means the embryo has died and is not developing.
- Cloudy shadows – cloudy shadows that swirl within the egg also indicate that the embryo has died and will not continue developing.
After candling all the eggs, quickly and carefully place them back in the incubator. Make sure the incubator returns to the proper temperature and humidity levels and that all the eggs turn properly after being placed back in the incubator. Don’t place eggs back in the incubator that are not developing. The non-developing eggs can rot and potentially explode, contaminating all the eggs in your incubator and ruining your hatch.
Lockdown is the term used to refer to the last three days of the incubation period. Chicken eggs have a 21-day incubation period, so days 18-21 are considered lockdown time. Lockdown is when you candle the eggs for the last time and prepare the incubator for when the eggs hatch.
After 18 days of incubation, carefully remove all the eggs from the incubator and candle each egg. Keep an eye out for the following signs:
- embryo fills most of the egg.
- may see some blood vessels around the embryo, especially close to the air cell.
- dark shadow in the air cell (that means the embryo has internally pipped).
- signs of no development- murky or muddled contents, blood ring.
If you are unsure if an egg is developing or not at this stage of incubation, it is safe to keep it in the incubator just to see if it will hatch. If the contents of an egg are clearly not developing or are loose and swirly, the egg will not hatch and should not be put back in the incubator.
Before you place the eggs back in the incubator, you will want to lay down a piece of plastic shelf liner on the floor of the incubator. The shelf liner will provide a non-slip surface for the new hatchlings to stand on, helping to prevent leg issues such as splay leg. Putting the shelf liner on the floor of the incubator may mean that you need to remove the automatic turning system from the incubator. The eggs should not be turned after day 18 of incubation since the chick will now be moving into the proper hatching position.
If you are using a chick hatcher, now will be the time you transfer the eggs to the hatcher. The hatcher should be programmed for proper hatching conditions and prepared the same way you would with an incubator.
Once the shelf liner is in place, you can set all the eggs back in the incubator or hatcher. You will also want to increase the humidity levels in the incubator at lockdown time. For the final three days of incubation, the humidity level should be raised 8-10% higher than what it was during incubation. Higher humidity during the hatching time will prevent the shell membrane from drying out and trapping the chick inside the egg.
However, you don’t want the humidity to get too high since that will inhibit the hatchlings from fluffing out properly. If the hatchlings don’t fluff out fast enough, they could get chilled and die. As the chicks hatch, they will contribute added moisture and humidity within the incubator as well.
After you have candled the eggs, installed shelf liner on the floor of the incubator, stopped automatic turning, and increased the humidity, it’s time to shut the incubator lid and leave it closed until hatch time! Do not disturb the eggs after lockdown and avoid opening the incubator at all costs.
I Tried to Hatch Super Market Chicken Eggs.. #shorts
FAQ
How do you remove a chick from an egg?
Carefully lower the chick in the egg onto the washcloth and even more gently attempt to moisten the membrane at all points where it is attached to the chick. Using another washcloth that has also been slightly dampened with warm water, fold it over the chick in the egg for a few moments and then remove it.
How do I start a hen laying eggs?
For your first time hatching, it’s best to go with local eggs that you can carefully transport home yourself. You can artificially incubate and supervise egg development, then raise them until they’re old enough to join the flock. As I mentioned, you can also purchase eggs for hatching and have a broody hen sit on them.
How do I make my chicken eggs hatch better?
If you want to improve the quality of your chicken eggs for hatching, give the girls a calcium supplement, such as crushed egg shells (mine go NUTS for these) or oyster shells. The added calcium increases the strength of the shells. Hatching eggs really is that easy! If all your eggs don’t hatch, don’t worry.
How do you clean a chick egg?
Place a washcloth over the bowl so it touches the water – but just barely. Think of it as a soft safety net for the chick if you can get it out of the egg safely. Carefully lower the chick in the egg onto the washcloth and even more gently attempt to moisten the membrane at all points where it is attached to the chick.
How do you keep a chick out of an egg?
Fill a bowl with warm but not hot water. Place a washcloth over the bowl so it touches the water – but just barely. Think of it as a soft safety net for the chick if you can get it out of the egg safely.
How do you soften a chick egg?
Avoid getting water inside the egg or on the chick’s beak. When the membrane is softened, wrap the shell in a warm moist towel to soften that, as well. Begin picking back small parts of the shell where the beak is protruding. Only do enough to help the chick emerge.
How to turn an egg into a baby chick?
Fertile eggs can be hatched by using an egg incubator. An incubator is an enclosed structure with a fan and heater to keep eggs warm during the 21-day incubation period.
How long does it take for an egg to turn into a baby chicken?
After the egg is laid by the hen and fertilized by the rooster, it takes 21 days for a baby chicken to develop and hatch.
Can you turn a regular egg into a chicken?
Yes, you can grow a chicken from an egg, but only if the egg is fertilized and then incubated under the right conditions. Most eggs bought from a grocery store are unfertilized because commercial laying hens are kept separate from roosters, so they cannot grow into chicks. You would need to purchase fertilized hatching eggs from a poultry farmer or hatchery to have a chance at growing a chick.
Can an egg become a chick without a rooster?
No, a hen will not lay an egg that can hatch without a rooster to fertilize it, as the eggs will be infertile. However, hens will lay eggs regardless of whether a rooster is present, though these eggs will only be for eating and will never develop into chicks. In rare cases, a chicken egg may develop without fertilization through a natural process called parthenogenesis, but this is not typical for birds and the embryo will most likely not survive.