There’s nothing quite like biting into perfectly crispy fried chicken – that satisfying crunch giving way to juicy, tender meat inside. But we’ve all experienced the disappointment of fried chicken that loses its crispiness after just a short while, turning soggy and limp.
I’ve spent years perfecting my fried chicken recipe, and through plenty of trial and error (and some soggy disappointments), I’ve discovered reliable techniques to keep that delicious crunch intact for hours – even overnight! Whether you’re preparing for a picnic, making food ahead for a party, or just want to enjoy leftovers that taste as good as fresh, these tips will transform your fried chicken experience
Why Fried Chicken Loses Its Crispiness
Before diving into solutions, it helps to understand the enemy. Two main culprits cause fried chicken to lose its crunch
-
Moisture As soon as chicken comes out of hot oil, it releases steam This steam gets trapped under the coating, making it soft and soggy Additionally, fried chicken absorbs ambient moisture from the air.
-
Oil: While frying gives chicken its crispy texture, excess oil trapped in the coating can make it limp and greasy over time.
Now let’s look at how to combat these issues!
1. Choose the Right Frying Method
The method you use to fry chicken significantly affects how long it stays crispy. Here’s what works best:
- Deep frying yields the best results, as hot oil surrounds the chicken evenly
- Maintain oil temperature between 325°F and 350°F (use a thermometer!)
- Double frying is extremely effective – fry once, let rest, then fry again briefly
- For healthier options, an air fryer can produce surprisingly crispy results at 400°F
I personally prefer using peanut oil when deep frying chicken. It has a high smoke point and adds a subtle flavor that complements the chicken perfectly.
2. Apply a Dry Brine
This step is often overlooked but makes a huge difference in crispiness and flavor:
- Rub chicken pieces with salt and desired spices
- Let sit in the refrigerator for several hours or overnight
- The salt draws moisture out, which is then reabsorbed with flavors
- The surface becomes drier, resulting in crispier coating
- The salt creates a moisture barrier that helps maintain crispiness
When I dry brine chicken, I usually add garlic powder, paprika and a touch of cayenne to the salt mixture. This not only helps with texture but deeply flavors the meat itself.
3. Use the Perfect Coating
Your breading mixture significantly impacts crispiness longevity:
- Use a light coating instead of heavy batter
- A 50/50 ratio of flour and cornstarch creates exceptional crispiness
- Add 1 tablespoon baking powder to your flour mixture to create tiny air pockets
- Season your flour mixture thoroughly (salt, pepper, garlic powder, paprika)
- Avoid thick, wet batters that trap moisture
- Shake off excess coating before frying
My secret addition is a pinch of baking powder in the flour mixture. It creates these amazing little bubbles in the coating that add extra crunch!
4. Master Proper Draining Techniques
After frying, proper draining is crucial:
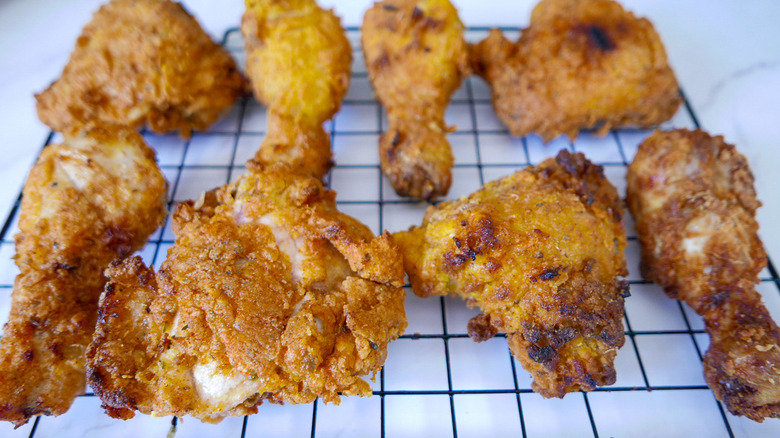
- Use a wire cooling rack placed over a baking sheet (never place directly on paper towels)
- The rack allows air to circulate around the entire piece
- Keep chicken in a single layer to prevent steam buildup
- Let chicken rest on the rack for 5-10 minutes after frying
- This setup allows excess oil to drip away while steam escapes
When I’m frying multiple batches, I keep my wire rack in a low-temperature oven (around 200°F) to maintain crispiness until serving time.
5. Control Oil Temperature Carefully
Oil temperature management is absolutely critical:
- Oil that’s too cool makes chicken absorb more oil and become greasy
- Oil that’s too hot burns the outside before cooking the inside
- Ideal frying temperature: 325°F to 350°F
- Use a thermometer for accuracy
- Fry in small batches to maintain temperature
- Allow oil to return to proper temperature between batches
I can’t stress enough how important a good thermometer is! I used to guess and had inconsistent results until I started monitoring the temperature precisely.
6. Storage Tips for Maximum Crispiness
If you need to store your fried chicken for later:
- Allow chicken to cool completely on a wire rack
- Place in an airtight container lined with paper towels
- Store in the refrigerator for up to 3-4 days
- For longer storage, wrap pieces individually in plastic wrap and freeze
- Never cover hot chicken – condensation will make it soggy
For overnight storage, I sometimes leave the container slightly cracked open in the fridge to prevent moisture buildup.
7. Reheating for Restored Crispiness
When it’s time to enjoy your stored fried chicken:
- Oven method (best option): Preheat to 375°F, place chicken on wire rack over baking sheet, bake 15-20 minutes
- Air fryer method: 350°F for 10 minutes
- Avoid microwaving at all costs – it creates steam and ruins crispiness
- Allow refrigerated chicken to come to room temperature before reheating
- If frozen, thaw completely in refrigerator first
I’ve found that spritzing the chicken lightly with oil before reheating in the oven helps restore that fresh-fried texture.
Perfect Crispy Fried Chicken Recipe
Here’s my go-to recipe that incorporates all these tips:
Ingredients:
- 3 lbs chicken pieces (thighs and drumsticks work best)
- 1 cup buttermilk
- 1 cup all-purpose flour
- 1 cup cornstarch
- 1 tablespoon baking powder
- 2 teaspoons kosher salt
- 1 teaspoon black pepper
- 1 teaspoon garlic powder
- 1 teaspoon paprika
- Vegetable or peanut oil for frying
Instructions:
- Mix salt and spices, then rub onto chicken pieces
- Refrigerate uncovered for 8-12 hours (dry brining)
- Dip chicken in buttermilk, then dredge in flour mixture (equal parts flour and cornstarch plus baking powder and seasonings)
- Heat oil to 325°F in a heavy-bottomed pot
- Fry chicken in small batches for 12-15 minutes until golden brown
- Drain on a wire rack set over a baking sheet
- If not serving immediately, keep warm in a 200°F oven
Troubleshooting Common Problems
If your chicken is still losing crispiness, check for these common issues:
-
Problem: Chicken wasn’t dried properly before coating
Solution: Pat chicken thoroughly with paper towels, air dry in fridge -
Problem: Oil temperature fluctuated too much
Solution: Use a thermometer and fry smaller batches -
Problem: Coating was too thick
Solution: Shake off excess flour before frying -
Problem: Chicken pieces were stacked while cooling
Solution: Always cool in a single layer on a wire rack
FAQ: Your Crispy Chicken Questions Answered
Q: Can I use a different coating besides flour?
A: Absolutely! Try cornmeal, crushed crackers, or panko breadcrumbs for unique textures. For gluten-free options, almond flour or chickpea flour work well.
Q: Is marinating necessary before frying?
A: While not mandatory, marinating enhances flavor and moisture. A buttermilk marinade tenderizes the meat while adding richness.
Q: How do I prevent chicken from sticking to the pan?
A: Ensure oil is hot enough before adding chicken, and avoid moving pieces too soon after adding them to the pan.
Q: What’s the best oil for frying chicken?
A: Oils with high smoke points work best – vegetable, peanut, or canola oil are excellent choices. Peanut oil adds a subtle flavor that many prefer.
Q: Can I make fried chicken healthier while keeping it crispy?
A: Yes! Try using skinless chicken, air frying, or baking with a light coating of oil spray. Using whole-grain flour or crushed nuts as coating can also provide healthier alternatives.
Final Thoughts
Creating fried chicken that stays crispy for hours (or even overnight) isn’t rocket science – it just requires attention to detail and following these proven techniques. The key factors are proper preparation (dry brining), the right coating mixture, careful temperature control, and proper cooling/storage methods.
We’ve all been disappointed by soggy fried chicken, but with these tips, you’ll be able to enjoy that satisfying crunch long after cooking. Whether you’re preparing food for a picnic, making ahead for a party, or just want to enjoy leftovers that taste as good as fresh, these techniques will transform your fried chicken experience.
Remember, practice makes perfect! Don’t get discouraged if your first attempt isn’t exactly what you hoped for. Each time you make fried chicken, you’ll get better at mastering these techniques until perfectly crispy chicken becomes your signature dish!
What’s your favorite technique for keeping fried chicken crispy? I’d love to hear your experiences in the comments below!
For the spice mix
- 2 tbsp paprika
- 2 tsp garlic granules
- 1 tsp chilli powder
- 1 tsp black pepper
- ½ tsp dried oregano
- 1 chicken stock cube