Hey there, food lovers! If you’ve ever ended up with a chicken breast that’s drier than a desert or raw in the middle while the outside looks fine, I feel ya. Been there, done that, and cursed my stove for it. But lemme tell ya, frying the perfect chicken breast ain’t rocket science—it’s just about knowin’ a few tricks up your sleeve. At our lil’ kitchen hub, we’re all about turnin’ your cooking game from “meh” to “hell yeah!” So, grab a skillet, and let’s dive into how to fry the perfect chicken breast that’s juicy, crispy, and downright drool-worthy.
Why Chicken Breasts Are a Pain to Fry (And How to Fix It)
First off, let’s chat about why chicken breasts can be such a headache. They’re lean as heck which means no fat to keep ‘em moist while they cook. You blink and boom, they’re overdone and taste like cardboard. Or worse, the outside’s golden, but the inside’s still pink—yuck. The main culprits? Overcooking, uneven thickness, and not enough flavor. But don’t worry, I’ve got the fixes to make your chicken sing.
Here’s the deal:
- Overcooking: They cook fast, so it’s easy to go too far tryin’ to get that crispy crust.
- Uneven Cooking: One end’s thick, the other’s thin, so half’s raw while the other’s dry.
- Bland Taste: Chicken breast ain’t exactly burstin’ with flavor on its own. It needs love.
Lucky for us a few simple steps can turn this around. We’re gonna pound ‘em flat, soak ‘em for juiciness, coat ‘em right, and fry ‘em at the perfect heat. Let’s break it down so you can whip up a chicken breast that’s golden on the outside and tender as can be inside.
Step 1: Prep That Chicken Like You Mean It
Before we even think about heatin’ up the pan, we gotta get our chicken ready. Trust me, skippin’ this part is why so many folks end up with sad dry meat. Here’s how to set yourself up for success.
Pound It Out for Even Cookin’
Grab your chicken breasts and put ‘em between two sheets of plastic wrap or in a zip-top bag. Now, take a meat mallet—or hell, even a rollin’ pin if that’s all ya got—and gently whack ‘em till they’re about half an inch thick all over. Why bother? ‘Cause if one side’s thicker, it won’t cook even, and you’ll be playin’ guessin’ games with raw spots. Even thickness means even cookin’, and that’s the name of the game.
Don’t wanna pound? You can also slice ‘em in half horizontally to make thinner cutlets. Just be careful with that knife, alright? I’ve nicked myself one too many times rushin’ through this.
Soak It in a Brine or Buttermilk
Next up, let’s keep that chicken moist. Soakin’ it in a brine or buttermilk is like givin’ it a spa day—it tenderizes the meat and locks in juice. Mix up a quick brine with some salt and water, or go for buttermilk if you got it. Buttermilk’s got this tangy kick and some acidity that breaks down the tough bits in the chicken. Add a splash of hot sauce if you’re feelin’ spicy.
Let it sit in the fridge for at least 30 minutes, but if you can swing it, leave it overnight. I once forgot mine for a full day, and lemme tell ya, it was the juiciest dang chicken I ever fried. Don’t got buttermilk? No sweat—mix a tablespoon of vinegar or lemon juice with a cup of milk and let it sit a few minutes. Works like a charm.
Step 2: Bread That Bird for Crunch
Now that our chicken’s prepped and juicy, let’s get that crispy coat goin’. A good breadin’ ain’t just for looks—it seals in the moisture so your breast don’t dry out while fryin’.
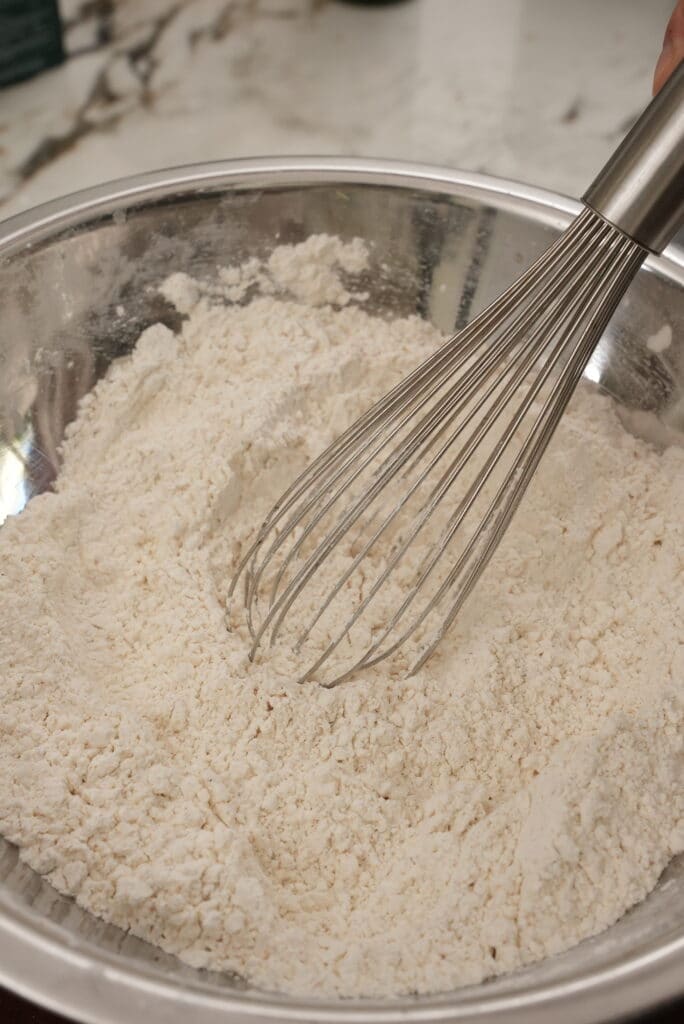
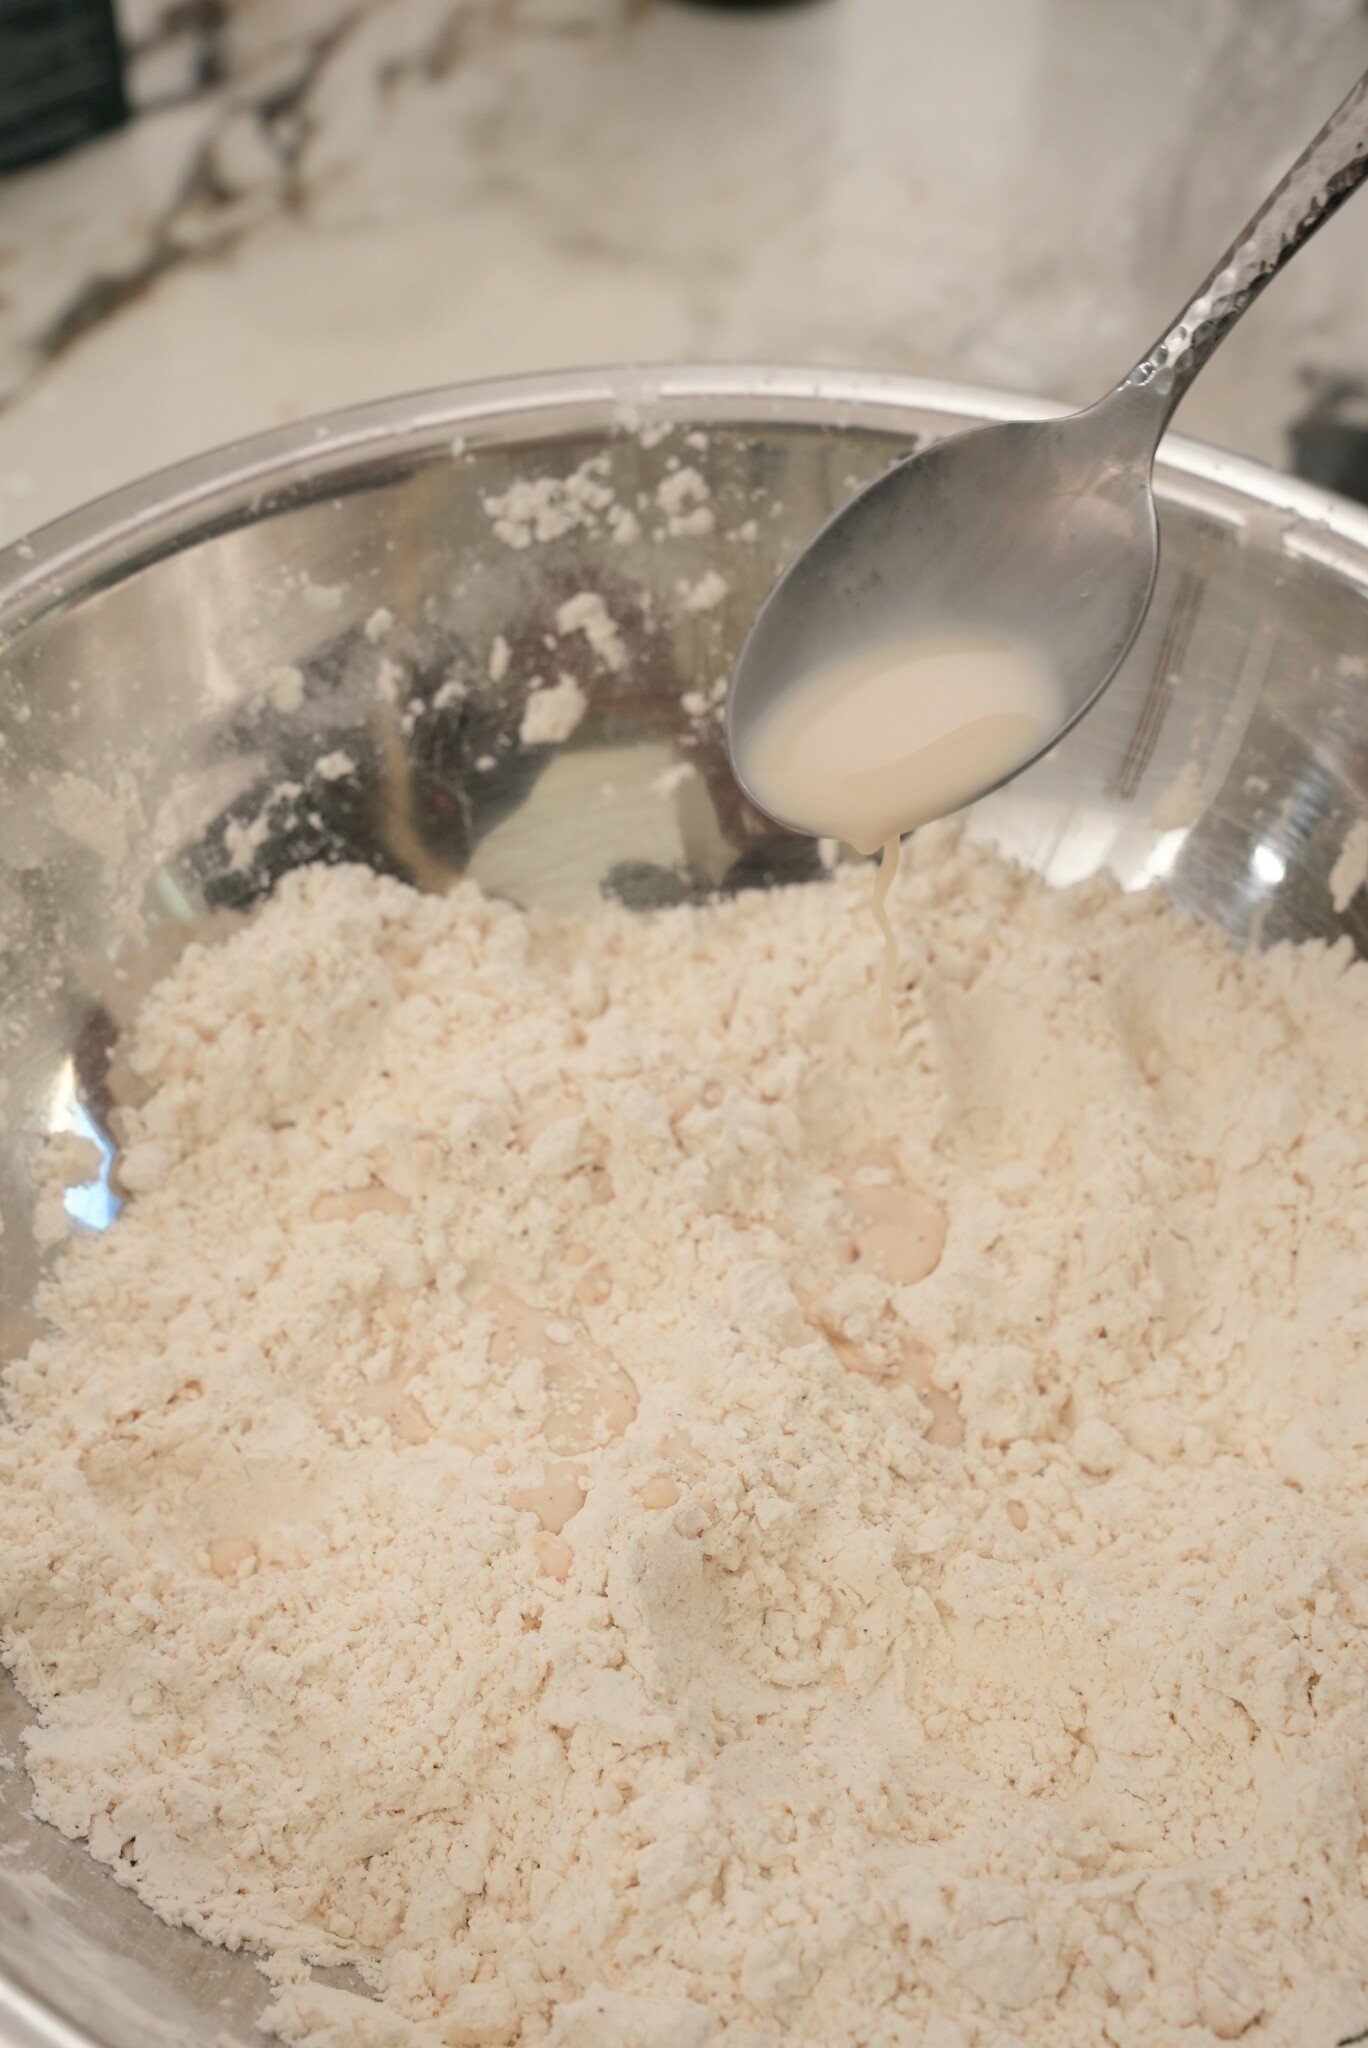
Set Up Your Dredgin’ Station
You’ll need three shallow dishes or plates:
- Flour Mix: Throw some all-purpose flour in one, and season it up with salt, pepper, garlic powder, onion powder, and a pinch of paprika for color and smokiness. This adds flavor right into the crust.
- Egg Wash: Beat a couple eggs in the second dish. This sticky layer helps the breadin’ stick like glue.
- Breadcrumbs or More Flour: In the third, use breadcrumbs (Panko if you want extra crunch) or just more seasoned flour. I’m partial to Panko ‘cause it gets crazy crispy.
Coat It Like a Pro
Take your chicken outta the brine, shake off the excess liquid, and pat it dry with paper towels. Wet chicken equals soggy breadin’, and we ain’t about that life. Then, dip it in the flour mix first to get a base layer. Shake off extra, then dunk it in the egg wash. Finally, press it into the breadcrumbs or second flour mix, makin’ sure it’s coated good. Pat it down so it sticks.
Here’s a pro tip I learned the hard way: Let the coated chicken sit on a wire rack in the fridge for about 30 minutes. This lets the breadin’ set so it don’t fall off when you fry. Skip this, and you might end up with bald spots on your chicken. Not cute.
Step 3: Get That Oil Hot (But Not Too Hot)
Alright, time to fry! The secret to a perfect crust is the right oil temp. Too low, and your chicken soaks up grease like a sponge, turnin’ soggy. Too high, and it burns before the inside’s done. Let’s nail this.
Pick the Right Oil
Use somethin’ with a high smoke point—canola, avocado, or peanut oil are my go-tos. They can handle the heat without burnin’ and won’t mess with the flavor of your chicken. Fill a big skillet or Dutch oven with about an inch of oil. You don’t need a deep fryer; shallow fryin’ works just fine and uses less oil.
Heat It Up Right
Get that oil to around 350-375°F. If you got a thermometer, use it—seriously, it’s a game-changer. No thermometer? Drop a tiny bit of breadin’ in the oil. If it sizzles right away and floats, you’re good. If it sinks or just sits there, it’s too cold. If it burns quick, turn the heat down, pal. I’ve scorched plenty of chicken by guessin’ wrong, so learn from my oopsies.
Step 4: Fry Without Messin’ It Up
We’re in the home stretch now! Frying ain’t hard, but you gotta pay attention. Here’s how to do it without turnin’ your kitchen into a grease bomb.
Don’t Crowd the Pan
Only fry a couple pieces at a time. If you jam too many in there, the oil temp drops, and instead of fryin’, your chicken steams. Steamed chicken = soggy sadness. Give ‘em space to brown up nice. I usually do two breasts at a time in my skillet, max.
Cook It Just Right
Lay the chicken in the hot oil gently—don’t just drop it or you’ll splash hot grease everywhere (ask me how I know). Let it cook for about 4-5 minutes per side, till it’s golden brown. Flip it only once, and be gentle so the breadin’ don’t peel off. Use tongs, not a fork, or you’ll poke holes and let the juices run out.
Most important? Check the internal temp. Stick a meat thermometer in the thickest part—165°F means it’s done and safe to eat. Don’t got a thermometer? Cut into one piece; the juices should run clear, no pink. But don’t overdo it, or you’re back to dry city.
Drain That Grease
Once it’s fried, lift the chicken outta the oil and put it on a wire rack over a baking sheet. No rack? Paper towels work too. This lets the extra oil drip off so it ain’t greasy as heck. Blot the top lightly with more towels if you wanna cut down on the shine.
Step 5: Serve It Up with Flair
You did it! You’ve got a perfectly fried chicken breast sittin’ there, all crispy and golden. Now, how do ya serve this bad boy? Honestly, the world’s your oyster. Here are some ideas to get ya started:
- Classic Dinner: Pair it with mashed taters and gravy, some green beans, or corn on the cob. Drizzle a lil’ extra gravy over the chicken if you’re feelin’ fancy.
- Sandwich Style: Slap it between a bun with lettuce, tomato, and a smear of mayo or spicy sauce. Instant fried chicken sammy—boom!
- Salad Topper: Slice it up and toss it on a fresh salad for a protein-packed lunch that ain’t boring.
- Pasta Partner: Lay it over some spaghetti with marinara for a quick chicken parm vibe. Sprinkle some cheese and broil if you’re extra.
I love slicin’ mine up and dippin’ it in honey mustard or a spicy aioli. Somethin’ about that sweet-spicy combo just hits different after all that fryin’ effort.
Troubleshooting: What If It Goes Wrong?
Even with all this, stuff can still go sideways. Here’s how to fix common screw-ups I’ve made myself:
- Chicken’s Dry: You prob’ly cooked it too long. Next time, check that temp sooner—pull it at 165°F, no higher. Brinin’ longer helps too.
- Breading Falls Off: Didn’t let it rest after coating, did ya? Give it that 30 minutes in the fridge, and don’t flip it too early in the pan.
- Soggy Crust: Oil wasn’t hot enough, or you crowded the pan. Crank the heat to 350°F and fry in smaller batches.
- Raw Inside: Thicker pieces need more time. Pound ‘em thinner, or finish ‘em in a 350°F oven after fryin’ if you’re worried about burnin’ the outside.
Variations to Switch Things Up
Wanna mix it up? Here’s a couple ways to fry chicken breast without gettin’ stuck in a rut:
- Air Fryer Option: If you’re tryin’ to cut the oil, bread it the same way, spray both sides with a lil’ cooking spray, and air fry at 400°F for 6-8 minutes, flippin’ halfway. It ain’t quite the same as pan-fryin’, but it’s darn close.
- Oven-Fried: Coat it, place on a greased baking sheet, and bake at 425°F for 15 minutes. Flip, then cook another 5-10 till it hits 165°F. Less mess, still crispy.
- Spice It Up: Add cayenne or chili powder to the breadin’ for a kick. Or toss some hot sauce in the brine for heat that soaks right in.
Tools You’ll Need (Nothin’ Fancy)
You don’t need a pro kitchen to pull this off. Here’s the basic gear I use:
- Skillet or Dutch Oven: Somethin’ heavy-bottomed to hold heat steady.
- Tongs: For flippin’ without piercin’ the meat.
- Meat Thermometer: Cheap and saves ya from guessin’ if it’s done.
- Wire Rack: For drainin’ oil, though paper towels work in a pinch.
- Meat Mallet or Rollin’ Pin: To flatten that chicken out.
Why This Matters (And Why You’ll Love It)
Fryin’ the perfect chicken breast ain’t just about eatin’—it’s about feelin’ like a boss in your own kitchen. There’s somethin’ magic about bitin’ into that crispy crust and findin’ juicy, tender meat inside. I remember the first time I got it right; I was prouder than a peacock, showin’ off to my fam like I invented chicken or somethin’. You’ll get that same high, I promise.
Plus, it’s versatile as heck. One night it’s dinner with all the fixins’, next day it’s lunch in a wrap. Master this, and you’ve got a skill that keeps on givin’. And hey, no more spendin’ bucks on takeout when you’re cravin’ fried chicken—you’re the chef now.
A Few Extra Tips for the Road
Before I let ya go, here’s some bonus nuggets of wisdom I’ve picked up over burnt pans and greasy counters:
- Season Every Step: Don’t just rely on the breadin’. Salt and pepper the chicken before brinin’, in the brine, and in the coat. Layers of flavor, baby.
- Don’t Reuse Old Oil: If it’s lookin’ dark or smells funky, ditch it. Fresh oil means better taste and less weird burnt bits.
- Test One Piece First: If you’re fryin’ a batch, cook one breast first to check your oil temp and timin’. Better to mess up one than the whole lot.
- Keep It Warm: If you’re fryin’ in batches, pop the done ones in a 200°F oven on a rack to stay warm without gettin’ soggy.
Wrappin’ It Up with a Crispy Bow
So there ya have it, folks—everything I know about fryin’ the perfect chicken breast, straight from my kitchen disasters to yours. Start with poundin’ it even, soak it for that moisture, bread it for crunch, fry at the right heat, and check that temp. It’s a few steps, sure, but each one’s worth it when you bite into that golden, juicy masterpiece.
We at this lil’ cookin’ corner are rootin’ for ya. Try this out, tweak it to your likin’, and lemme know how it goes. Burnt somethin’? Laugh it off and try again—I’ve been there. Got a killer twist with some wild spices? Share that too. Cookin’ is all about messin’ around till it’s yours. Now, get that skillet hot and fry up some magic!

Watch the Easy Fried Chicken Recipe Video Below!
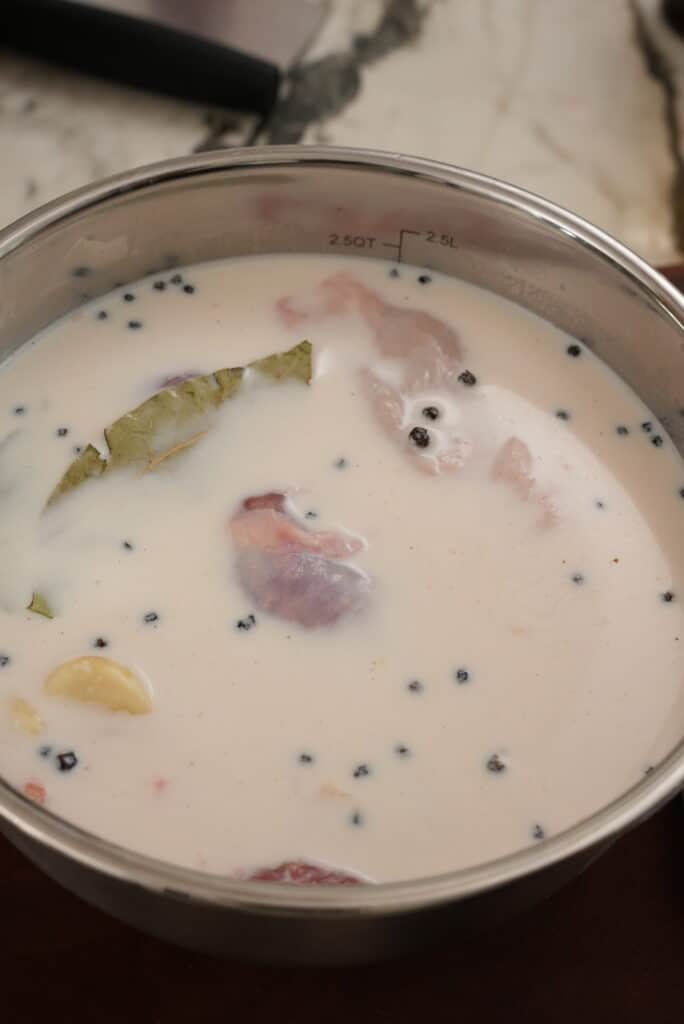
Brining for Juicy, Tender Chicken
MILK BRINE The lactic acid in dairy breaks down the proteins and collagen in the chicken, which softens the flesh and will make it more tender when cooked. By piercing the chicken, you’re allowing the dairy to reach farther in and tenderize more of the meat! If you don’t have milk, water brining is still better than nothing. (Brining is optional but I always recommend it, if you have the time!)
The Best Chicken Breast You’ll Ever Make (Restaurant-Quality) | Epicurious 101
FAQ
How to fry chicken breast without drying it out?
How long to fry chicken breasts in a frying pan?
How to keep chicken breast tender when frying?
What is the trick to frying chicken?
Fry in small batches.
The more chicken you add to the oil, the more the temperature will decrease. This can impact how evenly the poultry cooks and can result in a soggier, less crispy texture — so store your finished pieces in a warm oven while you fry up the rest in batches.