Hey there fellow food lovers! If you’ve ever stood over a hot skillet wondering “How long do I pan roast this dang chicken breast?” then you’re in the right spot. I’ve burned, undercooked, and somehow salvaged my fair share of chicken dinners, and I’m here to spill all the deets on getting that perfect, juicy, golden-brown result. Pan-roasting chicken breast aint just about slapping meat in a pan—it’s a game-changer for quick, flavorful meals. So, let’s dive straight into the big question and then unpack everything you need to know to nail this technique at home.
How Long Does It Take to Pan Roast Chicken Breast?
Right off the bat let’s get to the meat of the matter (pun intended!). The time it takes to pan roast chicken breast depends on whether you’re working with boneless skinless cuts or bone-in, skin-on pieces. Here’s the quick breakdown
- Boneless, Skinless Chicken Breasts (6-8 oz each): Sear ‘em for 3-4 minutes per side on the stovetop over medium-high heat, then finish in a 400°F oven for 10-15 minutes. You’re aiming for an internal temperature of 165°F. Thinner pieces might be done in as little as 8-10 minutes in the oven.
- Bone-In, Skin-On Chicken Breasts: These take a bit longer ‘cause the bone and skin insulate the meat. Sear skin-side down for 5-6 minutes, flip and sear the other side for 4-5 minutes, then roast in a 400°F oven for 25-35 minutes, again hitting that 165°F internal temp. Bigger, thicker cuts might lean toward the 35-minute mark.
Now lemme stress this time is just a guideline. The real trick is using a meat thermometer to check that internal temp. I’ve overcooked too many chickens relying on the clock alone and trust me, you don’t wanna chew on rubber. If you don’t got a thermometer yet, grab one—it’s a lifesaver!
What Even Is Pan-Roasting, Anyway?
Before we get deeper into the nitty-gritty, let’s clear up what pan-roasting actually means. It’s like the best of both worlds, combin’ searing on the stovetop with finishing in the oven (or sometimes just on the stove with a lid). You start by browning the chicken in a hot skillet to lock in juices and get that crispy, golden exterior. Then, you let the oven’s gentle heat cook it through without drying it out. It’s a heck of a lot faster than full-on oven roasting and gives you way more flavor than just frying. Plus, one pan to clean? Yes, please!
I remember the first time I tried this method—thought it was some fancy chef nonsense. But nope, it’s dead simple and makes chicken breasts that don’t suck. Whether you’re whipping up a quick weeknight dinner or impressing guests, this technique’s got your back.
Step-by-Step Guide to Pan-Roasting Chicken Breast
Alright, let’s walk through how to do this, step by step. I’m gonna assume you’ve got a basic kitchen setup, but I’ll toss in some workarounds if you’re missing stuff. Grab your skillet, and let’s cook!
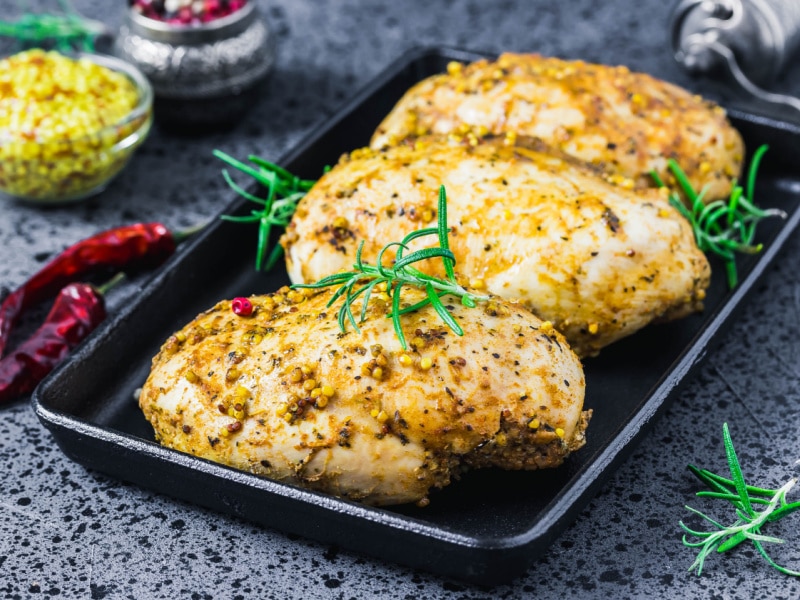
1. Prep Your Chicken
- Start by patting the chicken dry with paper towels. Wet chicken don’t sear—it steams, and you’ll miss that crispy crust.
- Season both sides generously with salt and pepper. I sometimes throw in some dried herbs or a pinch of paprika for extra kick, but keep it simple if you’re new to this.
- If your breasts are thicker than ¾ inch, flatten ‘em a bit with a meat mallet or the bottom of a heavy pan. Even thickness means even cooking.
2. Preheat Everything
- Crank your oven to 400°F (or 375°F if you’ve got convection). If you’re using an oven-safe skillet like cast iron, toss it in the oven while it preheats to get it nice and hot.
- No oven-safe pan? No worries. You can transfer the chicken to a baking dish later, or finish it on the stovetop with a lid.
3. Sear Like a Pro
- Heat up a tablespoon of oil (I like canola or olive oil) in your skillet over medium-high heat until it shimmers. Don’t use a cold pan—searing needs heat!
- Place the chicken in, skin-side down if it’s got skin. Don’t overcrowd—give each piece space to brown. Let it sit for 3-5 minutes without poking it. You want a deep golden color.
- Flip it and sear the other side for another 3-4 minutes. If you’ve got herbs like thyme or rosemary, sprinkle ‘em in now for extra flavor.
4. Finish Cooking
- For boneless cuts, slide the skillet into the oven for 10-15 minutes. Bone-in needs 25-35 minutes. Spoon any pan juices or melted butter over the chicken a couple times while it bakes to keep it moist.
- If you’re stovetop-only, lower the heat, add a tablespoon of butter, cover with a lid, and cook for another 10-15 minutes, checking the temp.
- Target is 165°F in the thickest part. Pull it out a few degrees early (like 160°F) if you’re resting it—it’ll keep cooking from residual heat.
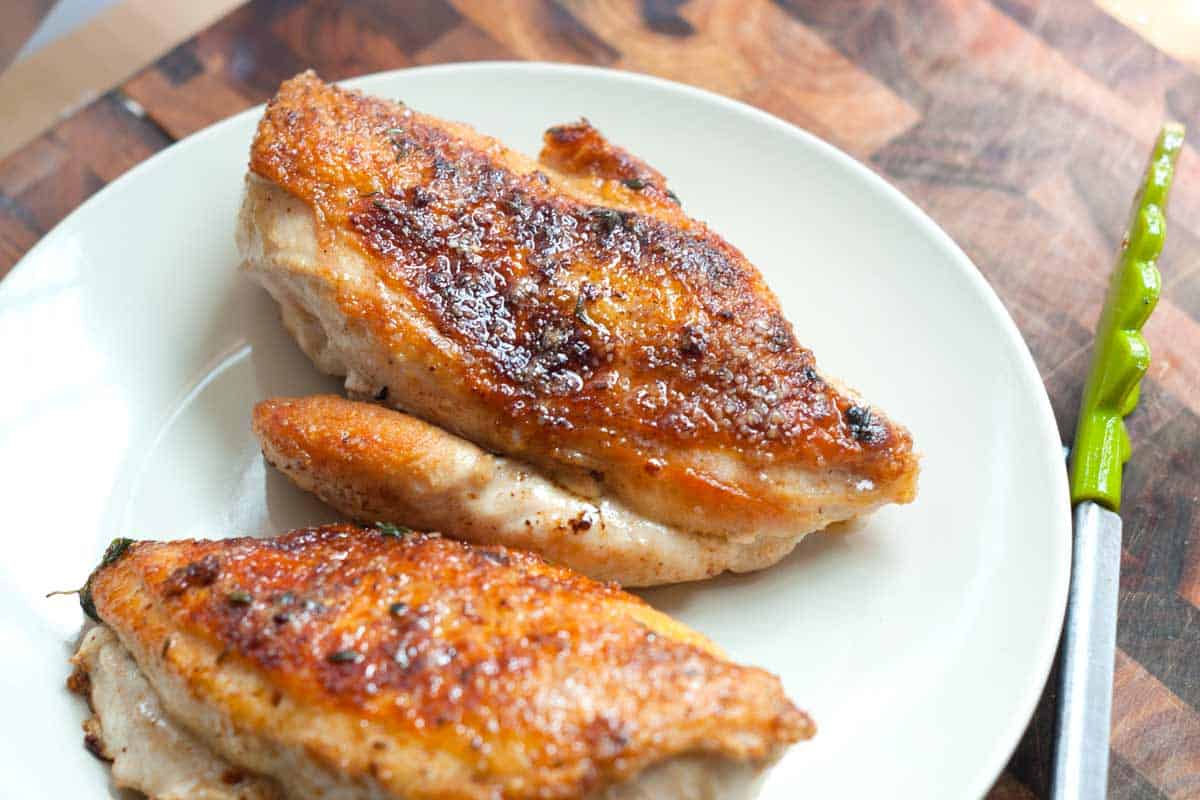
5. Rest and Serve
- Let the chicken sit on a cutting board for 5-10 minutes before slicing. This locks in the juices. Cut it too soon, and you’ve got a dry mess.
- Spoon some of them pan drippings over the top when serving. It’s like liquid gold, trust me.
Timing Breakdown for Different Chicken Cuts
I know I already gave the quick answer, but let’s put this in a handy table so you can glance at it while you’re cooking. Remember, these are rough estimates—always check that internal temp!
| Chicken Type | Searing Time (per side) | Oven Time (at 400°F) | Internal Temp |
|---|---|---|---|
| Boneless, Skinless (6-8 oz) | 3-4 minutes | 10-15 minutes | 165°F |
| Boneless, Skin-On (6-8 oz) | 5-6 minutes (skin down first) | 10-15 minutes | 165°F |
| Bone-In, Skin-On | 5-6 minutes (skin down), 4-5 minutes other side | 25-35 minutes | 165°F |
| Thinner Cuts (under ¾ inch) | 3 minutes | 8-10 minutes | 165°F |
Why Pan-Roasting Beats Other Methods
You might be thinking, “Why not just bake it or fry it?” Fair question. I used to just chuck chicken in the oven and call it a day, but pan-roasting changed the game for me. Here’s why it’s worth the extra step:
- Flavor Explosion: That sear on the stovetop creates a Maillard reaction—fancy term for the browning that gives you crazy-good taste. Baking alone can’t match it.
- Juicy Inside, Crispy Outside: The combo of hot skillet and gentle oven heat means you don’t dry out the meat while still getting a nice crust.
- Faster Than Full Roasting: You’re not waiting an hour for a whole bird to cook. Most cuts are done in under 30 minutes.
- Easy Pan Sauce: Them browned bits stuck to the skillet? Add a splash of broth or vinegar, some butter, and boom—you’ve got a sauce to die for.
I’ve tried straight frying, but it often leaves the inside raw or overcooks the outside. Pan-roasting just balances everything out.
Tools You’ll Need (And Workarounds If You Don’t Got ‘Em)
Don’t stress if your kitchen aint stocked like a pro chef’s. Here’s what works best and how to fake it if you’re missing stuff:
- Heavy Skillet: Cast iron is the GOAT for even heat and going from stove to oven. No cast iron? Use any heavy pan for searing, then transfer to a baking dish for the oven part.
- Meat Thermometer: Seriously, get one. It’s like $10 and saves you from guesswork. If you don’t have it, press the chicken—firm but with a slight give means it’s likely done. Risky, though.
- Tongs: For flipping without piercing the meat and losing juices. Fingers work in a pinch, but ouch, hot!
- Oven: If yours is busted, finish on the stovetop with a lid on low heat. Takes a bit longer, but it’ll do.
I’ve cooked in tiny apartments with barely any gear, so I know you can make this work with whatever you’ve got.
Tips to Avoid Dry, Sad Chicken
We’ve all been there—cutting into a breast and it’s drier than the Sahara. Here’s how to keep that from happening:
- Don’t Skip the Sear: It seals in juices. If you just bake, you’re losing moisture from the get-go.
- Rest It: I can’t say this enough. Resting lets the juices settle. Slice too soon, and they’re all over your plate instead of in the meat.
- Don’t Overcook: Past 165°F, it gets tougher by the minute. Pull it out early if you’re resting.
- Use Butter or Oil: A little fat during cooking keeps things moist. Spoon it over while it’s in the oven for bonus points.
- Room Temp Start: If you’ve got time, let the chicken sit out for 20-30 minutes before cooking. Cold meat cooks unevenly.
I learned the hard way after serving cardboard chicken to my family one too many times. Follow these, and you’ll be golden.
Seasoning Ideas to Jazz It Up
Salt and pepper are fine, but let’s get creative. I like switching it up depending on my mood or what’s in the pantry. Try these combos:
- Herb Vibes: Fresh thyme, rosemary, or parsley. Toss ‘em in during searing for a woodsy, aromatic kick.
- Spicy Kick: A pinch of cayenne or smoked paprika. Rub it on before searing for some heat.
- Citrus Zing: Squeeze half a lemon over the finished chicken, or zest it into the pan sauce. Brightens everything up.
- Garlic Lover’s Dream: Smash a couple cloves and throw ‘em in the pan with butter. Your kitchen’ll smell insane.
Don’t use sugary stuff like honey or BBQ sauce during searing—it burns fast. Save sweet glazes for the end if you’re into that.
What to Serve with Pan-Roasted Chicken
Now that you’ve got this killer chicken, what’s on the side? I’m all about easy pairings that don’t steal the spotlight but still feel like a full meal. Here are my go-tos:
- Mashed Taters: Classic for a reason. Spoon some pan juices over ‘em, and it’s comfort food heaven.
- Roasted Veggies: Carrots, asparagus, or Brussels sprouts. Toss ‘em in the oven at 400°F while the chicken finishes.
- Rice or Quinoa: Soaks up any sauce you make. I like a garlic butter rice to keep things cohesive.
- Simple Salad: Just greens with a light vinaigrette. Cuts through the richness of the chicken.
I’ve whipped up whole dinners with just a skillet and an oven tray, so don’t overthink it. Whatever you’ve got in the fridge can probably work.
Troubleshooting: Why’d My Chicken Go Wrong?
Sometimes, even with the best plans, stuff goes sideways. Here’s what might’ve happened and how to fix it next time:
- Too Dry: Likely overcooked. Check temp earlier, and rest it proper. Also, don’t skip fat like butter or oil during cooking.
- Undercooked: If the inside’s raw but outside’s burned, your heat was too high for searing. Turn it down a notch, and give it more oven time at a lower temp.
- No Crispiness: Didn’t pat it dry, or pan wasn’t hot enough. Moisture and low heat kill the sear. Crank that burner and dry the meat first.
- Uneven Cooking: Thick and thin parts cook at different rates. Flatten thicker cuts, or butterfly ‘em for evenness.
I’ve messed up every which way, so don’t beat yourself up. Cooking’s trial and error, and each flop teaches ya something.
Pan Sauce: The Secret Weapon
One of the best perks of pan-roasting? Them browned bits stuck to the skillet after cooking. Don’t wash that pan yet—make a quick sauce! Here’s my lazy-but-tasty method:
- After pulling the chicken out to rest, put the skillet back on medium heat.
- Add a splash (like ¼ cup) of liquid—chicken broth, white wine, or even water in a pinch.
- Scrape up all them bits with a wooden spoon. That’s pure flavor right there.
- Toss in a tablespoon or two of cold butter, stirring till it melts into a silky sauce.
- Optional: Add a splash of vinegar (apple cider works great) or a pinch of herbs for zing.
Drizzle this over your chicken and sides. It’s a small step that makes you look like a pro chef without much effort.
Variations for Different Diets or Tastes
Not everyone’s into the same flavors or got the same dietary needs. I’ve played around with this method to fit different vibes, so here’s some ideas:
- Low-Fat Option: Skip the butter and use a tiny bit of oil for searing. Finish with a splash of lemon juice instead of a rich sauce.
- Herb-Free: If you don’t like or can’t eat certain herbs, just use salt and pepper. The searing still gives plenty of taste.
- Spice It Up: For heat lovers, rub in some chili powder or hot sauce before cooking. Balances with a creamy side like mashed potatoes.
- Gluten-Free: This method’s naturally gluten-free, so pair with rice or veggies instead of bread-based sides.
I’ve cooked for picky eaters and health nuts alike, and this technique adapts easy. Just tweak the extras to fit your crew.
Why You Should Master This Now
Look, pan-roasting chicken breast aint just a recipe—it’s a skill. Once you’ve got it down, you’ve got a go-to for quick dinners, meal prep, or even fancy date nights. It’s versatile, forgiving if you’ve got a thermometer, and don’t require a ton of ingredients. I’ve relied on this method for years, whether I’m feeding myself after a long day or hosting a small get-together. It’s saved my butt more times than I can count.
Plus, chicken’s cheap, easy to find, and a blank canvas for whatever flavors you’re craving. Master this, and you’ll feel like a kitchen boss, no cap. So, next time you’re staring at a pack of chicken breasts wondering what to do, don’t just bake ‘em—pan-roast ‘em for that next-level taste.
Final Thoughts and a Lil’ Pep Talk
If you’ve made it this far, you’re already halfway to pan-roasting perfection. Don’t overthink the timing—grab that thermometer, sear till golden, and finish it off with confidence. I’ve flubbed plenty of meals, but each one got me closer to nailing dishes like this. You’ve got this! Experiment with herbs, play with sauces, and make it your own. Cooking’s supposed to be fun, not stressful, so crank some tunes, pour a glass of whatever, and enjoy the process.
Got questions or a killer twist on this method? Drop a comment below—I’m all ears for new ideas. Now, go fire up that skillet and make some bomb chicken. You won’t regret it!
How to Make Pan Roasted Chicken
If we can find them, boneless skin-on chicken breasts are our go-to for this recipe. If you can’t find chicken breasts with the skin left on and the bone out, you can make this with bone-in breasts or skin-on chicken thighs. You can also use skinless breasts, although I have to admit that golden-brown skin is my favorite part.
I cook the chicken in butter for this chicken recipe and add lots of fresh thyme. You’ll start by generously seasoning the chicken with salt. Then, place it skin-side down into a hot pan. When the chicken is golden brown, flip it and add butter and fresh thyme.
Now, here’s the good part! When the butter has melted, spoon it all over the chicken, and then slide the pan into the oven so the chicken can finish cooking.
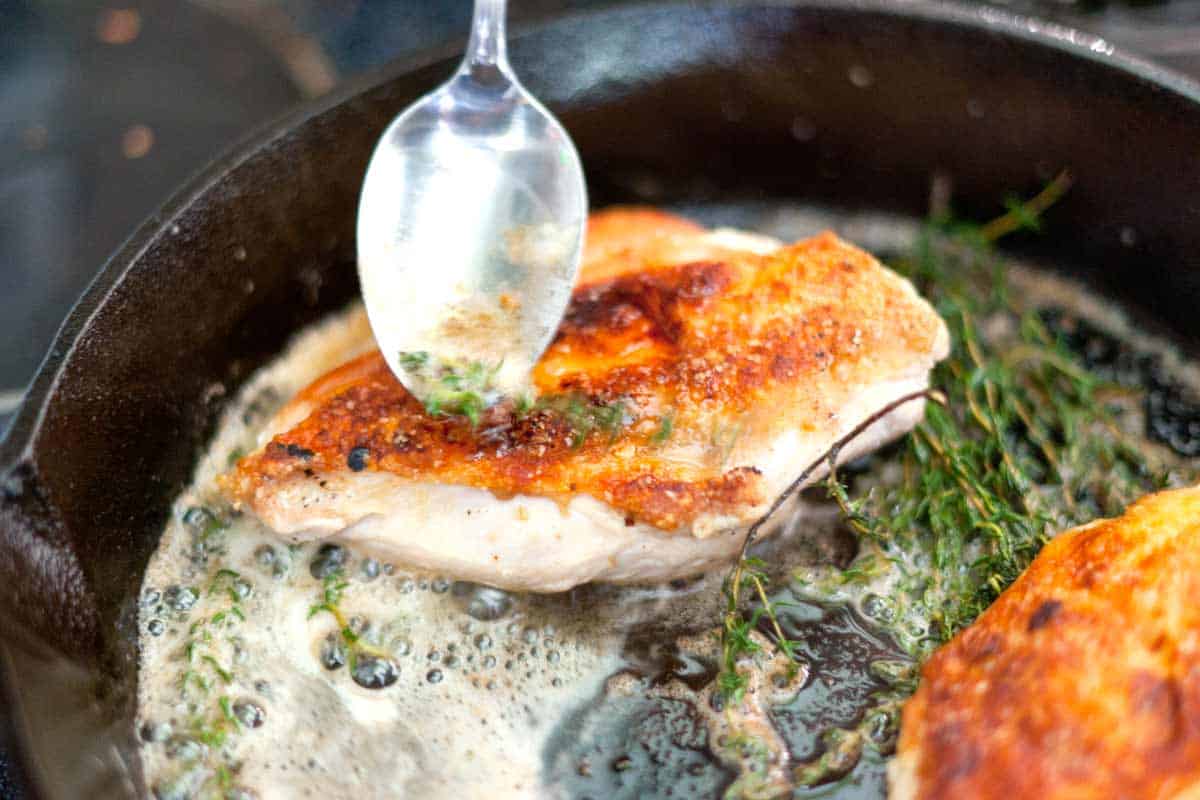
While the chicken finishes cooking in the oven, open the oven door a couple of times and spoon more butter over the chicken to keep it moist.
How To: Pan-Fry Chicken Breasts
FAQ
How long does it take to cook a chicken breast?
Place chicken breasts skin-side down in the skillet. Sprinkle with fresh herbs. Cook until the bottoms are well seared and golden brown, 5 to 6 minutes. Flip chicken breasts over and continue cooking until an instant-read thermometer inserted into the center of a breast reads 150 degrees F (66 degrees C), about 5 minutes.
How long do you cook chicken breast in a frying pan?
Sprinkle with fresh herbs. Cook until the bottoms are well seared and golden brown, 5 to 6 minutes. Flip chicken breasts over and continue cooking until an instant-read thermometer inserted into the center of a breast reads 150 degrees F (66 degrees C), about 5 minutes. Add vinegar and cold butter to the pan with chicken.
How long do you cook chicken breast without flipping?
Heat the skillet over medium-low (or medium heat for thin cut breasts). Once hot, swirl the oil in the skillet to coat the surface, then add the chicken breasts. Let the chicken breasts cook for 8 minutes without flipping (or 5 minutes for thin cut breasts). Flip once and cook until well browned on the second side and cooked through.
How do you cook chicken breast in a pan?
Here’s exactly how I cook chicken breasts in a pan so they’re crisp on the outside and tender in the center. Follow these steps and you’ll have perfect results every time: Pat dry and season generously. Use paper towels to pat the chicken breasts dry—this helps you get a good sear. Excess moisture will make the chicken steam instead of brown.
How do you cook chicken breast in a cast iron pan?
Preheat oven to 425°F. Preheat your cast iron pan on top of the stove for just a few minutes. Generously salt and pepper the skin side of the chicken breasts. Add the butter and oil at the same time. Once the butter and oil are melted and heated, add the chicken breasts skin side down. Allow them to sear for a few minutes.
What is pan roasted chicken breast?
Pan-roasted chicken breast is a culinary joy that marries simplicity with a range of flavors. It’s a recipe that tells a story of comfort and care. I’ve enjoyed it countless times, whether cooking for family or sharing a meal with friends. The joy lies not just in the dish but in the moments it creates.
How long does it take to cook chicken breasts in a pan?
How long to bake chicken at 400 after searing?
Is it better to roast chicken at 350 or 400?
How long does it take to roast a breast of chicken?