Hey there, fellow food lovers! If ya ever craved that golden, crunchy bite of fried chicken with meat so juicy it practically melts in your mouth, you’re in the right spot. Today, we’re divin’ headfirst into the art of fryin’ bone-in chicken breast. Ain’t no fast food joint gonna match what we can whip up at home, and I’m here to spill all my kitchen secrets to get ya that lip-smackin’ result every darn time. Whether you’re a rookie with a skillet or a seasoned cook lookin’ to up your game, let’s get that sizzle magic happenin’!
At our lil’ cooking corner, we believe fryin’ bone-in chicken breast ain’t just cookin’—it’s a straight-up vibe. It’s ‘bout gettin’ that perfect crisp while keepin’ the inside tender as a hug. So, grab your apron, crank up some tunes, and let’s break this down step by stinkin’ step. We’re startin’ with the must-knows right upfront, so you ain’t wastin’ no time.
Why Bone-In Chicken Breast Rocks for Frying
Lemme tell ya, bone-in chicken breast is where it’s at for fryin’. That bone keeps the meat juicier than a summer peach by slowin’ down the cookin’ near it, givin’ ya flavor that boneless just can’t touch. Plus, it’s often cheaper at the store, and who don’t love savin’ a buck? But heads up—it takes a smidge longer to cook than boneless, so patience is your buddy here.
Step 1: Pickin’ the Best Chicken
First things first, ya gotta start with good stuff. Head to your butcher or grocery and eyeball them bone-in chicken breasts. Here’s what I look for:
- Freshness is key: Grab ones with a nice pink color, no funky smell or weird gray spots. If it looks off, walk away.
- Uniform size: Pick breasts that ain’t too different in thickness so they cook even. Ain’t nobody got time for half raw, half burnt.
- Trim a lil’: I usually snip off extra fat or flappy skin to cut down on oil splatter and get that crisp goin’.
I’ve learned the hard way—startin’ with subpar chicken means no amount of spice gonna save ya So take a sec to choose right,
Step 2: Preppin’ Like a Boss
Now that ya got your chicken, let’s get it ready for the fryer. Prep is half the battle, fam. Here’s the deal
- Dry it good: Pat them breasts down with paper towels. Wet chicken equals soggy crust, and we ain’t about that life. Get it nice and dry for max crunch.
- Season early: Rub in some salt, pepper, a dash of garlic powder, maybe some paprika for a lil’ kick. I like to let it sit for at least 30 minutes in the fridge to soak up them flavors.
- Marinate if ya fancy: Wanna go next level? Soak it in buttermilk with a splash of hot sauce or vinegar for 1-4 hours, or even overnight if ya got time. It tenderizes the meat and adds a tangy zing. I’ve skipped this before when rushed, and it’s fine, but marinating? Game-changer.
One trick I picked up after a few greasy messes—dust the chicken with a thin layer of flour or cornstarch before any batter. Helps that coating stick like glue and crisps up real nice.
Step 3: Choosin’ Your Oil Wisely
Oil ain’t just oil when fryin’ chicken—it’s the secret sauce to not burnin’ your kitchen down Ya need somethin’ with a high smoke point, meanin’ it can handle the heat without turnin’ bitter or smokey My go-tos are
- Vegetable oil: Cheap, neutral taste, handles high temps like a champ.
- Canola oil: Another solid pick, light on flavor, fries up clean.
- Peanut oil: If I’m feelin’ fancy, this gives a subtle nutty vibe and takes heat well.
I steer clear of stuff like olive oil for fryin’—it burns too quick unless it’s the refined kind, and even then, it’s pricey for this gig. Health nuts might dig avocado oil, but for me, it’s all ‘bout balance of cost and crunch.
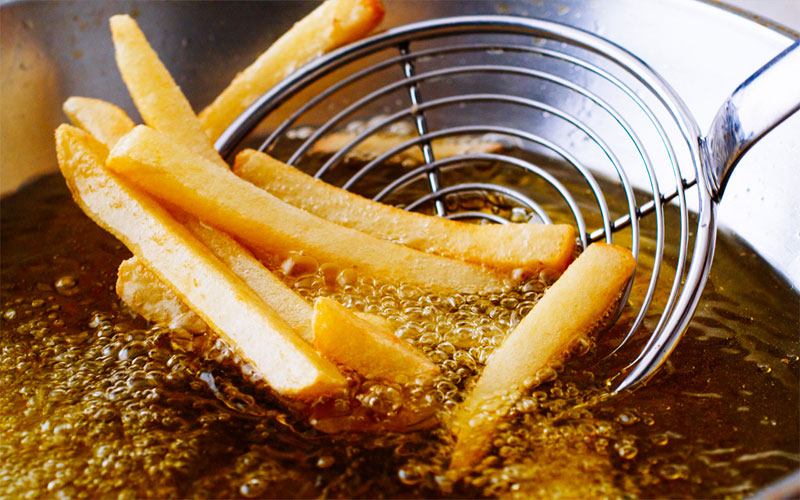
Step 4: Heat It Up—Get That Oil Right
Here’s where folks mess up big time, includin’ me back in the day. Temperature is everything. Ya want your oil sittin’ pretty at 350°F to 375°F. Too low, and your chicken turns into a greasy sponge. Too high, and it’s charred outside with raw insides. No thanks.
- Use a thermometer: Don’t guess, fam. Grab a deep-fry thermometer to keep tabs. I burned a batch once thinkin’ I could eyeball it—never again.
- Heat slow and steady: Fill your skillet or deep fryer with enough oil to cover at least halfway up the chicken, ‘bout 1-2 inches deep. Heat it up over medium till it hits that sweet spot.
- Test it: Drop a lil’ bread crumb in there. If it sizzles and floats quick, you’re golden. If it sinks or burns instant, adjust that heat.
Keepin’ that temp steady while fryin’ is a dance. Don’t overcrowd the pan, or it drops like a rock and ruins the crisp.
Step 5: Coat and Fry That Bird
Time for the main event! Let’s get that chicken coated and into the hot oil. Here’s how I roll:
- Coatin’ options: Mix up some flour with salt, pepper, paprika, garlic powder—whatever ya dig. For extra crunch, I sometimes do flour, then egg wash, then breadcrumbs. Or just flour if I’m keepin’ it simple.
- Shake off excess: Don’t let globs of coating hang on there, or it’ll fall off in the oil and burn. Give it a lil’ shake.
- Ease it in: Lower the chicken gently into the oil with tongs. No splashin’—I’ve got the scars to prove why ya don’t drop it in reckless.
- Fry time: Bone-in breasts take ‘bout 12-15 minutes total. Flip ‘em halfway, ‘round 6-7 minutes per side. Bigger pieces might need a couple extra minutes, so don’t rush it.
- Check the temp: Pull it out when the inside hits 165°F. Use a meat thermometer in the thickest part, avoidin’ the bone. No guessin’—raw chicken ain’t cute.
I like to fry in batches, maybe 2-3 pieces at a time, so the oil don’t cool down too much. Crowdin’ the pan is a rookie move I made once, and it turned my chicken into a sad, soggy mess.
Step 6: Rest and Drain for Max Juiciness
Once it’s out the oil, don’t just dig in—ya gotta let it chill for a sec. Here’s the why and how:
- Drain smart: Set it on a wire rack over a baking sheet, not paper towels. Paper towels make the bottom soggy, and we worked too hard for that crisp! A rack lets air flow all ‘round.
- Rest a bit: Give it 3-5 minutes to rest. This lets the juices settle back into the meat, keepin’ it tender instead of dryin’ out the second ya cut in.
- Keep warm: If you’re fryin’ more batches, pop the done ones in a 275°F oven on that rack to stay toasty without overcookin’.
I used to skip this step, thinkin’ it don’t matter, but trust—restin’ makes a diff. First time I did it, my chicken was ten times juicier.
Bonus Trick: Double-Fry for Extra Crunch
Wanna blow minds with next-level crispiness? Try double-fryin’. I stumbled on this after messin’ up a batch and refryin’ it to fix it—turned out amazin’!
- Fry the chicken for ‘bout 5-7 minutes till light golden.
- Pull it out, let it rest a few minutes on the rack.
- Dunk it back in the hot oil for another 2-3 minutes till it’s deep golden and extra crunchy.
This trick pulls more moisture outta the coating without overdoin’ the meat. It’s a lil’ more work, but when I did this for a family cookout, folks couldn’t stop ravin’.
Troubleshootin’ Common Fryin’ Fails
I’ve botched enough chicken to know where things go south. Here’s how to dodge them pitfalls:
- Soggy crust?: Oil was prob’ly too cold, or ya didn’t dry the chicken enough. Crank that heat to 350°F and pat it down next time.
- Burnt outside, raw inside?: Oil’s too hot, fam. Turn it down a notch and give it more time. Check that internal temp at 165°F.
- Coating fallin’ off?: Didn’t let it sit after dredgin’, or oil wasn’t hot enough to seal it quick. Let the coated chicken rest 15-20 minutes till tacky before fryin’.
- Greasy as heck?: Again, low temp or overcrowdin’. Fry in small batches and keep that oil hot.
I remember my first few tries—chicken lookin’ like it took a mud bath instead of a fry. These tweaks saved my bacon, or rather, my bird.
Spice It Up: Flavor Twists to Try
Basic fried chicken is dope, but sometimes ya wanna switch it up. Here’s a couple ideas I’ve played with:
- Southern kick: Add cayenne and a lil’ hot sauce to the marinade for some heat. Reminds me of them spicy joints down south.
- Sweet n’ savory: After fryin’, drizzle a tiny bit of honey over it while it’s hot. Sounds weird, but the sweet crunch with salty chicken? Chef’s kiss.
- Herby vibes: Mix dried oregano or thyme into your flour mix for an earthy pop. I did this once on a whim, and it felt gourmet as heck.
Don’t overthink it—just experiment with what ya got in the pantry. Half the fun is makin’ it your own.
What to Serve with Your Fried Masterpiece
Fried bone-in chicken breast deserves some killer sides to round out the meal. I’m all ‘bout balance—somethin’ rich, somethin’ fresh. Here’s what I pair mine with:
- Classic comfort: Creamy mashed taters with gravy and some steamed green beans. It’s like a hug on a plate.
- Light and zesty: A crisp salad with a tangy citrus dressin’. Cuts through the richness of the fry.
- Southern soul: Collard greens and cornbread. I whipped this up for a potluck once, and it was gone in minutes.
- Indulgent treat: Mac n’ cheese, all gooey and cheesy. Ain’t healthy, but dang, it’s good with crispy chicken.
And don’t forget a lil’ hot sauce or honey on the side for dippin’. I’m a hot sauce fiend myself—adds that extra punch.
Reheatin’ Leftovers Without Losin’ the Magic
If ya got leftovers (rare in my house), don’t let ‘em go to waste. Reheatin’ fried chicken wrong turns it to cardboard, so listen up:
- Oven is best: Preheat to 375°F, put the chicken on a baking sheet with a rack or parchment. Heat for ‘bout 10-15 minutes till it’s crisp again. Keeps that texture way better than a microwave.
- Microwave hack: If ya gotta zap it, cover with a damp paper towel to keep it moist. Heat in short bursts, checkin’ often so it don’t overcook.
- Cold snack: Honestly, I sometimes just eat it cold straight from the fridge. Still tasty, no fuss.
I’ve revived day-old chicken this way plenty, and it’s almost as good as fresh if ya do the oven trick.
Tools Ya Might Wanna Grab
Ya don’t need a fancy kitchen, but a few gadgets make fryin’ easier. Here’s what I swear by:
| Tool | Why It’s Handy |
|---|---|
| Deep-fry thermometer | Keeps oil temp spot-on. No more guesswork. |
| Meat thermometer | Checks if it’s 165°F inside. Safety first! |
| Tongs | Flips chicken without oil splatter on ya hands. |
| Wire rack | Drains oil without soggy bottoms. Must-have. |
| Cast iron skillet | Holds heat steady for even fryin’. |
I started with just a cheap skillet and tongs, but addin’ a thermometer changed everythin’. No more undercooked surprises.
Safety First—Fryin’ Ain’t a Game
Hot oil is no joke, y’all. I’ve had a couple close calls, so here’s how to keep it safe:
- Don’t overfill: Too much oil can overflow and start a fire. Keep it at 1-2 inches deep.
- Lower gently: Use tongs to place chicken in—no droppin’ from a height unless ya want burns.
- Keep water away: Water plus hot oil equals disaster. Dry hands, dry chicken, no exceptions.
- Watch the heat: If oil starts smokin’ bad, turn it down or off. Better safe than sorry.
I once splashed oil on my arm by bein’ careless—hurt like heck. Stay focused, and ya won’t have my dumb stories to tell.
Why Homemade Fried Chicken Beats Takeout Any Day
Lemme rant a sec—homemade fried bone-in chicken breast smokes any fast food or diner version. You control the quality, the spices, the crisp level. Plus, it’s cheaper in the long run, and nothin’ beats the smell of fryin’ chicken fillin’ your kitchen. I’ve had folks over who swore they’d never eat store-bought again after tastin’ mine. It’s a pride thing, ya know?
And hey, it ain’t just dinner—it’s a memory maker. Fryin’ up a batch for a picnic or family night feels like straight love. I remember cookin’ this for my crew on a rainy day, windows fogged up from the heat, laughin’ over who got the crispiest piece. That’s the good stuff.
Final Tips for Fryin’ Success
Before I let ya go whip up your own batch, here’s a quick roundup of my top nuggets of wisdom:
- Always start with dry chicken for that crunch.
- Keep oil at 350°F—don’t skimp on a thermometer if ya can.
- Don’t crowd the pan; give each piece its space to shine.
- Rest it after fryin’ on a rack for best juiciness.
- Play with flavors—add a lil’ heat or sweet to make it yours.
Fryin’ bone-in chicken breast ain’t rocket science, but it does take a lil’ care and practice. I’ve flopped plenty before nailin’ it, and each mess-up taught me somethin’. So don’t sweat if your first go ain’t perfect—just tweak and try again.
Now, get in that kitchen and make some magic happen! Drop a comment below if ya got tricks of your own or if this recipe got ya droolin’. We’re all ‘bout sharin’ the love of good eats here. Let’s fry up a storm, fam!
TENDER and JUICY bone in FRIED chicken breast! The best fried chicken recipe online!!!
FAQ
How to cook bone-in chicken breast in a frying pan?
Pan Searing.
Rub the bone-in chicken breasts with olive oil and season with salt and pepper. Make sure your pan is hot before adding the chicken (skin side down). Let it cook for 7-8 minutes before you turn it to ensure a crispy skin that seals in the juices.
Can you fry chicken bone-in?
We used to fry chicken, including “bone in breast”, in a cast iron pan. Basically, fill the pan about half way with vegetable oil, heat until it starts to glimmer, slowly lower in your battered chicken, cook for a few minutes on one side, flip, and then continue to cook.
How long does a chicken breast take to deep fry?
It should register 165°. This usually equates to around 10 minutes for wings and 12 minutes for breasts, thighs and legs. For the best tasting fried chicken with a beautifully even golden crumb, turn your chicken pieces with tongs (being careful not to splash yourself with hot oil) every 1 – 2 minutes.
How do you fry chicken breast without drying it out?