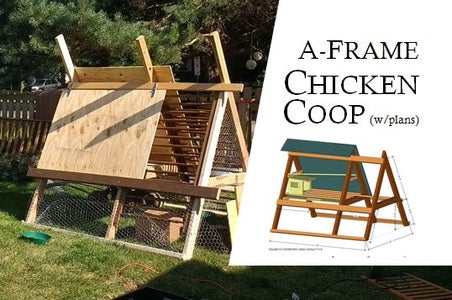
Are you dreaming of fresh eggs every morning but don’t want to spend a fortune on a pre-built chicken coop? I’ve got good news for you! A-frame chicken coops are one of the most affordable and beginner-friendly designs you can build yourself, even if you’re not exactly a DIY expert
After building several coops myself and helping countless friends with their backyard chicken projects, I can confidently say that A-frame coops offer the perfect balance of simplicity, functionality, and cost-effectiveness. In this article, I’ll share multiple free A-frame chicken coop plans with downloadable PDFs, plus essential tips to customize your build.
Why Choose an A-Frame Chicken Coop?
Before diving into the plans, let’s talk about why A-frame coops are so popular:
- Easy to build – Simple design requires minimal carpentry skills
- Cost-effective – Uses less materials than other designs
- Portable – Lightweight and easy to move around your yard
- Space-efficient – Triangular design maximizes usable space
- Weather-resistant – Sloped sides naturally shed rain and snow
- Predator protection – Elevated design keeps chickens safer
Free A-Frame Chicken Coop Plans (PDF Downloads)
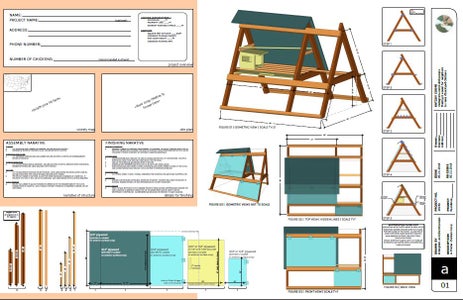
1. Chicken Fans A-Frame Coop (3-4 Chickens)
This versatile A-frame plan from Chicken Fans is perfect for housing 3-4 chickens with features that make maintenance easy.
Key Features
- 8×5 feet A-frame design
- 40 square feet run space
- 45×30 inch elevated coop compartment
- Open roof design for easy cleaning
- Rain shelter for your hens
- Flexible design that can be modified
To download this plan, you’ll need to subscribe to their newsletter at Chicken Fans The PDF includes 12 detailed pages with
- Complete materials list
- Technical plans showing front, top and sides
- Visual step-by-step instructions
- Tips for customization and finishing
2. The RE Store A-Frame Chicken Coop Plan
This detailed PDF plan from The RE Store offers a more traditional A-frame design with a full materials list and step-by-step instructions with photos.
Materials Needed:
- 11 pieces of 8-foot 2×4 lumber
- 1 piece of 8-foot 2×2 lumber
- 1 piece of 8-foot 1×4 lumber
- 2 full sheets of 3/8 inch exterior plywood for sides
- 2 sheets of 1/2 inch exterior plywood for floor
- Cabinet drawer for nesting box
- 4 exterior hinges
- 10 feet of nylon rope
- 2 large eye screws
- Roofing materials and paint
- Exterior grade screws
This plan includes ingenious features like a repurposed cabinet drawer for a nesting box and a rope-operated trap door. The PDF download is available directly from RE Store.
Building Your A-Frame Chicken Coop: Step-by-Step Overview
While each plan has detailed instructions, here’s a general overview of the building process:
Step 1: Gather Materials and Tools
Most A-frame coops require basic materials like pressure-treated lumber, plywood, hardware cloth, hinges, and screws. For tools, you’ll typically need:
- Circular saw or table saw
- Drill with bits
- Measuring tape
- Level
- Speed square
- Hammer
- Screwdriver
Step 2: Build the Frame
Start by creating the triangular “A” frames that form the structure. This usually involves cutting lumber at specific angles (typically around 70 degrees) and securing the pieces together.
Step 3: Connect the Frames
Place your A-frames parallel to each other and connect them with horizontal supports and sill plates to create the basic structure.
Step 4: Add Flooring
Install plywood flooring in the elevated coop area. Make sure it’s secure and properly sized to fit around the frame members.
Step 5: Add Walls and Doors
Attach plywood or other materials to create the walls. Install doors with hinges for access to the interior and nesting boxes.
Step 6: Add Roofing and Finishing Touches
Complete your coop with roofing material, paint or sealer, and interior features like roosting bars and nesting boxes.
Customizing Your A-Frame Chicken Coop
One of the best things about building your own coop is the ability to customize! Here are some popular modifications from the Chicken Fans plan:
- Larger Run: Add extra triangles to extend the run length
- Predator-Proofing: Install hardware cloth on sides and bottom
- Cost Reduction: Reuse wood for sides; only add a door on one side
- Insulation: Add a layer between the 2x3s (with interior plywood to prevent chickens from eating it)
- Increased Height: Adjust the angle or place the entire coop on a rectangular base
- Wind Protection: Add locks to doors to prevent them from being blown open
- Nesting Boxes: Attach external nesting boxes to the back of the coop for easy egg collection
Materials List for A Standard A-Frame Coop
Based on the Chicken Fans plan, here’s what you’ll need:
| Item | Material | Amount/Length |
|---|---|---|
| Base | 2×4″ pressure-treated lumber | 3 x 53 inch |
| A-Bars | 2×4″ pressure-treated lumber | 3 x 36 inch |
| Base Plate | 3/4″ plywood | 49 x 38 inch |
| Legs | 3×4″ pressure-treated lumber | 6 x 5 ft |
| Ridge Board | 1 x 6″ standard lumber | 8 ft |
| Furring Strips | 1 x 3″ (for wire) | 2 x 4 ft |
| Horizontal connectors | 2 x 3″ standard lumber | 2 x 8ft |
| Hinges | Standard exterior hinges | 4 |
| Doors and Sides | 3/4″ plywood | 3 pieces (50 x 40″) |
Tips for Success
After building a few of these coops myself, I’ve learned some valuable lessons:
-
Measure twice, cut once – This old carpentry saying will save you materials and frustration!
-
Treat your lumber – Even if using pressure-treated wood, adding extra sealer extends your coop’s life.
-
Elevate your coop – Raising it slightly off the ground prevents rot and deters predators.
-
Consider ventilation – Chickens need good airflow, so add small vents near the top of your coop.
-
Plan for cleaning – The open roof design in these plans makes a huge difference for maintenance.
-
Add wheels – If you want a truly mobile coop, attach wheels to one end so you can tilt and roll it.
-
Test doors and hinges – Make sure everything opens and closes smoothly before adding chickens.
Alternative A-Frame Plans Worth Checking Out
If the main plans don’t quite fit your needs, consider these alternatives:
- Anna White A-Frame Coop – Fully roofed with entrances on both sides
- Chicken Coop Sled – Completely covered design without a run (7’8″ long, 5’4″ wide, 55″ high)
- Easycoops A-Frame With Nesting Boxes – Larger design (7 x 6 feet) for up to 6 chickens
FAQ About A-Frame Chicken Coops
How many chickens can an A-frame coop house?
Most standard A-frame coops can comfortably house 3-4 chickens. You can modify the design for more, but don’t overcrowd!
How much does it cost to build an A-frame chicken coop?
Depending on material prices in your area, expect to spend $150-300 for a basic A-frame coop if buying new materials. Repurposing and upcycling can reduce this cost significantly.
Is an A-frame coop good for winter?
A-frames can work well in winter with some modifications. Consider adding insulation and making sure there’s enough protected space for your chickens to stay warm.
Can I move an A-frame coop by myself?
Yes! That’s one of the biggest advantages – most A-frame coops are lightweight enough for one person to tilt and drag to a new location.
Do I need a permit to build a chicken coop?
Check your local regulations! Many areas have specific rules about backyard chickens and coop placement.
Final Thoughts
Building your own A-frame chicken coop is a rewarding weekend project that’ll save you hundreds compared to pre-built options. With these free PDF plans, you’ve got everything you need to create a functional, affordable home for your backyard flock.
I’ve built several of these coops over the years, and there’s nothing better than watching happy chickens explore their new home – especially when I know I built it myself! If you have questions about these plans or run into challenges during your build, drop a comment below and I’ll do my best to help.
Happy building, and enjoy those fresh eggs!

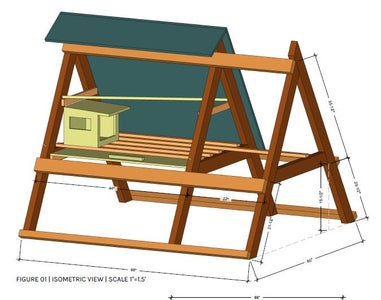
Introduction: A-Frame Chicken Coop: Redux

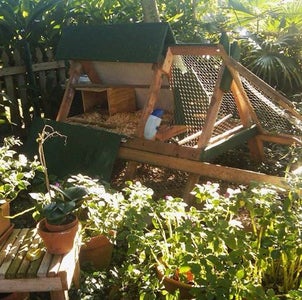
One of my first instructables was the backyard chicken coop I made in New Orleans 09. Now in Southeast, MN Ive built a new coop and have put together plans to help neighbors start raising backyard chickens – 6 neighbors have started within two blocks!
This is also my first product on Etsy – www.etsy.com/listing/602561678/a-frame-chicken-coop
- Know that everything I provide on the Etsy plans is available in this Instructable.
- Hope you find value. Certainly welcome any purchases that may come through Etsy but, again, you have everything here.
–heres my initial A-Frame Coop Post
Step 3: Building the Frame
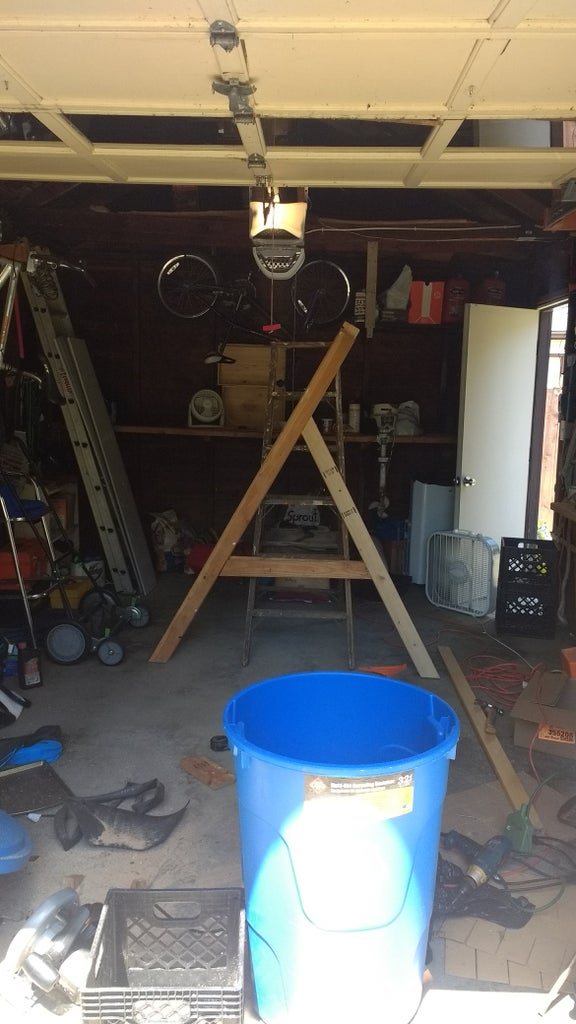
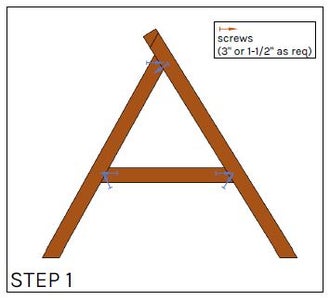
The first step is to build the A-Frame. The construction is built around a right triangle. By having 60 degree angles at each corner its easy to set the angle on a miter or circular saw to 30 degrees.
Screws are shown in each of the s. Please note that a few are at an angle or “toenailed” into the boards. These are the screws that are placed over two boards.