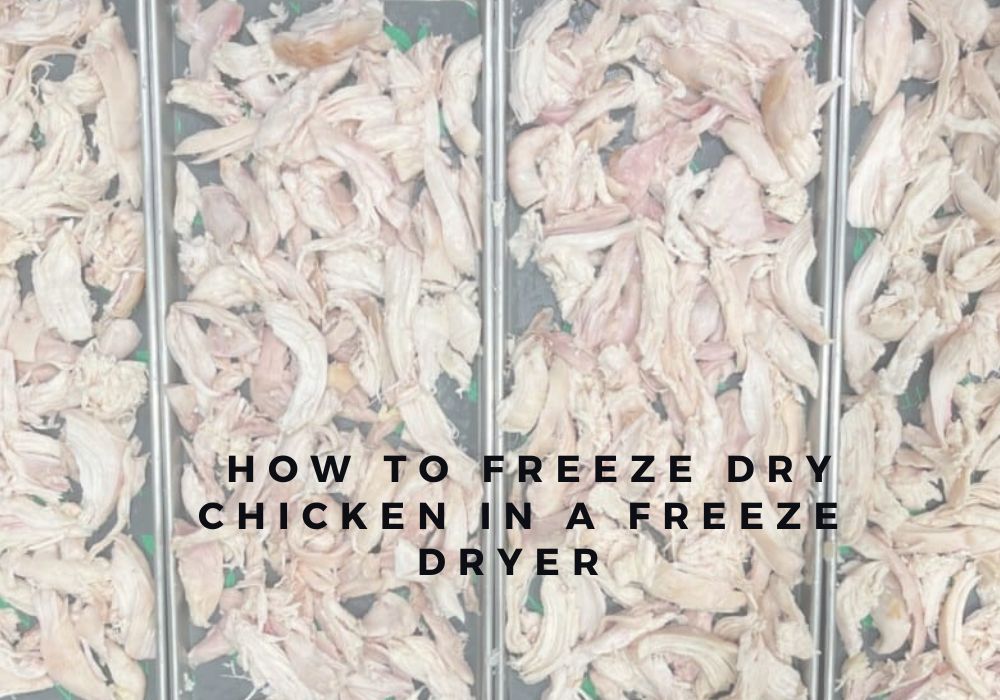
Are you looking to preserve chicken for the long term without taking up valuable freezer space? Freeze drying chicken is a fantastic solution that can give you shelf-stable protein that lasts for years! I’ve been freeze drying foods for over 3 years now, and chicken is one of my absolute favorites to keep in my pantry.
Whether you’ve just invested in a home freeze dryer or you’re considering getting one, this guide will walk you through everything you need to know about freeze drying chicken. Let’s dive in!
Why Freeze Dry Chicken?
Before we get into the how-to, let’s talk about why freeze drying chicken is such a great idea:
- Long shelf life – Properly stored freeze-dried chicken can last 5-25 years
- Saves freezer space – No more packed freezers!
- Lightweight – Perfect for camping, hiking, or emergency preparedness
- Retains nutrients – Unlike some preservation methods, freeze drying keeps most nutrients intact
- Versatile for meals – Rehydrates quickly for fast, nutritious meals
- Takes advantage of sales – Stock up when chicken is on clearance
Raw vs. Cooked Chicken: Which Should You Freeze Dry?
You can freeze dry both raw and cooked chicken. but there are important differences to consider
Raw Chicken
- Takes longer to rehydrate
- Still requires cooking after rehydration
- Good for when you find bulk deals and want to preserve chicken in its most versatile form
- Must be handled safely as raw chicken when rehydrated
Cooked Chicken
- Rehydrates faster (typically 15-20 minutes)
- Ready to use immediately in recipes
- Can be pre-seasoned before freeze drying
- More convenient for quick meals
I personally prefer freeze drying cooked chicken for the convenience factor, but having some raw freeze-dried chicken isn’t a bad idea either if you have the space.
Supplies You’ll Need
Before starting, gather these supplies:
- Harvest Right Freeze Dryer (or similar home freeze dryer)
- Sharp knife for cutting chicken
- Cutting board (preferably dedicated to poultry)
- Parchment paper
- Food scale
- Cooking equipment (if pre-cooking)
- Meat thermometer
- Storage containers:
- Mason jars with lids
- Mylar bags
- Vacuum sealer (for bags or jars)
- Oxygen absorbers
Step-by-Step Guide to Freeze Drying Chicken
Step 1: Prepare Your Chicken
Whether using raw or cooked chicken proper preparation is crucial
For Raw Chicken:
- Remove all bones, skin, and visible fat
- Cut into small, even pieces (no more than 1 inch thick)
- Weigh your prepared chicken and record the weight
For Cooked Chicken
- Cook chicken completely (internal temp of 165°F)
- Season if desired (I love using garlic salt and herbs)
- Allow to cool slightly
- Remove bones, skin, and visible fat
- Cut into small, even pieces
- Weigh and record
For Rotisserie Chicken:
- Remove skin, fat, and bones (save these for making broth!)
- Cut into bite-sized pieces (about 1 inch or smaller)
- Weigh and record
Homesteading Hack: Fat is the enemy of freeze-dried foods! It goes rancid quickly, so be thorough in removing all visible fat from your chicken.
Step 2: Pre-freeze Your Chicken (Optional but Recommended)
Pre-freezing can save energy and time on your freeze dryer:
- Line cookie sheets or freeze dryer trays with parchment paper
- Arrange chicken pieces in a single layer, leaving small spaces between pieces
- Freeze for 12-24 hours
I usually freeze mine overnight. This step is especially helpful if you’re processing a large batch of chicken.
Step 3: Prepare Your Freeze Dryer
- Make sure your freeze dryer is clean and ready
- Line trays with parchment paper (if you haven’t already)
- Run the pre-freeze cycle according to manufacturer’s instructions
Step 4: Load and Run the Freeze Dryer
- Place frozen chicken pieces onto freeze dryer trays
- Load trays into freeze dryer
- Close the vacuum chamber
- Set the freeze dryer to run (follow manufacturer’s instructions)
- For chicken, I recommend adding at least 12 extra hours to the default dry time
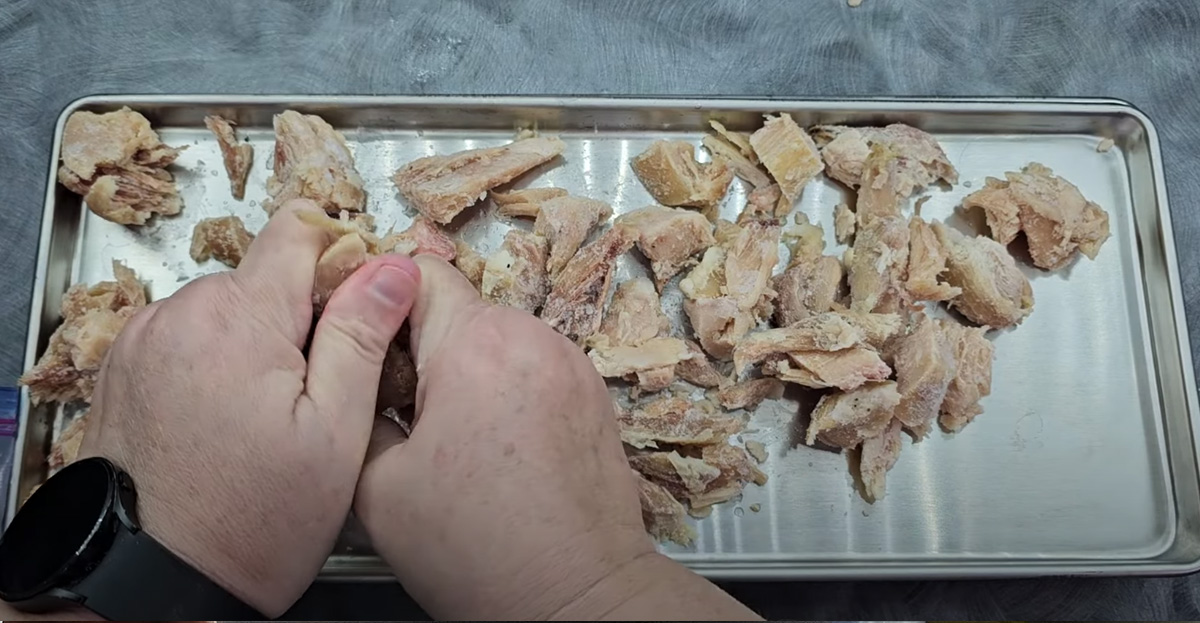
Step 5: Test for Doneness
It’s super important to make sure your chicken is completely freeze-dried before storage. Here’s how to test:
Method 1: Weight Test
- When the initial dry time ends, stop the machine
- Remove a tray and weigh it
- Return the tray to the freeze dryer and continue drying for 2-3 hours
- Weigh again – if there’s ANY weight difference, it’s still losing moisture and needs more time
- Repeat until there’s no weight change between checks
Method 2: Feel & Break Test
- Chicken should not feel cold to the touch
- It should break easily and be fully dry
- Break a piece – if there’s any moisture or it feels cold inside, it needs more time
I prefer using both methods just to be sure. With protein foods like chicken, it’s better to over-dry than under-dry.
Step 6: Store Properly
Proper storage is crucial for long-term preservation:
- Allow freeze-dried chicken to cool for a few minutes
- Quickly pack into storage containers:
- Mason jars with oxygen absorbers and vacuum sealed lids
- Mylar bags with oxygen absorbers, sealed
- Label with contents and date
- Store in a cool, dark place
For rotisserie chicken, I’ve found that due to any residual fat, a six-month to one-year shelf life may be all you get, even with proper storage. Regular chicken with fat thoroughly removed can last much longer (5+ years).
How to Rehydrate Freeze-Dried Chicken
When you’re ready to use your freeze-dried chicken, rehydration is simple:
For Hot Dishes:
- Place chicken in a skillet
- Add enough broth or water to cover the bottom
- Simmer gently until rehydrated (usually just a few minutes for pre-cooked chicken)
For Cold Dishes:
- Place chicken in a bowl
- Cover with cool water or broth
- Let sit for 15-20 minutes (longer for raw chicken)
- Drain any excess liquid if needed
Measurement Tip: Generally, use the same amount of freeze-dried chicken as you would fresh in recipes. If your recipe calls for 1 cup of chicken, use 1 cup of freeze-dried chicken.
Recipe Ideas for Freeze-Dried Chicken
Here are some of my favorite ways to use freeze-dried chicken:
- Chicken Salad: Rehydrate chicken, mix with mayo, grapes, chopped pecans, and seasonings
- Quick Tikka Masala: Rehydrate chicken with jarred sauce and extra broth while cooking rice
- Soups and Stews: Add directly to simmering broth for a quick protein boost
- Camping Meals: Bring along in lightweight containers for protein on the trail
- Emergency Food: Keep in your emergency kit for nutritious shelf-stable protein
Common Problems and Solutions
| Problem | Possible Cause | Solution |
|---|---|---|
| Chicken tastes rancid | Fat wasn’t completely removed | Be more thorough with fat removal next time |
| Chicken is still cold/moist | Not fully freeze-dried | Return to freeze dryer for additional time |
| Chicken is hard to rehydrate | Pieces were too large | Cut into smaller pieces next time |
| Chicken has freezer burn taste | Poor storage conditions | Use proper airtight containers with oxygen absorbers |
Final Tips for Success
- Catch sales: Look for rotisserie chickens on clearance for an affordable option
- Don’t waste scraps: Save bones and skin to make chicken broth that you can also freeze dry
- Document your process: Keep notes on weights before and after freeze drying to perfect your technique
- Re-seal immediately: Always promptly re-seal your storage containers after removing chicken
- Add extra dry time: With protein foods like chicken, it’s better to err on the side of extra drying time
Freeze drying chicken is a fantastic way to build your food storage and have convenient protein ready for quick meals. Whether you’re using a Harvest Right or another home freeze dryer, the process is straightforward once you know the steps.
I’ve been freeze drying foods for our family’s pantry for years now, and chicken remains one of our most-used items. The convenience of having pre-cooked, shelf-stable chicken ready to toss into meals has saved us countless hours in the kitchen!
Note: Always follow safe food handling practices before, during, and after freeze drying. Raw freeze-dried chicken is still raw when rehydrated and must be cooked thoroughly before consumption.
Step Four: Run pre-freeze cycle of freeze dryer
Make sure to follow your manufacturer’s directions for this cycle. I usually start this when I’m prepping the final trays or before I pull out my frozen trays from the freezer.
How to Freeze Dry Rotisserie Chicken
Remove skin, fat and bones from chicken. Set aside to make broth!
This Changes Everything! (Freeze Drying Chicken)
FAQ
How long does it take to freeze dry raw chicken?
Is freeze-dried chicken raw or cooked?
You can freeze dry either pre-cooked or raw chicken. It’s important to know that freeze drying chicken allows you to store it at room temperature, but the freeze drying temperatures of -30°F to -50°F do not kill off the harmful bacteria that can make you sick.
Is freeze-dried chicken good?
You might wonder whether freeze-dried food tastes okay and you’ll be surprised to find that properly freeze-dried meat tastes pretty good. The freeze-drying process removes excess water, but not flavor. Once you rehydrate the freeze-dried meats, they’ll retain almost the same flavor as they had when they were fresh.
Is freeze-dried raw chicken safe to handle?
The general rule is if it’s safe to eat in whatever state it’s in when it’s freeze-dried, you’re good to eat it. You wouldn’t eat raw meat, so don’t eat raw meat that’s been freeze-dried without cooking it. You would, however, eat raw strawberries, so those are fine.