Are you tired of dry, flavorless chicken? Looking for a quick and healthy way to get dinner on the table? You’re in luck! Today I’m sharing my absolute favorite method for cooking cut-up chicken in an air fryer This technique delivers juicy, crispy chicken every single time with minimal effort and cleanup
As someone who uses my air fryer almost daily I’ve perfected the art of cooking chicken pieces to tender, flavorful perfection. Let’s dive into everything you need to know!
Why Choose the Air Fryer for Cut-Up Chicken?
Before we get to the step-by-step process, let’s talk about why the air fryer is my go-to method for cooking chicken pieces:
- Healthier Option: Uses significantly less oil than traditional frying
- Time-Saving: Cooks chicken faster than conventional ovens
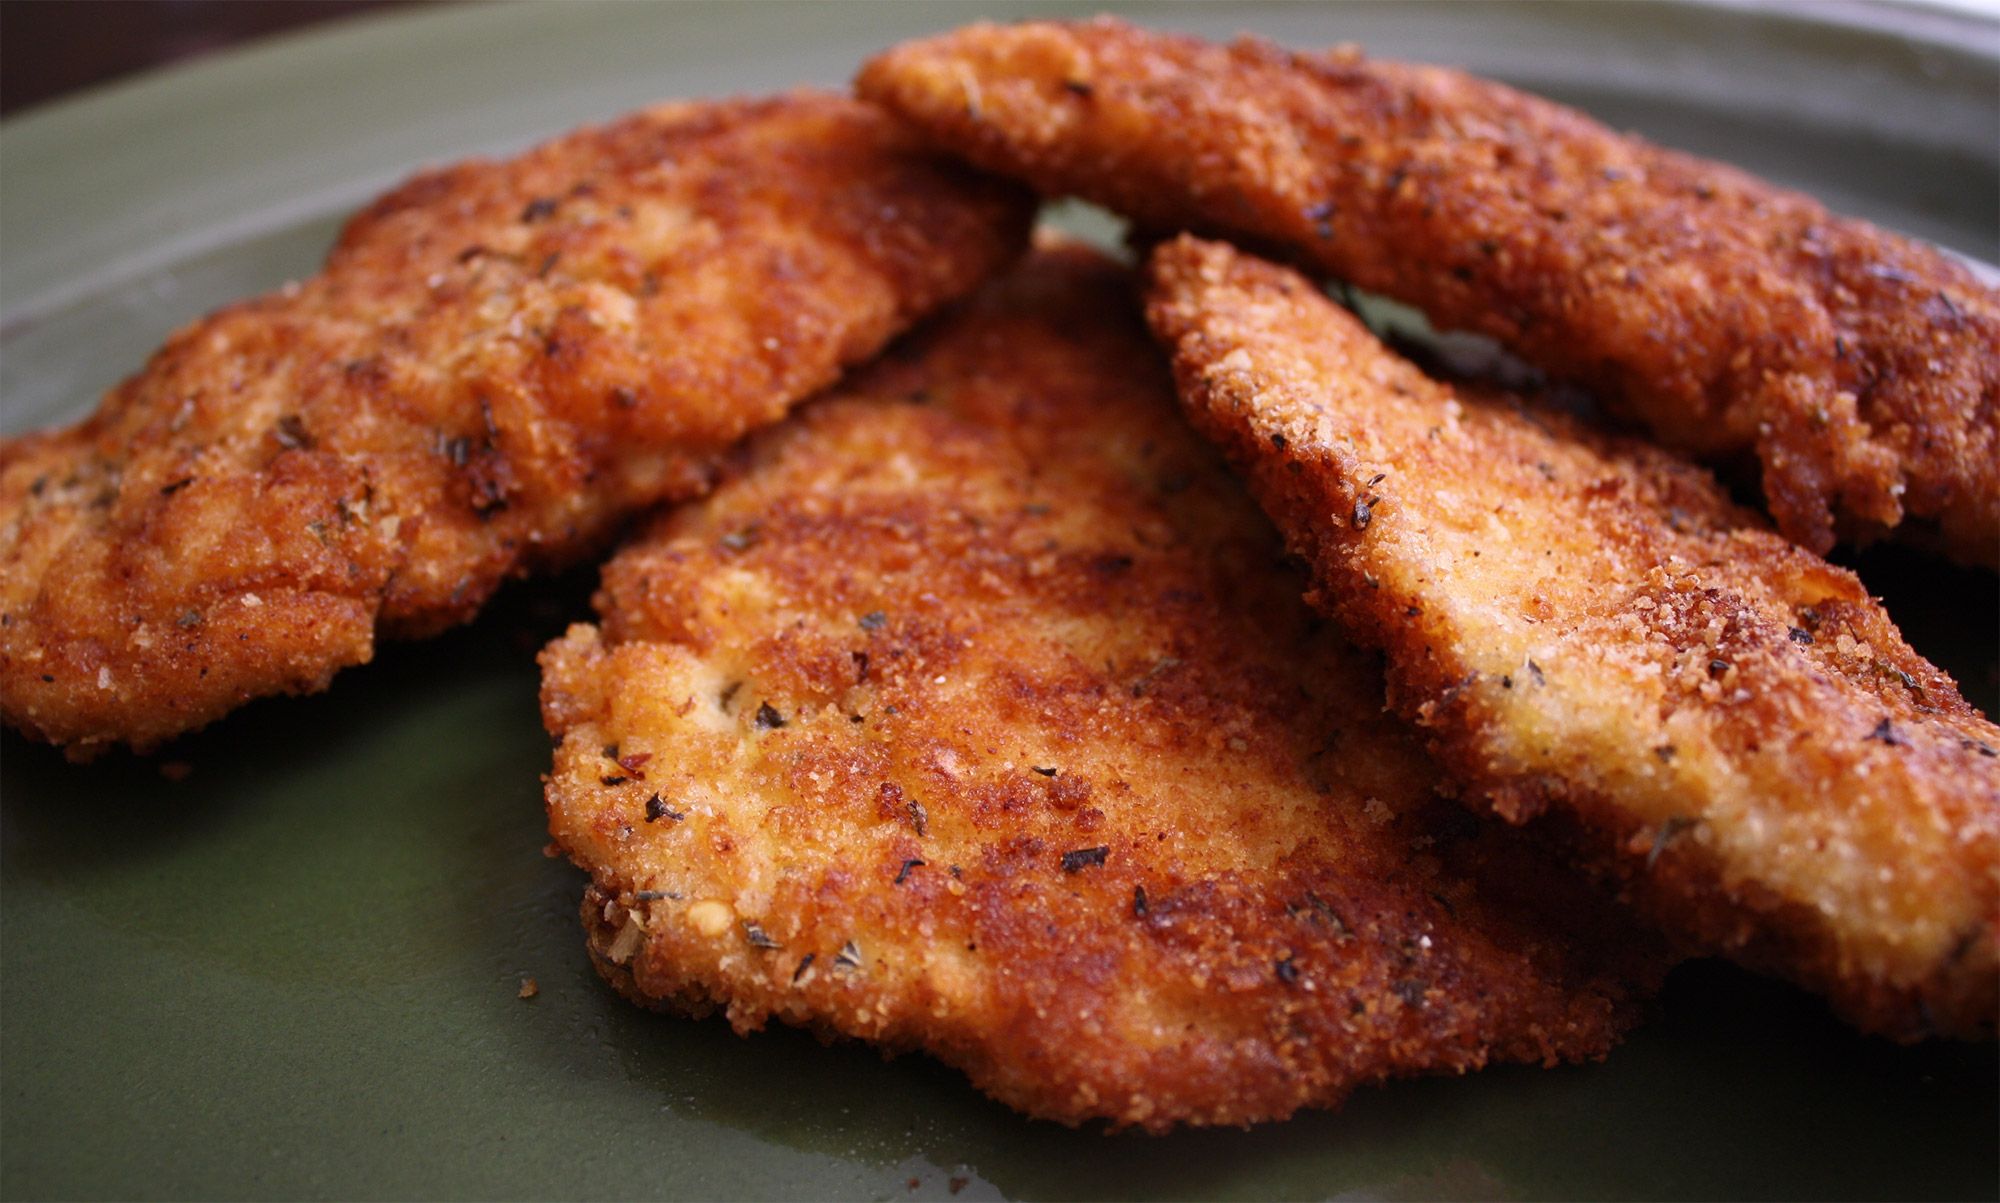
- Crispy Exterior: Creates a deliciously crisp outside while keeping the inside juicy
- Even Cooking: The circulating hot air ensures all sides cook evenly
- Versatility: Works with all chicken cuts – thighs, drumsticks, wings, and breasts
Choosing the Right Chicken Cuts
Different chicken pieces work beautifully in the air fryer, but each has its own advantages:
| Chicken Part | Why It’s Great | Typical Cooking Time |
|---|---|---|
| Thighs | Juicy, flavorful, forgiving if slightly overcooked | 25-30 mins at 375°F |
| Drumsticks | Kid-friendly, rich flavor, great for parties | 30-35 mins at 400°F |
| Wings | Perfect for appetizers, get super crispy | 25-30 mins at 400°F |
| Thin Chicken Breasts | Cook quickly, great for meal prep | 10-12 mins at 400°F |
I personally love using thin-sliced chicken breasts when I’m in a hurry. They cook up in just 10-12 minutes and are perfect for meal prepping!
Essential Preparation Steps
1. Cleaning and Preparing Your Chicken
Start with fresh or properly thawed chicken pieces. Here’s my process:
- Rinse chicken pieces under cold water to remove any residue
- Pat completely dry with paper towels (this is SUPER important for crispy skin!)
- Trim any excess fat or skin if desired
2. Seasoning Options
You’ve got two main approaches to flavor your chicken:
Option 1: Marinade
This is great if you’ve got a bit more time. A simple marinade might include:
- 1/4 cup olive oil
- 2 tablespoons lemon juice
- 2 teaspoons garlic powder
- 1 teaspoon paprika
- Salt and pepper to taste
Combine all ingredients in a bowl, add chicken and coat well, then refrigerate for at least 30 minutes (overnight is even better).
Option 2: Dry Rub (My Go-To Method)
This is perfect for last-minute meals. Try this all-purpose chicken seasoning:
- 1/2 tablespoon lemon pepper
- 1.5 tablespoons garlic powder
- 1.5 tablespoons onion powder
- 1 tablespoon dried parsley
- 1.5 tablespoons smoked paprika
- 1/2 teaspoon salt (optional if lemon pepper is already salted)
Mix these spices together and generously coat both sides of your chicken pieces.
Step-by-Step Air Fryer Cooking Process
Now for the main event! Here’s how I cook cut-up chicken in the air fryer:
1. Preheating
Always preheat your air fryer! This creates the ideal cooking environment for crispy chicken.
- Set temperature to 375°F-400°F depending on chicken parts
- Allow 3-5 minutes for preheating
2. Preparing the Chicken for Cooking
After your chicken is seasoned:
- Lightly brush or spray each piece with a bit of oil (I prefer avocado oil)
- This helps achieve that golden-brown exterior we all love!
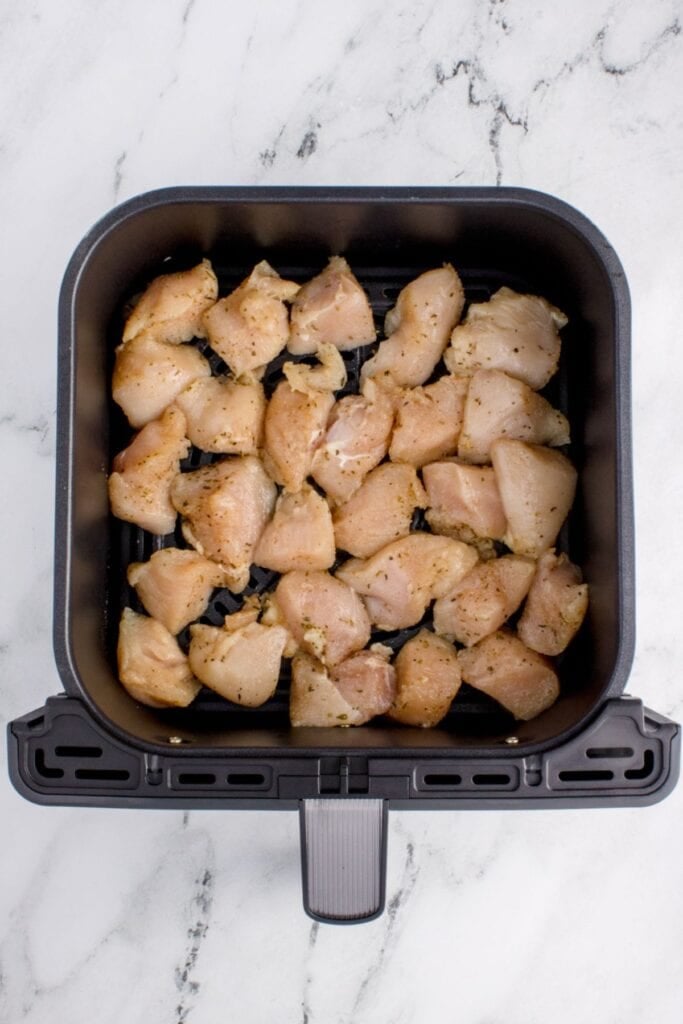
3. Arranging in the Air Fryer
The #1 mistake I see people make is overcrowding the basket!
- Arrange chicken pieces in a single layer
- Leave space between pieces for proper air circulation
- If cooking a large batch, work in smaller batches instead of piling pieces on top of each other
4. Cooking Times
Here’s my cheat sheet for cooking times (remember to flip halfway through!):
- Thin Chicken Breasts: 8-12 minutes at 400°F
- Regular Chicken Breasts: 18-22 minutes at 375°F
- Thighs: 25-30 minutes at 375°F
- Drumsticks: 30-35 minutes at 400°F
- Wings: 25-30 minutes at 400°F
5. The Essential Flip
Don’t skip this step! Halfway through cooking:
- Open the air fryer
- Flip each piece using tongs
- This ensures even browning and cooking
6. Checking for Doneness
Safety first! Chicken needs to reach an internal temperature of 165°F.
- Use a meat thermometer inserted into the thickest part
- Check that juices run clear, not pink
- If not done, continue cooking in 2-3 minute increments until proper temperature is reached
Troubleshooting Common Issues
Sometimes things don’t go perfectly. Here’s how to fix common problems:
- Chicken not crispy enough? Try patting it drier before cooking, or spritz with a bit more oil before the final minutes of cooking
- Chicken drying out? Your temperature might be too high or cooking time too long – try reducing both
- Uneven cooking? Make sure you’re not overcrowding and remember to flip halfway
Delicious Serving Ideas
Transform your air fryer chicken into a complete meal with these sides:
- Roasted vegetables (can be air fried alongside chicken!)
- Fresh garden salad or coleslaw
- Quinoa or brown rice
- Mashed potatoes or cauliflower mash
- Dipping sauces like BBQ, honey mustard, or ranch
Storing and Reheating Leftovers
If you’re lucky enough to have leftovers (which honestly rarely happens in my house!):
- Refrigerator Storage: Allow chicken to cool completely, then store in an airtight container for up to 3 days
- Freezer Storage: Wrap individual pieces in plastic wrap, then place in freezer bags for up to 3 months
- Reheating: The air fryer works great for this too! Set to 350°F and reheat for 5-10 minutes until warmed through
Meal Prep Magic
Here’s my favorite meal prep hack: I buy thin chicken breasts in bulk, season them all at once, then freeze them individually. When I need a quick meal, I can cook them straight from frozen in the air fryer (it takes about 20-30 minutes from frozen).
Final Tips for Air Fryer Chicken Success
- Different air fryer models cook slightly differently – you might need to adjust times by a minute or two
- Always check internal temperature rather than just relying on cooking times
- Pat the chicken dry before seasoning – this is crucial for crispy results!
- Don’t be afraid to experiment with seasonings once you’ve mastered the basic technique
FAQ: Your Air Fryer Chicken Questions Answered
Can I cook frozen chicken pieces in the air fryer?
Yes! Add about 5-10 minutes to the cooking time and check frequently with a meat thermometer.
Do I need to use oil when air frying chicken?
While not strictly necessary, a light coating of oil helps achieve better browning and crispiness.
What’s the best way to check if my chicken is done?
Always use a meat thermometer to ensure the internal temperature reaches 165°F in the thickest part.
Can I stack chicken in the air fryer?
No! For best results, arrange in a single layer with space between pieces. Cook in batches if needed.
What if I don’t have a specific seasoning?
Don’t worry! Even simple salt and pepper works great, or experiment with whatever spices you have on hand.
Happy air frying!
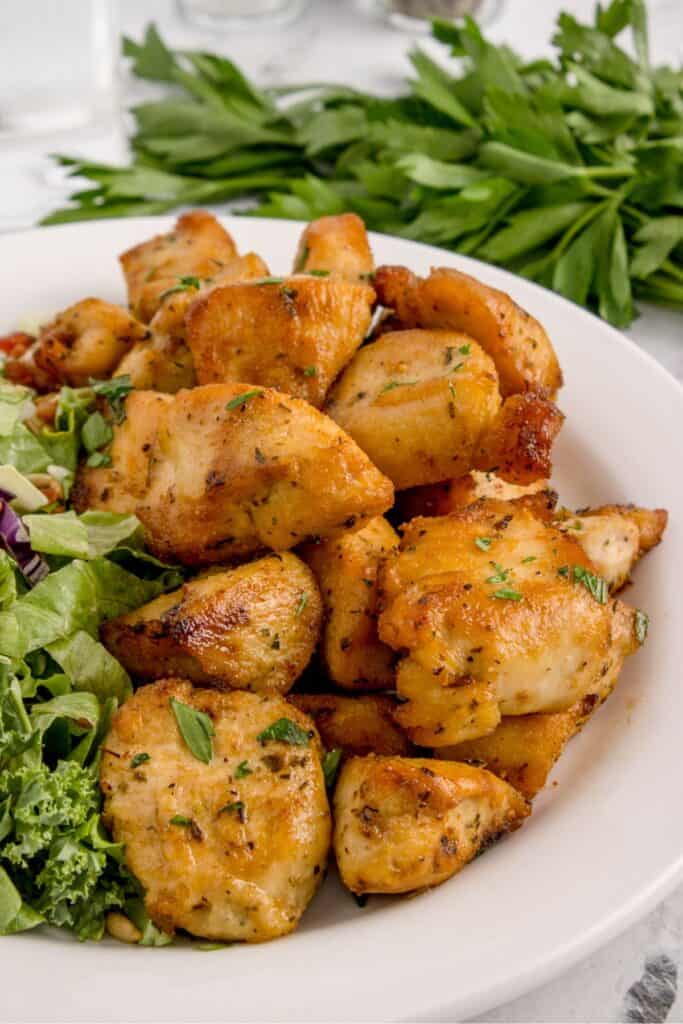
What to Serve with Air Fryer Chicken Breast Bites
I always have plenty of sauces ready to go with my air fryer chicken bites. Some sauces I’ve tried and taste great are my 2 ingredient BBQ sauce, ketchup, ranch, homemade buffalo sauce, honey mustard, and honey sriracha sauce!
How to Cook Chicken Bites in the Air Fryer
A full printable version of this recipe with ingredient measurements is available at the bottom of this post.
STEP ONE: Preheat the air fryer to 400 degrees F.
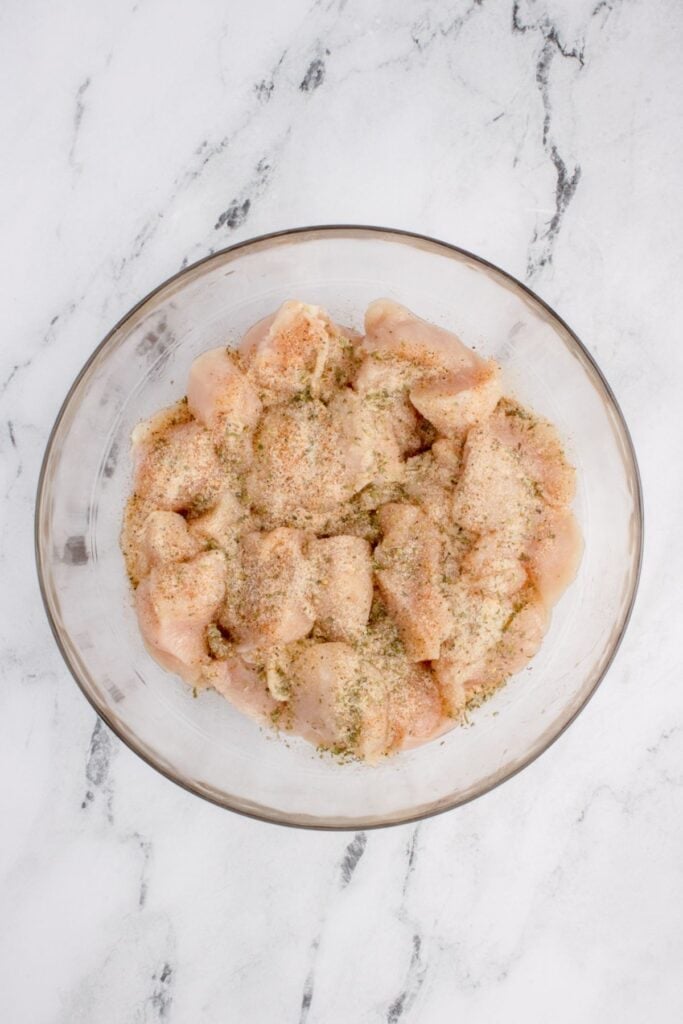
STEP TWO: Cut the chicken breasts into 1-inch thick pieces and place them in a large bowl.
STEP THREE: Drizzle the olive oil over the chicken, then toss them until the oil coats the chicken evenly. This will help the seasonings stick to the chicken.
STEP FOUR: Sprinkle the chicken with Cajun seasoning, starting with 1 to 3 teaspoons and adjusting to taste preference, then the Italian seasoning, garlic powder, and onion powder. Toss again so thel chicken is evenly coated.
STEP FIVE: Place the chicken bites in the air fryer in a single layer, cooking in batches if necessary. Air fry them for 8-10 minutes until they are golden brown and crispy.