Are you craving that intense umami flavor that only dried shrimp can deliver? I’ve spent years perfecting the art of drying shrimp at home, and I’m excited to share my tried-and-true method with you. Whether you’re looking to make your own dried shrimp for Asian cuisine or just want to try something new, this guide will walk you through everything you need to know.
Why Should You Make Dried Shrimp at Home?
Let me tell you why making dried shrimp at home is totally worth it:
- You control the ingredients (no nasty additives or preservatives)
- It’s way cheaper than buying pre-dried shrimp
- You can customize the flavors to your taste
- The texture is superior to store-bought versions
- They last for months when stored properly
What You’ll Need
Here’s your shopping list
- Fresh shrimp (shell-on preferred)
- Salt for brining
- Drying rack or food dehydrator
- Airtight storage containers
- Optional seasonings of your choice
Step-by-Step Guide to Drying Shrimp
1. Selecting Your Shrimp
Choose fresh shrimp that are:
- Wild-caught or sustainably farmed
- Shell-on (this protects the meat while drying)
- Small to medium size (they dry faster)
- Unpeeled and unseasoned
2. Brining Process (Optional but Recommended)
Mix up your brine:
1 quart water1/4 cup kosher salt2 tablespoons sugar1 bay leaf1/2 lemon, sliced- Dissolve salt and sugar in warm water
- Add aromatics (bay leaf, lemon)
- Chill brine completely
- Soak shrimp for 4-6 hours
3. Preparation
- Rinse shrimp under cold water
- Devein if using raw shrimp
- Pat dry with paper towels
- Season if desired (this is your chance to get creative!)
4. Drying Methods
Using a Food Dehydrator (Recommended)
- Arrange shrimp in single layer
- Set temperature to 145°F for first hour
- Reduce to 120°F for remaining time
- Dry for 8-12 hours total
Using an Oven
- Set oven to lowest setting (around 150-200°F)
- Place shrimp on racks
- Keep door slightly open (use wooden spoon trick)
- Dry for 4-8 hours
Storage Tips
Keep your dried shrimp fresh by
- Cooling completely before storing
- Using airtight containers
- Storing in a cool, dark place
- Refrigerating for longer shelf life
- Vacuum sealing for up to 1 year storage
Creative Ways to Use Dried Shrimp
Here’s what I love doing with my dried shrimp:
- Grind into powder for seasoning
- Add to soups and broths
- Toss in stir-fries
- Mix into fried rice
- Use as crunchy toppings
- Make shrimp stock from shells
Pro Tips from My Kitchen
- Small shrimp dry faster and more evenly
- Don’t skip the cooling step before storage
- Save those shells for making amazing stock
- Rehydrate in warm water before using in recipes
- Start with less drying time – you can always dry longer
Troubleshooting Common Issues
Sometimes things don’t go as planned. Here’s what to watch for:
- If shrimp are still bendy: Need more drying time
- If they smell funky: Weren’t dried properly or stored correctly
- If they’re too salty: Reduce brine time next batch
- If they’re too hard: Might be overdried
My Final Thoughts
Making dried shrimp at home might seem intimidating at first, but trust me – it’s totally worth the effort! The flavor you’ll get from homemade dried shrimp is unbeatable, and knowing exactly what’s in your food is priceless.
Would you like me to explain or break down any part of this guide in more detail?

Step Equalizing and Conditioning the Dehydrated Shrimp
When the dehydrated shrimps are removed from the dehydrator, the remaining moisture may not be distributed equally among all of the pieces because of their location and position in the dehydrator. Equalizing and conditioning is a process for freshly dehydrated foods that ensures any residual moisture remaining in any piece is spread or equalized among all the other pieces in the batch. Let the dried shrimps equalize and condition in the storage container for 7 to 10 days.
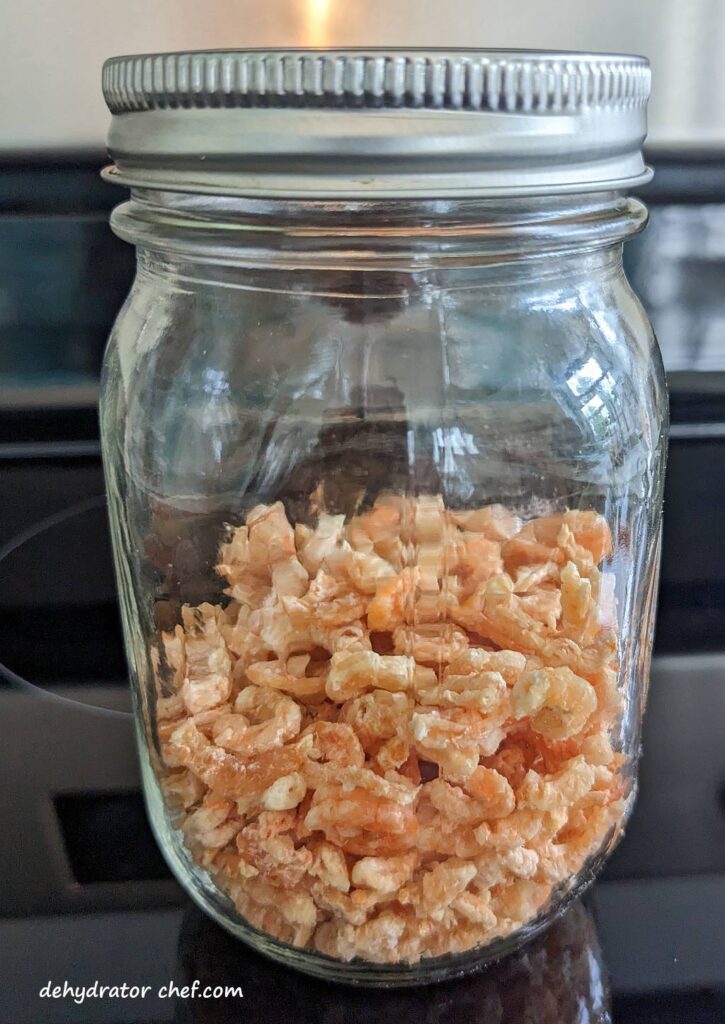
We always recommend letting food items cool completely after they have finished dehydrating and before packing them into an airtight storage container for equalizing and conditioning. Warm food may cause sweating which could provide just enough moisture for mold to grow.
After a short cooling period, pack the dehydrated shrimp into clean, dry, insect-proof containers with tight-fitting lids. We’ll use pint- and quart-size canning jars for this task. Fill the jars at most 2/3 to 3/4 full, leaving some headspace.
Headspace is the distance between the food surface and the lid’s underside. Its purpose is to provide ample space for the dehydrated food product to slide and tumble when shaken and rotated to expose any evidence of clumping or sticking.
Dehydrated food items do not take long to start hydrating from naturally occurring household humidity. Do not leave dehydrated food items exposed to the elements any longer than necessary because of the increased risk of mold growth.
A wide-mouth canning jar funnel is handy for the task of getting dehydrated food from the trays into the canning jars with minimal spillage. It’s not a necessity, but having one does make the job easier and faster. If you need one, check them out on Amazon.
Every day, check the jar for moisture. Roll the jar contents around and note any clumping or sticking. If seen, put the contents back on the dehydrator for several more hours. Since canning jars are clear, it’s easy to see what’s inside.
Lastly, if you notice any mold at all, even the smallest bit, throw it all out. What you see are the mold spores finally blooming enough to make them visible. But there are more, even tinier mold spores in the rest of your jar that make your dehydrated food inedible. Toss it out, clean your gear, and start another batch.
Step Preparing the Dehydrator for Dehydrating Shrimp
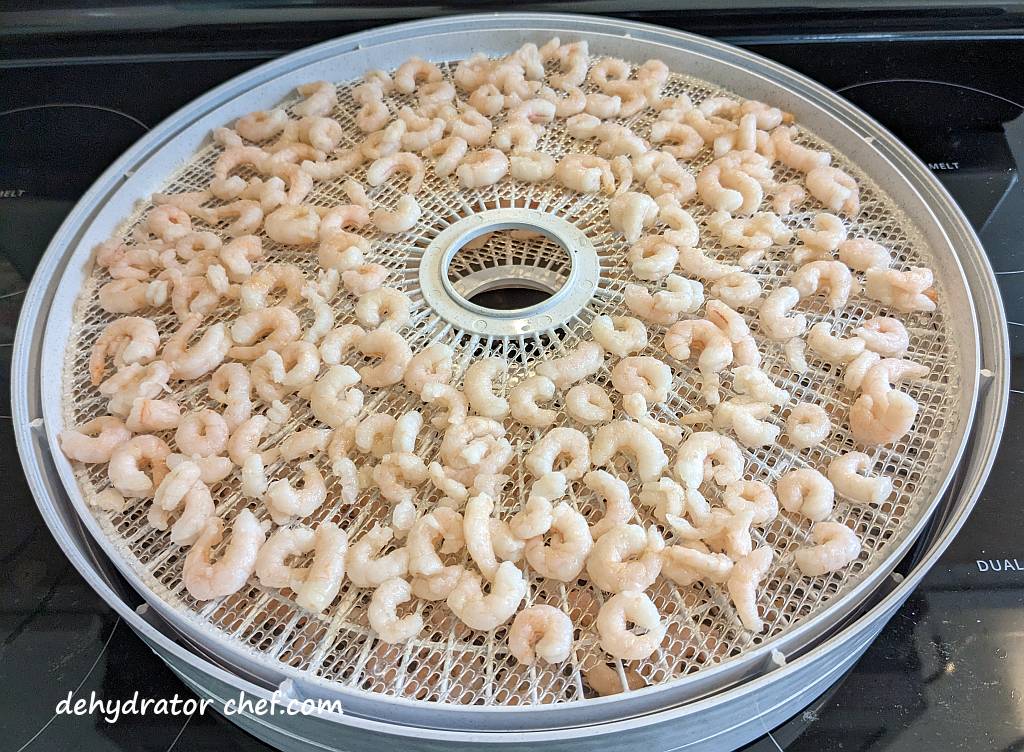
To dry the shrimp, spread them out on the mesh screen inserts in a single layer. This will help them dry faster. As you spread them out, remove any shell bits or other unwanted material.
For today’s dehydrator project, we are using the Nesco Clean-A-Screen removable mesh screen inserts for sticky fruits and small food items that we are dehydrating today. They have over 2500 customer reviews with an average rating of 4.7 stars out of 5, which is evidence of a great product. Check out other Nesco food dehydrator products here.
Nesco Clean-A-Screens are mesh screens that are flexible and removable. They have a top and bottom side, with each side being distinct. If you were to look at the mesh screens under a high-powered microscope, you would notice that the individual strands of the mesh have a triangular shape. The bottom side feels smooth, while the top side has the point of the triangle and feels rough when you rub your fingers across it.
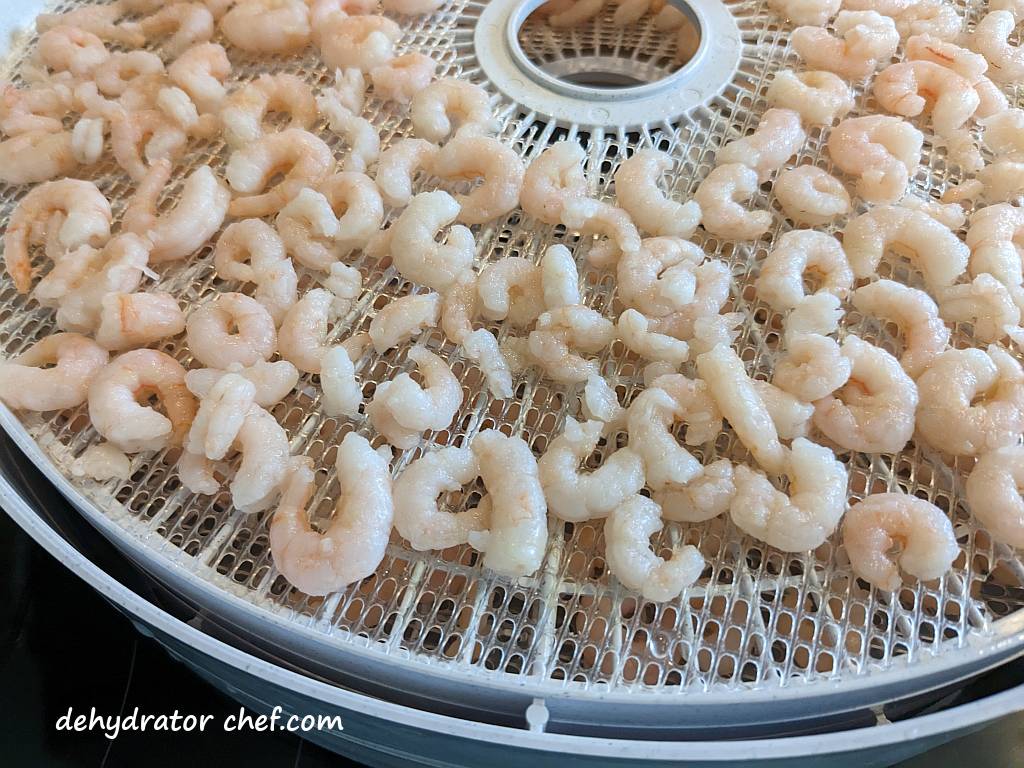
For optimal results, ensure that you leave some space between the shrimp pieces on the dehydrator trays to allow for proper airflow and drying. The Nesco 13.5-inch round dehydrator tray has close to 119 square inches or .8 square feet of surface area for drying.
How to make Dried Shrimp at home
FAQ
What’s the best way to dry shrimp?
Place the shrimp onto your dehydrator trays, ensuring the shrimp are not touching one another. Set the dehydrator to 145 degrees and dry them for one hour. Reduce the temperature to 120 degrees and continue to dry them until they break apart easily.
How to get moisture out of shrimp?
Use Shrimp Immediately After Thawing: It is best to cook the shrimp immediately after thawing by the cold water method to ensure quality and safety. No matter how you thaw your shrimp, make sure to use a paper towel to remove any excess moisture before cooking.
Should I dry my shrimp before cooking?
Whether your rinsing store-bought shrimp or just defrosted, make sure to dry the surface thoroughly before cooking. This is important as a dry surface ensures the proper sear in the hot oil which will create more browning flavor. If still partially wet, you’ll get unwanted steam instead.
What is the best oil to dry shrimp in?
Choose the right oil: The best oils for frying shrimp are those with a high smoke point, such as vegetable, canola, or peanut oil.
What is dried shrimp?
Dried shrimp are shrimp that have been sun-dried and shrunk to a thumbnail size. They are used in many Asian cuisines, imparting a unique umami taste. A handful of shrimp is generally used for dishes. The flavors of this ingredient are released when allowed to simmer.
What does dried shrimp taste like?
Dried shrimp is an ethnic ingredient widely used in Asian cuisine. It has an intense savory flavor similar to other dehydrated ingredients such as dried scallop and shiitake mushrooms. It is widely available in Asia and at most of the Asian grocery shops and supermarkets.
Can you cook dried shrimp?
Dried shrimp is a popular ingredient in many cuisines, known for its intense umami flavor and versatility in cooking. Whether you’re making a traditional Asian dish or looking to add depth to your favorite recipes, cooking with dried shrimp can elevate the flavor of your dishes. Here are some tips on how to cook dried shrimp to perfection.