Hey there! I’m Thomas, and after testing countless shrimp recipes in my kitchen, I’ve finally cracked the code to perfectly pan-seared shrimp. Trust me, I’ve had my fair share of rubbery, overcooked disasters before figuring this out! Let me share my fool-proof method that’ll give you restaurant-quality results every single time.
Why You Should Trust This Method
I’ve spent years perfecting this technique and testing different approaches. The method I’m sharing today consistently produces:
- Juicy, tender shrimp (no rubber bands here!)
- Beautiful golden-brown sear
- Perfect texture every time
- Quick 10-minute cooking time
Essential Equipment & Ingredients
The Right Pan Matters
Choose one of these pans for best results
- Non-stick skillet (my top choice)
- Well-seasoned cast iron pan
- Carbon steel pan
Pro tip Avoid stainless steel – your shrimp will stick like crazy!
Shrimp Selection
- Size: Extra large or jumbo (easier to cook without overcooking)
- Type: Raw, not pre-cooked
- Shell: Either peeled or shell-on (I prefer peeled for easier eating)
- Fresh vs Frozen: Both work great, just thaw frozen ones properly
My Foolproof Step-by-Step Method
1. Prep Your Shrimp
First things first:
- Keep shrimp cold until cooking (don’t let them reach room temp)
- Pat them SUPER dry with paper towels
- Remove excess moisture (key for proper searing!)
2. Season Like You Mean It
My go-to seasoning mix
- 1 tbsp olive oil- 1 tsp paprika- 1/2 tsp chili powder- 1/2 tsp salt- 1/4 tsp black pepper3. The Perfect Sear Technique
- Heat your pan over medium-high heat
- Add oil with high smoke point (I use grapeseed or avocado oil)
- Place shrimp in a single layer – DON’T CROWD THE PAN!
- Cook 2-3 minutes per side (adjust based on size)
- Remove immediately when done
Common Mistakes (I’ve Made Them All!)
- Overcrowding the pan: Leads to steaming instead of searing
- Using butter alone: It’ll burn at high heat
- Moving shrimp too much: Let them sear undisturbed
- Cooking too long: They’ll turn rubbery real quick!
How to Tell When They’re Done
Look for these signs:
- Color changes from grey to opaque pink
- Forms a loose “C” shape (if it’s a tight “O”, it’s overcooked)
- Flesh should be slightly translucent in the middle when you remove from heat
Quick Troubleshooting Guide
| Problem | Solution |
|---|---|
| Not browning | Pat drier, higher heat |
| Rubbery texture | Shorter cooking time |
| Sticking to pan | More oil, better pan |
| Uneven cooking | Don’t crowd the pan |
Serving Suggestions
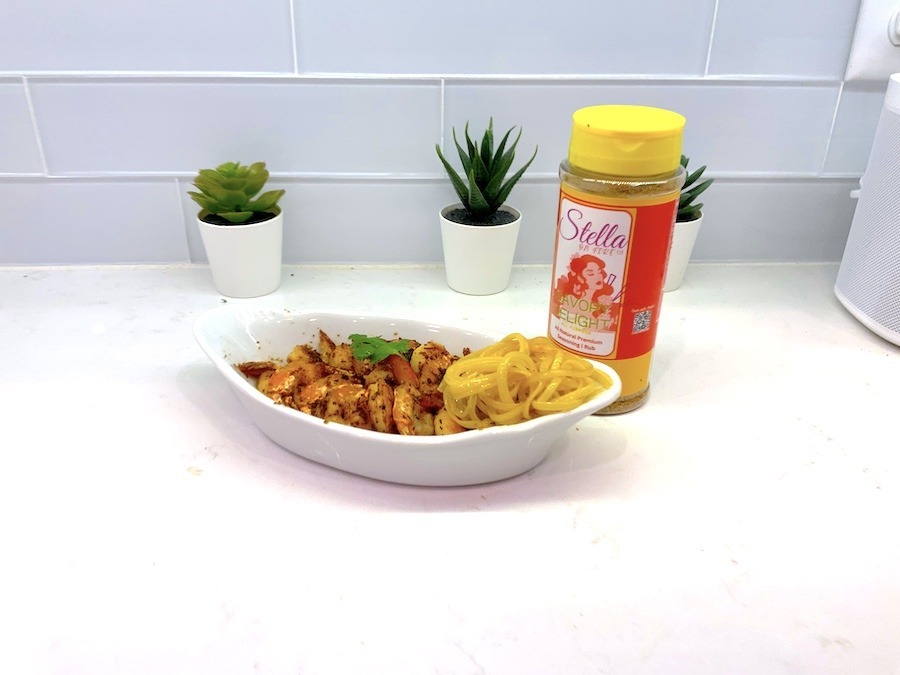
These pan-seared shrimp are super versatile! Try them:
- Over pasta with garlic butter
- In tacos with avocado
- On salads
- As an appetizer with cocktail sauce
- In rice bowls
Final Tips From My Kitchen to Yours
- Keep it simple – good shrimp don’t need much fuss
- Work in batches if cooking for a crowd
- Have everything ready before you start cooking
- Trust your instincts – you’ll get better with practice
Would you like me to explain or break down any part of this guide in more detail?
Why You Should Buy Frozen Shrimp—and How to Measure Them Accurately

Unless you have access to shrimp directly from a boat, we recommend buying them frozen. The quality is generally much better than that of defrosted shrimp, the flavor and texture of which decline rapidly once thawed.
Most shrimp, including all bagged options, are individually quick-frozen. The process locks in freshness and allows you to thaw exactly what you need, but it also encases each shrimp in an icy shell that adds weight, making it tricky to measure how much you’ll have for cooking once the ice melts. We’ve found that the shrimp lose anywhere from 12 to 25 percent of their weight.
To account for that, it’s best to defrost more shrimp than a recipe calls for. But because the range of loss is so wide (it depends on factors such as shrimp size and whether or not they are peeled), weight isn’t the most precise way to measure. Instead, count out what you need based on the shrimp’s per-pound number range. Example: For extra-large shrimp, the range is 21 to 25 (see chart below), which represents the shrimp’s raw, unfrozen weight. So if a recipe calls for 11/2 pounds of shrimp, count out 25 pieces plus 13 more.

5 Steps to Perfect Pan-Seared Shrimp

Salting the shrimp for 15 minutes (up to 30 minutes is fine) helps them retain moisture even as they’re seared, but it doesn’t introduce extra moisture like brining does, so the shrimp’s exteriors still brown beautifully. Salt also seasons the shrimp. 2. Add Sugar Just Before Cooking
Sprinkling sugar on the shrimp (patted dry after salting) boosts browning and underscores their sweetness. The trick is waiting to sprinkle it until just before searing so that it doesn’t get wiped off when you dry the shrimp. 3. use a slick Pan; oil shrimp, not skillet
Searing in a nonstick or carbon‑steel skillet ensures that flavorful browning sticks to the food and not to the pan. Lightly oiling the shrimp themselves (instead of the pan) ensures that they are evenly coated. 4. start cold; sear gently
A cold start offers more control: You can arrange the shrimp in a single layer before cooking, so they make even contact with the pan. Since they heat up gradually with the skillet, they don’t buckle (good for browning) and are less likely to overcook. 5. Flip and Finish Off Heat
Once the shrimp are spotty brown and pink at the edges on the first side, cut the heat and quickly turn each piece, letting residual heat gently cook the shrimp the rest of the way.
Easy & Crispy Pan Seared Buttery Shrimp Recipe – EatSimpleFood.com
FAQ
How do you sear shrimp in a pan?
Heat your pan to medium-high, add half of the olive oil or butter, and let it heat until shimmering. Then, add the remaining oil/butter with half of the shrimp. Sear the Shrimp: Cook them for a minute or 2 without touching them. Flip them over and cook until they’re opaque.
Is it better to saute shrimp in butter or oil?
How long do shrimp take in a frying pan?
Cook the shrimp, stirring occasionally, until the flesh is totally pink and opaque, and you see no more grey bits. Depending on the size of your shrimp and how many you have in the pan, this will usually take 4 to 5 minutes. Transfer to a serving dish. Serve sautéed shrimp immediately.
Can You Pan sear shrimp?
Pan-searing shrimp can be a little tricky, since shrimp cook so quickly. You want to get a great sear and some browning on them, but you definitely don’t want to end up with overcooked shrimp. Lucky for you, I’ve tested a bunch of ways to do it, found the best one, which I’ll share below, along with a list of tips so they end up perfect every time.
How long does pan seared shrimp take to cook?
Pan Seared Shrimp is a quick, easy, and delicious seafood recipe! Made with butter, fresh herbs, and simple seasonings – this versatile dish is cooked on the stove in less than 10 minutes. This juicy, tender shrimp is the perfect healthy protein for a busy weeknight dinner! Looking for more easy shrimp recipes?
What is pan seared shrimp?
by Kayla Berman on May 11, 2023 0 comments Leave a comment » Pan Seared Shrimp is a quick, easy, and delicious seafood recipe! 15 minute, juicy, tender, garlic & butter stovetop shrimp.
How do you cook shrimp in a frying pan?
Stir in garlic, lemon juice, parsley, and 1/8 teaspoon salt until combined. Set aside. Heat 1 tablespoon oil in 12-inch skillet over high heat until smoking. Meanwhile, toss shrimp, salt, pepper, and sugar in medium bowl. Add half of shrimp to pan in single layer and cook until spotty brown and edges turn pink, about 1 minute.
How do you sear shrimp?
To sear something well, it’s important that water not be involved. It can make your food steam instead of brown. So, before you season and cook the shrimp, blot them dry on some paper towels to remove excess moisture. 4. Use a seasoning blend that darkens in color.
How do you eat seared shrimp?
Toss it in a wrap: Put this seared shrimp in a big tortilla along with some cheese, lettuce, tomato, and sauce. All of this comes together to make a delicious and easy lunch or dinner. Add it to a salad. In my opinion, nothing beats a salad with some seared or grilled shrimp on top.