Hey there seafood lovers! I’ve been cooking shrimp for over 10 years and lemme tell you – keeping the heads on is a total game changer. Today I’m gonna share all my tips and tricks for preparing head-on shrimp that’ll make your mouth water. Trust me, once you try this method, you’ll never go back to headless shrimp again!
Why Should You Cook Shrimp with Heads On?
Before we dive into the how-to, let’s talk about why head-on shrimp is worth the extra effort:
- Better Flavor: The head contains loads of delicious fats and proteins that create an amazing umami taste
- Juicier Meat: The shell and head help lock in moisture while cooking
- More Bang for Your Buck: You’re getting the whole shrimp, so more value!
- Impressive Presentation: Let’s be honest – whole shrimp just look fancy on the plate
How to Choose Fresh Head-On Shrimp
First things first – you gotta start with good quality shrimp. Here’s what I look for:
- Firm, translucent flesh
- Fresh ocean smell (if it smells fishy, walk away!)
- Clear, not cloudy eyes
- Shells should be intact and shiny
- Heads firmly attached
- No black spots or discoloration
Step-by-Step Preparation Guide
1. Cleaning and Prepping
Equipment needed:- Sharp kitchen scissors- Paring knife- Paper towels- Large bowl- Colander-
Initial Rinse Give your shrimp a good rinse under cold running water
-
Remove Sharp Parts:
- Cut off the long pointy part (rostrum) above the eyes
- Trim the legs if desired
- Leave antennae for presentation
-
Deveining (Optional but Recommended):
- Make a shallow cut along the back
- Lift out the dark vein
- Don’t cut too deep!
-
Final Rinse: Give them another quick rinse and pat dry with paper towels
2. Seasoning Options
Here’s my favorite basic marinade recipe:
Basic Marinade (for 1 lb shrimp):- 1/4 cup olive oil- 4 cloves minced garlic- 1 tsp red pepper flakes- Salt and pepper to taste- Optional: lemon juice, herbsPro tip Don’t marinate longer than 30 minutes – the acid can start “cooking” the shrimp!
Cooking Methods
1. Grilling (My Personal Favorite)
- Preheat grill to medium-high
- Brush shrimp with oil
- Grill 2-3 minutes per side
- They’re done when bright pink and slightly curled
2. Pan-Frying
- Heat pan over medium-high heat
- Add oil
- Cook 2-3 minutes per side
- Remove when opaque throughout
3. Deep Frying
- Heat oil to 375°F
- Fry in batches (don’t overcrowd!)
- Cook 2-3 minutes until golden
- Drain on paper towels
4. Steaming
- Bring water to boil in steamer
- Add seasoned shrimp
- Steam 5-7 minutes
- Don’t overcook!
Storage Tips
- Fresh uncooked shrimp: 1-2 days in fridge
- Cooked shrimp: up to 3 days refrigerated
- Frozen: up to 3 months (but try to eat fresh!)
Common Mistakes to Avoid
-
Overcooking: This is the #1 mistake! Overcooked shrimp get tough and rubbery
-
Not cleaning properly: Take time to clean thoroughly
-
Wrong temperature: Too hot = tough shrimp, too cool = rubbery texture
-
Overcrowding the pan: Give them space to cook evenly
My Favorite Recipe: Garlic Butter Head-On Shrimp
Ingredients:- 1 lb head-on shrimp- 4 tbsp butter- 6 cloves garlic, minced- 1 lemon- Fresh parsley- Salt and pepper- Red pepper flakes (optional)Instructions:1. Clean and prep shrimp2. Melt butter in large pan3. Add garlic, cook 1 minute4. Add shrimp, cook 2-3 mins per side5. Squeeze lemon juice6. Garnish with parsleyServing Suggestions
- Over pasta with the garlic butter sauce
- With crusty bread for soaking up juices
- On a bed of rice
- As part of a seafood boil
FAQs
Q: Is it safe to eat the head?
A: Yep! Many consider it a delicacy. The tomalley (the soft stuff inside) is full of flavor.
Q: How do I know when they’re done?
A: They should be pink and opaque, and curved into a loose “C” shape. If they’re tightly curled into an “O”, they’re overcooked.
Q: Can I freeze head-on shrimp?
A: Yes, but they’re best fresh. If freezing, wrap tightly and use within 3 months.
Wrapping Up
Remember: fresh ingredients, careful prep, and don’t overcook – that’s the secret to perfect head-on shrimp every time!
Happy cooking!
Get A Food Styling Kit
With garnish and food photography it’s better to start with a little and add more as you go. It’s easier to add more rather than have to backup and remove small pieces of garnish. But, we all have overdone it with the garnish sometimes. I have this food styling kit in my home studio which includes a variety of different sized spoons, tongs and finger grips. It helps me carefully remove small pieces of garnish or move things around without having to use my fingers and disrupt the rest of the plated food.
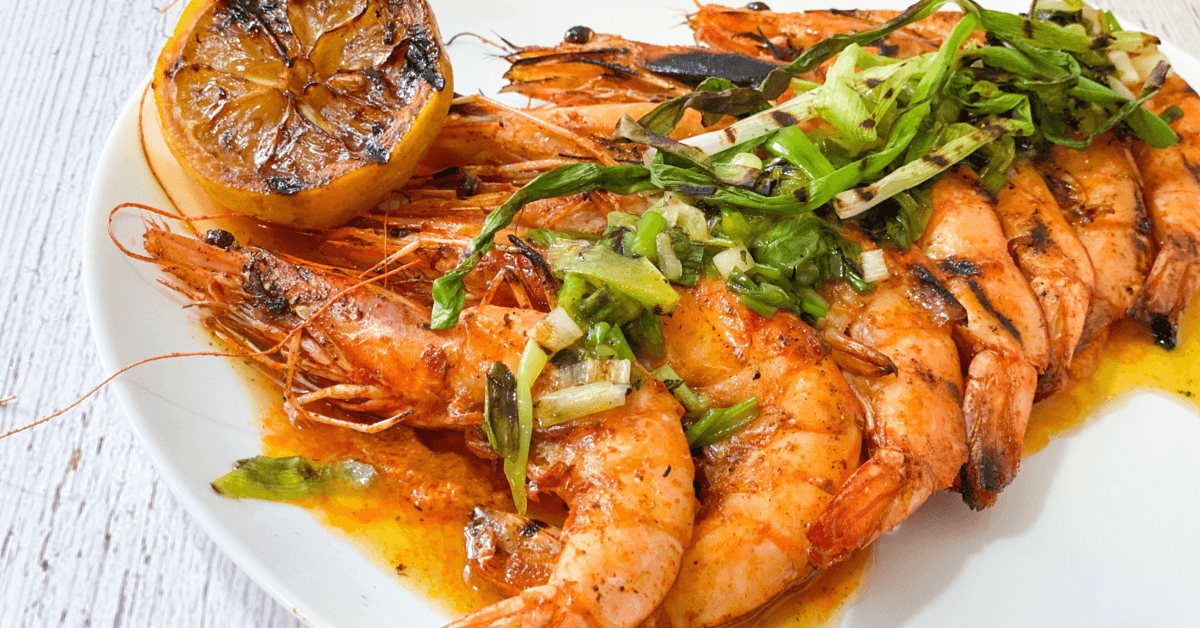
Food Photography Tips for Grilled Head On Prawns
I love shooting seafood. It might be my favorite food to shoot. Since it was a beautiful day to grill, I decided to shoot the prawns outside right as we took them off the grill to capture them at their freshest.